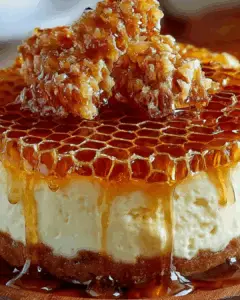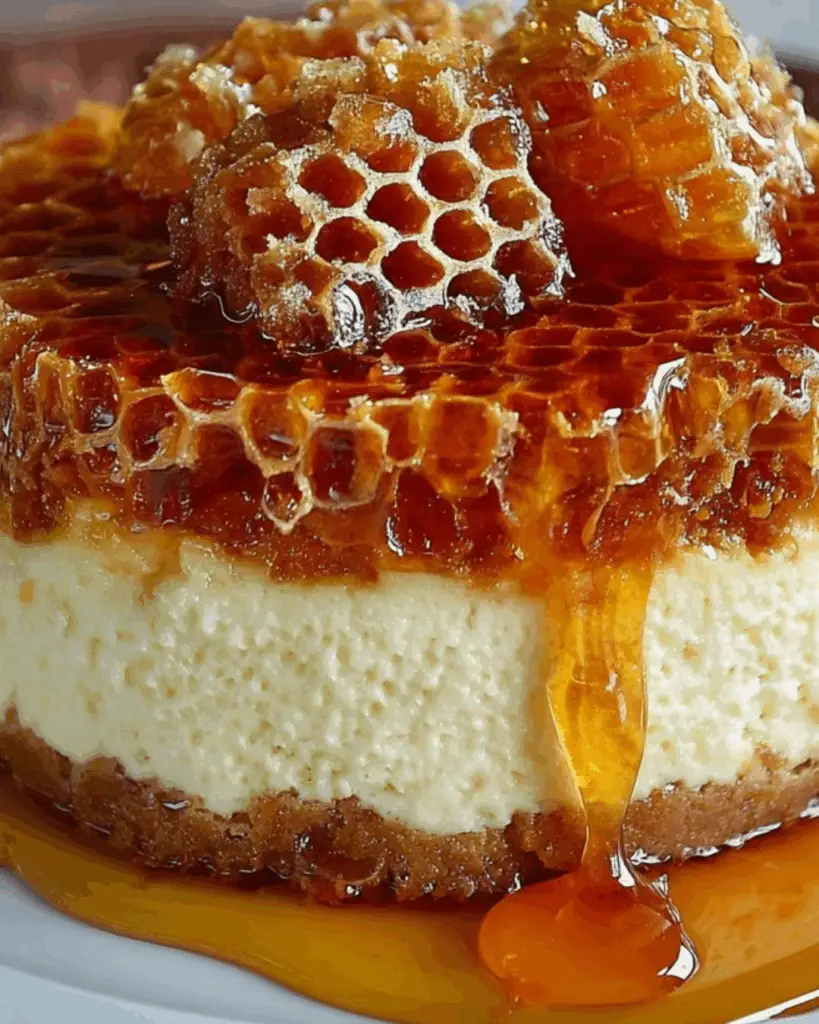
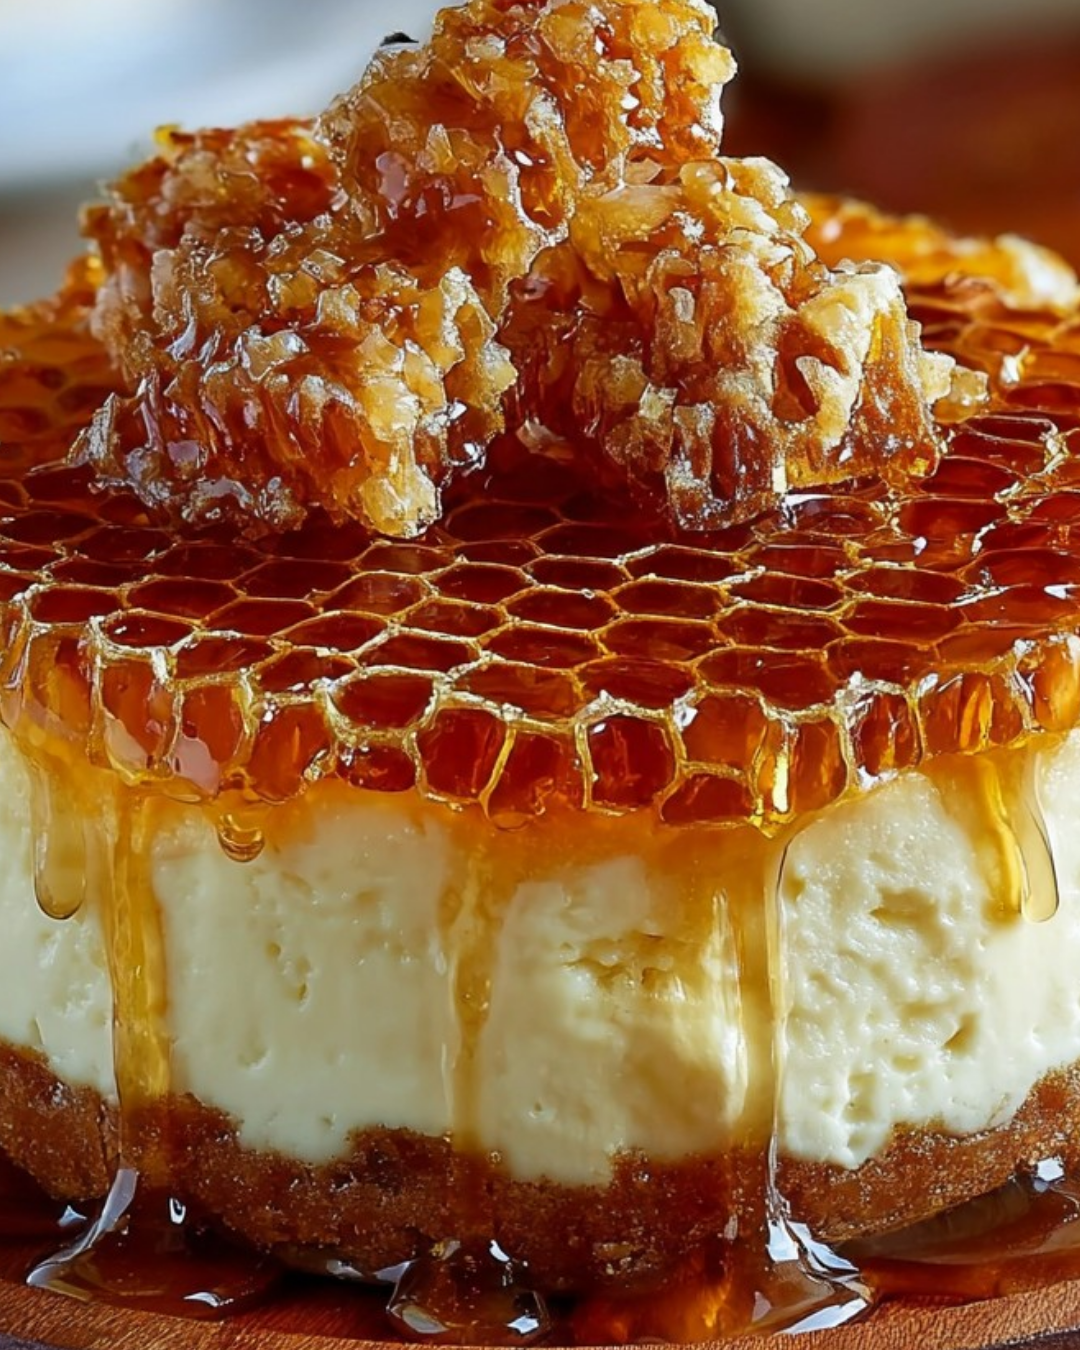
Introduction to Honeycomb Cheesecake
There’s something magical about desserts that bring back memories, isn’t there? Honeycomb cheesecake is one of those treats that can transport you to a cozy kitchen filled with laughter and sweet aromas. This creamy delight combines the rich flavors of cream cheese and honey, making it a perfect indulgence for any occasion. Whether you’re looking to impress your loved ones or simply treat yourself after a long day, this honeycomb cheesecake is a quick solution that will leave everyone asking for seconds. Trust me, once you try it, you’ll understand why it’s a favorite in my home!
Why You’ll Love This Honeycomb Cheesecake
This honeycomb cheesecake is a game-changer in the dessert world. It’s incredibly easy to whip up, making it perfect for busy weeknights or last-minute gatherings. The creamy texture paired with the sweet, floral notes of honey creates a taste sensation that’s hard to resist. Plus, it’s a crowd-pleaser! Your friends and family will rave about it, and you’ll bask in the glory of being the dessert hero.
Ingredients for Honeycomb Cheesecake
Gathering the right ingredients is the first step to creating a delicious honeycomb cheesecake. Here’s what you’ll need:
- Graham cracker crumbs: These form the base of your cheesecake crust, providing a sweet and crunchy texture.
- Unsalted butter: Melted butter binds the crumbs together, ensuring a firm crust that holds its shape.
- Granulated sugar: A touch of sweetness in the crust enhances the overall flavor of the cheesecake.
- Cream cheese: The star of the show! Softened cream cheese gives the cheesecake its rich and creamy texture.
- Powdered sugar: This fine sugar dissolves easily, adding sweetness without graininess to the filling.
- Vanilla extract: A splash of vanilla elevates the flavor profile, adding warmth and depth.
- Heavy cream: Whipped to stiff peaks, it lightens the cream cheese mixture, making it airy and luscious.
- Honey: The key ingredient that brings a natural sweetness and floral notes to the cheesecake.
- Honeycomb pieces (optional): For those who want to take it up a notch, these add a delightful crunch and visual appeal.
For exact measurements, check the bottom of the article where you can find everything listed for easy printing. Feel free to experiment with substitutions, like using maple syrup instead of honey for a different flavor twist!
How to Make Honeycomb Cheesecake
Creating a honeycomb cheesecake is a delightful journey that combines simple steps with a touch of love. Let’s dive into the process, ensuring you have all the tips you need for a perfect dessert!
Step 1: Preheat the Oven
Start by preheating your oven to 325°F (160°C). This step is crucial because it ensures that your cheesecake bakes evenly. A properly preheated oven helps set the crust just right, giving it that perfect crunch.
Step 2: Prepare the Crust
In a medium bowl, mix together the graham cracker crumbs, melted butter, and granulated sugar. Stir until everything is well combined. Now, here’s the key: press this mixture firmly into the bottom of a 9-inch springform pan. A solid crust is essential; it holds the cheesecake together and provides a satisfying crunch with every bite.
Step 3: Bake the Crust
Pop the crust into your preheated oven and bake for about 10 minutes. This short baking time helps to set the crust. Once done, remove it from the oven and let it cool completely. Cooling is important; it prevents the filling from melting into a warm crust.
Step 4: Mix the Cream Cheese
In a large mixing bowl, beat the softened cream cheese with an electric mixer until it’s smooth and creamy. This step is vital because it creates the base for your cheesecake. A well-mixed cream cheese ensures a silky texture that melts in your mouth.
Step 5: Add Sugar and Vanilla
Gradually add the powdered sugar and vanilla extract to the cream cheese mixture. Mix until fully incorporated. This gradual addition helps to avoid lumps, ensuring a smooth filling. The vanilla adds a warm, inviting flavor that complements the honey beautifully.
Step 6: Whip the Cream
In a separate bowl, whip the heavy cream until stiff peaks form. This is crucial for achieving that light, airy texture in your cheesecake. The whipped cream will lighten the cream cheese mixture, making it fluffy and delightful.
Step 7: Combine Mixtures
Gently fold the whipped cream into the cream cheese mixture. Use a spatula and be careful not to deflate the whipped cream. This folding technique is what gives your cheesecake that luscious, creamy texture.
Step 8: Add Honey
Now, drizzle the honey into the mixture and fold gently until it’s evenly mixed. The honey not only sweetens the cheesecake but also adds a unique floral note that elevates the entire dessert.
Step 9: Pour and Smooth
Pour the cheesecake filling over the cooled crust. Use a spatula to smooth the top, ensuring an even surface. This step is where the magic happens; you’re creating a beautiful layer of creamy goodness that will soon set into a delicious treat.
Step 10: Refrigerate
Finally, refrigerate the cheesecake for at least 4 hours, or preferably overnight. Chilling is essential for the cheesecake to set properly. Patience is key here; the longer it chills, the better the flavors meld together, resulting in a truly irresistible honeycomb cheesecake.
Tips for Success
- Use room temperature cream cheese for easier mixing and a smoother texture.
- Don’t skip the chilling time; it’s crucial for the cheesecake to set properly.
- For a cleaner slice, use a hot knife to cut through the cheesecake.
- Experiment with different toppings like fresh fruit or chocolate drizzle for added flair.
- Store leftovers in an airtight container in the fridge for up to 3 days.
Equipment Needed
- 9-inch springform pan: Essential for easy removal of the cheesecake. A regular pie dish works too, but slicing will be trickier.
- Mixing bowls: Use a large bowl for the cream cheese and a medium one for the crust. Any size will do, just ensure they’re sturdy.
- Electric mixer: A hand mixer is perfect for this recipe. If you don’t have one, a whisk and some elbow grease will work!
- Spatula: A silicone spatula is great for folding and smoothing. A wooden spoon can also do the job.
Variations of Honeycomb Cheesecake
- Chocolate Honeycomb Cheesecake: Add 1/4 cup of cocoa powder to the cream cheese mixture for a rich chocolate twist.
- Maple Honeycomb Cheesecake: Substitute honey with maple syrup for a unique flavor profile that’s equally delicious.
- Fruit-Infused Cheesecake: Fold in fresh berries or pureed fruit into the cream cheese mixture for a fruity burst.
- Gluten-Free Option: Use gluten-free graham cracker crumbs to make the crust suitable for gluten-sensitive friends.
- Vegan Honeycomb Cheesecake: Replace cream cheese with a vegan alternative and use coconut cream instead of heavy cream for a plant-based version.
Serving Suggestions
- Pair your honeycomb cheesecake with a dollop of whipped cream for extra creaminess.
- Serve alongside fresh berries like strawberries or blueberries for a pop of color and flavor.
- Drizzle with a bit of honey or chocolate sauce for an elegant touch.
- Complement with a cup of coffee or a sweet dessert wine for a delightful finish.
FAQs about Honeycomb Cheesecake
Curious about honeycomb cheesecake? You’re not alone! Here are some common questions I’ve encountered, along with answers to help you navigate this delicious dessert.
Can I make honeycomb cheesecake ahead of time?
Absolutely! In fact, making it a day in advance is ideal. This allows the flavors to meld beautifully while it chills in the fridge. Just be sure to cover it well to keep it fresh.
What can I use instead of honey?
If you’re looking for alternatives, maple syrup works wonderfully. It adds a different but equally delightful flavor to your cheesecake. You can also try agave syrup for a similar sweetness.
How do I store leftovers?
Store any leftover honeycomb cheesecake in an airtight container in the fridge. It should stay fresh for up to three days. Just remember to let it sit at room temperature for a few minutes before serving for the best texture.
Can I freeze honeycomb cheesecake?
Yes, you can freeze it! Wrap the cheesecake tightly in plastic wrap and then in aluminum foil. It can last up to two months in the freezer. Thaw it in the fridge overnight before serving.
What’s the best way to cut cheesecake?
For clean slices, use a hot knife! Dip your knife in hot water, wipe it dry, and then cut through the cheesecake. This technique helps prevent the filling from sticking to the knife, giving you those perfect, beautiful slices.
Final Thoughts
Creating a honeycomb cheesecake is more than just baking; it’s about crafting a moment of joy. Each slice offers a creamy, sweet experience that can brighten any day. Whether you’re celebrating a special occasion or simply indulging after a long week, this dessert brings people together. The delightful combination of honey and cream cheese creates a flavor that lingers in your memory, making it a recipe you’ll return to time and again. So, roll up your sleeves, gather your ingredients, and let the magic of honeycomb cheesecake fill your kitchen with warmth and happiness!
PrintHoneycomb Cheesecake: An Irresistible Dessert Recipe
- Total Time: 4 hours 30 minutes
- Yield: 8 servings
- Diet: Vegetarian
Description
A delicious and creamy Honeycomb Cheesecake that combines the rich flavors of cream cheese and honey, topped with optional honeycomb pieces for garnish.
Ingredients
- 2 cups graham cracker crumbs
- 1/2 cup unsalted butter, melted
- 1/4 cup granulated sugar
- 2 (8-ounce) packages cream cheese, softened
- 1 cup powdered sugar
- 1 teaspoon vanilla extract
- 1 cup heavy cream
- 1/2 cup honey
- 1/4 cup honeycomb pieces (optional, for garnish)
Instructions
- Preheat your oven to 325°F (160°C).
- In a medium bowl, combine the graham cracker crumbs, melted butter, and granulated sugar. Mix until well combined.
- Press the crumb mixture firmly into the bottom of a 9-inch springform pan to form the crust. Bake for 10 minutes, then remove from the oven and let cool.
- In a large mixing bowl, beat the softened cream cheese with an electric mixer until smooth and creamy.
- Gradually add the powdered sugar and vanilla extract, mixing until fully incorporated.
- In a separate bowl, whip the heavy cream until stiff peaks form. Gently fold the whipped cream into the cream cheese mixture until well combined.
- Drizzle the honey into the cream cheese mixture and fold gently until evenly mixed.
- Pour the cheesecake filling over the cooled crust and smooth the top with a spatula.
- Refrigerate the cheesecake for at least 4 hours or until set, preferably overnight.
- Before serving, garnish with honeycomb pieces if desired.
Notes
- For a chocolate twist, add 1/4 cup of cocoa powder to the cream cheese mixture.
- Substitute the honey with maple syrup for a different flavor profile.
- Prep Time: 20 minutes
- Cook Time: 10 minutes
- Category: Dessert
- Method: Baking and Refrigeration
- Cuisine: American
Nutrition
- Serving Size: 1 slice
- Calories: 350
- Sugar: 20g
- Sodium: 200mg
- Fat: 24g
- Saturated Fat: 14g
- Unsaturated Fat: 8g
- Trans Fat: 0g
- Carbohydrates: 30g
- Fiber: 1g
- Protein: 5g
- Cholesterol: 80mg