A Taste of Nostalgia and Celebration
Easter has always been a time of joy, family gatherings, and sweet indulgences. Growing up, my family’s Easter traditions were filled with vibrant decorations, egg hunts, and, most importantly, an array of homemade desserts that signified the spirit of the season. Among them, one treat stood out—the beloved Easter cake pops.
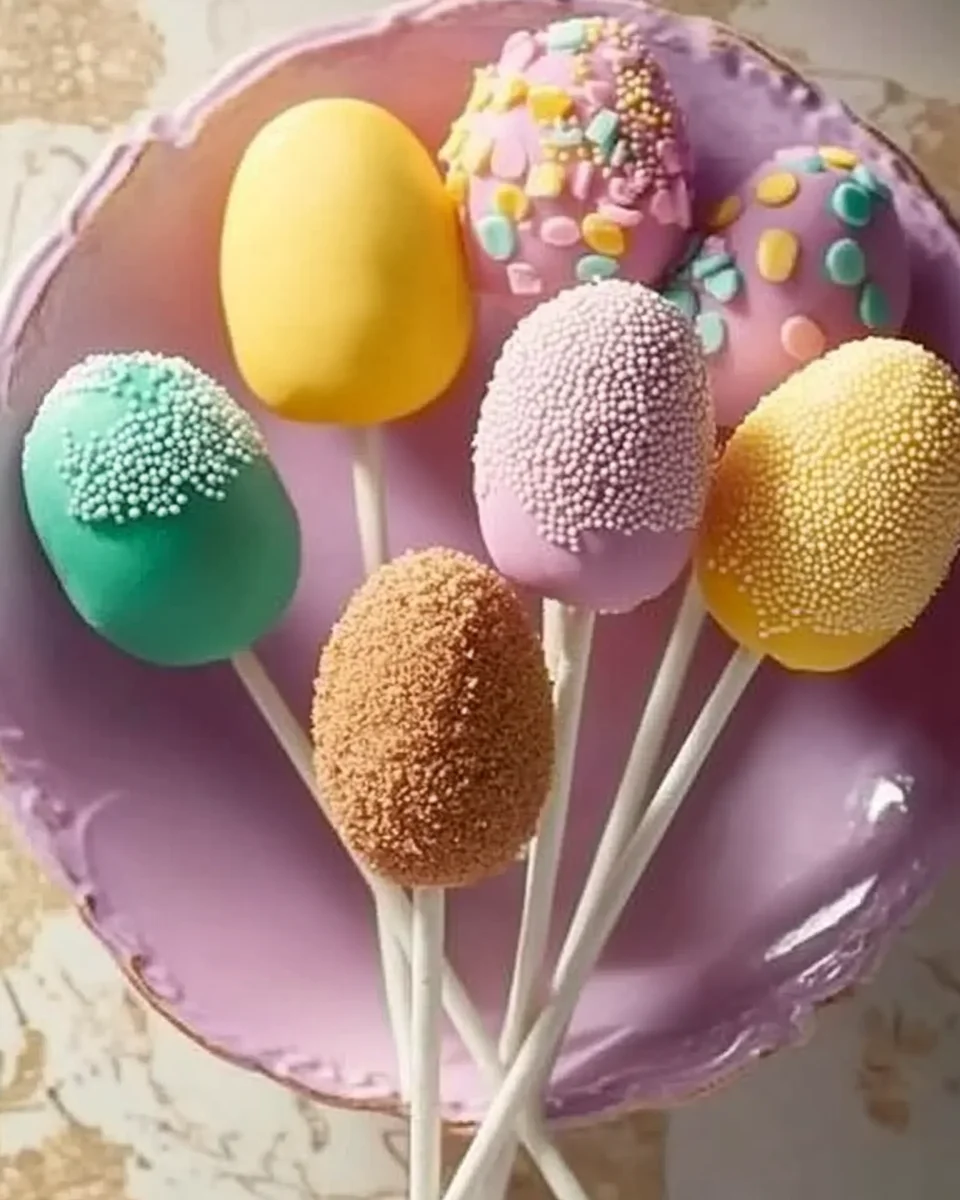
I remember watching my grandmother carefully crumble soft cake into a bowl, mixing it with just the right amount of frosting to form perfectly shaped eggs. As a child, I was mesmerized by the transformation of these tiny creations, watching them take on colorful coats of pastel candy melts before being decorated with sprinkles, stripes, and shimmering dust. Each pop felt like a little masterpiece, lovingly crafted and filled with warmth.
Now, as an adult, I find myself passing this tradition on to my own family. The joy of making Easter cake pops isn’t just about their sweet taste—it’s about the memories they create, the laughter shared in the kitchen, and the delight in seeing loved ones enjoy something homemade. Whether you’re making them for an Easter party, a family gathering, or as a gift, these cake pops encapsulate the essence of Easter: joy, color, and togetherness.
What Makes Easter Cake Pops So Special?
Easter cake pops aren’t just a delicious treat; they’re an experience. They blend the soft, moist texture of cake with the smooth, crisp bite of a candy coating, making every bite a delightful contrast of flavors. Their versatility in decoration allows for endless creativity—each cake pop can be uniquely designed to resemble pastel Easter eggs, speckled with sprinkles or adorned with delicate patterns.
What truly sets them apart is their ability to bring people together. Making cake pops is an interactive process that kids and adults alike can enjoy. From shaping the cake into eggs to dipping and decorating, every step offers an opportunity for bonding, creativity, and laughter.
Why Easter Cake Pops Are a Must-Have for Your Celebration
- Easy to Make, Fun to Decorate
Unlike elaborate cakes or pastries, cake pops require minimal baking skills. They are a fantastic project for beginners and an exciting challenge for those who love to experiment with decorations. - Perfect for Easter Gifting
These little treats are ideal for packaging in cute Easter baskets, wrapping in cellophane bags with ribbons, or arranging in a festive centerpiece. Their individual size makes them easy to share with friends, neighbors, and co-workers. - Kid-Friendly Dessert
Easter cake pops are a great way to involve children in the kitchen. Let them get creative with sprinkles, edible glitter, and fun colors. It’s a hands-on activity that fosters their imagination while creating delicious results. - Customizable for Any Taste
Whether you prefer vanilla, chocolate, red velvet, or even carrot cake, the base of cake pops can be made from any flavor. The candy coating and decorations can also be tailored to suit different preferences and themes.
Whimsical Ingredients
- 1 package cake mix of your choice (regular size)
- 1/4 to 1/2 cup prepared frosting of your choice
- 24 lollipop sticks
- 1 1/2 pounds candy coating disks (color(s) of your choice)
- Optional toppings: Sprinkles, colored sugar, assorted candies
Magical Directions
- Bake & Crumble
Prepare and bake the cake mix according to package directions in a greased 13×9-inch baking pan. Let it cool completely on a wire rack, then crumble it into a large bowl. - Mix & Shape
Add 1/4 cup of frosting to the crumbled cake and mix well. Gradually add more frosting until the mixture holds together. Using about 2 rounded tablespoons each, shape into egg-like forms. Cover and refrigerate for 20-30 minutes until firm. - Melt & Dip
In a microwave, melt the candy coating in 30-second intervals, stirring between each until smooth. Dip the tip of a lollipop stick into the melted coating and insert it into the base of a cake egg. - Coat & Decorate
Holding the cake pop over the melted candy, spoon the coating over it until fully covered. Allow excess to drip off. Decorate immediately with sprinkles, colored sugar, or candies. - Set & Enjoy
Insert the finished cake pops into a foam block to stand upright. Let them set completely before serving.
Sweet Stats (Per Cake Pop)
- Calories: 301
- Fat: 16g (9g saturated)
- Cholesterol: 24mg
- Sodium: 223mg
- Carbohydrates: 38g (30g sugar, 1g fiber)
- Protein: 2g
Make these delightful cake pops the highlight of your Easter celebration, bursting with color and sweetness!
FAQs About Easter Cake Pops
1. How Far in Advance Can I Make Cake Pops?
Cake pops can be prepared a few days in advance. Once they are fully coated and decorated, they can be stored in an airtight container at room temperature for up to two days or in the refrigerator for up to a week. If freezing, wrap them individually in plastic wrap and place them in an airtight container for up to a month.
2. Why Are My Cake Pops Cracking?
Cracking usually occurs due to temperature differences between the cake and the melted candy coating. If the cake pops are too cold when dipped into the warm coating, the sudden temperature change can cause cracks as the coating sets. To avoid this, let your cake pops rest at room temperature for a few minutes before dipping them.
3. How Can I Make My Cake Pops Smoother?
For a flawless finish, make sure your cake and frosting mixture is well combined and free of dry crumbs. When melting the candy coating, stir it thoroughly after each heating interval to ensure it’s smooth and lump-free. When dipping the cake pops, use a spoon to help coat them evenly and tap off excess coating gently.
4. What Can I Use Instead of Candy Melts?
If you don’t have candy melts, you can use white or milk chocolate with a little vegetable oil or shortening to achieve a smooth consistency. However, chocolate does not set as firmly as candy melts and may take longer to dry.
5. How Do I Prevent Cake Pops from Falling Off the Stick?
To keep the cake pops securely on the stick, dip the tip of each stick into melted candy before inserting it into the cake ball. Let the candy set for a few minutes before dipping the entire pop. This acts as a “glue” and helps prevent them from slipping off.
6. Can I Make Cake Pops Without a Stand?
If you don’t have a cake pop stand, you can use a foam block, an inverted egg carton, or a colander with small holes to hold the cake pops upright while they set.
7. How Do I Get Vibrant Colors for My Cake Pops?
Use high-quality, oil-based food coloring for the candy melts. Water-based food coloring can cause the coating to seize. If using white candy melts, add a few drops of oil-based color to achieve pastel or bold shades.
8. Can I Make These Without Lollipop Sticks?
Yes! If you prefer, you can make cake truffles instead by shaping the cake mixture into small balls and dipping them in chocolate without inserting sticks. Place them in mini cupcake liners for easy serving.
Creative Easter Cake Pop Decoration Ideas
- Speckled Egg Effect: Use a clean brush to flick edible paint or cocoa powder onto the coated pops for a realistic speckled look.
- Drizzled Designs: Melt additional candy melts in a contrasting color and drizzle over the cake pops using a piping bag.
- Shimmering Elegance: Dust the finished cake pops with edible shimmer dust for a magical, pearlescent shine.
- Bunny & Chick Designs: Use fondant or small candy pieces to create bunny ears, chick beaks, or tiny eyes for an extra festive touch.
The Joy of Easter in Every Bite
Easter cake pops are more than just a dessert; they’re a celebration of love, creativity, and tradition. Whether you’re making them as a family activity, gifting them to loved ones, or simply indulging in a sweet treat, these colorful little delights bring a sense of joy and nostalgia to the holiday.
Every bite is a reminder of the warmth of Easter mornings, the excitement of egg hunts, and the laughter shared around the table. So, as you prepare your Easter treats this year, embrace the mess, enjoy the process, and savor the sweetness of making cherished memories—one cake pop at a time.

Easter Cake Pops: A Sweet Treat for Cherished Moments
- Total Time: 55 minutes
- Yield: 24 cake pops
Description
A delightful and colorful treat, these Easter cake pops are the perfect festive addition to your celebration! With a smooth candy coating and endless decorating possibilities, they are fun to make and even more fun to eat.
Ingredients
- 1 package cake mix of your choice (regular size)
- 1/4 to 1/2 cup prepared frosting of your choice
- 24 lollipop sticks
- 1 1/2 pounds candy coating disks (color(s) of your choice)
- Optional toppings: Sprinkles, colored sugar, assorted candies
Instructions
Prepare and bake the cake mix according to package directions in a greased 13×9-inch baking pan. Let it cool completely on a wire rack, then crumble it into a large bowl.
2. Mix & Shape
Add 1/4 cup of frosting to the crumbled cake and mix well. Gradually add more frosting until the mixture holds together. Using about 2 rounded tablespoons each, shape into egg-like forms. Cover and refrigerate for 20-30 minutes until firm.
3. Melt & Dip
In a microwave, melt the candy coating in 30-second intervals, stirring between each until smooth. Dip the tip of a lollipop stick into the melted coating and insert it into the base of a cake egg.
4. Coat & Decorate
Holding the cake pop over the melted candy, spoon the coating over it until fully covered. Allow excess to drip off. Decorate immediately with sprinkles, colored sugar, or candies.
5. Set & Enjoy
Insert the finished cake pops into a foam block to stand upright. Let them set completely before serving.
Notes
- Consistency Check: If the cake mixture is too dry, add a bit more frosting. If too sticky, refrigerate before shaping.
- Storage: Store cake pops in an airtight container at room temperature for up to 3 days or refrigerate for up to a week.
- Creative Twist: Use pastel candy coatings and mix different sprinkles for a festive Easter theme.
Make these delightful cake pops the highlight of your Easter celebration, bursting with color and sweetness!
- Prep Time: 30 minutes
- Cook Time: 25 minutes
- Category: Dessert
- Method: No-Bake (after baking)
- Cuisine: American