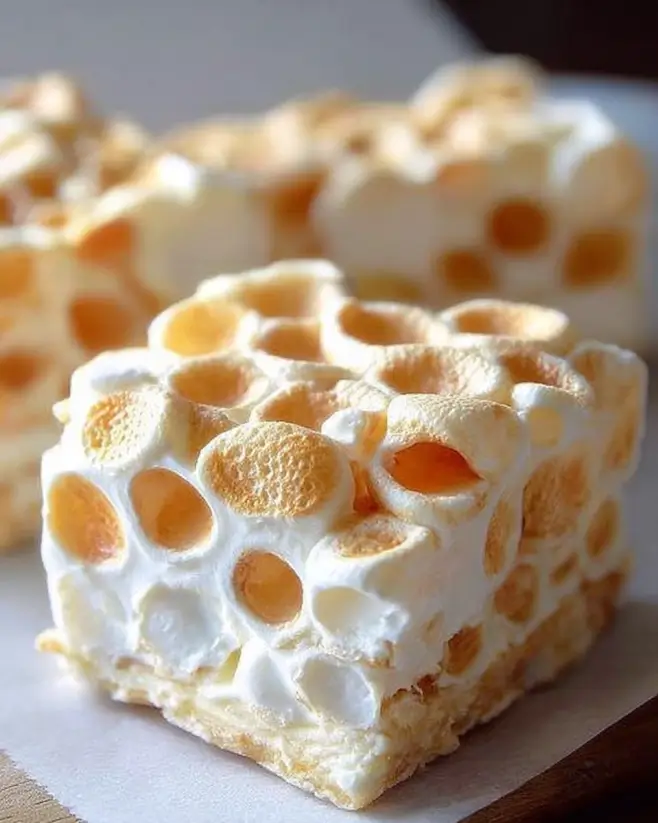
Introduction to Honeycomb Marshmallow Treats
There’s something magical about the combination of crispy rice cereal and gooey marshmallows. It takes me back to my childhood, where every bite felt like a sweet adventure. Today, I’m excited to share my recipe for Honeycomb Marshmallow Treats. This delightful treat is not just easy to make; it’s a quick solution for those busy days when you need a little something special. Whether you’re looking to impress your loved ones or simply satisfy a sweet tooth, these treats are sure to bring smiles all around. Let’s dive into this delicious journey together!
Why You’ll Love This Honeycomb Marshmallow Treats
These Honeycomb Marshmallow Treats are a game-changer in the dessert world. They come together in just 15 minutes, making them perfect for last-minute gatherings or a sweet snack after a long day. The taste? A delightful blend of honey and peanut butter, with a satisfying crunch from the crispy rice cereal. Plus, they’re a hit with kids and adults alike, ensuring everyone leaves with a smile. What’s not to love?
Ingredients for Honeycomb Marshmallow Treats
Gathering the right ingredients is the first step to creating these delightful Honeycomb Marshmallow Treats. Here’s what you’ll need:
- Crispy rice cereal: This is the base of your treats, providing that satisfying crunch.
- Mini marshmallows: These little puffs add sweetness and gooeyness, making every bite irresistible.
- Honey: A natural sweetener that brings a unique flavor and helps bind everything together.
- Unsweetened peanut butter: Adds creaminess and a nutty taste. You can swap it for almond butter for a nut-free option.
- Vanilla extract: A splash of this enhances the overall flavor, making your treats even more delicious.
- Salt: Just a pinch balances the sweetness and elevates the flavors.
- Cooking spray or butter: Use this for greasing your baking dish, ensuring easy removal of the treats.
For those who want to get creative, consider drizzling melted chocolate on top for an extra indulgent twist. You can find the exact measurements for these ingredients at the bottom of the article, ready for printing!
How to Make Honeycomb Marshmallow Treats
Creating these Honeycomb Marshmallow Treats is a breeze! Follow these simple steps, and you’ll have a delicious dessert ready in no time. Let’s get started!
Step 1: Combine Honey and Peanut Butter
In a large saucepan, combine honey and peanut butter over medium heat. Stir continuously until the mixture is smooth and begins to bubble, about 3-5 minutes. This step is crucial; you want that perfect blend of flavors. The aroma will fill your kitchen, making it hard to resist sneaking a taste!
Step 2: Add Vanilla and Salt
Once your honey and peanut butter mixture is bubbling, remove the saucepan from heat. Stir in the vanilla extract and salt. This little pinch of salt is a game-changer, balancing the sweetness and enhancing the overall flavor. Trust me; it makes a difference!
Step 3: Melt the Marshmallows
Now, it’s time to add the mini marshmallows to the warm mixture. Stir until they are completely melted and combined. The marshmallows will create a gooey, sweet base that binds everything together. Keep stirring until you see that beautiful, smooth consistency.
Step 4: Fold in the Cereal
Gently fold in the crispy rice cereal until it’s evenly coated with the marshmallow mixture. This is where the magic happens! The cereal adds that satisfying crunch, making each bite a delightful experience. Be careful not to overmix; you want to keep that airy texture.
Step 5: Prepare the Baking Dish
Lightly grease a 9×13 inch baking dish with cooking spray or butter. This step ensures your treats come out easily once they’ve cooled. Pour the mixture into the dish and press it down evenly with a spatula. Make sure it’s compact; this will help the treats hold their shape.
Step 6: Cool and Cut
Allow the treats to cool at room temperature for about 30 minutes. Once they’re set, cut them into squares. The anticipation will be worth it! You’ll have a batch of Honeycomb Marshmallow Treats that are not only delicious but also perfect for sharing.
Tips for Success
- Use fresh mini marshmallows for the best texture and flavor.
- Don’t rush the melting process; low and slow is key to a smooth mixture.
- Grease your spatula for easier pressing of the mixture into the baking dish.
- For extra flavor, try adding a sprinkle of cinnamon or nutmeg.
- Store leftovers in an airtight container to keep them fresh and chewy.
Equipment Needed
- Large saucepan: A medium pot works too if you don’t have a large one.
- Spatula: A wooden spoon can also do the trick for mixing.
- Baking dish: Any 9×13 inch dish will suffice; glass or metal both work.
- Measuring cups: Use a kitchen scale for precise measurements if preferred.
Variations
- Chocolate Drizzle: Melt some chocolate and drizzle it over the cooled treats for a decadent touch.
- Nut-Free Option: Substitute peanut butter with sunflower seed butter or almond butter for a nut-free version.
- Flavor Infusion: Add a teaspoon of almond extract instead of vanilla for a unique twist.
- Fruit Add-Ins: Mix in dried fruits like cranberries or raisins for a chewy texture and added flavor.
- Vegan Version: Use maple syrup instead of honey and a plant-based butter alternative to make it vegan-friendly.
Serving Suggestions
- Pair your Honeycomb Marshmallow Treats with a glass of cold milk for a classic combination.
- Serve them alongside fresh fruit, like strawberries or bananas, for a refreshing contrast.
- For a fun presentation, stack the treats on a colorful plate and drizzle with chocolate.
- Wrap individual squares in parchment paper for a delightful homemade gift.
FAQs about Honeycomb Marshmallow Treats
Curious about these delightful Honeycomb Marshmallow Treats? Here are some common questions I often hear, along with answers to help you make the most of this easy recipe.
Can I use different types of cereal?
Absolutely! While crispy rice cereal is traditional, you can experiment with other cereals like cornflakes or even granola for a unique twist.
How should I store the treats?
Keep your Honeycomb Marshmallow Treats in an airtight container at room temperature. They’ll stay fresh and chewy for up to a week—if they last that long!
Can I make these treats ahead of time?
Yes! These treats are perfect for making ahead. Just store them properly, and they’ll be ready to enjoy whenever you need a sweet snack.
What can I substitute for honey?
If you’re looking for a vegan option, maple syrup works beautifully as a substitute for honey. It adds a lovely flavor while keeping the treats sweet.
Are these treats gluten-free?
Yes, as long as you use gluten-free crispy rice cereal, these Honeycomb Marshmallow Treats can be enjoyed by those following a gluten-free diet!
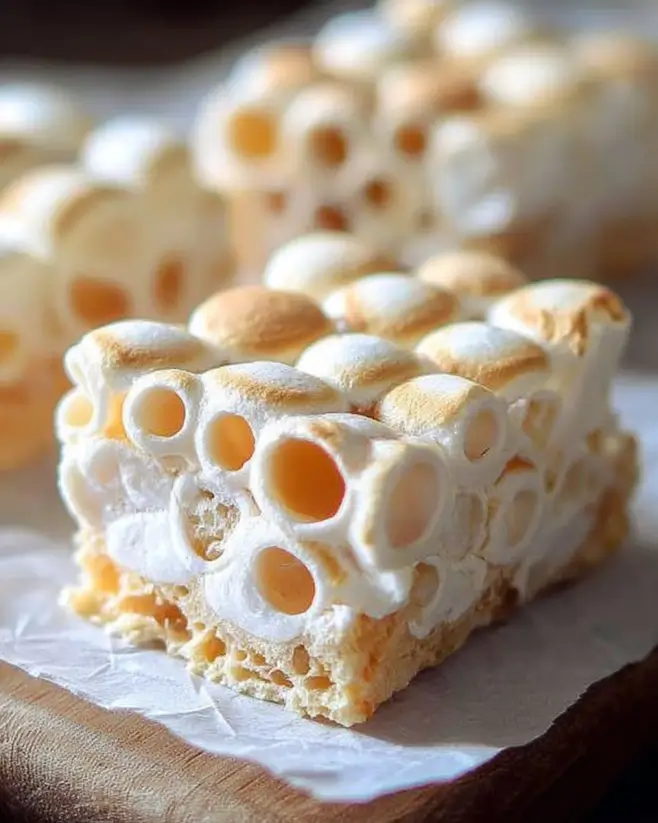
Final Thoughts
Making Honeycomb Marshmallow Treats is more than just whipping up a dessert; it’s about creating memories. The joy of mixing those gooey marshmallows with crunchy cereal brings a sense of nostalgia that warms the heart. Each bite is a delightful reminder of simpler times, perfect for sharing with family or friends. Whether you’re enjoying them after a long day or serving them at a gathering, these treats are sure to bring smiles. So, roll up your sleeves, gather your ingredients, and let the sweet adventure begin. You won’t regret it!
PrintHoneycomb Marshmallow Treats: Easy Recipe You’ll Love!
- Total Time: 45 minutes
- Yield: 12 servings
- Diet: Vegetarian
Description
A delicious and easy recipe for Honeycomb Marshmallow Treats that combines crispy rice cereal, mini marshmallows, honey, and peanut butter.
Ingredients
- 3 cups crispy rice cereal
- 1 cup mini marshmallows
- 1 cup honey
- 1/2 cup unsweetened peanut butter
- 1 teaspoon vanilla extract
- 1/4 teaspoon salt
- Cooking spray or butter (for greasing)
Instructions
- In a large saucepan, combine honey and peanut butter over medium heat. Stir continuously until the mixture is smooth and begins to bubble, about 3-5 minutes.
- Remove the saucepan from heat and stir in vanilla extract and salt.
- Add the mini marshmallows to the mixture and stir until they are completely melted and combined.
- Gently fold in the crispy rice cereal until evenly coated.
- Lightly grease a 9×13 inch baking dish with cooking spray or butter. Pour the mixture into the dish and press it down evenly with a spatula.
- Allow the treats to cool at room temperature for about 30 minutes before cutting into squares.
Notes
- For a chocolatey twist, drizzle melted chocolate over the top before cooling.
- You can also substitute almond butter for peanut butter for a nut-free version.
- Prep Time: 10 minutes
- Cook Time: 5 minutes
- Category: Dessert
- Method: Stovetop
- Cuisine: American
Nutrition
- Serving Size: 1 square
- Calories: 150
- Sugar: 12g
- Sodium: 50mg
- Fat: 6g
- Saturated Fat: 1g
- Unsaturated Fat: 5g
- Trans Fat: 0g
- Carbohydrates: 24g
- Fiber: 1g
- Protein: 3g
- Cholesterol: 0mg