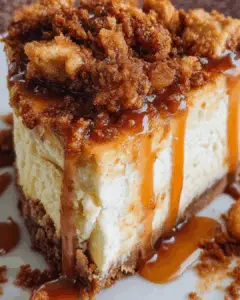
Introduction to Biscoff Cookie Crust Cheesecake
There’s something magical about a cheesecake that brings people together. The creamy texture, the sweet notes, and that delightful crunch from a Biscoff cookie crust make this dessert a true crowd-pleaser. I remember the first time I made a Biscoff Cookie Crust Cheesecake; it was for a family gathering, and the smiles on everyone’s faces were priceless. This recipe is perfect for impressing your loved ones or simply treating yourself after a long day. With minimal effort and maximum flavor, you’ll find this cheesecake to be a quick solution for any occasion.
Why You’ll Love This Biscoff Cookie Crust Cheesecake
This Biscoff Cookie Crust Cheesecake is a game-changer for dessert lovers. It’s incredibly easy to whip up, making it perfect for busy weeknights or last-minute gatherings. The rich, creamy filling paired with the crunchy, spiced crust creates a flavor explosion that’s hard to resist. Plus, it’s a showstopper that will have your friends and family raving about your baking skills. Trust me, this cheesecake is a must-try!
Ingredients for Biscoff Cookie Crust Cheesecake
Gathering the right ingredients is the first step to creating your Biscoff Cookie Crust Cheesecake masterpiece. Here’s what you’ll need:
- Biscoff cookie crumbs: These are the star of the show! They provide a sweet, spiced flavor and a delightful crunch.
- Unsalted butter: This helps bind the cookie crumbs together, creating a rich and buttery crust.
- Cream cheese: The base of the cheesecake filling, it gives that creamy texture we all love.
- Granulated sugar: Sweetens the filling, balancing the flavors perfectly.
- Vanilla extract: Adds a warm, aromatic note that enhances the overall taste.
- Eggs: These help set the cheesecake, giving it structure and richness.
- Sour cream: This ingredient adds creaminess and a slight tang, making the cheesecake even more delicious.
- All-purpose flour: A small amount helps stabilize the filling, ensuring it holds its shape.
- Salt: Just a pinch enhances the flavors and balances the sweetness.
- Ground cinnamon: This adds a warm spice that complements the Biscoff cookies beautifully.
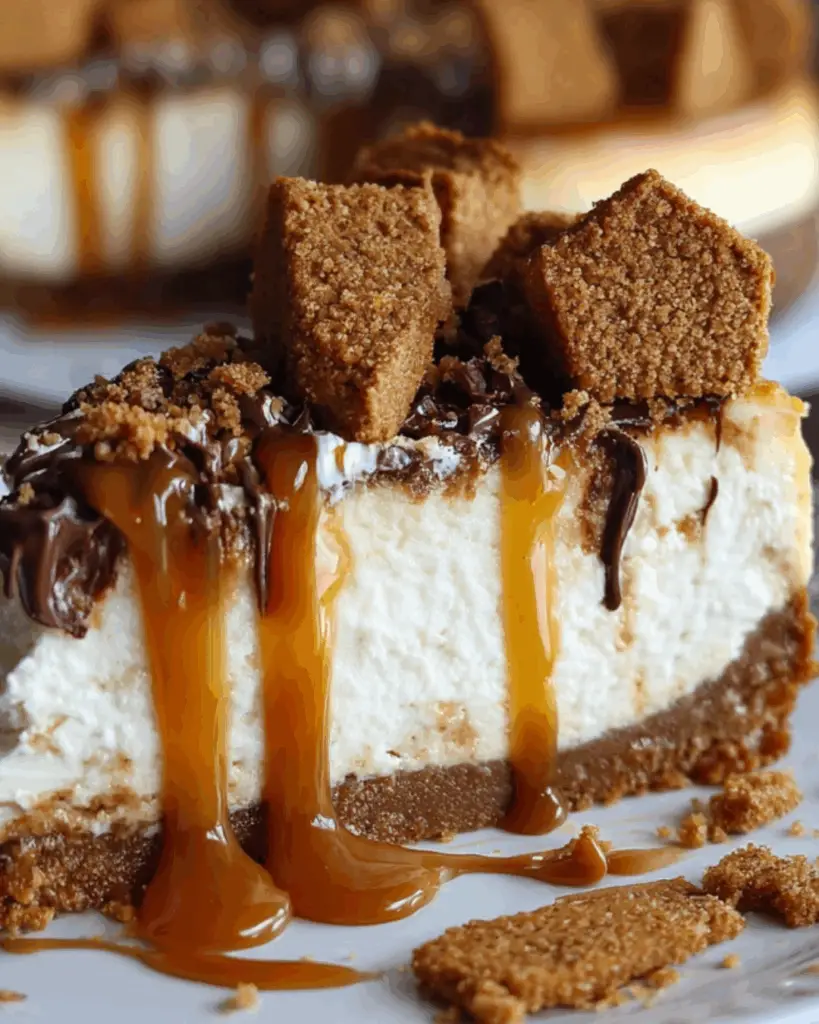
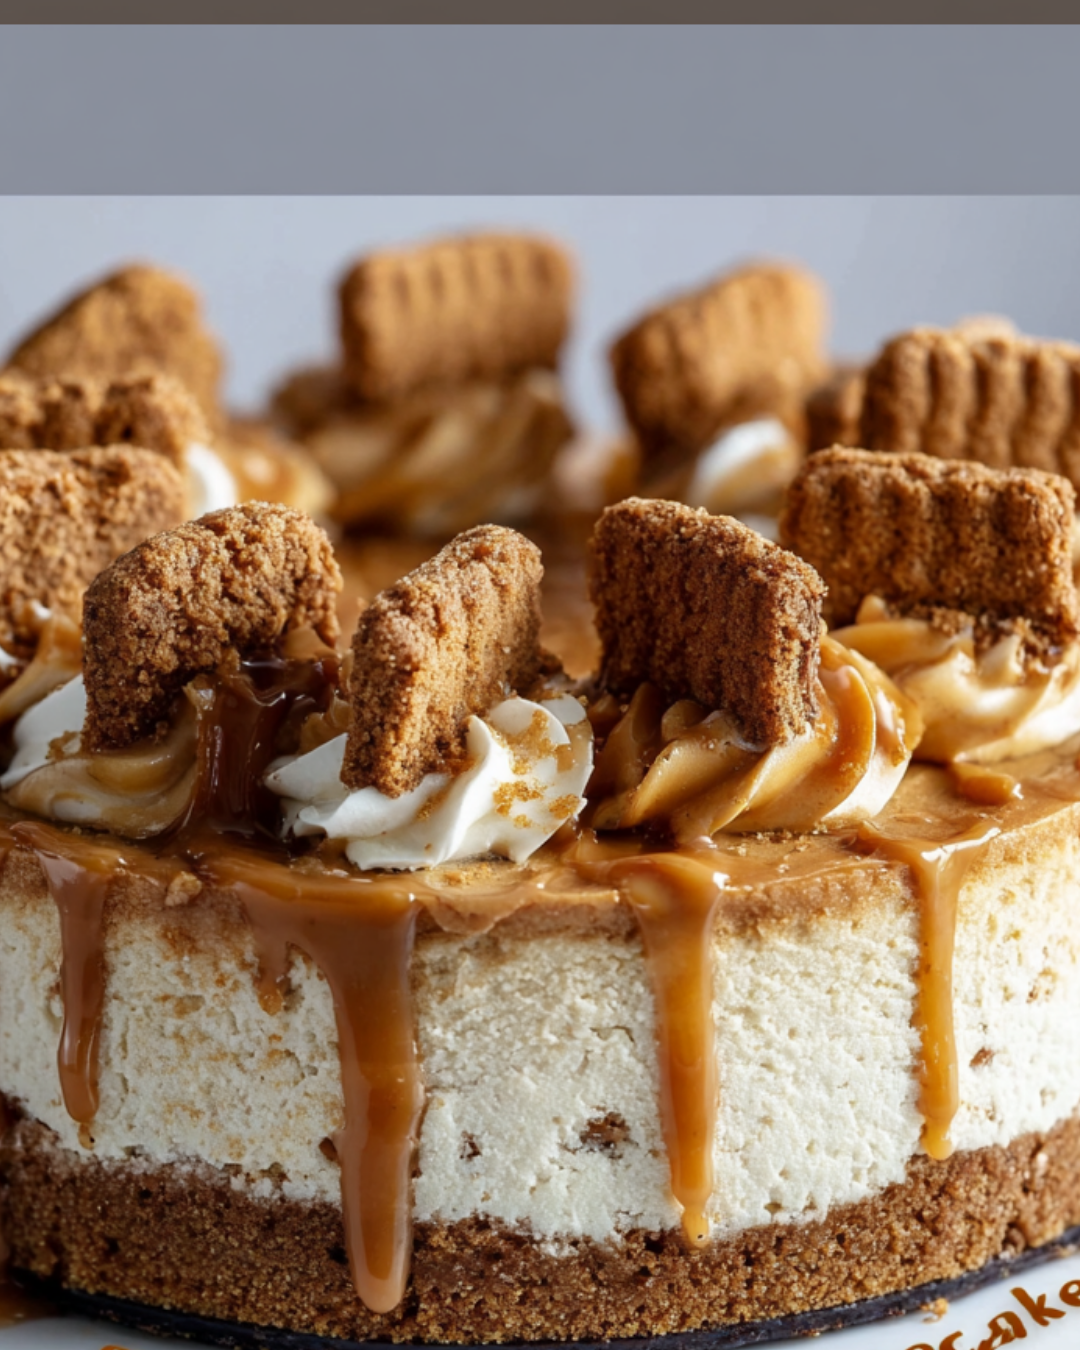
For those looking to get creative, consider adding a layer of Biscoff spread on top before serving for an extra indulgent touch. You can also garnish with whipped cream and crushed Biscoff cookies for added texture and flair. If you’re feeling adventurous, try incorporating chocolate chips or caramel sauce into the batter for a unique twist!
Exact measurements for these ingredients can be found at the bottom of the article, ready for printing. Happy baking!
How to Make Biscoff Cookie Crust Cheesecake
Creating a Biscoff Cookie Crust Cheesecake is a delightful journey that’s easier than you might think. Follow these simple steps, and you’ll be on your way to a dessert that will impress everyone. Let’s dive in!
Step 1: Preheat the Oven
Start by preheating your oven to 325°F. This step is crucial because it ensures even baking. A properly preheated oven helps the cheesecake set correctly, giving it that perfect creamy texture. Trust me, you don’t want to skip this part!
Step 2: Prepare the Biscoff Crust
In a medium bowl, combine your Biscoff cookie crumbs with melted butter. Mix them until they’re well combined. The mixture should resemble wet sand. Now, here’s the key: press it firmly into the bottom of a 9-inch springform pan. This creates a solid base for your cheesecake, so don’t be shy—use your fingers or the back of a measuring cup to pack it down well.
Step 3: Bake the Crust
Pop the crust into your preheated oven and bake for about 10 minutes. This short baking time helps set the crust, making it sturdy enough to hold the creamy filling. Once done, remove it from the oven and let it cool completely. Patience is a virtue here; a cool crust is essential for a perfect cheesecake.
Step 4: Make the Cheesecake Filling
In a large mixing bowl, beat the softened cream cheese with an electric mixer on medium speed until it’s smooth and creamy. Gradually add the granulated sugar, mixing until well combined. Then, mix in the vanilla extract. Next, add the eggs one at a time, mixing on low speed after each addition. This gentle mixing helps keep the filling light and airy. Finally, add the sour cream, flour, salt, and ground cinnamon, mixing until everything is smooth and well incorporated.
Step 5: Pour and Bake
Now it’s time to pour that luscious cheesecake filling over your cooled Biscoff crust. Spread it evenly with a spatula. Bake in the oven for 50-60 minutes. The center should be set but still slightly jiggly. This is the sweet spot for a creamy cheesecake!
Step 6: Cooling Process
Once baked, turn off the oven and crack the door open. Let the cheesecake cool in the oven for about an hour. This gradual cooling helps prevent cracks on the surface. After that, remove it from the oven and let it cool to room temperature. Finally, refrigerate for at least 4 hours or overnight before serving. This chilling time allows the flavors to meld beautifully, making each bite a heavenly experience.
Tips for Success
- Use room temperature cream cheese for a smoother filling.
- Don’t overmix the batter; this keeps your cheesecake light and fluffy.
- For a perfect crust, ensure it’s packed tightly and evenly.
- Let the cheesecake cool gradually to avoid cracks.
- Chill overnight for the best flavor and texture.
Equipment Needed
- 9-inch springform pan: Essential for easy removal; a regular cake pan works too, but it may be trickier to serve.
- Mixing bowls: Use a large bowl for the filling and a medium one for the crust.
- Electric mixer: A hand mixer is perfect; a whisk can work, but it’ll take longer.
- Spatula: Great for spreading the filling evenly; a wooden spoon can also do the job.
Variations
- Chocolate Lovers: Add chocolate chips to the cheesecake batter for a rich, decadent twist.
- Nutty Delight: Incorporate crushed nuts, like pecans or walnuts, into the crust for added texture and flavor.
- Fruit Topping: Top your cheesecake with fresh berries or a fruit compote for a refreshing contrast to the creamy filling.
- Caramel Swirl: Drizzle caramel sauce into the batter before baking for a sweet surprise in every bite.
- Gluten-Free Option: Substitute Biscoff cookies with gluten-free cookies to make this dessert suitable for gluten-sensitive friends.
Serving Suggestions
- Pair your cheesecake with a dollop of whipped cream for added creaminess.
- Serve alongside fresh berries for a burst of color and flavor.
- Drizzle with chocolate or caramel sauce for an indulgent touch.
- Enjoy with a cup of coffee or tea to balance the sweetness.
- Garnish with crushed Biscoff cookies for a delightful crunch on top.
FAQs about Biscoff Cookie Crust Cheesecake
Can I use other cookies for the crust? Absolutely! While Biscoff cookies are fantastic, you can experiment with other cookies like Oreos or graham crackers. Just adjust the butter accordingly to ensure the crust holds together.
How do I know when the cheesecake is done baking? The cheesecake is done when the edges are set, and the center is still slightly jiggly. It will continue to firm up as it cools.
Can I make this cheesecake ahead of time? Yes! This Biscoff Cookie Crust Cheesecake is perfect for making ahead. It actually tastes better after chilling overnight, allowing the flavors to meld beautifully.
What’s the best way to store leftovers? Store any leftovers in an airtight container in the refrigerator. It should stay fresh for up to a week, but I doubt it will last that long!
Can I freeze the cheesecake? Yes, you can freeze the cheesecake! Just wrap it tightly in plastic wrap and then in aluminum foil. It can be frozen for up to three months. Thaw it in the fridge before serving for the best texture.
Final Thoughts
Creating a Biscoff Cookie Crust Cheesecake is more than just baking; it’s about crafting memories. Each slice tells a story, whether it’s a family gathering or a quiet evening at home. The combination of creamy filling and that irresistible cookie crust brings joy to every bite. I love how this cheesecake can transform an ordinary day into something special. Plus, it’s a recipe that invites creativity, allowing you to add your personal touch. So, roll up your sleeves, embrace the process, and enjoy the sweet rewards of your efforts. Trust me, your taste buds will thank you!
PrintBiscoff Cookie Crust Cheesecake: Discover the Best Recipe!
- Total Time: 4 hours 20 minutes
- Yield: 8 servings
- Diet: Vegetarian
Description
A delicious cheesecake with a Biscoff cookie crust, perfect for dessert lovers.
Ingredients
- 1 ½ cups Biscoff cookie crumbs
- ½ cup unsalted butter, melted
- 2 (8-ounce) packages cream cheese, softened
- ¾ cup granulated sugar
- 1 teaspoon vanilla extract
- 2 large eggs
- 1 cup sour cream
- ¼ cup all-purpose flour
- ¼ teaspoon salt
- 1 teaspoon ground cinnamon
Instructions
- Preheat the oven to 325°F.
- In a medium bowl, combine Biscoff cookie crumbs and melted butter. Mix until well combined.
- Press the mixture firmly into the bottom of a 9-inch springform pan to form the crust.
- Bake for 10 minutes, then remove from the oven and let cool.
- In a large mixing bowl, beat the softened cream cheese with an electric mixer on medium speed until smooth and creamy.
- Gradually add the granulated sugar and continue to beat until well combined. Mix in the vanilla extract.
- Add the eggs one at a time, mixing on low speed after each addition until just combined.
- Add the sour cream, flour, salt, and ground cinnamon, mixing until smooth.
- Pour the cheesecake batter over the cooled Biscoff crust.
- Bake in the preheated oven for 50-60 minutes, or until the center is set but still slightly jiggly.
- Turn off the oven and crack the door open, allowing the cheesecake to cool in the oven for 1 hour.
- Remove the cheesecake from the oven and let it cool to room temperature.
- Once cooled, refrigerate for at least 4 hours or overnight before serving.
Notes
- For a richer flavor, consider adding a layer of Biscoff spread on top of the cheesecake before serving.
- You can also garnish with whipped cream and crushed Biscoff cookies for added texture and presentation.
- Alternatively, try incorporating chocolate chips or caramel sauce into the batter for a different twist.
- Prep Time: 20 minutes
- Cook Time: 60 minutes
- Category: Dessert
- Method: Baking
- Cuisine: American
Nutrition
- Serving Size: 1 slice
- Calories: 350
- Sugar: 25g
- Sodium: 300mg
- Fat: 25g
- Saturated Fat: 15g
- Unsaturated Fat: 5g
- Trans Fat: 0g
- Carbohydrates: 30g
- Fiber: 1g
- Protein: 6g
- Cholesterol: 80mg