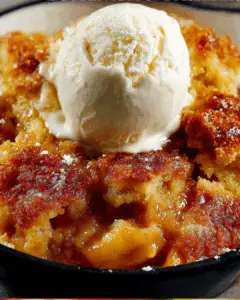
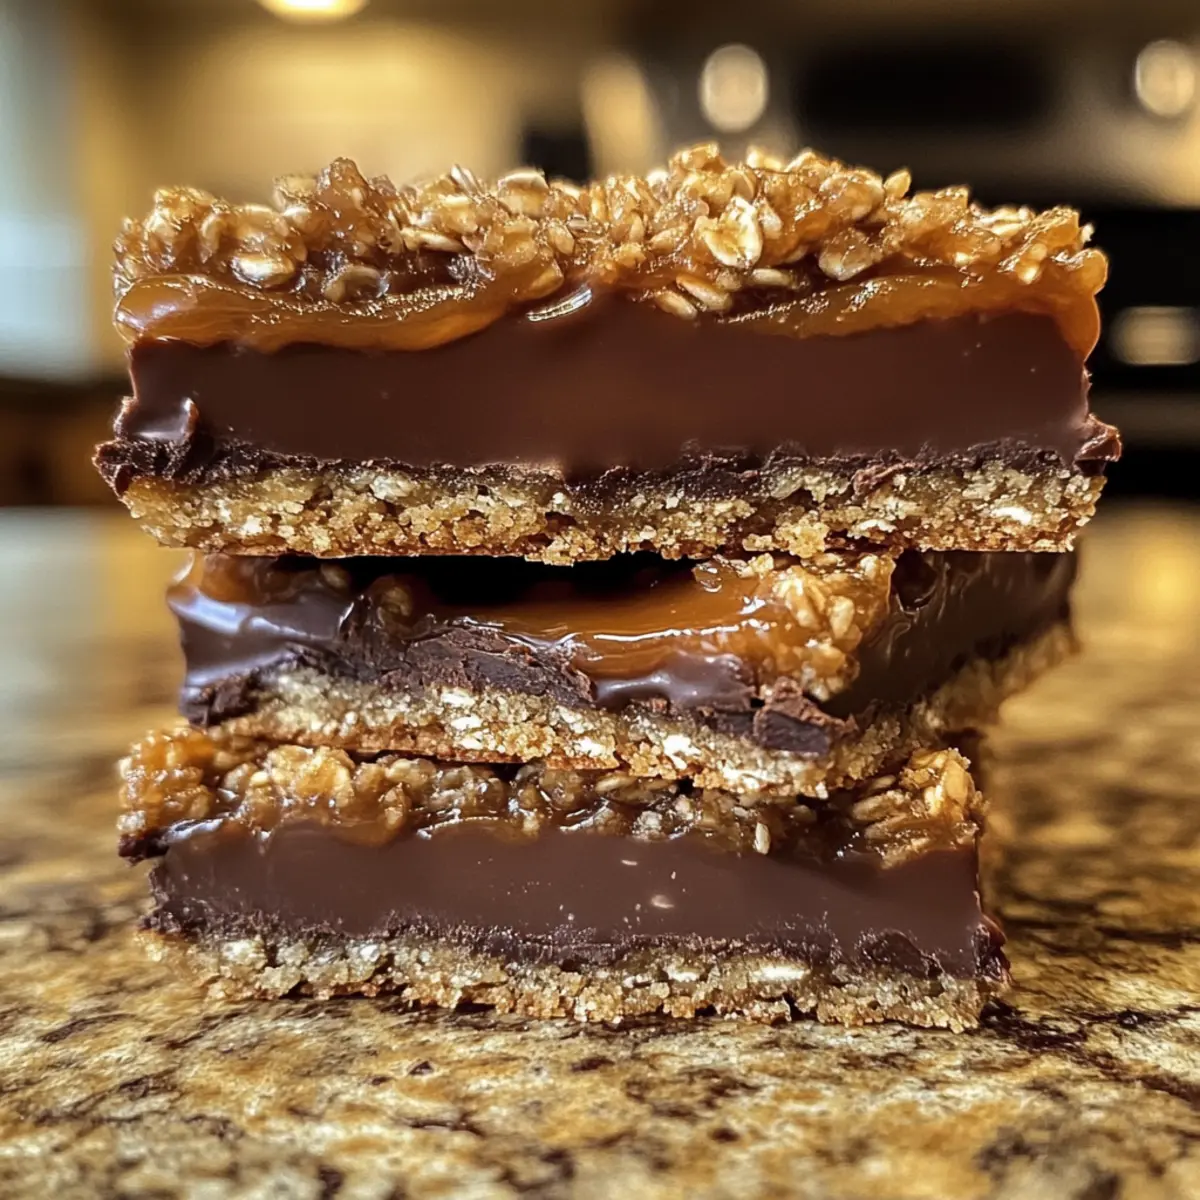
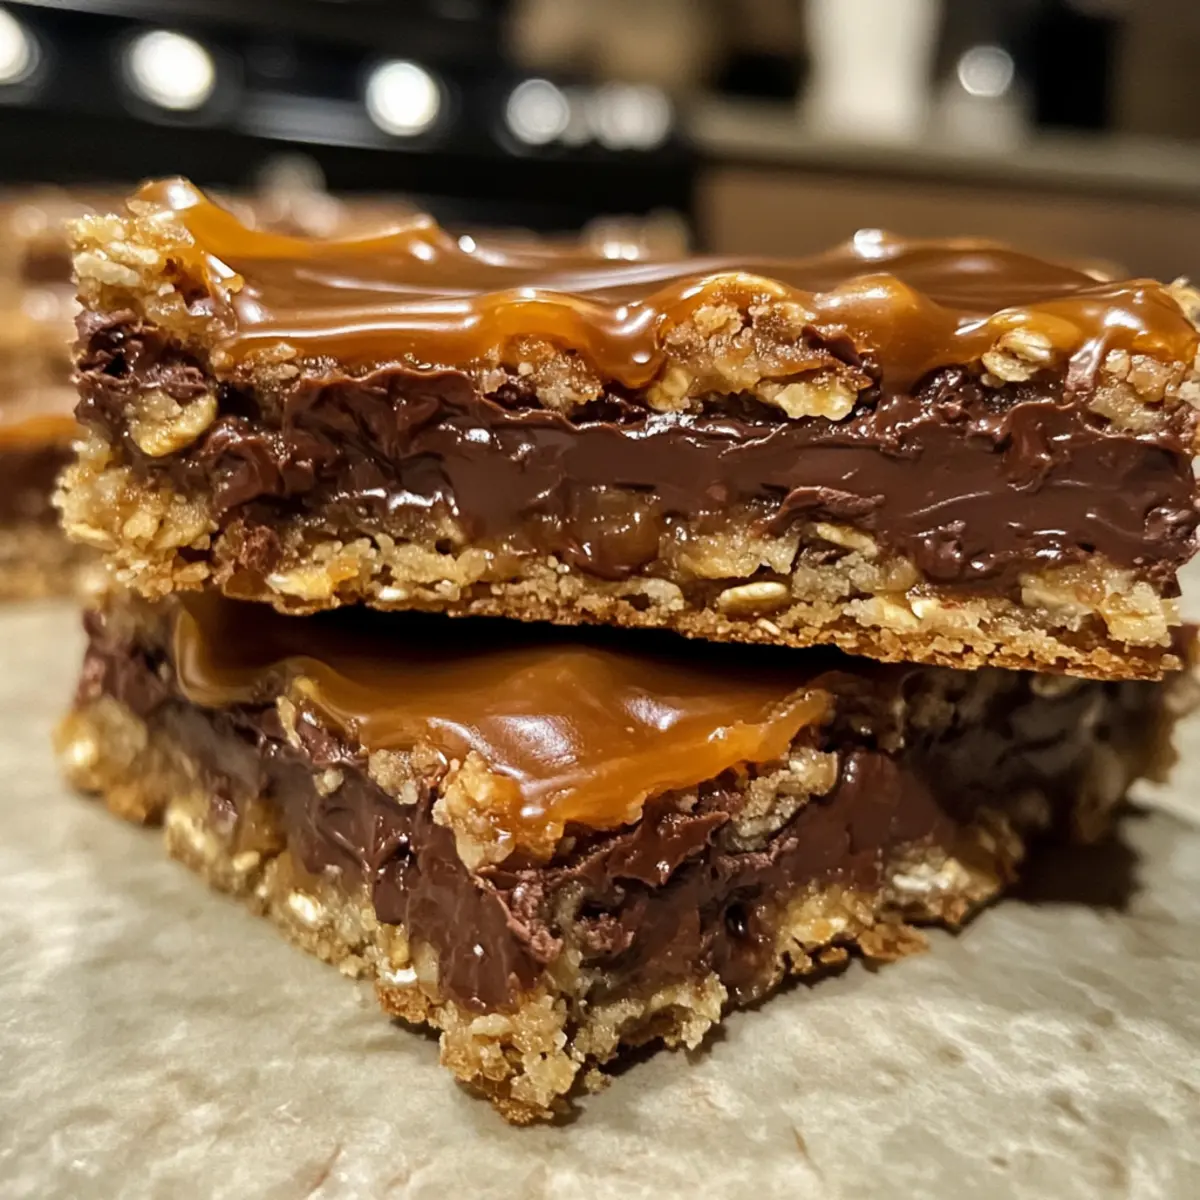
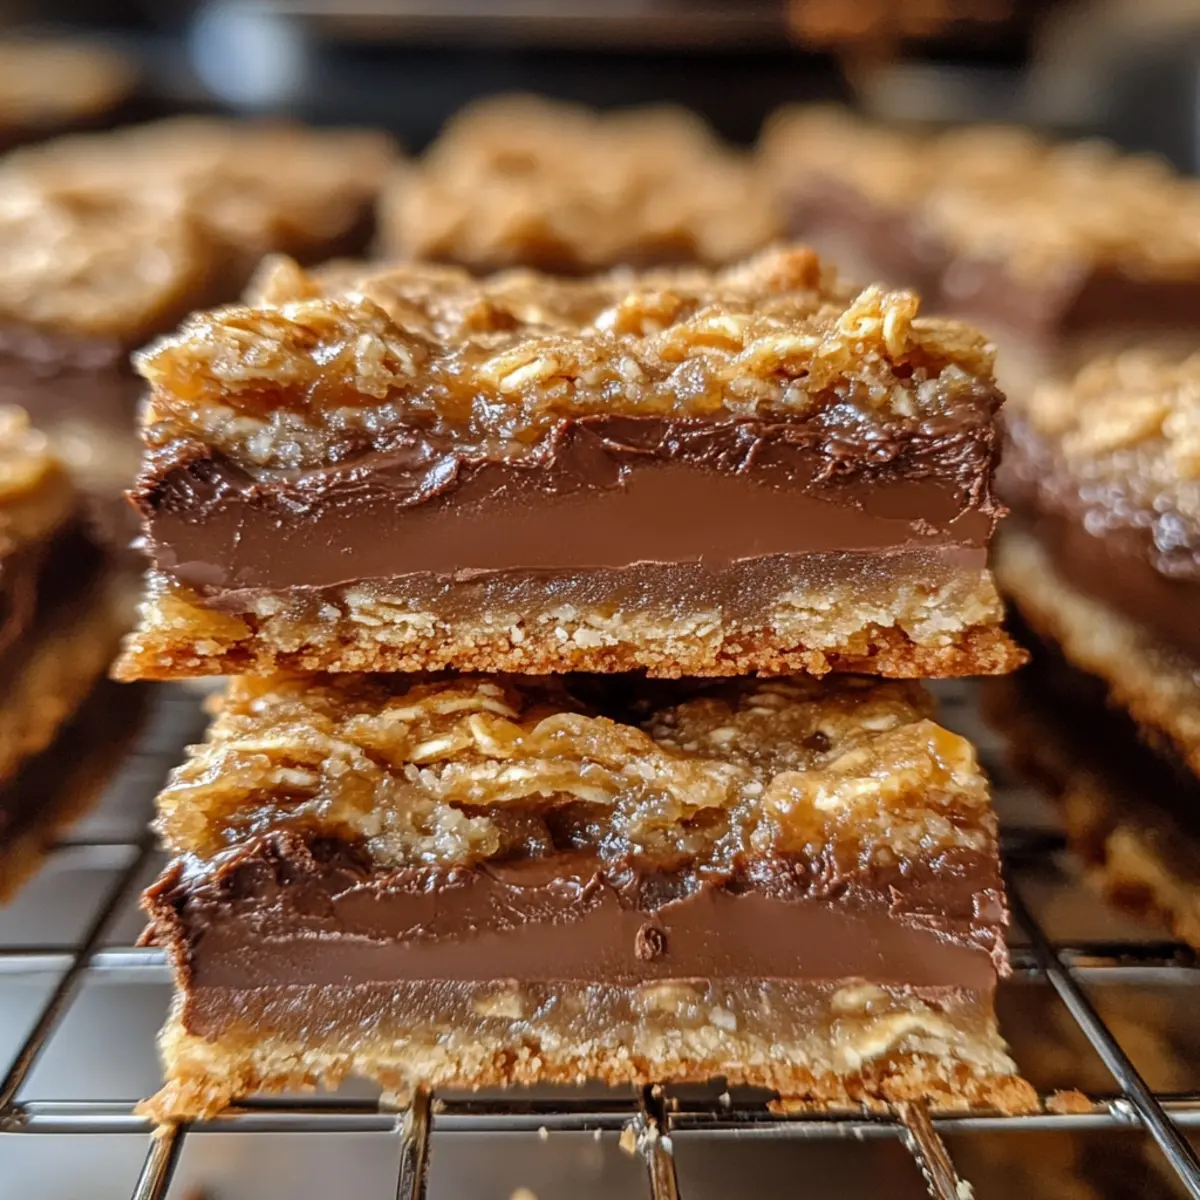
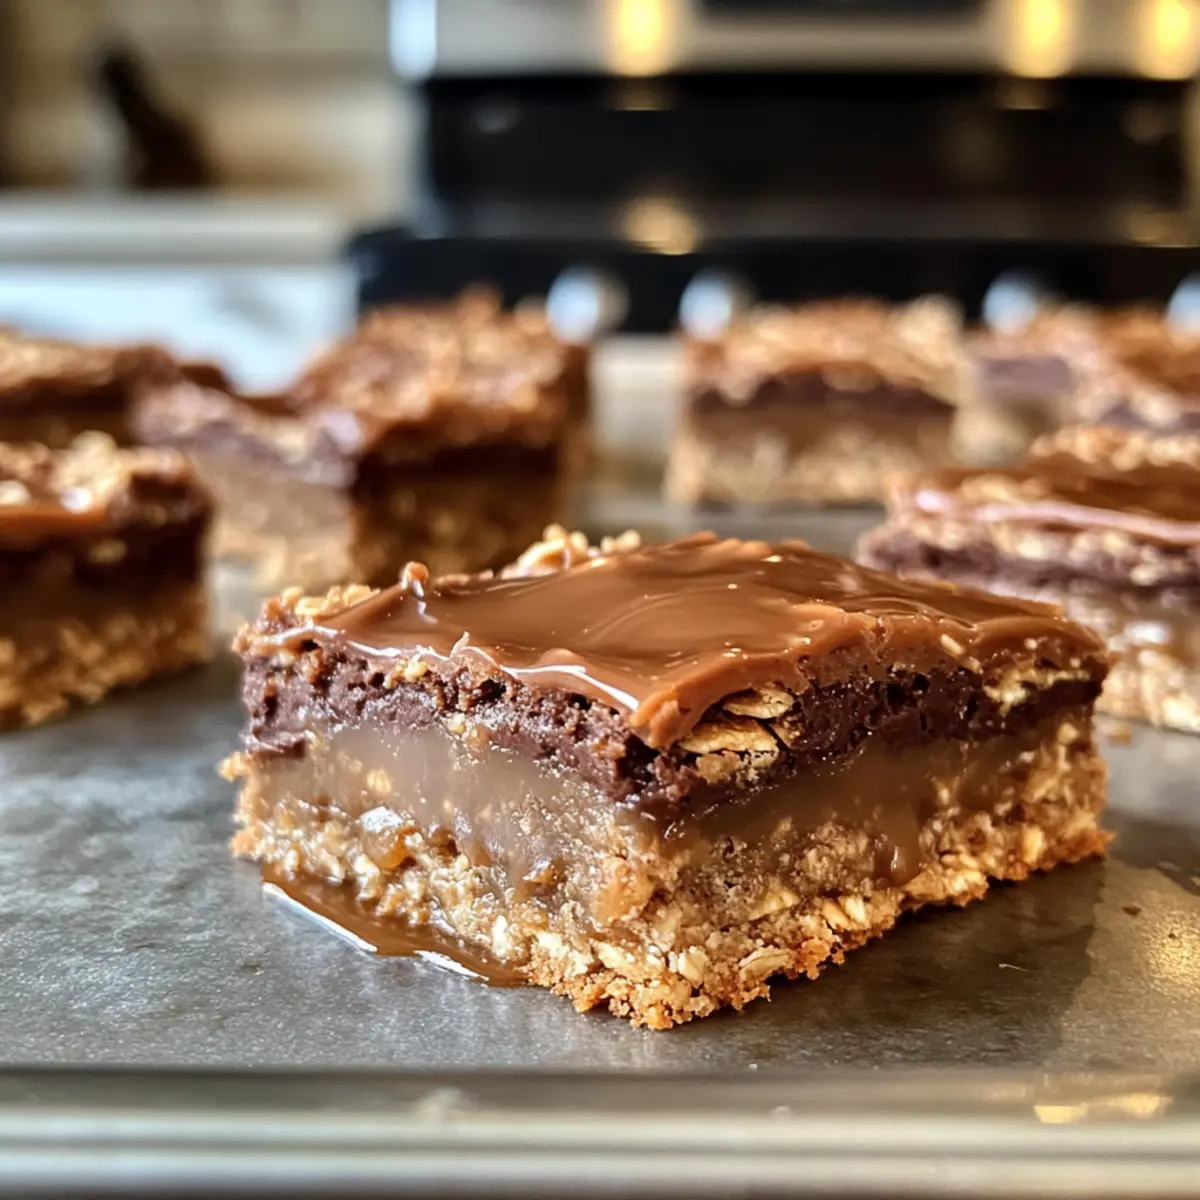
There’s something truly magical about the aroma of warm caramel and melting chocolate wafting through the kitchen, isn’t there? These Carmelitas for a Crowd are my secret weapon for sweet gatherings. With a delightful chewy texture and a gooey caramel layer, you’ll want to make these bar cookies over and over. Not only are they incredibly easy to prepare ahead of time, but they’re also a guaranteed showstopper that everyone will love. Imagine serving them up at your next get-together—watch as friends and family gather around, drawn in by the enticing smell. So, how do you get this heavenly treat into your kitchen? Let’s dive in!
Why Are Carmelitas a Must-Have?
Irresistible Flavor: The rich, gooey caramel mixed with chocolate creates a flavor combination that is hard to resist.
Crowd-Pleaser: These Carmelitas are guaranteed to impress guests at any gathering. They’re perfect for parties, holidays, or simply a sweet treat after dinner.
Make-Ahead Convenience: Prep these delicious bars a day in advance. They store well and can be kept in the fridge until serving, making life easier for busy hosts.
Customizable: Want a twist? Add nuts, or a sprinkle of sea salt for that sweet-salty balance. Everyone’s taste preferences can be met!
Easy to Prepare: Even novice bakers will find these Carmelitas simple to whip up, removing the stress from dessert preparation.
Versatile Enjoyment: Whether served warm or at room temperature, they stay chewy and delicious, satisfying any sweet tooth craving. Consider serving alongside our Cranberry Cream Cheese dip for an extra delight!
Carmelitas for a Crowd Ingredients
For the Base
- Oats – Provides the chewy texture; swap for gluten-free oats to cater to dietary restrictions.
- Flour – The binder for all the ingredients; opt for all-purpose flour or a gluten-free blend as needed.
- Brown Sugar – Sweetens the bars while adding moisture; coconut sugar is a great substitute for a healthier option.
- Butter – Essential for richness and flavor; use unsalted for better control or vegan butter for a dairy-free alternative.
For the Filling
- Chocolate Chips – Melty goodness that enhances the flavor; choose dark or semi-sweet for deeper taste, or go for butterscotch chips for a fun twist.
- Caramel Sauce – The star of the show that brings gooeyness; store-bought works well, but homemade elevates it to gourmet.
Optional Add-Ins
- Chopped Nuts – Adds crunch and flavor; consider pecans or walnuts to enhance the treat.
- Sea Salt – A light drizzle on top offers a delightful sweet-salty experience.
Get ready to create these irresistible Carmelitas for a crowd—your guests will be coming back for seconds!
Step‑by‑Step Instructions for Carmelitas for a Crowd
Step 1: Preheat the Oven
Begin by preheating your oven to 350°F (175°C). This is a crucial first step to ensure that your Carmelitas bake evenly and develop that beautifully golden top. While the oven is heating, prepare your baking pan by greasing it with butter or non-stick spray, so your treats release effortlessly once baked.
Step 2: Mix the Dry Ingredients
In a large mixing bowl, combine 2 cups of oats, 1 cup of all-purpose flour, 1 cup of brown sugar, and a pinch of salt. Stir these ingredients together until well incorporated, looking for even distribution of the dry components. This mixture will serve as the foundation for your Carmelitas, giving them that delightful chewy texture.
Step 3: Combine with Butter
Melt 1 cup of unsalted butter in a microwave-safe bowl or on the stovetop until fully liquefied. Pour the melted butter into the dry mixture and mix well until the dough becomes crumbly and clumps together, about 2-3 minutes of mixing. This buttery blend will add richness and moisture to your Carmelitas.
Step 4: Press into the Pan
Take half of the crumbly mixture and press it firmly into the bottom of your prepared baking pan. Use the back of a spatula or your hands to ensure an even, compact layer that covers the entire base. This will create a sturdy crust for the gooey caramel and chocolate layers to rest on.
Step 5: Layer Caramel and Chocolate
Now it’s time to spread the magic! Carefully drizzle 1 cup of caramel sauce over the pressed base layer, ensuring an even coating that reaches the edges. Then evenly sprinkle 1 cup of chocolate chips on top of the caramel, adding that irresistible chocolatey goodness that pairs perfectly with the chewy base.
Step 6: Top with Remaining Mixture
Crumble the remaining oat mixture over the chocolate chips, creating a rustic top layer. Be sure to cover the chocolate chips as best as you can, ensuring a delicious surprise awaits when these Carmelitas bake. This layer will bake to a golden brown, sealing in all those delicious flavors.
Step 7: Bake to Perfection
Place your assembled Carmelitas in the preheated oven and bake for 25-30 minutes. Keep an eye on them, looking for a golden-brown color on top as an indicator that they are done. The aroma filling your kitchen will be heavenly—this is the moment to savor!
Step 8: Cool and Cut
Once baked, remove the Carmelitas from the oven and let them cool in the pan for about 10 minutes before transferring to a wire rack. Allow them to cool completely, as this helps the caramel set and makes cutting easier. When ready, slice them into squares and serve your delightful Carmelitas for a Crowd, perfect for any gathering!
Make Ahead Options
These Carmelitas for a Crowd are perfect for busy home cooks looking to streamline their dessert preparation! You can prepare the base layer and caramel filling up to 24 hours in advance. Simply mix the dry ingredients, combine them with butter, and press half of the mixture into your baking pan. Layer the caramel sauce and chocolate chips before crumbling the remaining oat mixture on top. Cover the pan tightly with plastic wrap and refrigerate. When you’re ready to bake, just pop the pan directly into the oven from the fridge! This method ensures that the flavors stay fresh and the texture remains deliciously chewy. Enjoy the convenience of having a crowd-pleasing treat ready to serve with minimal last-minute effort!
How to Store and Freeze Carmelitas for a Crowd
Room Temperature: Store Carmelitas in an airtight container at room temperature for up to 7 days. This keeps their chewy texture intact and prevents them from drying out.
Fridge: If you prefer, these delicious bars can be kept in the fridge for 1-2 weeks. Just make sure to seal them tightly to avoid absorbing any odors.
Freezer: For longer storage, freeze Carmelitas for up to 3 months. Arrange them in a single layer in a freezer-safe container, separating layers with parchment paper.
Reheating: To enjoy your Carmelitas warm, simply thaw them in the fridge overnight, then reheat in a microwave for 10-15 seconds, just until the chocolate softens.
What to Serve with Decadent Carmelitas
There’s nothing quite like the harmony of flavors and textures that complete a festive dessert experience.
- Vanilla Ice Cream: A scoop of creamy vanilla ice cream adds temperature contrast and richness, enhancing the sweetness of the Carmelitas.
- Fresh Berries: Raspberries or strawberries offer a burst of tartness that perfectly cuts through the rich layers of caramel and chocolate.
- Coffee or Espresso: A warm cup of coffee balances the sweetness while its rich notes elevate the overall dessert experience.
- Chocolate Drizzle: A simple drizzle of melted chocolate on top provides visual appeal and an extra layer of indulgence.
- Whipped Cream: Light, fluffy whipped cream creates a delightful contrast to the dense, chewy Carmelitas and adds a touch of elegance.
- Salted Caramel Sauce: A drizzle of salted caramel intensifies the sweetness while bringing a savory twist that will delight dessert lovers.
- Chopped Nuts: A sprinkle of crunchy nuts like pecans or walnuts gives an exciting texture and a nutty flavor complement to the bars.
- Nutella Spread: A thin layer of Nutella offers a decadent chocolate-hazelnut flavor that pairs beautifully with the rich caramel.
- Chilled Milk: Serve a glass of cold milk alongside for a comforting and nostalgic pairing that appeals to all ages.
Expert Tips for Carmelitas
• Chill Before Cutting: To achieve clean slices, chill the Carmelitas in the refrigerator for about an hour before cutting them into squares.
• Watch the Baking Time: Keep an eye on the oven; baking too long can dry them out. Aim for a golden-brown top for the best texture.
• Use Quality Ingredients: The flavor of your Carmelitas will shine through excellent chocolate and caramel. Choose high-quality brands for the best results.
• Experiment with Add-Ins: Feel free to incorporate nuts or different types of chocolate chips. These variations can enhance the overall flavor of your Carmelitas.
• Store Properly: Keep leftover Carmelitas in an airtight container at room temperature. They stay fresh for up to a week—if they last that long!
• Perfect for Freezing: For longer storage, freeze the cut squares in a single layer. When you’re ready for a treat, just thaw and enjoy!
Carmelitas for a Crowd: Exciting Variations
Customize these delightful caramel and chocolate bars to make them uniquely yours! Each variation adds a fun twist to the classic recipe that’s sure to please any palate.
- Gluten-Free: Use gluten-free oats and a gluten-free flour blend. You can enjoy these Carmelitas without the worry!
- Nutty Delight: Add in chopped pecans or walnuts for a satisfying crunch. The combination of nuts and gooey caramel is irresistible!
- Dairy-Free: Swap regular butter for vegan butter and enjoy these rich flavors without dairy. Everyone will appreciate this thoughtful adjustment.
- Spicy Kick: Incorporate a sprinkle of cayenne pepper into the crumb mix for a surprising heat that complements the sweetness beautifully. Who doesn’t love a little sweet and spicy blend?
- Choco-Nut Fusion: Mix in half chocolate chips and half butterscotch chips for a different flavor experience. It creates a wonderful new character to each bite.
- Salted Caramel Twist: Drizzle some sea salt on the warm bars just before serving for that trendy sweet-salty combo. It takes these Carmelitas to the next level!
- Fruity Zing: Fold in dried cranberries or chopped dried apricots into the base for a fruity explosion. A little bit of tartness balances the rich flavors splendidly!
- Chocolate Drizzle: For an extra touch of decadence, melt some chocolate and drizzle over the cooled Carmelitas before cutting them into squares. It’s the cherry on top!
So whether you’re preparing for a festive gathering or simply looking to share with loved ones, these variations ensure your Carmelitas are as special as the company you keep. For an extra treat, consider pairing these with our delicious Cranberry Cream Cheese dip for a fabulous dessert spread!
Carmelitas for a Crowd Recipe FAQs
What kind of oats should I use?
For the best chewy texture, I recommend using rolled oats. If you or your guests are gluten-intolerant, feel free to substitute with certified gluten-free oats, which work just as wonderfully in this recipe!
How should I store leftover Carmelitas?
Store your Carmelitas in an airtight container at room temperature for up to 7 days to maintain their delightful chewiness. If you prefer a cooler treat, you can refrigerate them for about 1-2 weeks, just be sure they’re sealed tightly to keep them fresh.
Can I freeze Carmelitas, and if so, how?
Absolutely! For longer storage, freeze your Carmelitas for up to 3 months. Slice them into squares and lay them in a single layer in a freezer-safe container, separating layers with parchment paper to prevent sticking. To enjoy later, just thaw them overnight in the fridge, and they’ll be ready as if fresh from the oven!
What should I do if my Carmelitas seem too crumbly?
If your Carmelitas come out crumbly, it might be due to not enough moisture in the mixture. Make sure to fully incorporate melted butter with the dry ingredients. If they’re still too dry after baking, you can drizzle a bit more caramel sauce over the top once cooled to add moisture and flavor.
Are Carmelitas suitable for those with nut allergies?
Yes! You can definitely make Carmelitas nut-free by omitting any nuts from the recipe. Just use the base ingredients as they are, and you’ll have a delicious treat that keeps everyone safe and satisfied!
Can I make these Carmelitas vegan?
Absolutely! To make these Carmelitas vegan, simply substitute regular butter with a plant-based vegan butter and use dairy-free chocolate chips. This way, you can cater to your vegan friends without skimping on the decadent flavors they love.
Carmelitas for a Crowd: Irresistibly Gooey and Chewy Delights
Ingredients
Equipment
Method
- Preheat the oven to 350°F (175°C) and grease your baking pan with butter or non-stick spray.
- In a large mixing bowl, combine oats, flour, brown sugar, and a pinch of salt. Mix well.
- Melt the butter and mix it into the dry ingredients until crumbly.
- Press half of the mixture into the bottom of the prepared baking pan.
- Drizzle caramel sauce over the base layer and sprinkle chocolate chips on top.
- Crumble the remaining mixture over the chocolate chips.
- Bake for 25-30 minutes, until golden brown.
- Let cool for 10 minutes, then transfer to a wire rack and cool completely before cutting.