Introduction to Cherry Cheesecake Lush
There’s something magical about a dessert that requires no baking, and Cherry Cheesecake Lush is just that!
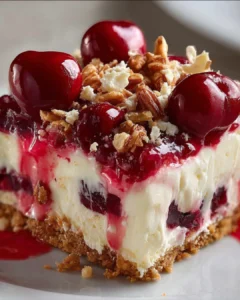
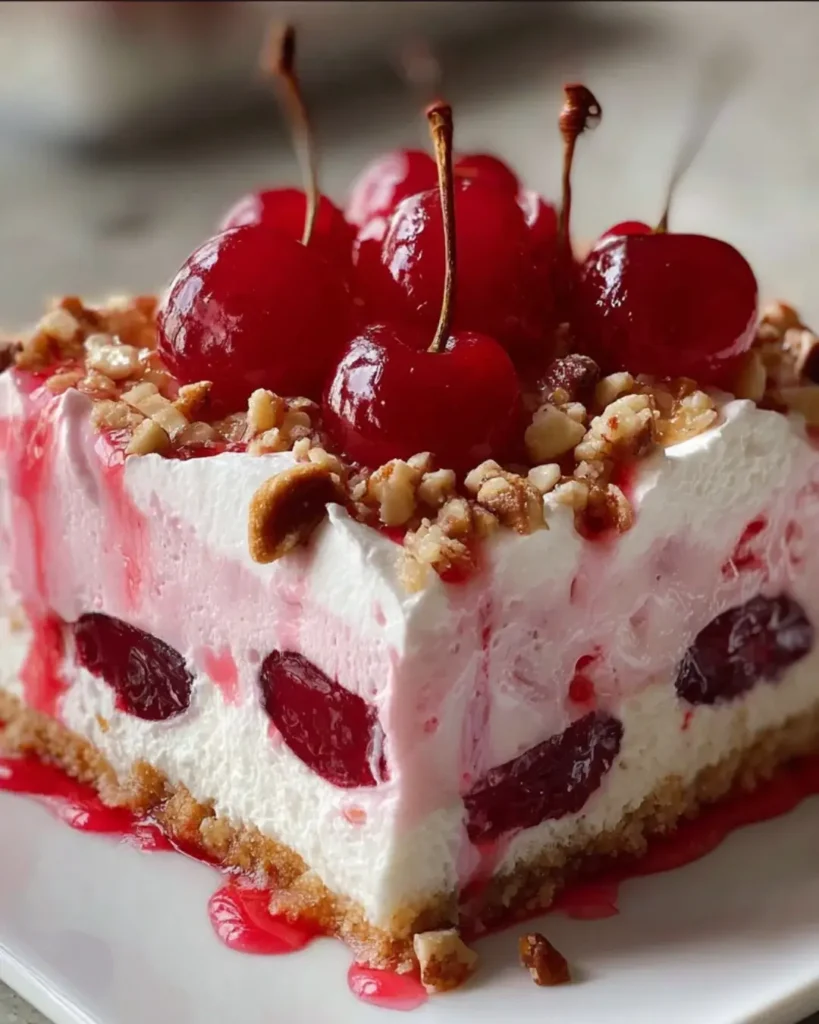
This delightful no-bake treat combines creamy cheesecake goodness with a sweet cherry topping, all resting on a buttery graham cracker crust.
Whether you’re looking to impress guests or simply satisfy a sweet tooth after a long day, this recipe is your go-to solution.
It’s quick, easy, and perfect for any occasion.
Trust me, once you serve this luscious dessert, you’ll be the star of the kitchen, and your loved ones will be begging for seconds!
Why You’ll Love This Cherry Cheesecake Lush
This Cherry Cheesecake Lush is a dream come true for busy home cooks.
It’s incredibly easy to whip up, taking just 20 minutes of your time.
The creamy layers and sweet cherry topping create a flavor explosion that will have everyone raving.
Plus, it’s a no-bake dessert, so you can enjoy the process without heating up the kitchen.
Perfect for gatherings or a cozy night in, it’s a treat that never disappoints!
Ingredients for Cherry Cheesecake Lush
Creating this Cherry Cheesecake Lush is a breeze, and it all starts with a handful of simple ingredients.
Here’s what you’ll need:
- Graham cracker crumbs: These form the base of your dessert, providing a crunchy texture that contrasts beautifully with the creamy layers.
- Unsalted butter: Melted butter binds the crumbs together, ensuring a rich and flavorful crust.
- Cream cheese: The star of the show! Softened cream cheese gives the cheesecake layer its signature smoothness and tangy flavor.
- Powdered sugar: This sweetens the cream cheese layer, making it irresistibly delicious and creamy.
- Vanilla extract: A splash of vanilla adds warmth and depth to the cheesecake flavor.
- Whipped topping: Light and airy, this ingredient helps create a fluffy texture in the cheesecake layer.
- Cherry pie filling: The crowning glory! This sweet and tart topping brings a burst of flavor and color to your dessert.
- Lemon juice: Just a hint of lemon juice brightens the cherry filling, enhancing its flavor.
Feel free to get creative!
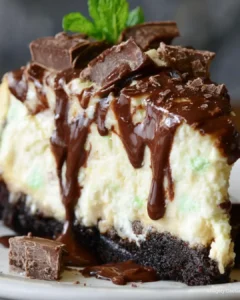
For a chocolate twist, consider swapping half of the graham cracker crumbs with crushed chocolate cookies.
You can also add a layer of fresh strawberries or blueberries on top of the cherry filling for an extra pop of flavor and color.
Exact quantities for each ingredient are available at the bottom of the article for your convenience.
How to Make Cherry Cheesecake Lush
Creating this Cherry Cheesecake Lush is a delightful journey that’s as simple as it is rewarding.
Let’s dive into the steps that will transform your kitchen into a dessert haven!
Step 1: Prepare the Crust
Start by grabbing a medium bowl.
Combine the graham cracker crumbs with the melted butter.
Mix until the crumbs are evenly coated.
Then, press this mixture firmly into the bottom of a 9×13-inch baking dish.
This crust is the foundation of your luscious dessert, so make sure it’s compact and even.
Step 2: Make the Cream Cheese Layer
In a large bowl, beat the softened cream cheese with an electric mixer until it’s smooth and creamy.
Gradually add the powdered sugar and vanilla extract, mixing until everything is well combined.
This step is crucial for achieving that rich cheesecake flavor.
Once it’s smooth, gently fold in the whipped topping.
This will give your cheesecake layer that light, fluffy texture we all love.
Step 3: Combine and Spread
Now it’s time to spread the cream cheese mixture over the graham cracker crust.
Use a spatula to ensure it’s even and covers the crust completely.
This layer is where the magic begins, so take your time to make it look nice.
The creamy goodness should be inviting and smooth.
Step 4: Add the Cherry Topping
In a separate bowl, mix the cherry pie filling with a splash of lemon juice.
This little addition brightens the flavor of the cherries.
Spoon the cherry mixture over the cream cheese layer, spreading it evenly.
The vibrant red cherries will make your dessert pop with color and flavor.
Step 5: Chill and Serve
Cover the dish with plastic wrap and refrigerate for at least 4 hours.
If you can wait overnight, that’s even better!
This chilling time allows the layers to set beautifully.
When you’re ready to serve, cut into squares and enjoy the delightful layers of Cherry Cheesecake Lush.
Trust me, your taste buds will thank you!

Tips for Success
- Make sure your cream cheese is softened for easy mixing; leave it out for about 30 minutes before starting.
- Press the graham cracker crust firmly to avoid crumbling when you cut into it.
- For a smoother cheesecake layer, mix until no lumps remain.
- Chill the dessert overnight for the best flavor and texture.
- Garnish with fresh cherries or whipped cream for an extra touch!
Equipment Needed
- Mixing bowls: Use medium and large bowls; any size will do as long as they fit your ingredients.
- Electric mixer: A hand mixer works great, but a whisk can do the job if you’re feeling strong!
- Spatula: A rubber spatula is perfect for spreading and folding ingredients.
- Baking dish: A 9×13-inch dish is ideal, but any similar-sized dish will work.
Variations of Cherry Cheesecake Lush
- Chocolate Cherry Lush: Swap half of the graham cracker crumbs for crushed chocolate cookies to add a rich chocolate flavor.
- Berry Bliss: Layer fresh strawberries or blueberries on top of the cherry filling for a colorful and fruity twist.
- Nutty Delight: Add chopped nuts, like pecans or walnuts, to the crust for an extra crunch and flavor.
- Gluten-Free Option: Use gluten-free graham cracker crumbs or almond flour to make the crust suitable for gluten-sensitive friends.
- Vegan Version: Substitute cream cheese with a vegan alternative and use coconut whipped cream for a dairy-free treat.
Serving Suggestions for Cherry Cheesecake Lush
- Pair with a scoop of vanilla ice cream for a delightful contrast in temperature and texture.
- Serve alongside a cup of freshly brewed coffee or iced tea to balance the sweetness.
- Garnish with fresh mint leaves for a pop of color and a refreshing touch.
- Present in individual cups for a fun, personal serving style at gatherings.
FAQs about Cherry Cheesecake Lush
Can I make Cherry Cheesecake Lush ahead of time?
Absolutely! This no-bake dessert is perfect for making ahead. Just prepare it the day before and let it chill overnight. The flavors will meld beautifully, making it even more delicious!
How long does Cherry Cheesecake Lush last in the fridge?
When stored properly in an airtight container, Cherry Cheesecake Lush can last up to 3-4 days in the fridge. Just be sure to keep it covered to maintain its freshness.
Can I use fresh cherries instead of cherry pie filling?
Yes, you can! If you prefer fresh cherries, simply pit and slice them, then toss them with a bit of sugar and lemon juice to enhance their flavor. This will give your dessert a fresh twist!
Is Cherry Cheesecake Lush suitable for vegetarians?
Yes, this recipe is vegetarian-friendly! It contains no meat or meat-derived ingredients, making it a great choice for those following a vegetarian diet.
What can I substitute for whipped topping?
If you want a homemade option, you can whip heavy cream with a bit of sugar and vanilla extract until soft peaks form. This will give you a fresh and creamy alternative to store-bought whipped topping.
Final Thoughts
Cherry Cheesecake Lush is more than just a dessert; it’s a celebration of flavors and memories.
Each layer tells a story, from the buttery crust to the creamy cheesecake and the vibrant cherry topping.
This no-bake delight is perfect for any occasion, whether it’s a family gathering or a quiet night at home.
The joy of sharing this treat with loved ones is unmatched.
So, roll up your sleeves, gather your ingredients, and create something special.
Trust me, the smiles and compliments you’ll receive will make every moment in the kitchen worthwhile!
PrintCherry Cheesecake Lush: A Delightful No-Bake Recipe!
- Total Time: 4 hours 20 minutes
- Yield: 12 servings
- Diet: Vegetarian
Description
Cherry Cheesecake Lush is a delightful no-bake dessert that combines a creamy cheesecake layer with a sweet cherry topping, all on a buttery graham cracker crust.
Ingredients
- 2 cups graham cracker crumbs
- ½ cup unsalted butter, melted
- 1 (8-ounce) package cream cheese, softened
- 1 cup powdered sugar
- 1 teaspoon vanilla extract
- 2 cups whipped topping (like Cool Whip)
- 1 can (21 ounces) cherry pie filling
- 1 teaspoon lemon juice
Instructions
- In a medium bowl, combine the graham cracker crumbs and melted butter. Mix until the crumbs are evenly coated. Press the mixture into the bottom of a 9×13-inch baking dish to form the crust.
- In a large bowl, beat the softened cream cheese with an electric mixer until smooth. Gradually add the powdered sugar and vanilla extract, mixing until well combined.
- Gently fold in the whipped topping until the mixture is smooth and fluffy.
- Spread the cream cheese mixture evenly over the graham cracker crust in the baking dish.
- In a separate bowl, combine the cherry pie filling and lemon juice. Spoon the cherry mixture over the cream cheese layer, spreading it evenly.
- Cover the dish with plastic wrap and refrigerate for at least 4 hours, or overnight for best results.
- Before serving, cut into squares and enjoy!
Notes
- For a chocolate twist, substitute half of the graham cracker crumbs with crushed chocolate cookies.
- Add a layer of sliced fresh strawberries or blueberries on top of the cherry filling for added flavor and color.
- Prep Time: 20 minutes
- Cook Time: 0 minutes
- Category: Dessert
- Method: No-Bake
- Cuisine: American
Nutrition
- Serving Size: 1 square
- Calories: 220
- Sugar: 12g
- Sodium: 150mg
- Fat: 10g
- Saturated Fat: 5g
- Unsaturated Fat: 3g
- Trans Fat: 0g
- Carbohydrates: 24g
- Fiber: 1g
- Protein: 2g
- Cholesterol: 30mg