Introduction to Cherry Pie Bombs
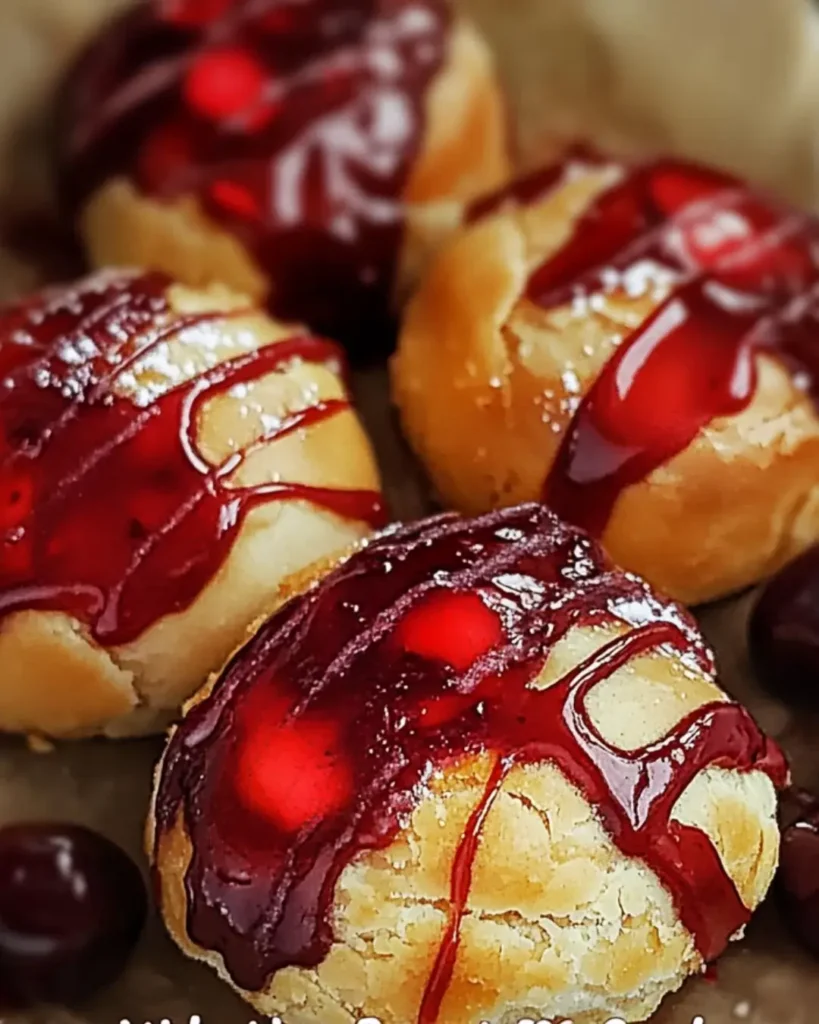
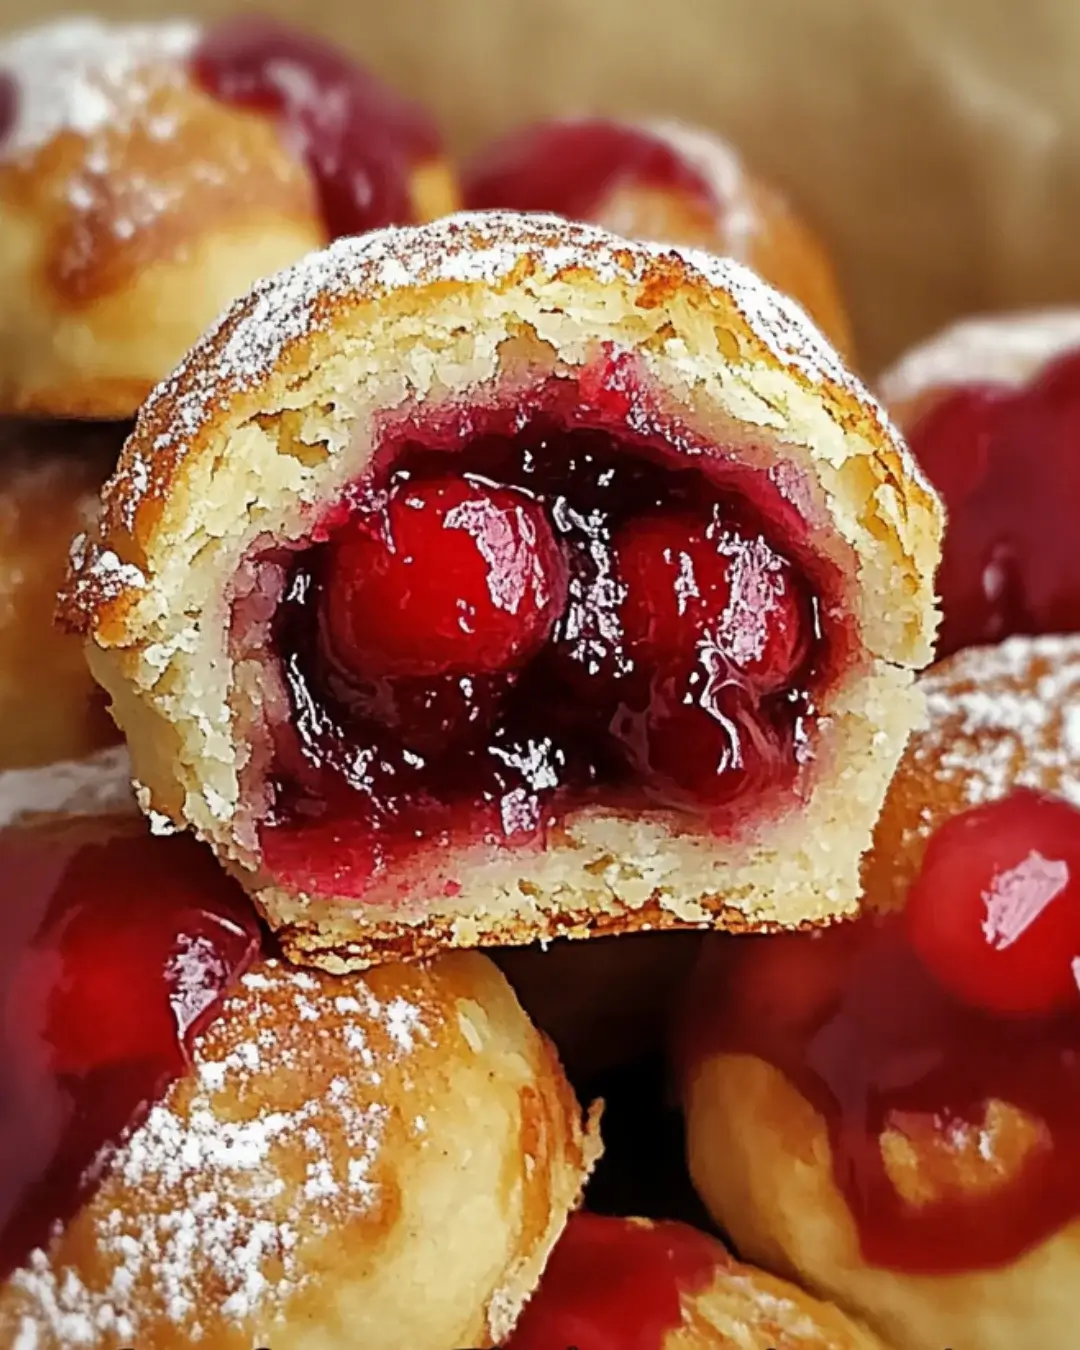
There’s something magical about desserts that remind us of home. Cherry Pie Bombs are one of those delightful treats that can transport you back to simpler times. They’re not just a quick solution for a busy day; they’re a way to impress your loved ones with minimal effort. Imagine biting into a warm, flaky crescent roll, bursting with sweet cherry filling. It’s like a hug for your taste buds! Whether you’re hosting a gathering or just craving something sweet, these Cherry Pie Bombs are sure to bring smiles all around.
Why You’ll Love This Cherry Pie Bombs
Cherry Pie Bombs are the ultimate dessert for anyone who craves something sweet without spending hours in the kitchen. They’re incredibly easy to make, taking just 30 minutes from start to finish. The combination of flaky crescent roll dough and luscious cherry filling creates a flavor explosion that’s hard to resist. Plus, they’re perfect for sharing, making them a hit at any gathering. Who wouldn’t love a warm, gooey treat that’s ready in a flash?
Ingredients for Cherry Pie Bombs
Gathering the right ingredients is the first step to creating these delightful Cherry Pie Bombs. Here’s what you’ll need:
- Cherry Pie Filling: The star of the show! This sweet and tangy filling brings that classic cherry flavor. You can use store-bought for convenience or make your own if you’re feeling adventurous.
- Crescent Roll Dough: This flaky dough is what makes these bombs so easy to prepare. It’s readily available in the refrigerated section of your grocery store. If you want a healthier option, look for whole wheat or gluten-free varieties.
- Vanilla Extract: A splash of vanilla enhances the sweetness of the cherries, adding depth to the flavor. Always opt for pure vanilla extract for the best taste.
- All-Purpose Flour: Just a tablespoon helps thicken the cherry filling, preventing it from becoming too runny. You can substitute with cornstarch if you prefer.
- Egg (for egg wash): This gives your Cherry Pie Bombs a beautiful golden color when baked. If you’re avoiding eggs, a mixture of milk and water works as a great alternative.
- Granulated Sugar: A sprinkle on top adds sweetness and a slight crunch. You can use brown sugar for a richer flavor.
- Ground Cinnamon: This warm spice complements the cherries perfectly. Feel free to adjust the amount based on your taste.
- Cooking Spray or Parchment Paper: Essential for preventing sticking. Parchment paper is my go-to for easy cleanup!
For exact measurements, check the bottom of the article where you can find everything listed for printing. Now that you have your ingredients ready, let’s dive into the fun part—making these Cherry Pie Bombs!
How to Make Cherry Pie Bombs
Now that you have your ingredients ready, let’s get to the fun part—making these Cherry Pie Bombs! Follow these simple steps, and you’ll have a delicious dessert in no time.
Step 1: Preheat the Oven
Start by preheating your oven to 375°F (190°C). This step is crucial because it ensures even baking. While the oven heats up, line a baking sheet with parchment paper or lightly spray it with cooking spray. This will help prevent sticking and make cleanup a breeze.
Step 2: Prepare the Cherry Filling
In a medium bowl, combine the cherry pie filling, a splash of vanilla extract, and a tablespoon of all-purpose flour. Gently mix everything together. The flour helps thicken the filling, so it doesn’t ooze out when you bake the bombs. Set this mixture aside while you work on the dough.
Step 3: Unroll the Crescent Roll Dough
Next, grab your package of refrigerated crescent roll dough. Unroll it carefully and separate it into triangles along the perforated lines. Each triangle will be a cozy little pocket for that cherry goodness. Keep the dough chilled until you’re ready to fill it; this helps maintain its flakiness.
Step 4: Fill the Dough
Take a heaping tablespoon of the cherry filling and place it at the wide end of each triangle. Be generous, but don’t overfill! You want to leave enough space to roll and seal the dough without any filling spilling out.
Step 5: Roll and Seal
Now, it’s time to roll! Starting from the wide end, roll the dough towards the point, enclosing the cherry filling completely. Pinch the edges to seal them tightly. This step is key to keeping all that delicious filling inside while baking.
Step 6: Prepare for Baking
Place the rolled cherry pie bombs on your prepared baking sheet, leaving some space between each one. This allows them to expand as they bake. In a small bowl, beat an egg and brush it over the tops of the bombs. This egg wash will give them a beautiful golden color when they come out of the oven.
Step 7: Sprinkle Cinnamon Sugar
In another small bowl, mix together granulated sugar and ground cinnamon. Sprinkle this delightful mixture over the tops of the bombs. The sugar adds sweetness, while the cinnamon brings warmth and a hint of spice that pairs perfectly with the cherries.
Step 8: Bake
Pop the baking sheet into your preheated oven and bake for 12-15 minutes. Keep an eye on them! You’ll know they’re done when they turn a lovely golden brown. The aroma wafting through your kitchen will be irresistible!
Step 9: Cool and Serve
Once baked, remove the Cherry Pie Bombs from the oven and let them cool slightly on the baking sheet. This cooling time is important; it allows the filling to set a bit. Serve them warm, and watch as everyone digs in with delight!
Tips for Success
- Keep the crescent roll dough chilled until you’re ready to use it for better flakiness.
- Don’t overfill the dough; a heaping tablespoon of filling is just right.
- For a golden finish, make sure to brush the egg wash evenly over the tops.
- Experiment with different fruit fillings for a fun twist on the classic recipe.
- Serve warm with a scoop of ice cream for an extra indulgent treat!
Equipment Needed
- Baking Sheet: A standard baking sheet works perfectly. If you don’t have one, a large oven-safe dish will do.
- Parchment Paper: This helps prevent sticking. If you’re out, a silicone baking mat is a great alternative.
- Mixing Bowls: Use any medium-sized bowl for mixing the filling. A large measuring cup can also work.
- Pastry Brush: For applying the egg wash. If you don’t have one, a clean paper towel will suffice.
Variations
- Fruit Fillings: Swap out the cherry pie filling for other fruits like apple, blueberry, or peach for a delightful twist.
- Nutty Addition: Add chopped nuts, like walnuts or pecans, to the filling for a crunchy texture and extra flavor.
- Chocolate Drizzle: Drizzle melted chocolate over the baked bombs for a decadent touch that chocolate lovers will adore.
- Gluten-Free Option: Use gluten-free crescent roll dough to make these Cherry Pie Bombs suitable for those with dietary restrictions.
- Vegan Version: Substitute the egg wash with a mixture of almond milk and a bit of maple syrup for a vegan-friendly treat.
Serving Suggestions
- Ice Cream: Serve warm Cherry Pie Bombs with a scoop of vanilla ice cream for a classic pairing.
- Whipped Cream: A dollop of whipped cream adds a light, fluffy touch to each bite.
- Fresh Berries: Garnish with fresh berries for a pop of color and extra flavor.
- Drinks: Pair with a glass of cold milk or a cup of coffee for a delightful treat.
- Presentation: Arrange on a decorative plate and dust with powdered sugar for an elegant touch.
FAQs about Cherry Pie Bombs
As you embark on your Cherry Pie Bomb adventure, you might have a few questions. Here are some common queries that can help you along the way:
Can I use homemade cherry pie filling?
Absolutely! Homemade cherry pie filling can elevate your Cherry Pie Bombs to a whole new level. Just make sure it’s thick enough to prevent any leaks during baking.
How do I store leftover Cherry Pie Bombs?
Store any leftovers in an airtight container at room temperature for up to two days. If you want to keep them longer, refrigerate them for up to a week. Just reheat in the oven for a few minutes to regain that fresh-baked taste!
Can I freeze Cherry Pie Bombs?
Yes, you can freeze them! Before baking, place the assembled bombs on a baking sheet and freeze until solid. Then transfer them to a freezer bag. When you’re ready to bake, just add a few extra minutes to the baking time.
What other fillings can I use?
The beauty of Cherry Pie Bombs is their versatility! You can use apple, blueberry, or even chocolate filling. Get creative and experiment with your favorite flavors!
Are Cherry Pie Bombs suitable for a vegetarian diet?
Yes, these Cherry Pie Bombs are vegetarian-friendly! Just be sure to use a plant-based egg wash alternative if you want to keep them vegan.
Final Thoughts
Creating Cherry Pie Bombs is more than just baking; it’s about sharing joy and deliciousness with those you love. The warm, flaky exterior gives way to a sweet, gooey cherry center that’s simply irresistible. Whether you’re whipping them up for a family gathering or a cozy night in, these treats are bound to bring smiles and satisfaction. Plus, the ease of preparation means you can focus on what really matters—enjoying the moment with friends and family. So, roll up your sleeves, embrace the fun, and let these Cherry Pie Bombs become a cherished part of your dessert repertoire!
PrintCherry Pie Bombs: Discover This Easy, Tasty Recipe!
- Total Time: 30 minutes
- Yield: Serves 8
- Diet: Vegetarian
Description
Cherry Pie Bombs are a delicious and easy-to-make dessert that combines cherry pie filling with crescent roll dough for a delightful treat.
Ingredients
- 1 can (21 ounces) cherry pie filling
- 1 package (8 ounces) refrigerated crescent roll dough
- 1 teaspoon vanilla extract
- 1 tablespoon all-purpose flour
- 1 egg (for egg wash)
- 2 tablespoons granulated sugar
- 1 teaspoon ground cinnamon
- Cooking spray or parchment paper (for baking)
Instructions
- Preheat your oven to 375°F (190°C) and line a baking sheet with parchment paper or lightly spray it with cooking spray.
- In a medium bowl, combine the cherry pie filling, vanilla extract, and flour. Mix gently to coat the cherries and set aside.
- Unroll the crescent roll dough and separate it into triangles along the perforated lines.
- Place a heaping tablespoon of the cherry filling mixture at the wide end of each triangle.
- Roll the dough from the wide end to the point, enclosing the filling completely. Pinch the edges to seal.
- Place the rolled cherry pie bombs on the prepared baking sheet, leaving space between each one.
- In a small bowl, beat the egg and brush it over the tops of the bombs. This will give them a nice golden color when baked.
- In another small bowl, combine the granulated sugar and ground cinnamon. Sprinkle this mixture over the tops of the bombs.
- Bake in the preheated oven for 12-15 minutes or until golden brown.
- Allow the cherry pie bombs to cool slightly before serving.
Notes
- For a fun twist, try using different fruit fillings such as apple or blueberry.
- Serve warm with a scoop of vanilla ice cream or a drizzle of chocolate sauce for an extra treat.
- Prep Time: 15 minutes
- Cook Time: 15 minutes
- Category: Dessert
- Method: Baking
- Cuisine: American
Nutrition
- Serving Size: 1 bomb
- Calories: 180
- Sugar: 10g
- Sodium: 200mg
- Fat: 8g
- Saturated Fat: 1g
- Unsaturated Fat: 7g
- Trans Fat: 0g
- Carbohydrates: 22g
- Fiber: 1g
- Protein: 2g
- Cholesterol: 30mg