Introduction to Christmas Red Velvet Cheesecake
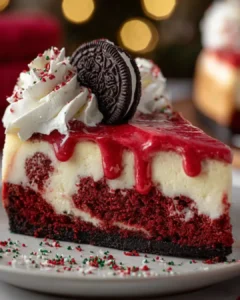
As the holiday season approaches, the scent of cinnamon and pine fills the air, and I can’t help but think of festive treats. One dessert that never fails to impress is the Christmas Red Velvet Cheesecake. It’s a showstopper that combines the rich, velvety texture of cheesecake with the vibrant color of red velvet. This recipe is perfect for gatherings, whether you’re hosting a holiday party or bringing a dish to share. It’s not just about the taste; it’s about creating memories around the table with loved ones, making every bite a celebration.
Why You’ll Love This Christmas Red Velvet Cheesecake
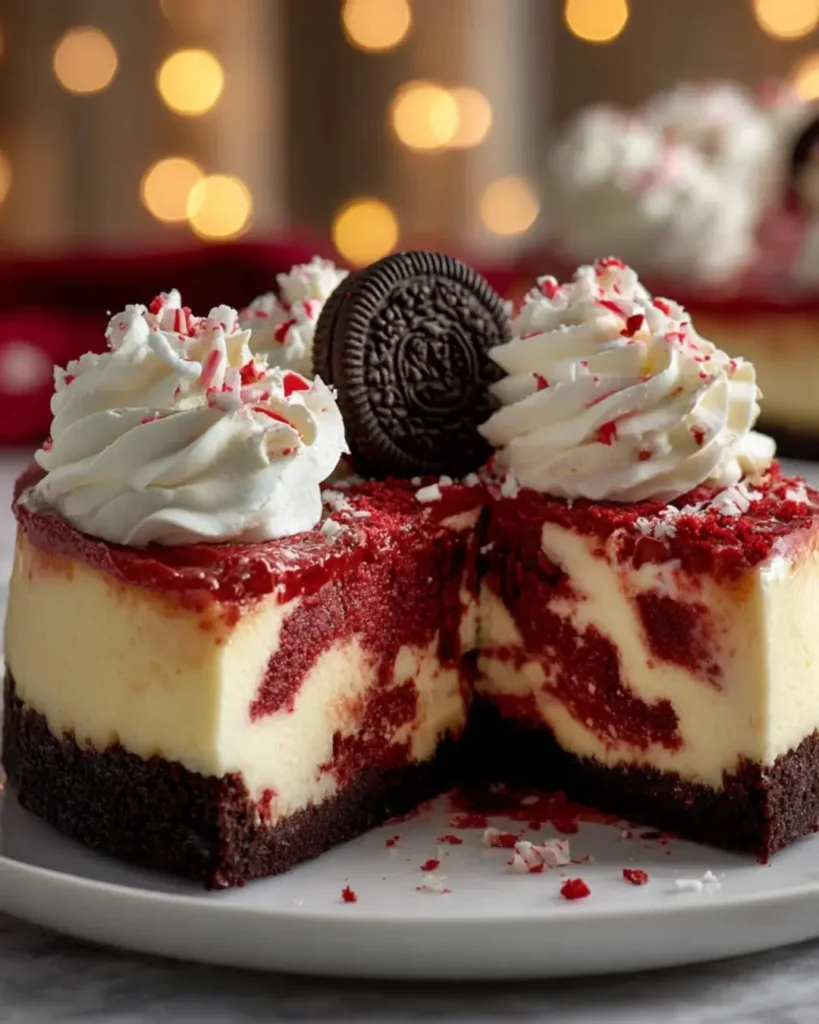
This Christmas Red Velvet Cheesecake is a delightful blend of flavors and textures that will have everyone asking for seconds. It’s surprisingly easy to make, even for those who might feel intimidated by baking. The vibrant red color adds a festive touch, making it a perfect centerpiece for your holiday table. Plus, the creamy filling paired with a crunchy crust creates a taste sensation that’s simply irresistible. You’ll be the star of the holiday season!
Ingredients for Christmas Red Velvet Cheesecake
Gathering the right ingredients is the first step to creating this festive masterpiece. Here’s what you’ll need:
- Graham cracker crumbs: These form the base of your cheesecake crust, providing a sweet and crunchy texture.
- Unsalted butter: Melted butter binds the crumbs together, adding richness to the crust.
- Granulated sugar: Sweetens both the crust and the cheesecake filling, balancing the flavors perfectly.
- Cream cheese: The star of the show! It gives the cheesecake its creamy, smooth texture.
- Sour cream: Adds a tangy flavor and enhances the creaminess of the filling.
- Buttermilk: This ingredient keeps the cheesecake moist and adds a subtle tang.
- Cocoa powder: Just a touch of cocoa gives the cheesecake a hint of chocolate flavor, complementing the red velvet.
- Red food coloring: Essential for that iconic red velvet look, making your cheesecake festive and eye-catching.
- White vinegar: This helps to stabilize the cheesecake and enhances the red color.
- Salt: A pinch of salt balances the sweetness and enhances the overall flavor.
For those looking to customize, consider adding a swirl of cream cheese frosting on top for extra sweetness or topping it with whipped cream and crushed peppermint candies for a holiday twist. You can find the exact measurements for each ingredient at the bottom of the article, ready for printing!
How to Make Christmas Red Velvet Cheesecake
Creating this Christmas Red Velvet Cheesecake is a delightful journey that fills your kitchen with warmth and festive cheer. Follow these simple steps, and you’ll have a stunning dessert that’s sure to impress.
Step 1: Preheat and Prepare
Start by preheating your oven to 325°F. This ensures that your cheesecake bakes evenly. While the oven warms up, grab a 9-inch springform pan and grease it well. This will help your cheesecake release easily once it’s baked.
Step 2: Make the Crust
In a medium bowl, combine the graham cracker crumbs, melted butter, and sugar. Mix until everything is well blended. The mixture should resemble wet sand. Press this mixture firmly into the bottom of your prepared springform pan. This crust will provide a delicious crunch that complements the creamy filling.
Step 3: Prepare the Cheesecake Filling
In a large mixing bowl, beat the softened cream cheese with an electric mixer until it’s smooth and creamy. Gradually add in the sugar, mixing until well combined. Then, add the vanilla extract, followed by the eggs, one at a time. Make sure to mix well after each addition. Next, stir in the sour cream, buttermilk, cocoa powder, red food coloring, vinegar, and salt. Mix until everything is smooth and well incorporated. This filling is where the magic happens!
Step 4: Bake the Cheesecake
Pour the luscious cheesecake batter over the crust in your springform pan. Spread it evenly with a spatula. Bake in the preheated oven for 55-60 minutes. The center should be set but still slightly jiggly. This is key to achieving that perfect creamy texture.
Step 5: Cool and Refrigerate
Once baked, turn off the oven and leave the cheesecake inside for an additional hour. This gradual cooling helps prevent cracks. After an hour, remove the cheesecake from the oven and let it cool to room temperature. Once cooled, refrigerate it for at least 4 hours, but overnight is even better. This allows the flavors to meld beautifully.

Tips for Success
- Use room temperature ingredients for a smoother batter; this helps everything blend seamlessly.
- Don’t overmix the batter after adding the eggs; this keeps your cheesecake light and fluffy.
- For a perfect crust, press the graham cracker mixture firmly to avoid crumbling.
- Let the cheesecake cool gradually in the oven to prevent cracks.
- Chill overnight for the best flavor and texture.
Equipment Needed
- 9-inch springform pan: Essential for easy removal; a regular cake pan works in a pinch.
- Electric mixer: For smooth batter; a whisk can be used, but it requires more effort.
- Mixing bowls: Have a few on hand for different steps.
- Spatula: Perfect for spreading the batter evenly.
Variations
- Chocolate Chip Swirl: Fold in mini chocolate chips into the cheesecake batter for a delightful surprise in every bite.
- Gluten-Free Option: Substitute graham cracker crumbs with gluten-free cookie crumbs to make the crust suitable for gluten-sensitive guests.
- Red Velvet Cupcakes: Transform the cheesecake batter into mini cupcakes for individual servings, perfect for holiday parties.
- Nutty Crust: Add crushed nuts, like pecans or walnuts, to the crust mixture for an extra crunch and flavor.
- Vegan Version: Use vegan cream cheese and a flaxseed egg substitute to create a plant-based version of this festive treat.
Serving Suggestions
- Pair with a dollop of whipped cream for added creaminess and a festive touch.
- Serve alongside a warm cup of spiced apple cider or rich hot chocolate.
- Garnish with fresh berries or mint leaves for a pop of color.
- Present on a decorative platter for an eye-catching display.
FAQs about Christmas Red Velvet Cheesecake
As you embark on your journey to create this Christmas Red Velvet Cheesecake, you might have a few questions. Here are some common queries that can help you along the way:
Can I make this cheesecake ahead of time?
Absolutely! This cheesecake actually tastes better when made a day in advance. Just keep it covered in the refrigerator until you’re ready to serve.
What can I use instead of red food coloring?
If you prefer a natural alternative, beet juice can be used to achieve a similar red hue. Just be mindful that it may alter the flavor slightly.
How do I know when the cheesecake is done baking?
The cheesecake is done when the edges are set, but the center still has a slight jiggle. It will firm up as it cools.
Can I freeze the cheesecake?
Yes, you can freeze it! Just wrap it tightly in plastic wrap and aluminum foil. Thaw it in the refrigerator before serving for the best texture.
What toppings pair well with this cheesecake?
Whipped cream, crushed peppermint candies, or a drizzle of chocolate sauce make excellent toppings. They add a festive flair and enhance the flavor!
Final Thoughts
Creating this Christmas Red Velvet Cheesecake is more than just baking; it’s about crafting a centerpiece for your holiday celebrations. Each slice brings a burst of flavor and a splash of color to your table, sparking joy and conversation among family and friends. The creamy texture and rich taste will have everyone coming back for more, making it a cherished tradition in your home. As you share this delightful dessert, you’re not just serving food; you’re sharing love, warmth, and the spirit of the season. So, roll up your sleeves and let the festivities begin!
PrintChristmas Red Velvet Cheesecake that Everyone Will Love!
- Total Time: 5 hours 30 minutes
- Yield: 10 servings
- Diet: Vegetarian
Description
A festive and delicious Christmas Red Velvet Cheesecake that everyone will love, perfect for holiday gatherings.
Ingredients
- 2 cups graham cracker crumbs
- 1/2 cup unsalted butter, melted
- 1/4 cup granulated sugar
- 1 1/2 cups cream cheese, softened
- 1 cup granulated sugar
- 1 teaspoon vanilla extract
- 3 large eggs
- 1 cup sour cream
- 1/2 cup buttermilk
- 2 tablespoons cocoa powder
- 1 tablespoon red food coloring
- 1 teaspoon white vinegar
- 1/4 teaspoon salt
Instructions
- Preheat the oven to 325°F. Grease a 9-inch springform pan.
- In a medium bowl, combine the graham cracker crumbs, melted butter, and 1/4 cup sugar. Mix until well combined. Press the mixture firmly into the bottom of the prepared springform pan to form the crust.
- In a large mixing bowl, beat the softened cream cheese with an electric mixer until smooth. Gradually add 1 cup sugar and continue to beat until creamy. Add the vanilla extract and mix well.
- Add the eggs one at a time, mixing well after each addition. Then, add the sour cream, buttermilk, cocoa powder, red food coloring, vinegar, and salt. Mix until everything is well combined and smooth.
- Pour the cheesecake batter over the crust in the springform pan. Bake in the preheated oven for 55-60 minutes, or until the center is set but still slightly jiggly.
- Turn off the oven and leave the cheesecake inside for an additional hour to cool gradually.
- Remove the cheesecake from the oven and let it cool to room temperature. Once cooled, refrigerate for at least 4 hours, preferably overnight, before serving.
Notes
- For a festive touch, top the cheesecake with whipped cream and crushed peppermint candies.
- Alternatively, you can swirl in some cream cheese frosting on top before serving for added sweetness.
- Prep Time: 30 minutes
- Cook Time: 60 minutes
- Category: Dessert
- Method: Baking
- Cuisine: American
Nutrition
- Serving Size: 1 slice
- Calories: 350
- Sugar: 25g
- Sodium: 300mg
- Fat: 24g
- Saturated Fat: 14g
- Unsaturated Fat: 10g
- Trans Fat: 0g
- Carbohydrates: 40g
- Fiber: 1g
- Protein: 6g
- Cholesterol: 100mg