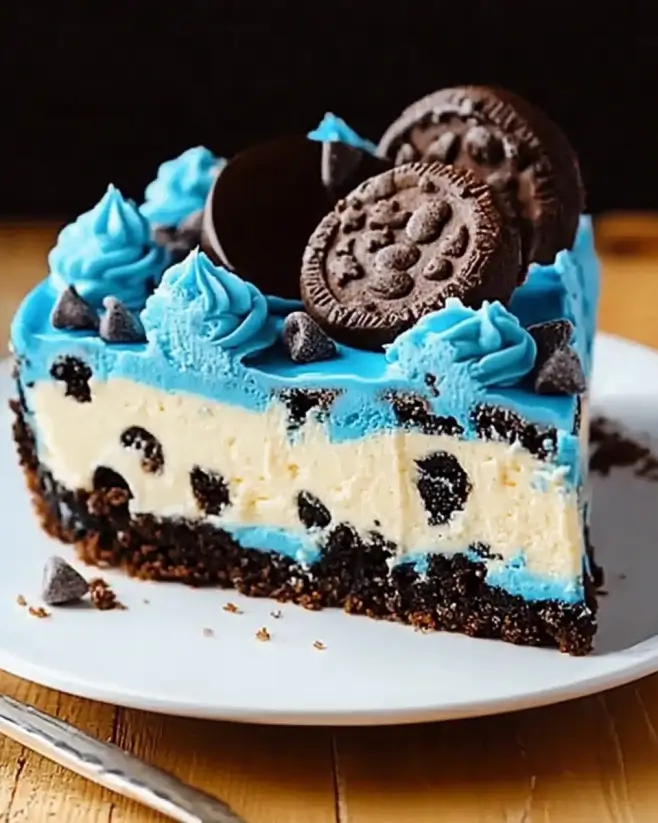
Introduction to Cookie Monster Cheesecake
There’s something magical about desserts that bring out the kid in us. The Cookie Monster Cheesecake is one of those delightful treats that not only satisfies your sweet tooth but also adds a splash of fun to any gathering. Whether you’re hosting a party or just looking to impress your family, this cheesecake is a quick solution that combines the rich flavors of chocolate sandwich cookies with creamy goodness. It’s visually stunning and incredibly delicious, making it the perfect dessert to share with loved ones. Trust me, this is one recipe you’ll want to keep in your back pocket!
Why You’ll Love This Cookie Monster Cheesecake
This Cookie Monster Cheesecake is a game-changer in the dessert world. It’s easy to whip up, even for those of us who might not consider ourselves baking experts. The combination of creamy cheesecake and crunchy cookie crust is simply irresistible. Plus, it’s a crowd-pleaser! Whether it’s a birthday party or a casual family dinner, this cheesecake will have everyone coming back for seconds. Trust me, you’ll be the star of the show!
Ingredients for Cookie Monster Cheesecake
Gathering the right ingredients is the first step to creating your Cookie Monster Cheesecake masterpiece. Here’s what you’ll need:
- Chocolate sandwich cookies: These are the stars of the crust. Think Oreos or any similar brand. They provide that rich, chocolatey flavor.
- Unsalted butter: This helps bind the cookie crumbs together, creating a firm crust. Unsalted is best to control the overall saltiness.
- Cream cheese: The heart of the cheesecake! Softened cream cheese gives that smooth, creamy texture we all love.
- Granulated sugar: Sweetens the filling and balances the flavors. You can adjust the amount based on your sweetness preference.
- Vanilla extract: A splash of vanilla adds depth to the flavor. It’s a must-have in any cheesecake recipe.
- Eggs: These are crucial for binding the ingredients together and giving the cheesecake its structure. Use large eggs for the best results.
- Mini chocolate chips: These little gems add bursts of chocolate throughout the cheesecake. They’re a fun surprise in every bite!
- Blue frosting: This is what gives the cheesecake its Cookie Monster look. You can use store-bought or whip up your own at home.
- Crushed chocolate sandwich cookies for topping: A sprinkle of these on top adds a nice crunch and ties the whole dessert together.
For those looking to make adjustments, consider using low-fat cream cheese for a lighter version or a sugar substitute if you’re watching your sugar intake. You can find the exact quantities for each ingredient at the bottom of the article, ready for printing!
How to Make Cookie Monster Cheesecake
Creating your Cookie Monster Cheesecake is a delightful journey. Follow these simple steps, and you’ll have a show-stopping dessert that’s sure to impress!
Step 1: Preheat the Oven
Start by preheating your oven to 325°F. This step is crucial because it ensures even baking. If you skip this, your cheesecake might not set properly, leading to a gooey mess instead of a creamy delight. Trust me, a well-preheated oven is your best friend in baking!
Step 2: Prepare the Crust
In a medium bowl, combine your crushed chocolate sandwich cookies with melted butter. Mix them until they’re well combined. The mixture should resemble wet sand. Now, press this mixture firmly into the bottom of a 9-inch springform pan. This step is vital; a well-pressed crust holds everything together and gives your cheesecake that perfect crunch.
Step 3: Make the Cheesecake Filling
In a large mixing bowl, beat the softened cream cheese with an electric mixer until it’s smooth and creamy. Gradually add in the granulated sugar and vanilla extract, mixing until everything is well combined. Now, add the eggs one at a time, mixing on low speed. Be careful not to overmix; you want a smooth batter without too much air. Finally, gently fold in the mini chocolate chips for those delightful bursts of chocolate.
Step 4: Bake the Cheesecake
Pour the cream cheese mixture over your prepared crust in the springform pan. Bake in the preheated oven for 50-60 minutes. The center should be set but still slightly jiggly. To check for doneness, gently shake the pan; if the edges are firm and the center has a slight wobble, you’re good to go!
Step 5: Cool and Refrigerate
Once baked, turn off the oven and leave the cheesecake inside for an additional hour. This gradual cooling helps prevent cracks. After that, remove it from the oven and let it cool to room temperature. Once cooled, refrigerate for at least 4 hours or overnight. This chilling time is essential for achieving that perfect creamy texture.
Step 6: Frost and Serve
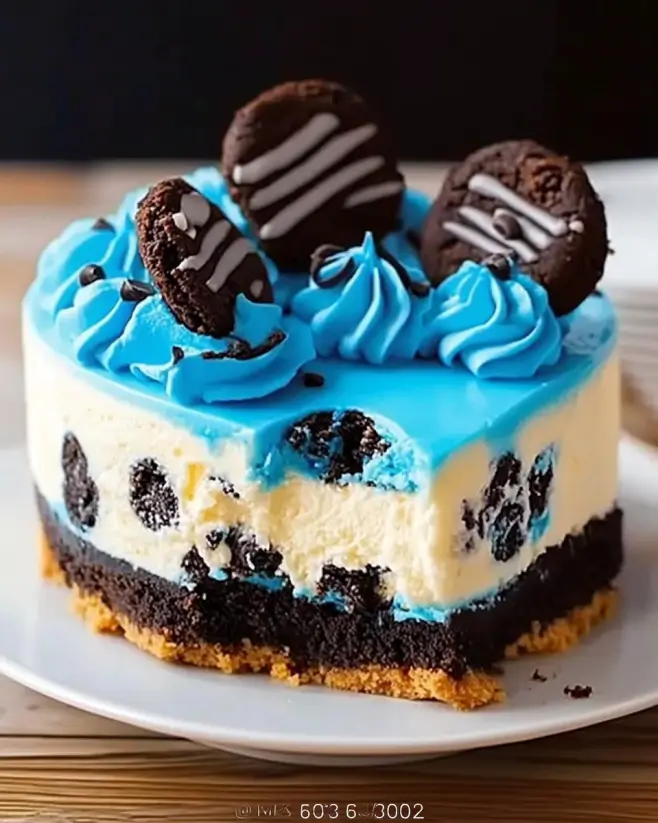
Before serving, spread the blue frosting generously on top of the cheesecake. This is where the fun really begins! Sprinkle crushed chocolate sandwich cookies on top for that extra crunch and visual appeal. Slice it up, serve, and watch everyone’s eyes light up with joy!
Tips for Success
- Make sure your cream cheese is at room temperature for easy mixing.
- Don’t skip the cooling step; it helps prevent cracks in your cheesecake.
- Use a springform pan for easy removal and a beautiful presentation.
- For a fun twist, try adding different flavored frosting or toppings.
- Always check for doneness by gently shaking the pan; it’s a reliable method!
Equipment Needed
- 9-inch springform pan: Ideal for easy removal. A regular cake pan works too, but slicing may be trickier.
- Electric mixer: For smooth batter. A whisk can work, but it’ll take more elbow grease!
- Mixing bowls: Use a large one for the filling and a medium one for the crust.
- Spatula: Perfect for folding in chocolate chips and spreading frosting.
- Measuring cups and spoons: Essential for accuracy in your ingredients.
Variations
- Nutty Delight: Add chopped nuts like walnuts or pecans to the crust for an extra crunch and flavor.
- Fruit Fusion: Incorporate fresh berries or a layer of fruit preserves on top of the frosting for a refreshing twist.
- Chocolate Lovers: Use chocolate cream cheese instead of regular cream cheese for an even richer chocolate flavor.
- Gluten-Free Option: Substitute regular chocolate sandwich cookies with gluten-free versions to accommodate dietary needs.
- Vegan Version: Replace cream cheese with a vegan alternative and use flax eggs for a plant-based treat.
Serving Suggestions
- Pair with a scoop of vanilla ice cream for a delightful contrast in temperature and texture.
- Serve alongside fresh berries for a pop of color and a refreshing taste.
- Drizzle with chocolate sauce for an extra indulgent touch.
- Consider a side of whipped cream for added fluffiness.
- Present on a colorful platter to enhance the visual appeal!
FAQs about Cookie Monster Cheesecake
As you embark on your Cookie Monster Cheesecake adventure, you might have a few questions. Here are some common queries that can help you along the way:
Can I make Cookie Monster Cheesecake ahead of time?
Absolutely! This cheesecake actually tastes better after chilling overnight. Just make sure to store it in the refrigerator, covered, until you’re ready to serve.
What can I use instead of chocolate sandwich cookies?
If you’re looking for alternatives, graham crackers or even vanilla sandwich cookies can work. Just keep in mind that the flavor will change slightly, but it’ll still be delicious!
How do I know when my cheesecake is done baking?
Check for doneness by gently shaking the pan. The edges should be firm, while the center should have a slight jiggle. It will continue to set as it cools.
Can I freeze Cookie Monster Cheesecake?
Yes, you can freeze it! Just wrap it tightly in plastic wrap and then in aluminum foil. Thaw it in the fridge before serving for the best texture.
What’s the best way to slice a cheesecake?
For clean slices, use a sharp knife dipped in hot water. Wipe the knife between cuts to keep those slices looking neat and tidy!
Final Thoughts
Creating a Cookie Monster Cheesecake is more than just baking; it’s about bringing joy to those around you. The vibrant blue frosting and crunchy cookie topping make it a feast for the eyes, while the creamy filling delights the taste buds. Each slice is a reminder of childhood fun, evoking smiles and laughter. Whether it’s a special occasion or a simple family dinner, this cheesecake is sure to be a hit. So roll up your sleeves, gather your ingredients, and let the magic happen in your kitchen. You’ll be creating sweet memories one slice at a time!
PrintCookie Monster Cheesecake: Delight Everyone with This Recipe!
- Total Time: 4 hours 20 minutes
- Yield: 10 servings
- Diet: Vegetarian
Description
A delicious and visually appealing Cookie Monster Cheesecake that combines the flavors of chocolate sandwich cookies and cream cheese, topped with blue frosting.
Ingredients
- 2 cups crushed chocolate sandwich cookies (like Oreos)
- 1/2 cup unsalted butter, melted
- 16 ounces cream cheese, softened
- 1 cup granulated sugar
- 1 teaspoon vanilla extract
- 3 large eggs
- 1 cup mini chocolate chips
- 1 cup blue frosting (store-bought or homemade)
- 1/4 cup crushed chocolate sandwich cookies for topping
Instructions
- Preheat the oven to 325°F.
- In a medium bowl, combine the crushed chocolate sandwich cookies and melted butter. Mix until well combined.
- Press the mixture firmly into the bottom of a 9-inch springform pan to form the crust.
- In a large mixing bowl, beat the softened cream cheese with an electric mixer until smooth.
- Gradually add the granulated sugar and vanilla extract, mixing until well combined.
- Add the eggs one at a time, mixing on low speed until just incorporated. Do not overmix.
- Fold in the mini chocolate chips gently with a spatula.
- Pour the cream cheese mixture over the prepared crust in the springform pan.
- Bake in the preheated oven for 50-60 minutes, or until the center is set but still slightly jiggly.
- Turn off the oven and leave the cheesecake inside for an additional hour to cool gradually.
- Remove the cheesecake from the oven and let it cool to room temperature.
- Once cooled, refrigerate for at least 4 hours or overnight.
- Before serving, spread the blue frosting on top of the cheesecake and sprinkle with crushed chocolate sandwich cookies.
Notes
- For a lighter version, substitute low-fat cream cheese and use a sugar substitute.
- You can also add a layer of whipped cream on top for extra fluffiness.
- For a fun twist, mix in some crushed candy bars or sprinkles into the cheesecake batter before baking.
- Prep Time: 20 minutes
- Cook Time: 60 minutes
- Category: Dessert
- Method: Baking
- Cuisine: American
Nutrition
- Serving Size: 1 slice
- Calories: 410
- Sugar: 30g
- Sodium: 300mg
- Fat: 30g
- Saturated Fat: 15g
- Unsaturated Fat: 10g
- Trans Fat: 0g
- Carbohydrates: 30g
- Fiber: 2g
- Protein: 6g
- Cholesterol: 100mg

