A Slice of Springtime Joy
There’s something magical about the arrival of spring. The world shakes off its winter slumber, and everything seems to come alive with color—soft pastels in the sky at sunrise, fresh blooms dotting the landscape, and delicate Easter decorations filling homes. It’s a season of renewal, of gathering with loved ones, and of course, of indulging in sweet traditions.
For me, Easter has always been a time of joy, laughter, and baking. I remember my grandmother’s kitchen, where the scent of vanilla and butter wafted through the air as we prepared treats for the family. She would hum a tune as she carefully decorated cakes with the softest shades of pink, blue, and yellow. “Spring is nature’s way of showing us beauty,” she would say, “and a cake should do the same.”
Years later, I found myself recreating those cherished moments in my own kitchen, experimenting with different hues and flavors. That’s when I discovered the charm of an Easter Ombre Cake—a dessert that doesn’t just taste delightful but tells a story through its layers. Each pastel shade blends into the next, much like the gentle transitions of the season itself. This cake isn’t just about baking; it’s about celebration, creativity, and making memories that last far beyond the last crumb.
What Makes an Ombre Cake Special?
The ombre effect, where colors gradually fade from one to another, isn’t just visually appealing—it evokes a sense of wonder. When you slice into the cake and reveal the delicate layers of pastel, it feels like uncovering a hidden masterpiece.
Unlike traditional cakes that stick to one uniform shade, an ombre cake allows for artistic expression. You can choose colors that complement your theme—soft pastels for Easter, bolder hues for birthdays, or even a monochrome gradient for an elegant touch. The beauty of this technique is its versatility.
Beyond aesthetics, the texture of an ombre cake is what makes it truly special. Each layer is light, fluffy, and perfectly moist, complemented by the silky smooth buttercream that ties everything together. It’s a cake that looks as delightful as it tastes, making it a centerpiece for any springtime gathering.
The Inspiration Behind the Pastel Palette
Color has a way of evoking emotions, and pastels are no exception. These soft, muted tones symbolize warmth, happiness, and the gentle transition of the seasons. Each color in an Easter Ombre Cake carries a special meaning:
- Pink: Represents love, joy, and the warmth of family gatherings.
- Purple: A color of creativity and spirituality, often associated with Easter traditions.
- Blue: Symbolizes tranquility and the clear spring skies after a long winter.
- Yellow: Brings brightness and energy, much like the blooming daffodils of the season.
These colors don’t just enhance the cake visually; they add to the overall experience of celebrating Easter—a holiday that’s as much about togetherness as it is about renewal.
Decorating Ideas to Elevate Your Easter Cake
While the ombre effect itself is a stunning design choice, there are several ways to take this cake to the next level:
1. Floral Elegance
Fresh edible flowers like pansies or chamomile can add a whimsical touch. If using non-edible flowers, place them strategically on top for a spring garden effect.
2. Easter-Themed Toppings
Mini chocolate eggs, pastel sprinkles, or even small fondant bunnies can make this cake an Easter showstopper.
3. Drip Effect for a Modern Twist
A white or pastel chocolate ganache drip can add a contemporary feel, making the cake even more visually appealing.
4. Gold Accents for a Touch of Glamour
Edible gold leaf or a light dusting of gold shimmer can add an elegant contrast to the soft colors.
5. Textured Buttercream for a Rustic Look
Instead of smoothing out the frosting, use a spatula to create a rough, textured look that mimics the strokes of a painter’s brush.
Ingredients: The Building Blocks of a Pastel Dream
For the Cake
- Flour Power: 3 ½ cups (440g) all-purpose flour
- Rising Agents: 1 tablespoon baking powder, ½ teaspoon baking soda
- A Pinch of Perfection: ½ teaspoon salt
- Butter Bliss: 1 cup (225g) unsalted butter, room temperature
- Sweetness Factor: 2 cups (400g) granulated sugar
- Egg-cellent Structure: 4 large eggs, room temperature
- Flavor Boost: 1 tablespoon vanilla extract
- Moisture Magic: 1 ½ cups (360ml) buttermilk, room temperature
For the Buttercream
- Creamy Base: 2 cups (450g) unsalted butter, room temperature
- Fluffy Sweetness: 6 cups (720g) powdered sugar
- Flavor Touch: 2 teaspoons vanilla extract
- Silky Smoothness: ¼ cup (60ml) heavy cream or milk
- Balancing Act: A pinch of salt
- Pastel Perfection: Gel food coloring (pink, purple, blue, yellow)
Directions: Crafting the Ombre Masterpiece
Step 1: Preparing the Cake Batter
- Preheat & Prep: Set the oven to 350°F (175°C). Grease and line four 8-inch cake pans with parchment paper.
- Dry Ingredients First: In a medium bowl, whisk together flour, baking powder, baking soda, and salt.
- Creamy Goodness: In a large bowl, beat butter and sugar until light and fluffy (about 3-4 minutes).
- Eggs & Vanilla: Add eggs one at a time, mixing well after each addition. Stir in vanilla extract.
- Mixing it Up: Alternate adding dry ingredients and buttermilk, beginning and ending with dry ingredients. Mix until just combined.
Step 2: Coloring & Baking the Layers
- Divide & Tint: Split batter evenly into four bowls. Use gel food coloring to create pastel pink, purple, blue, and yellow.
- Baking Time: Pour colored batters into prepared cake pans and bake for 22-25 minutes.
- Cooling is Key: Let cakes rest in pans for 10 minutes before transferring to a wire rack to cool completely.
Step 3: Whipping Up the Buttercream
- Butter Bliss: Beat butter until creamy (about 2 minutes).
- Sweet & Smooth: Gradually add powdered sugar, mixing well after each addition.
- Final Touches: Stir in vanilla extract, salt, and heavy cream. Beat on high speed for 2-3 minutes until fluffy.
- Divide & Tint: Separate frosting into four bowls, tinting each to match cake layers, leaving one portion uncolored for the top.
Step 4: Assembling the Cake
- Layer by Layer: Place pink cake layer on a stand and spread pink buttercream on top. Repeat with purple, blue, and yellow layers, using matching frosting in between.
- Crumb Coat: Apply a thin frosting layer to seal in crumbs. Chill for 15 minutes.
Step 5: Creating the Ombre Effect
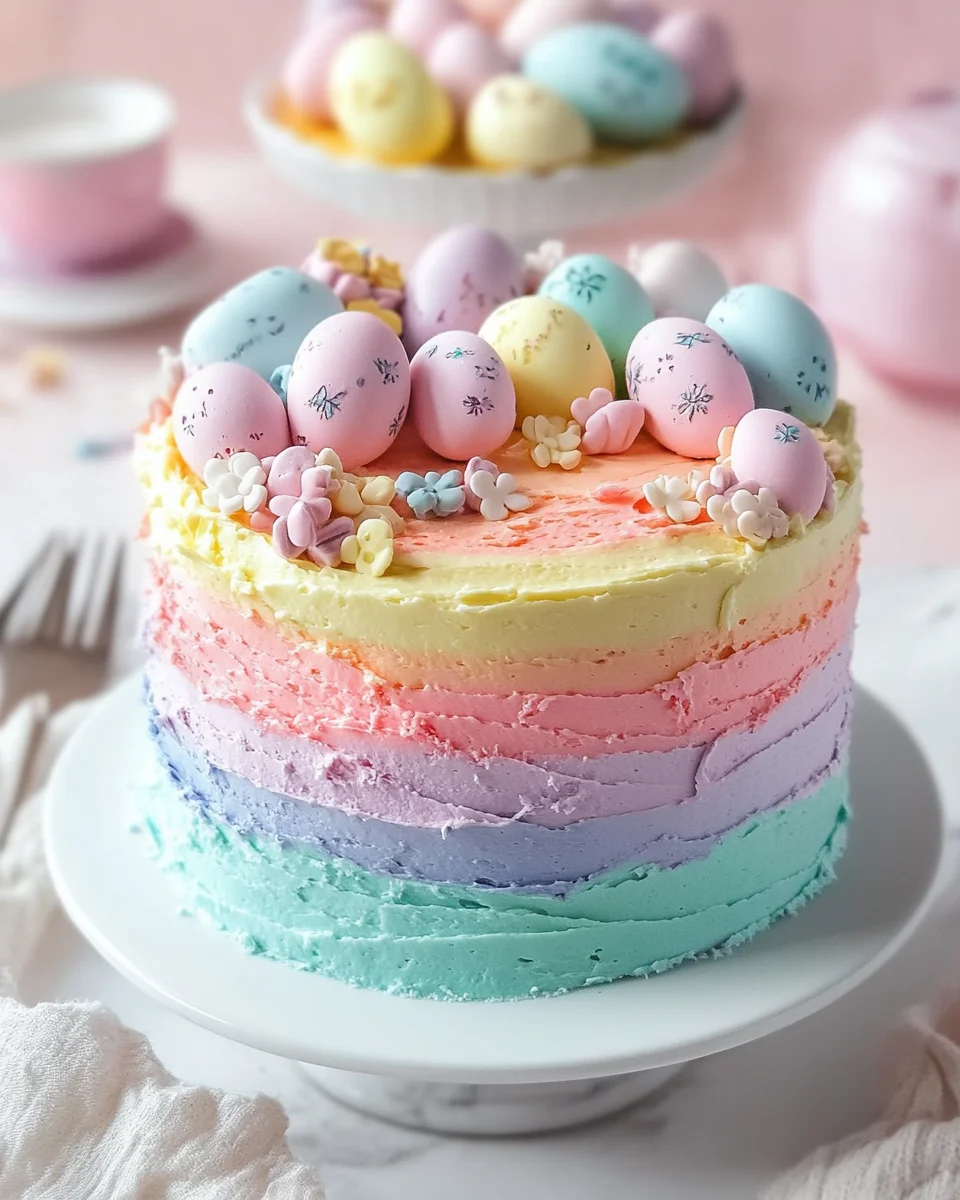
- Gradient Magic: Spread pink frosting at the bottom, then purple, blue, and yellow at the top.
- Blend Beautifully: Use a bench scraper to smooth the colors together for a seamless ombre finish.
- Final Flourish: Decorate with mini Easter eggs and small flowers.
Nutritional Breakdown: A Slice of Sweetness
- Calories: 211 per serving
- Total Fat: 5g
- Saturated Fat: 3g
- Unsaturated Fat: 2g
- Cholesterol: 72mg
- Sodium: 331mg
- Carbohydrates: 32g
- Fiber: 1g
- Sugar: 4g
- Protein: 7g
This Easter Ombre Cake is a feast for the eyes and the taste buds—perfect for springtime celebrations! Let the pastel layers and creamy buttercream bring joy to your holiday table.
Common Questions About Easter Ombre Cake
Can I use natural food coloring instead of gel food coloring?
Yes! Natural alternatives like beet juice for pink, blueberry reduction for purple, and turmeric for yellow can work well. However, they may slightly alter the flavor, so it’s best to use them sparingly.
How can I achieve an even gradient effect on the outside of the cake?
The key is to apply each color in horizontal sections and use a bench scraper to blend them together. A turntable makes this process much smoother, helping to create a seamless ombre look.
What if I only have two cake pans instead of four?
You can bake in batches! Prepare half the batter, bake two layers, and then repeat the process with the remaining batter. Just make sure to clean the pans between batches to avoid color contamination.
Can I make this cake in advance?
Absolutely! The cake layers can be baked up to two days in advance and stored wrapped in plastic at room temperature. You can also freeze the layers for up to three months—just thaw them before assembling. The buttercream can be prepared ahead as well; simply rewhip it before using.
How do I prevent my cake from becoming too dense?
Overmixing the batter can result in a dense cake. Stir just until the ingredients are combined, and make sure your ingredients (especially butter and eggs) are at room temperature for the best texture.
What can I use instead of buttercream?
If you’re looking for a lighter alternative, whipped cream frosting or a cream cheese frosting works beautifully with this cake. Just keep in mind that whipped cream is less stable, so the cake should be refrigerated if not served immediately.
Why This Cake Brings People Together
Baking, especially during the holidays, is about more than just following a recipe. It’s about the laughter shared while mixing batter, the anticipation of watching the cake rise in the oven, and the joy of slicing into something that feels almost too pretty to eat.
One of my favorite memories with this cake was a spring afternoon spent with my nieces and nephews. They each picked a color for one of the layers, carefully stirring the gel food coloring into the batter with wide-eyed excitement. When the cake was finally ready, they crowded around, eagerly waiting to see how the inside would look. The gasp of delight when the pastel layers were revealed was priceless. That moment reminded me that baking isn’t just about creating something delicious—it’s about creating memories.
Conclusion: A Cake That Celebrates More Than Just Easter
The Easter Ombre Cake is more than just a dessert; it’s a symbol of spring’s beauty, of creativity in the kitchen, and of the joy that comes from sharing something special with loved ones. Whether you’re baking it for a festive Easter brunch, a spring birthday, or just because you love the art of baking, this cake is guaranteed to bring smiles to the table.
So, gather your ingredients, mix up those pastel shades, and bake a cake that will not only taste incredible but will also become part of your holiday traditions. Because at the end of the day, the best recipes are the ones that come with stories worth telling.
Print
Easter Ombre Cake: A Celebration of Colors and Sweet Memories
- Total Time: 55 minutes
- Yield: 12 servings
Description
Celebrate Easter with this stunning Ombre Cake! Featuring soft pastel layers and luscious buttercream, this dessert is a showstopper that’s as delicious as it is beautiful. Perfect for springtime gatherings and festive celebrations.
Ingredients
For the Cake:
- 3 ½ cups (440g) all-purpose flour
- 1 tablespoon baking powder
- ½ teaspoon baking soda
- ½ teaspoon salt
- 1 cup (225g) unsalted butter, room temperature
- 2 cups (400g) granulated sugar
- 4 large eggs, room temperature
- 1 tablespoon vanilla extract
- 1 ½ cups (360ml) buttermilk, room temperature
For the Buttercream:
- 2 cups (450g) unsalted butter, room temperature
- 6 cups (720g) powdered sugar
- 2 teaspoons vanilla extract
- ¼ cup (60ml) heavy cream or milk
- A pinch of salt
- Gel food coloring (pink, purple, blue, yellow)
Instructions
- Preheat & Prep:
Preheat oven to 350°F (175°C). Grease and line four 8-inch cake pans with parchment paper. - Dry Ingredients:
In a bowl, whisk together flour, baking powder, baking soda, and salt. - Cream Butter & Sugar:
Beat butter and sugar until light and fluffy (about 3-4 minutes). - Add Eggs & Vanilla:
Mix in eggs one at a time, followed by vanilla extract. - Mix the Batter:
Alternate adding dry ingredients and buttermilk, starting and ending with dry ingredients. Mix until just combined. - Color the Batter:
Divide batter evenly into four bowls and tint each with gel food coloring (pink, purple, blue, yellow). - Bake the Layers:
Pour each color into prepared cake pans and bake for 22-25 minutes. Cool in pans for 10 minutes before transferring to a wire rack. - Prepare the Buttercream:
Beat butter until creamy, then gradually mix in powdered sugar. Add vanilla, salt, and heavy cream, beating until fluffy. - Color the Frosting:
Divide frosting into four bowls and tint each to match cake layers, leaving one portion uncolored. - Assemble the Cake:
Stack layers with matching buttercream between each. Apply a crumb coat and chill for 15 minutes. - Create the Ombre Effect:
Frost bottom with pink, then blend upward with purple, blue, and yellow. Smooth with a bench scraper for a seamless ombre look. - Decorate & Serve:
Top with mini Easter eggs and flowers for a festive finish.
Notes
- Use gel food coloring for vibrant pastel shades.
- Let cakes cool completely before frosting to avoid melting the buttercream.
- Store in an airtight container at room temperature for up to 2 days or in the fridge for up to a week.
- Prep Time: 30 minutes
- Cook Time: 25 minutes
- Category: Dessert
- Method: Baking
- Cuisine: American