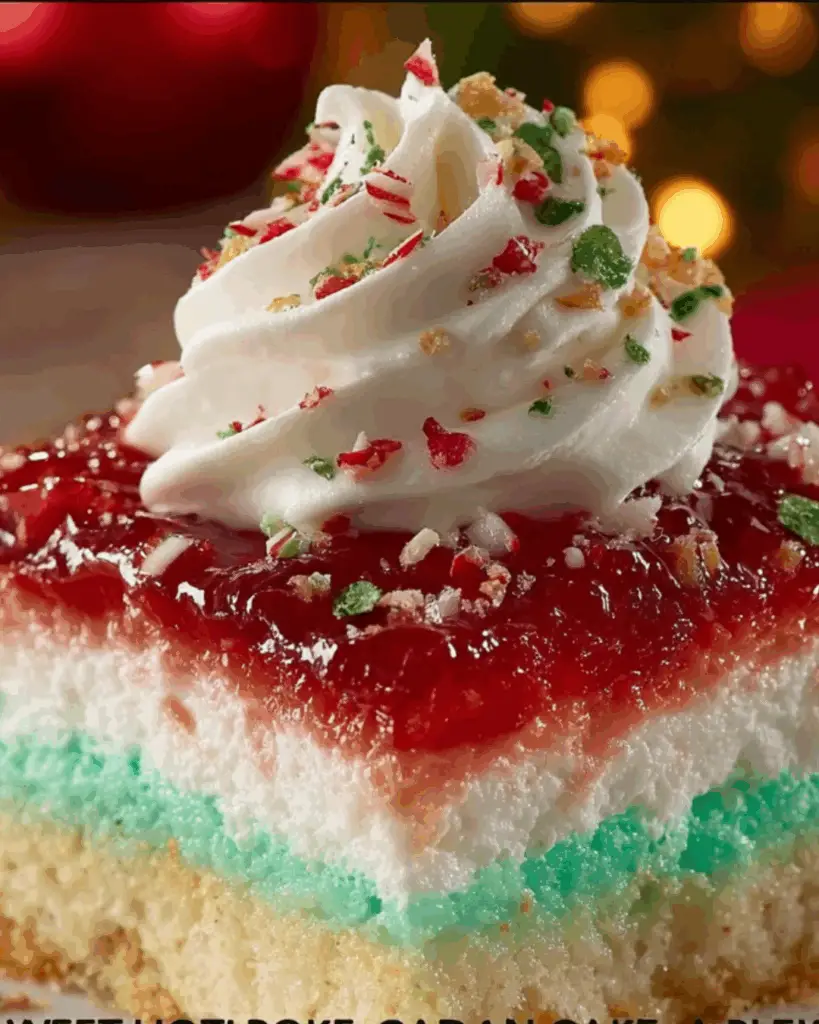
Introduction to Holiday Poke Cake with Festive Gelatin and Whipped Topping
There’s something magical about the holidays that brings everyone together, and what better way to celebrate than with a delightful dessert? The Holiday Poke Cake with Festive Gelatin and Whipped Topping is not just a cake; it’s a centerpiece that sparks joy and conversation. This recipe is perfect for those busy days when you want to impress your loved ones without spending hours in the kitchen. With its rich chocolate base and vibrant gelatin, this cake is sure to be a hit at any gathering, making it a must-try for your holiday festivities!
Why You’ll Love This Holiday Poke Cake with Festive Gelatin and Whipped Topping
This Holiday Poke Cake is a game-changer for your holiday gatherings. It’s incredibly easy to whip up, making it perfect for those last-minute dessert needs. The combination of rich chocolate and colorful gelatin creates a stunning visual that tastes as good as it looks. Plus, it’s a crowd-pleaser, ensuring your guests will be coming back for seconds. Who wouldn’t love a dessert that’s both simple and spectacular?
Ingredients for Holiday Poke Cake with Festive Gelatin and Whipped Topping
Gathering the right ingredients is the first step to creating your Holiday Poke Cake with Festive Gelatin and Whipped Topping. Here’s what you’ll need:
- All-purpose flour: The backbone of your cake, providing structure and texture.
- Granulated sugar: Sweetens the cake and helps it rise, giving it that delightful fluffiness.
- Unsweetened cocoa powder: Adds a rich chocolate flavor, making every bite indulgent.
- Baking powder and baking soda: These leavening agents ensure your cake rises perfectly.
- Salt: Enhances the flavors, balancing the sweetness of the cake.
- Large eggs: Bind the ingredients together and add moisture.
- Whole milk: Contributes to a moist texture and rich flavor.
- Vegetable oil: Keeps the cake tender and adds moisture.
- Vanilla extract: A must-have for that warm, comforting flavor.
- Boiling water: Helps to create a smooth batter and intensifies the chocolate flavor.
- Flavored gelatin: This is where the fun begins! Choose a vibrant flavor like raspberry or lime for a festive touch.
- Cold water: Used to set the gelatin, ensuring it seeps into the cake.
- Whipped topping: Adds a light, creamy finish that complements the cake beautifully.
- Sprinkles or festive decorations: For that extra pop of color and holiday cheer!
For exact measurements, check the bottom of the article where you can find everything listed for easy printing. Feel free to get creative with your ingredients; for instance, you can swap in chocolate-flavored gelatin for a richer experience or top it with fresh berries for a fruity twist!
How to Make Holiday Poke Cake with Festive Gelatin and Whipped Topping
Step 1: Preheat and Prepare
Start by preheating your oven to 350°F (175°C). While it warms up, grease and flour a 9×13-inch baking pan. This step is crucial to ensure your cake releases easily after baking, so don’t skip it!
Step 2: Mix Dry Ingredients
In a large mixing bowl, combine the all-purpose flour, granulated sugar, cocoa powder, baking powder, baking soda, and salt. Whisk them together until they’re well blended. This creates a solid foundation for your Holiday Poke Cake with Festive Gelatin and Whipped Topping.
Step 3: Combine Wet Ingredients
Add the large eggs, whole milk, vegetable oil, and vanilla extract to the dry mixture. Beat everything together with an electric mixer on medium speed for about 2 minutes. This helps to create a smooth batter that’s full of flavor.
Step 4: Add Boiling Water
Carefully stir in the boiling water. This step is essential as it thins the batter, allowing it to bake evenly. The heat also intensifies the chocolate flavor, making your cake even more delicious!
Step 5: Bake the Cake
Pour the batter into your prepared baking pan and bake for 30-35 minutes. To check for doneness, insert a toothpick into the center. If it comes out clean, your cake is ready to cool!
Step 6: Poke Holes
Once the cake has cooled for about 10 minutes, use the handle of a wooden spoon to poke holes all over the top, about 1 inch apart. This allows the gelatin to seep in, creating that signature poke cake texture.
Step 7: Prepare Gelatin
In a separate bowl, dissolve the flavored gelatin in 1 cup of boiling water. Stir in 1 cup of cold water to help it set. Pour this vibrant mixture over the cake, ensuring it seeps into all the holes for maximum flavor.
Step 8: Chill and Top
Refrigerate the cake for at least 2 hours to let the gelatin set properly. Once chilled, spread the whipped topping evenly over the cake. Feel free to get creative with sprinkles or festive decorations for that extra holiday cheer!

Tips for Success
- Make sure your ingredients are at room temperature for better mixing.
- Don’t rush the cooling process; a cooled cake absorbs the gelatin better.
- Use a variety of gelatin flavors for a colorful presentation.
- For a richer taste, consider adding chocolate chips to the batter.
- Top with fresh fruit for added flavor and a pop of color.
Equipment Needed
- 9×13-inch baking pan: Essential for baking your cake; a glass or metal pan works well.
- Mixing bowls: Use a large bowl for dry ingredients and a medium one for wet.
- Electric mixer: A hand mixer is perfect for blending; a whisk can work too.
- Wooden spoon: Great for poking holes and mixing; a spatula is handy for spreading.
- Toothpick: For checking cake doneness; a cake tester or knife can substitute.
Variations
- Chocolate Lovers: Swap the flavored gelatin for chocolate-flavored gelatin to create a rich, decadent dessert.
- Fruit Fiesta: Use a mix of flavored gelatins like strawberry, orange, and blue raspberry for a colorful, fruity twist.
- Gluten-Free Option: Substitute all-purpose flour with a gluten-free flour blend to accommodate dietary needs.
- Vegan Version: Replace eggs with flaxseed meal and use plant-based milk and whipped topping for a vegan-friendly treat.
- Nutty Delight: Add chopped nuts like walnuts or pecans to the batter for an extra crunch and flavor.
Serving Suggestions
- Pair with a scoop of vanilla ice cream for a delightful contrast in temperature and texture.
- Serve alongside fresh fruit like strawberries or raspberries to enhance the flavors.
- For drinks, consider a festive punch or hot cocoa to complement the cake.
- Garnish with mint leaves for a pop of color and freshness.
FAQs about Holiday Poke Cake with Festive Gelatin and Whipped Topping
Can I make this Holiday Poke Cake ahead of time?
Absolutely! This cake can be made a day in advance. Just ensure you refrigerate it after adding the gelatin and whipped topping. It will taste even better after sitting overnight!
What other flavors of gelatin can I use?
The beauty of this recipe lies in its versatility. You can use any flavored gelatin you like! Consider tropical flavors like pineapple or mango for a fun twist.
How do I store leftovers?
Store any leftover cake in an airtight container in the refrigerator. It should stay fresh for up to 3 days, but I doubt it will last that long!
Can I freeze the Holiday Poke Cake?
While it’s best enjoyed fresh, you can freeze the cake without the whipped topping. Wrap it tightly in plastic wrap and foil. When ready to serve, thaw it in the fridge and add the topping just before serving.
What can I substitute for whipped topping?
If you’re looking for a healthier option, you can use Greek yogurt or homemade whipped cream. Both will add a delicious creaminess to your cake!
Final Thoughts
Creating the Holiday Poke Cake with Festive Gelatin and Whipped Topping is more than just baking; it’s about bringing joy to your holiday gatherings. The vibrant colors and rich flavors make it a showstopper that will have your guests raving. Each slice is a delightful blend of chocolate and fruity goodness, evoking memories of laughter and celebration. Plus, the ease of preparation means you can spend less time in the kitchen and more time enjoying the company of loved ones. This cake is a sweet reminder that the best moments are often shared over dessert!
PrintHoliday Poke Cake with Festive Gelatin and Whipped Topping is sure to delight your guests!
- Total Time: 2 hours 55 minutes
- Yield: 12 servings
- Diet: Vegetarian
Description
A delightful and festive cake that combines a rich chocolate base with colorful gelatin and whipped topping, perfect for holiday gatherings.
Ingredients
- 2 cups all-purpose flour
- 1 ½ cups granulated sugar
- ½ cup unsweetened cocoa powder
- 1 ½ teaspoons baking powder
- 1 ½ teaspoons baking soda
- 1 teaspoon salt
- 2 large eggs
- 1 cup whole milk
- ½ cup vegetable oil
- 2 teaspoons vanilla extract
- 1 cup boiling water
- 3 ounces flavored gelatin (such as raspberry or lime)
- 1 cup boiling water (for gelatin)
- 1 cup cold water (for gelatin)
- 8 ounces whipped topping (thawed)
- Sprinkles or festive decorations for garnish
Instructions
- Preheat the oven to 350°F (175°C). Grease and flour a 9×13-inch baking pan.
- In a large mixing bowl, combine the flour, sugar, cocoa powder, baking powder, baking soda, and salt. Whisk until well blended.
- Add the eggs, milk, vegetable oil, and vanilla extract to the dry ingredients. Beat with an electric mixer on medium speed for 2 minutes.
- Carefully stir in the boiling water until the batter is smooth (the batter will be thin). Pour the batter into the prepared baking pan.
- Bake for 30-35 minutes or until a toothpick inserted in the center comes out clean. Allow the cake to cool in the pan for 10 minutes, then transfer to a wire rack to cool completely.
- Once the cake is cool, use the handle of a wooden spoon to poke holes all over the top of the cake, about 1 inch apart.
- In a separate bowl, dissolve the flavored gelatin in 1 cup of boiling water. Stir in 1 cup of cold water.
- Pour the gelatin mixture over the cake, ensuring it seeps into the holes. Refrigerate the cake for at least 2 hours to allow the gelatin to set.
- Spread the whipped topping evenly over the chilled cake. Garnish with sprinkles or festive decorations.
- Slice and serve chilled.
Notes
- For a chocolate version, use chocolate-flavored gelatin instead of fruit-flavored.
- Add fresh berries or sliced bananas on top of the whipped topping for an extra fruity twist.
- Prep Time: 20 minutes
- Cook Time: 35 minutes
- Category: Dessert
- Method: Baking
- Cuisine: American
Nutrition
- Serving Size: 1 slice
- Calories: 210
- Sugar: 20g
- Sodium: 200mg
- Fat: 8g
- Saturated Fat: 1g
- Unsaturated Fat: 7g
- Trans Fat: 0g
- Carbohydrates: 30g
- Fiber: 1g
- Protein: 3g
- Cholesterol: 30mg