
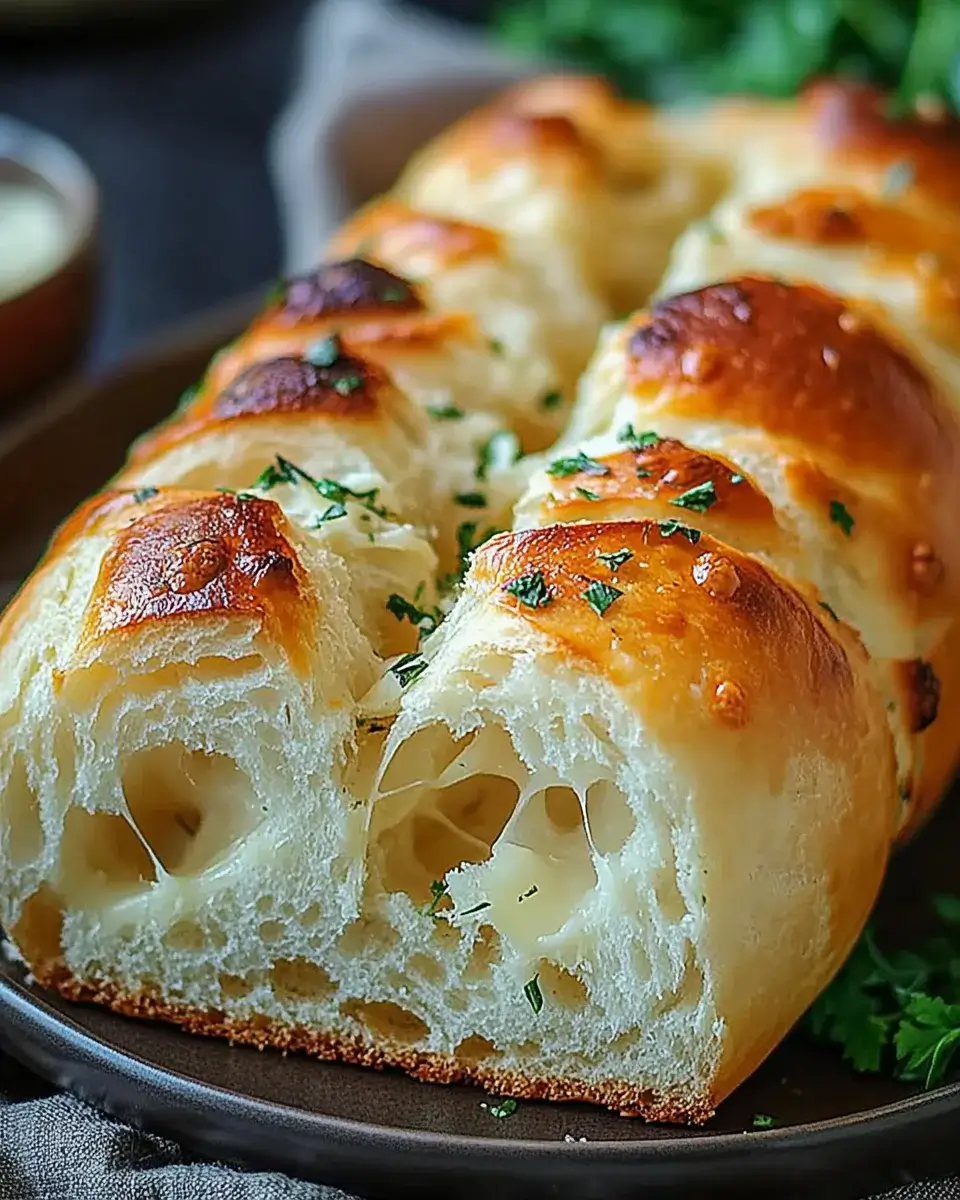
Introduction to Italian Herb and Cheese Bread
There’s something magical about the aroma of freshly baked bread wafting through the house. It takes me back to my childhood, where weekends meant family gatherings and the comforting scent of Italian Herb and Cheese Bread filling the air. This recipe is not just about baking; it’s about creating memories. Whether you’re looking for a quick solution for a busy day or a dish to impress your loved ones, this bread is your answer. With its cheesy goodness and fragrant herbs, it’s bound to become a staple in your kitchen. Let’s dive into this delightful baking adventure!
Why You’ll Love This Italian Herb and Cheese Bread
This Italian Herb and Cheese Bread is a game-changer for any home cook. It’s incredibly easy to whip up, making it perfect for those busy weeknights or lazy weekends. The combination of gooey mozzarella and sharp Parmesan creates a flavor explosion that will have everyone asking for seconds. Plus, the delightful aroma as it bakes is simply irresistible. Trust me, once you try it, you’ll be hooked!
Ingredients for Italian Herb and Cheese Bread
Gathering the right ingredients is the first step to creating your Italian Herb and Cheese Bread masterpiece. Here’s what you’ll need:
- All-purpose flour: The backbone of your bread, providing structure and texture.
- Shredded mozzarella cheese: This melty cheese adds gooeyness and a rich flavor.
- Grated Parmesan cheese: A sharp, nutty kick that elevates the overall taste.
- Italian seasoning: A blend of herbs that brings that classic Italian flavor to life.
- Garlic powder: For a subtle, savory depth that complements the cheeses.
- Salt: Essential for enhancing flavors and controlling yeast activity.
- Black pepper: A hint of spice that rounds out the flavor profile.
- Sugar: Helps activate the yeast and adds a touch of sweetness.
- Active dry yeast: The magic ingredient that makes your bread rise and become fluffy.
- Warm water: Activates the yeast; make sure it’s just the right temperature!
- Olive oil: Adds moisture and a lovely richness to the dough.
For those looking to get creative, consider adding chopped sun-dried tomatoes or olives for a Mediterranean twist. You can also brush the top of the loaf with melted butter and sprinkle extra herbs before baking for an added flavor boost. Exact measurements for these ingredients can be found at the bottom of the article, ready for printing!
How to Make Italian Herb and Cheese Bread
Now that you have your ingredients ready, let’s get to the fun part—making your Italian Herb and Cheese Bread! Follow these simple steps, and you’ll be on your way to baking a loaf that will impress everyone.
Step 1: Prepare the Yeast Mixture
Start by combining warm water, sugar, and yeast in a small bowl. Make sure the water is between 110°F to 115°F—too hot, and you’ll kill the yeast; too cold, and it won’t activate. Let this mixture sit for about 5 minutes until it becomes frothy. This is your yeast coming to life, and it’s a beautiful sight!
Step 2: Mix Dry Ingredients
In a large mixing bowl, whisk together the all-purpose flour, Italian seasoning, garlic powder, salt, and black pepper. This blend of dry ingredients is where the magic begins. The aroma of the herbs will fill your kitchen, making it hard to resist diving in right away!
Step 3: Add Cheeses
Next, stir in the shredded mozzarella and grated Parmesan cheeses. This is where the cheesy goodness starts to shine. Make sure the cheeses are evenly distributed throughout the dry mixture. You want every bite to be packed with flavor!
Step 4: Combine Ingredients
Create a well in the center of your dry mixture. Pour in the frothy yeast mixture and the olive oil. Using a wooden spoon or your hands, mix everything together until a dough begins to form. It might be a bit sticky at first, but that’s perfectly normal.
Step 5: Knead the Dough
Turn the dough out onto a lightly floured surface. Knead it for about 5-7 minutes until it’s smooth and elastic. This step is crucial for developing the gluten, which gives your bread that perfect chewy texture. Don’t rush it; enjoy the process!
Step 6: First Rise
Place the kneaded dough in a greased bowl, turning it to coat all sides. Cover it with a damp cloth and let it rise in a warm place for about 1 hour, or until it doubles in size. This is the time to relax and maybe grab a snack while you wait!
Step 7: Shape the Loaf
Once the dough has risen, punch it down gently to release the air. Turn it out onto a floured surface again and shape it into a loaf. Place it in a greased 9×5 inch loaf pan. This is where it will take its final form before baking.
Step 8: Second Rise
Cover the loaf with a cloth and let it rise again for about 30 minutes. This second rise is essential for achieving that light, airy texture. You’ll notice it puffing up nicely, and it’s a good time to preheat your oven to 375°F.
Step 9: Bake the Bread
Once the oven is preheated, it’s time to bake! Place the loaf in the oven and bake for 25-30 minutes. You’ll know it’s done when it’s golden brown and sounds hollow when tapped on the bottom. The smell will be absolutely irresistible!
Step 10: Cool the Bread
After baking, allow the bread to cool in the pan for about 10 minutes. Then, transfer it to a wire rack to cool completely. This step is crucial; it helps the bread set and makes slicing easier. Plus, it gives you a moment to admire your handiwork!

Tips for Success
- Always measure your ingredients accurately for the best results.
- Use fresh yeast for optimal rising; check the expiration date.
- Let the dough rise in a warm, draft-free area for better results.
- Don’t skip the kneading; it’s key to developing gluten.
- For a crustier loaf, place a pan of water in the oven while baking.
Equipment Needed
- Mixing bowls: A large bowl for mixing and a small one for the yeast.
- Measuring cups and spoons: Essential for accurate ingredient measurements.
- Wooden spoon or spatula: Perfect for mixing the dough.
- Loaf pan: A 9×5 inch pan works best, but any similar size will do.
- Wire rack: For cooling the bread after baking.
Variations
- Herb Infusion: Experiment with fresh herbs like rosemary or thyme for a fragrant twist.
- Cheese Medley: Swap mozzarella and Parmesan for other cheeses like cheddar or feta for unique flavors.
- Spicy Kick: Add red pepper flakes or diced jalapeños for a spicy version that packs a punch.
- Gluten-Free Option: Use a gluten-free all-purpose flour blend to make this bread suitable for gluten-sensitive diets.
- Sweet Variation: Incorporate a touch of honey or sugar and add cinnamon for a sweet herb bread perfect for breakfast.
Serving Suggestions
- Pair your Italian Herb and Cheese Bread with a hearty bowl of marinara sauce for dipping.
- Serve alongside a fresh garden salad drizzled with balsamic vinaigrette.
- Enjoy with a glass of red wine, like Chianti, to complement the flavors.
- Slice and toast for a delicious bruschetta base topped with tomatoes and basil.
FAQs about Italian Herb and Cheese Bread
Can I use different types of cheese in this recipe?
Absolutely! While mozzarella and Parmesan are classic choices, feel free to experiment with other cheeses like cheddar, gouda, or even feta. Each will bring its own unique flavor to your Italian Herb and Cheese Bread.
How do I store leftover bread?
To keep your Italian Herb and Cheese Bread fresh, store it in an airtight container at room temperature for up to three days. For longer storage, slice the bread and freeze it in a resealable bag. Just pop it in the toaster when you’re ready to enjoy!
Can I make this bread ahead of time?
Yes! You can prepare the dough and let it rise, then shape it into a loaf and refrigerate it overnight. Just remember to let it come to room temperature and rise again before baking. This is a great way to have fresh bread ready for a special occasion!
What can I serve with Italian Herb and Cheese Bread?
This bread pairs wonderfully with a variety of dishes. Try serving it with marinara sauce, a fresh salad, or even as a side to your favorite pasta. It’s also fantastic toasted and topped with bruschetta ingredients!
Is this recipe suitable for beginners?
Definitely! This Italian Herb and Cheese Bread is perfect for novice bakers. The steps are straightforward, and the results are delicious. With a little patience, you’ll impress everyone with your homemade bread!
Final Thoughts
Baking Italian Herb and Cheese Bread is more than just a culinary task; it’s an experience that fills your home with warmth and joy. The process of kneading the dough, watching it rise, and finally pulling that golden loaf from the oven is incredibly rewarding. Each slice offers a delightful blend of cheesy goodness and aromatic herbs, perfect for sharing with family and friends. Whether you enjoy it fresh out of the oven or toasted with your favorite toppings, this bread is sure to become a cherished part of your cooking repertoire. Happy baking!
PrintItalian Herb and Cheese Bread: Discover Easy Baking!
- Total Time: 1 hour 45 minutes
- Yield: 8 servings
- Diet: Vegetarian
Description
A delicious and easy-to-make Italian Herb and Cheese Bread, perfect for any meal.
Ingredients
- 2 cups all-purpose flour
- 1 cup shredded mozzarella cheese
- 1/2 cup grated Parmesan cheese
- 1 tablespoon Italian seasoning
- 1 teaspoon garlic powder
- 1 teaspoon salt
- 1/2 teaspoon black pepper
- 1 tablespoon sugar
- 1 packet (2 1/4 teaspoons) active dry yeast
- 3/4 cup warm water (110°F to 115°F)
- 2 tablespoons olive oil
Instructions
- In a small bowl, combine warm water, sugar, and yeast. Let it sit for about 5 minutes until frothy.
- In a large mixing bowl, whisk together flour, Italian seasoning, garlic powder, salt, and black pepper.
- Stir in the mozzarella and Parmesan cheeses.
- Create a well in the center and add the yeast mixture and olive oil. Mix until a dough forms.
- Turn the dough out onto a lightly floured surface and knead for about 5-7 minutes until smooth and elastic.
- Place the dough in a greased bowl, cover with a damp cloth, and let it rise in a warm place for about 1 hour or until doubled in size.
- Preheat the oven to 375°F.
- Punch down the risen dough and shape it into a loaf. Place it in a greased 9×5 inch loaf pan.
- Cover and let it rise for another 30 minutes.
- Bake for 25-30 minutes or until golden brown and sounds hollow when tapped on the bottom.
- Allow the bread to cool in the pan for 10 minutes before transferring it to a wire rack to cool completely.
Notes
- For a twist, try adding chopped sun-dried tomatoes or olives to the dough before baking.
- You can also brush the top of the loaf with melted butter and sprinkle with additional herbs before baking for extra flavor.
- Prep Time: 15 minutes
- Cook Time: 30 minutes
- Category: Bread
- Method: Baking
- Cuisine: Italian
Nutrition
- Serving Size: 1 slice
- Calories: 180
- Sugar: 1g
- Sodium: 300mg
- Fat: 6g
- Saturated Fat: 2g
- Unsaturated Fat: 4g
- Trans Fat: 0g
- Carbohydrates: 28g
- Fiber: 1g
- Protein: 7g
- Cholesterol: 10mg