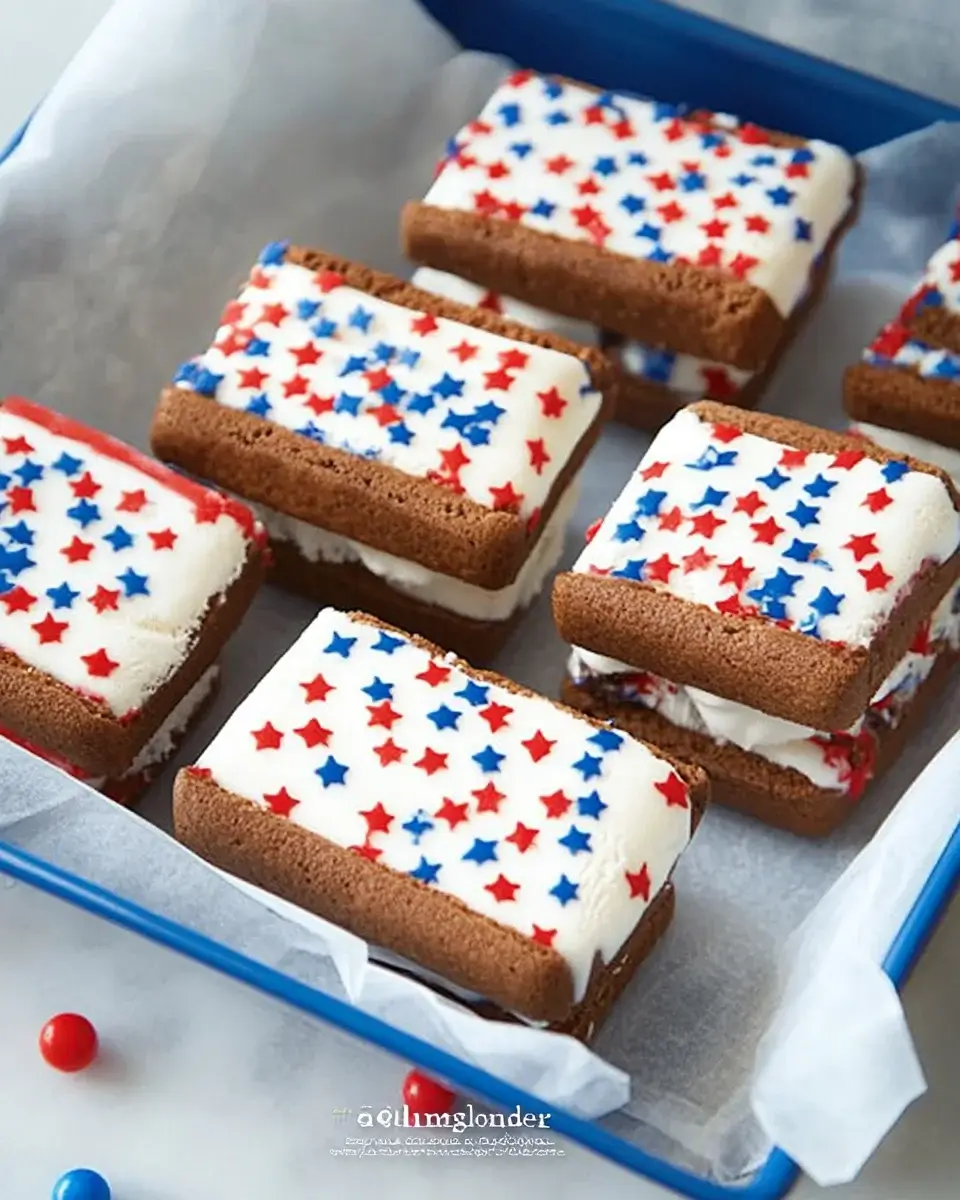
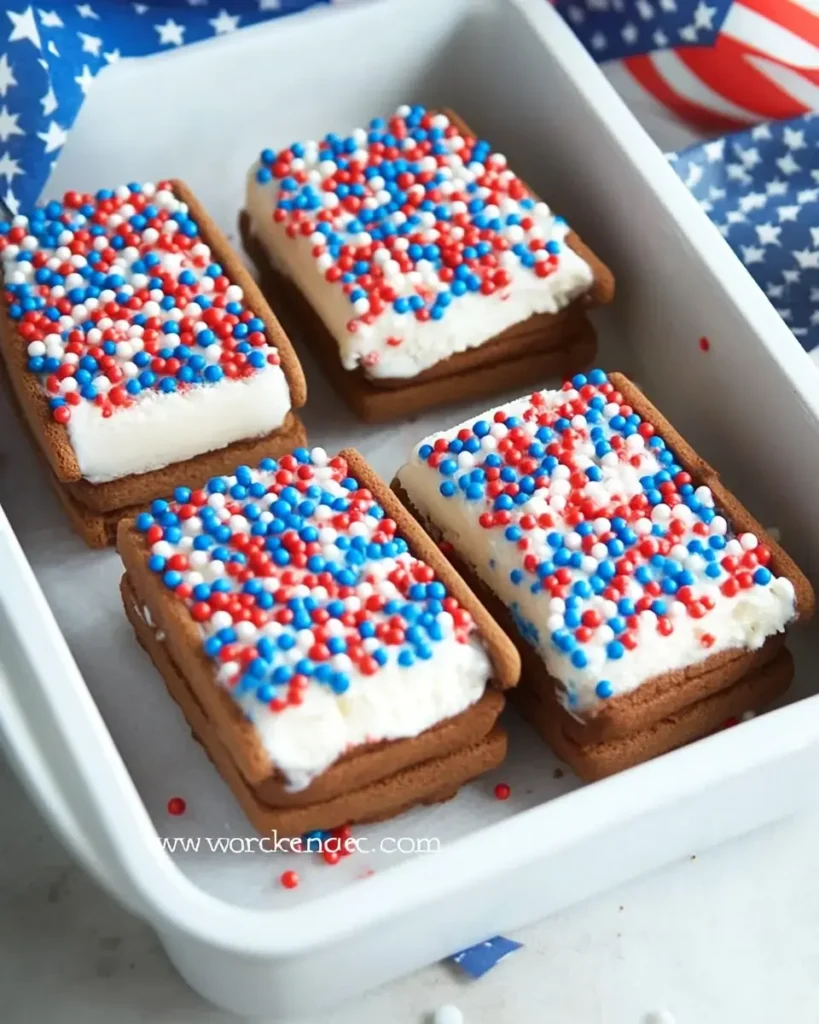
Introduction to Mini Patriotic Ice Cream Sandwiches
Summer is here, and with it comes the joy of outdoor gatherings and celebrations. What better way to cool off than with delightful Mini Patriotic Ice Cream Sandwiches? These little treats are not just a feast for the eyes; they’re a quick solution for those busy days when you want to impress your loved ones without spending hours in the kitchen. With vibrant red and blue sprinkles, they capture the spirit of summer festivities perfectly. Trust me, these sandwiches will be the highlight of your next barbecue or picnic!
Why You’ll Love This Mini Patriotic Ice Cream Sandwiches
These Mini Patriotic Ice Cream Sandwiches are a game-changer for summer fun! They’re incredibly easy to whip up, making them perfect for last-minute gatherings. The taste? Oh, it’s a delightful blend of soft cookies and creamy ice cream that will have everyone coming back for seconds. Plus, the vibrant colors add a festive touch that’s sure to impress. You’ll love how quickly they disappear!
Ingredients for Mini Patriotic Ice Cream Sandwiches
Gathering the right ingredients is the first step to creating these delightful Mini Patriotic Ice Cream Sandwiches. Here’s what you’ll need:
- All-purpose flour: The backbone of your cookies, providing structure and a soft texture.
- Baking soda: This little leavening agent helps the cookies rise, giving them that perfect chewy bite.
- Salt: Just a pinch enhances the sweetness and balances the flavors.
- Unsalted butter: Softened butter adds richness and moisture, making your cookies melt-in-your-mouth delicious.
- Granulated sugar: This sweetener contributes to the cookie’s crisp edges and overall sweetness.
- Brown sugar: Packed with molasses, it adds a deeper flavor and chewiness to the cookies.
- Vanilla extract: A splash of this aromatic essence elevates the flavor profile, making it irresistible.
- Large egg: Acts as a binder, helping to hold everything together while adding moisture.
- Red and blue sprinkles: These festive touches not only add color but also a fun crunch to each bite.
- Vanilla ice cream: The star of the show! Creamy and sweet, it pairs perfectly with the cookies.
- Whipped cream (optional): For an extra indulgent touch when serving, this adds a light and fluffy element.
For those looking to mix things up, consider substituting half of the all-purpose flour with cocoa powder for a chocolate twist. You can also experiment with different flavored ice creams, like strawberry or mint, to match your festive theme or personal preference. Exact measurements for these ingredients can be found at the bottom of the article, ready for printing!
How to Make Mini Patriotic Ice Cream Sandwiches
Creating these Mini Patriotic Ice Cream Sandwiches is a breeze! Follow these simple steps, and you’ll have a delicious treat ready in no time. Let’s dive in!
Step 1: Preheat and Prepare
Start by preheating your oven to 350°F (175°C). This ensures your cookies bake evenly. While the oven warms up, line a baking sheet with parchment paper. This will prevent sticking and make cleanup a snap!
Step 2: Mix Dry Ingredients
In a medium bowl, whisk together the all-purpose flour, baking soda, and salt. This step is crucial as it evenly distributes the leavening agent and salt, ensuring your cookies rise perfectly.
Step 3: Cream the Butter and Sugars
In a large bowl, cream together the softened butter, granulated sugar, and brown sugar until the mixture is light and fluffy. This process incorporates air, giving your cookies a delightful texture. It should take about 2-3 minutes.
Step 4: Combine Wet Ingredients
Next, beat in the vanilla extract and the large egg until everything is well mixed. The egg acts as a binder, helping to hold your cookie dough together.
Step 5: Combine Wet and Dry Mixtures
Gradually add the flour mixture to the wet ingredients. Mix until just combined. Be careful not to overmix; you want your cookies to stay soft and chewy!
Step 6: Add Sprinkles
Now, fold in the red and blue sprinkles. This is where the fun begins! The sprinkles not only add color but also a delightful crunch to each bite.
Step 7: Shape the Cookies
Using a tablespoon, drop balls of dough onto the prepared baking sheet, spacing them about 2 inches apart. This allows room for spreading as they bake.
Step 8: Bake the Cookies
Bake the cookies for 10-12 minutes or until the edges are lightly golden. Once done, remove them from the oven and let them cool on the baking sheet for about 5 minutes. Then, transfer them to a wire rack to cool completely.
Step 9: Assemble the Sandwiches
Once the cookies are cool, scoop a tablespoon of vanilla ice cream onto the flat side of one cookie. Top it with another cookie, pressing gently to create a sandwich. The ice cream should peek out just a bit, making it look extra inviting!
Step 10: Optional Decoration
If you want to take it up a notch, roll the edges of the ice cream sandwiches in additional sprinkles. This adds a festive flair that’s perfect for summer celebrations!
Tips for Success
- Make sure your butter is softened for easy creaming; it should be at room temperature.
- Don’t skip the chilling step if you have time; it helps the cookies hold their shape.
- Use a cookie scoop for uniform sizes, ensuring even baking.
- Experiment with different ice cream flavors for a unique twist.
- Store leftovers in an airtight container to keep them fresh.
Equipment Needed
- Baking sheet: A standard one works, but a silicone mat can prevent sticking.
- Parchment paper: Great for easy cleanup; aluminum foil is a good alternative.
- Mixing bowls: Use any size, but a large bowl is ideal for creaming.
- Whisk: A hand whisk or electric mixer will do the job.
- Cookie scoop: A tablespoon works too for uniform cookie sizes.
Variations
- For a chocolatey delight, substitute half of the all-purpose flour with cocoa powder to create chocolate cookies.
- Try using different flavored ice creams, such as strawberry, mint, or cookies and cream, to match your personal taste or theme.
- For a healthier twist, use whole wheat flour instead of all-purpose flour for added fiber.
- Make them gluten-free by using a gluten-free all-purpose flour blend.
- Add a layer of fruit, like sliced strawberries or bananas, between the cookies and ice cream for a fresh touch.
Serving Suggestions
- Pair these Mini Patriotic Ice Cream Sandwiches with fresh fruit, like strawberries or blueberries, for a refreshing contrast.
- Serve with a chilled glass of lemonade or iced tea to keep the summer vibe alive.
- For a festive touch, arrange them on a colorful platter with additional sprinkles for decoration.
FAQs about Mini Patriotic Ice Cream Sandwiches
Can I make Mini Patriotic Ice Cream Sandwiches ahead of time?
Absolutely! You can prepare the cookies in advance and store them in an airtight container. Assemble the sandwiches just before serving to keep the cookies fresh and the ice cream from melting.
What other flavors of ice cream work well with these sandwiches?
While vanilla is a classic choice, you can get creative! Strawberry, mint, or even cookies and cream can add a fun twist to your Mini Patriotic Ice Cream Sandwiches. Choose flavors that match your celebration theme!
How do I store leftover ice cream sandwiches?
Wrap each sandwich individually in plastic wrap or place them in an airtight container. They can be stored in the freezer for up to two weeks, ensuring you have a sweet treat ready whenever the craving strikes.
Can I use gluten-free flour for this recipe?
Yes, you can! Just substitute the all-purpose flour with a gluten-free all-purpose flour blend. This way, everyone can enjoy these delicious Mini Patriotic Ice Cream Sandwiches, regardless of dietary restrictions.
What can I do with leftover sprinkles?
Leftover sprinkles can be used to jazz up other desserts! Sprinkle them on cupcakes, pancakes, or even in your morning oatmeal for a fun, colorful touch. They add a festive flair to any dish!
Final Thoughts
Creating Mini Patriotic Ice Cream Sandwiches is more than just baking; it’s about making memories. The joy of assembling these colorful treats with family or friends brings a sense of togetherness that’s hard to beat. Each bite is a delightful mix of soft cookies and creamy ice cream, perfect for summer celebrations. Whether you’re hosting a barbecue or enjoying a quiet evening, these sandwiches add a festive touch to any occasion. So, roll up your sleeves, gather your loved ones, and dive into this fun, delicious adventure. Trust me, you’ll be the star of the summer!
Mini Patriotic Ice Cream Sandwiches to Celebrate Summer!
Ingredients
Method
- Preheat your oven to 350°F (175°C) and line a baking sheet with parchment paper.
- In a medium bowl, whisk together the flour, baking soda, and salt. Set aside.
- In a large bowl, cream together the softened butter, granulated sugar, and brown sugar until light and fluffy.
- Beat in the vanilla extract and egg until well combined.
- Gradually add the flour mixture to the wet ingredients, mixing until just combined.
- Fold in the red and blue sprinkles.
- Drop tablespoon-sized balls of dough onto the prepared baking sheet, spacing them about 2 inches apart.
- Bake for 10-12 minutes or until the edges are lightly golden. Remove from the oven and let cool on the baking sheet for 5 minutes before transferring to a wire rack to cool completely.
- Once the cookies are cool, scoop a tablespoon of vanilla ice cream onto the flat side of one cookie, then top with another cookie, pressing gently to create a sandwich.
- If desired, roll the edges of the ice cream sandwiches in additional sprinkles for extra color.
- Serve immediately or wrap individually in plastic wrap and freeze for later enjoyment.
Nutrition
Notes
- For a chocolate twist, substitute half of the all-purpose flour with cocoa powder.
- Use different flavored ice creams, such as strawberry or mint, to match the festive theme or personal preference.