Introduction to No-Bake Christmas Oreo Lasagna
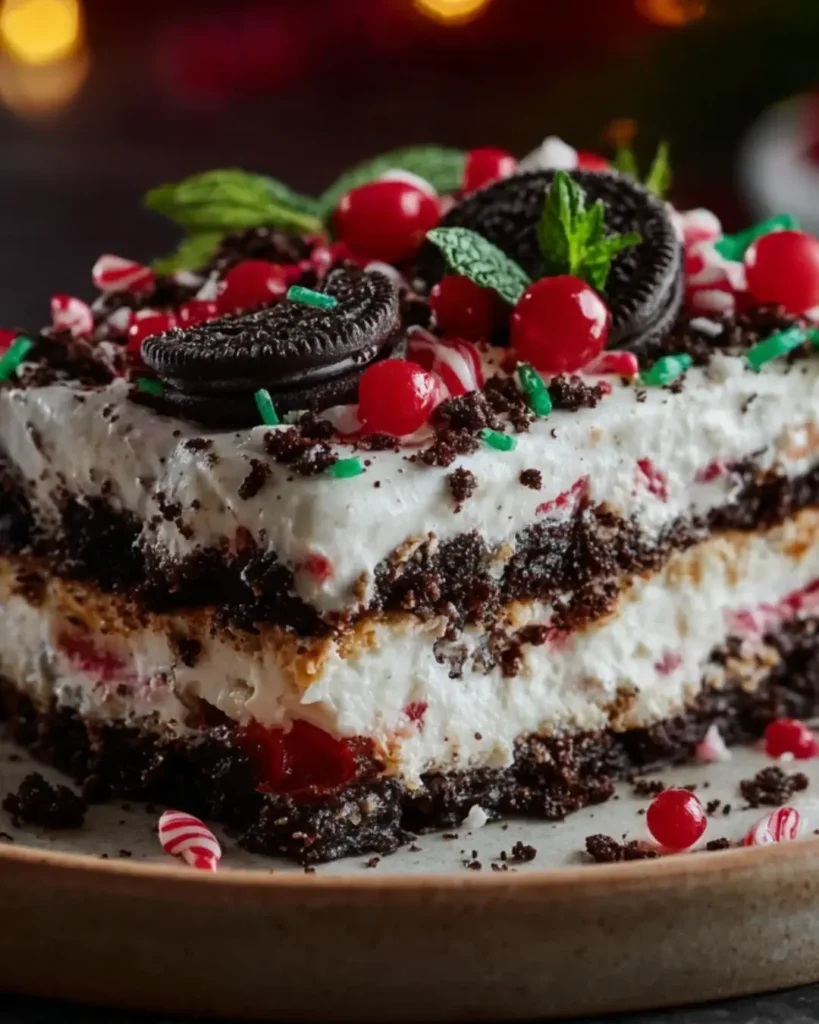
As the holiday season approaches, the hustle and bustle can feel overwhelming. That’s where my No-Bake Christmas Oreo Lasagna comes in—a delightful dessert that requires no oven time and minimal effort. This recipe is perfect for those busy days when you want to impress your family and friends without spending hours in the kitchen. With layers of creamy goodness and crunchy Oreos, it’s a festive treat that brings smiles all around. Trust me, this dessert will become a staple at your holiday gatherings, making sweet memories with every bite.
Why You’ll Love This No-Bake Christmas Oreo Lasagna
This No-Bake Christmas Oreo Lasagna is a game-changer for holiday desserts. It’s incredibly easy to whip up, taking just 30 minutes of your time. The layers of rich cream cheese, chocolate, and vanilla pudding create a flavor explosion that will have everyone coming back for seconds. Plus, it’s a no-fuss recipe that requires no baking, making it perfect for busy holiday schedules. You’ll impress your guests without breaking a sweat!
Ingredients for No-Bake Christmas Oreo Lasagna
Gathering the right ingredients is the first step to creating this festive masterpiece. Here’s what you’ll need:
- Oreo cookies: The star of the show! These chocolatey delights form the base and add a satisfying crunch.
- Unsalted butter: This helps bind the Oreo crust together, giving it a rich flavor.
- Cream cheese: Softened to perfection, it adds a creamy texture and tangy taste to the layers.
- Powdered sugar: Sweetens the cream cheese layer, balancing the flavors beautifully.
- Vanilla extract: A splash of this adds warmth and depth to the cream cheese mixture.
- Whipped topping: Light and fluffy, it gives the dessert a delightful finish and airy texture.
- Instant chocolate pudding mix: This layer brings a rich chocolate flavor that pairs perfectly with the other ingredients.
- Milk: Essential for preparing the pudding mixes, it helps achieve that perfect creamy consistency.
- Instant vanilla pudding mix: Adds another layer of flavor and creaminess, making each bite a delight.
- Candy canes or crushed peppermint candies (optional): For a festive touch, sprinkle these on top for a minty crunch.
- Additional Oreo cookies (optional): Use these for garnish to make your dessert even more visually appealing.
For exact measurements, check the bottom of the article where you can find everything listed for easy printing. Now, let’s get ready to create this delicious No-Bake Christmas Oreo Lasagna!
How to Make No-Bake Christmas Oreo Lasagna
Creating this No-Bake Christmas Oreo Lasagna is a breeze! Follow these simple steps, and you’ll have a festive dessert that will wow your guests. Let’s dive in!
Step 1: Prepare the Oreo Crust
Start by crushing the Oreo cookies. You can use a food processor for a fine crumb or place them in a zip-top bag and crush them with a rolling pin. It’s a great way to relieve stress, too! Once you have your crumbs, reserve one cup for later. Mix the crushed Oreos with melted butter until they’re well coated. Press this mixture firmly into the bottom of a 9×13 inch baking dish. This crust is the foundation of your delicious lasagna!
Step 2: Make the Cream Cheese Layer
In a large bowl, beat the softened cream cheese with an electric mixer until it’s smooth and creamy. Add in the powdered sugar and vanilla extract, mixing until everything is well combined. The sweetness of the sugar balances the tanginess of the cream cheese perfectly. Now, gently fold in half of the whipped topping until it’s light and fluffy. This layer is where the magic begins!
Step 3: Add the Chocolate Pudding Layer
In another bowl, whisk together the chocolate pudding mix and 2 cups of milk. Keep whisking until it thickens up nicely. This layer adds a rich chocolate flavor that pairs beautifully with the cream cheese. Spread the chocolate pudding evenly over the cream cheese layer. Don’t be shy—make sure it’s nice and even!
Step 4: Add the Vanilla Pudding Layer
Now, let’s move on to the vanilla pudding. In a clean bowl, whisk together the vanilla pudding mix and 2 cups of milk until it thickens. This layer adds a lovely contrast to the chocolate. Spread it gently over the chocolate pudding layer, smoothing it out with a spatula. You’re building a delicious masterpiece here!
Step 5: Top with Whipped Topping
It’s time to finish off your lasagna! Spread the remaining whipped topping over the vanilla pudding layer. Make it as smooth or as swirly as you like—this is your creation! Sprinkle the reserved Oreo crumbs on top for that extra crunch. If you’re feeling festive, add some crushed peppermint candies for a holiday touch.
Step 6: Chill and Serve
Cover your dish with plastic wrap and refrigerate for at least 4 hours, or overnight if you can wait. This chilling time allows all the flavors to meld together beautifully. When you’re ready to serve, slice into squares and watch the smiles appear. This No-Bake Christmas Oreo Lasagna is sure to be a hit!
Tips for Success
- Use room temperature cream cheese for easier mixing and a smoother texture.
- Chill the lasagna overnight for the best flavor and texture.
- Feel free to customize layers with different flavored puddings for a unique twist.
- For a festive look, add colorful sprinkles or holiday-themed decorations on top.
- Keep leftovers covered in the fridge for up to three days—if there are any!
Equipment Needed
- 9×13 inch baking dish: Essential for layering your lasagna. A glass or metal dish works well.
- Mixing bowls: Use a variety of sizes for mixing different layers.
- Electric mixer: Makes beating the cream cheese a breeze. A whisk can work too, but it’ll take longer.
- Food processor or rolling pin: For crushing Oreos into fine crumbs.
- Spatula: Perfect for spreading layers evenly.
Variations
- Flavored Puddings: Swap the chocolate pudding for caramel or butterscotch for a different flavor profile.
- Gluten-Free Option: Use gluten-free Oreo cookies to make this dessert suitable for those with gluten sensitivities.
- Healthier Twist: Substitute cream cheese with Greek yogurt for a lighter version without sacrificing creaminess.
- Fruit Layer: Add a layer of fresh berries or sliced bananas between the pudding layers for a fruity surprise.
- Nutty Crunch: Incorporate crushed nuts like walnuts or pecans for added texture and flavor.
Serving Suggestions
- Pair with Coffee: A warm cup of coffee complements the sweetness of the lasagna perfectly.
- Festive Platter: Serve on a decorative platter with holiday-themed napkins for a cheerful presentation.
- Ice Cream Scoop: Add a scoop of vanilla ice cream on the side for extra indulgence.
- Fresh Berries: Garnish with fresh raspberries or strawberries for a pop of color and freshness.
FAQs about No-Bake Christmas Oreo Lasagna
Can I make No-Bake Christmas Oreo Lasagna ahead of time?
Absolutely! In fact, making it a day in advance allows the flavors to meld beautifully. Just cover it tightly and store it in the fridge until you’re ready to serve.
What can I substitute for cream cheese?
If you’re looking for a lighter option, Greek yogurt works well as a substitute. It maintains the creamy texture while cutting down on calories.
Can I use different flavored puddings?
Yes! Feel free to experiment with different flavored puddings. Caramel or butterscotch can add a delightful twist to your No-Bake Christmas Oreo Lasagna.
How long does this dessert last in the fridge?
This dessert can last up to three days in the fridge if stored properly. Just make sure it’s covered to keep it fresh!
Is this dessert suitable for gluten-free diets?
Yes! Simply swap regular Oreo cookies for gluten-free ones, and you’ll have a delicious treat that everyone can enjoy.
Final Thoughts
Creating this No-Bake Christmas Oreo Lasagna is more than just whipping up a dessert; it’s about bringing joy to your holiday gatherings. Each layer tells a story, from the crunch of the Oreos to the creamy richness of the puddings. It’s a treat that invites laughter, conversation, and sweet memories around the table. Whether you’re sharing it with family or friends, this dessert is sure to be a crowd-pleaser. So, roll up your sleeves, gather your loved ones, and dive into this festive delight. Trust me, every bite will be a celebration of the season!
PrintNo-Bake Christmas Oreo Lasagna: A Festive Delight!
- Total Time: 4 hours 30 minutes
- Yield: 12 servings
- Diet: Vegetarian
Description
A delicious and festive no-bake dessert featuring layers of Oreo cookies, cream cheese, and pudding, perfect for Christmas celebrations.
Ingredients
- 1 package (15.25 oz) Oreo cookies
- 1/2 cup unsalted butter, melted
- 2 (8 oz) packages cream cheese, softened
- 1 cup powdered sugar
- 1 teaspoon vanilla extract
- 1 (12 oz) container whipped topping, thawed
- 1 (3.9 oz) package instant chocolate pudding mix
- 2 cups milk
- 1 (3.9 oz) package instant vanilla pudding mix
- 2 cups milk
- 1/2 cup crushed peppermint candies (optional for garnish)
- Additional Oreo cookies for garnish (optional)
Instructions
- Crush the Oreo cookies in a food processor or place them in a zip-top bag and crush with a rolling pin until fine crumbs form. Reserve 1 cup of crumbs for topping.
- In a medium bowl, combine the crushed Oreos with the melted butter. Mix until the crumbs are evenly coated. Press the mixture into the bottom of a 9×13 inch baking dish to form the crust.
- In a large bowl, beat the softened cream cheese with an electric mixer until smooth. Add the powdered sugar and vanilla extract, mixing until well combined. Fold in half of the whipped topping until smooth.
- Spread the cream cheese mixture evenly over the Oreo crust in the baking dish.
- In another bowl, whisk together the chocolate pudding mix and 2 cups of milk until it thickens. Spread the chocolate pudding over the cream cheese layer.
- In a clean bowl, whisk together the vanilla pudding mix and 2 cups of milk until it thickens. Spread the vanilla pudding over the chocolate pudding layer.
- Top the lasagna with the remaining whipped topping, smoothing it out evenly. Sprinkle the reserved Oreo crumbs on top and add crushed peppermint candies if desired.
- Cover the dish with plastic wrap and refrigerate for at least 4 hours or overnight for best results before serving.
Notes
- For a festive touch, add red and green sprinkles on top along with the crushed peppermint.
- Substitute the chocolate pudding with a flavored pudding like caramel or butterscotch for a different taste.
- Prep Time: 30 minutes
- Cook Time: 0 minutes
- Category: Dessert
- Method: No-Bake
- Cuisine: American
Nutrition
- Serving Size: 1 slice
- Calories: 320
- Sugar: 15g
- Sodium: 250mg
- Fat: 18g
- Saturated Fat: 10g
- Unsaturated Fat: 8g
- Trans Fat: 0g
- Carbohydrates: 30g
- Fiber: 1g
- Protein: 4g
- Cholesterol: 40mg