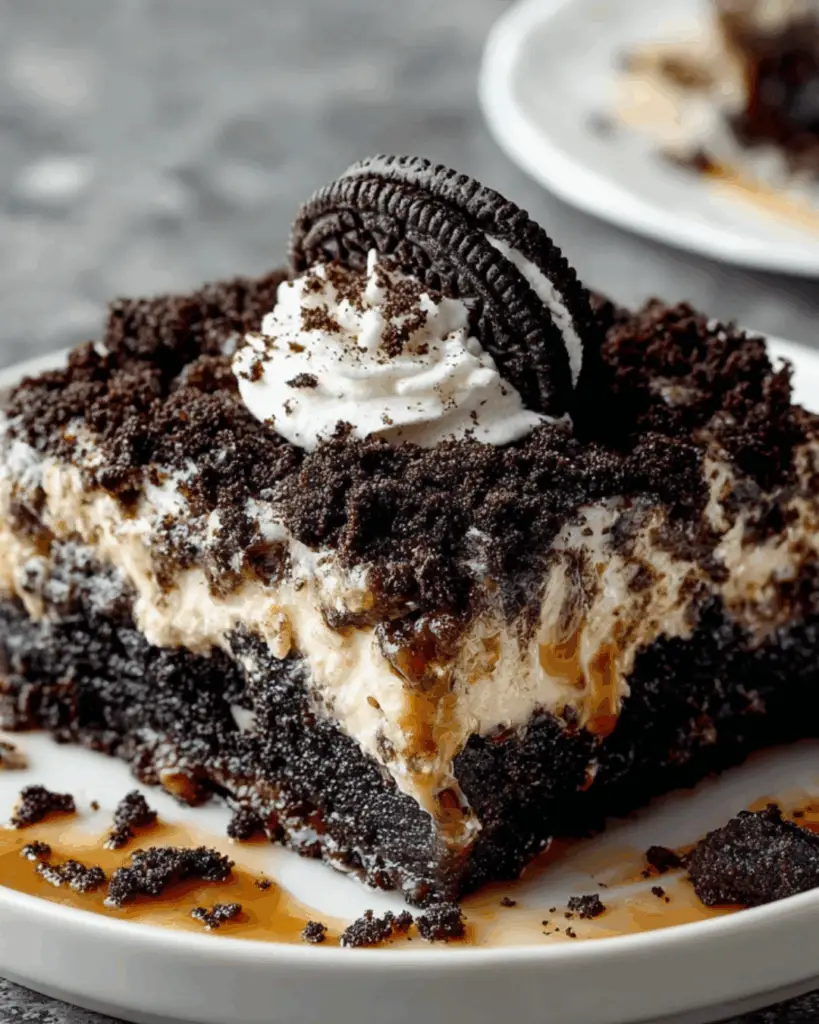
Introduction to Oreo Dump Cake
There’s something magical about desserts that come together with minimal fuss, and that’s exactly what you get with Oreo Dump Cake. This delightful treat is a nostalgic nod to simpler times, where the joy of baking didn’t require a culinary degree. Perfect for busy weeknights or last-minute gatherings, this recipe is a quick solution that will impress your loved ones. With layers of crushed Oreos, creamy goodness, and rich chocolate, it’s a dessert that satisfies every sweet tooth. Trust me, once you try this, it’ll become a staple in your dessert rotation!
Why You’ll Love This Oreo Dump Cake
This Oreo Dump Cake is a game-changer for anyone who loves dessert but hates complicated recipes. It’s incredibly easy to whip up, taking just about 15 minutes of prep time. The combination of rich chocolate and creamy layers creates a flavor explosion that’s hard to resist. Plus, it’s perfect for any occasion, whether you’re hosting friends or just treating yourself after a long day. Who wouldn’t love that?
Ingredients for Oreo Dump Cake
Gathering the right ingredients is the first step to creating this indulgent Oreo Dump Cake. Here’s what you’ll need:
- Oreo cookies: The star of the show! These chocolatey delights form the base and add a rich flavor.
- Sweetened condensed milk: This creamy ingredient sweetens the cream cheese layer and adds a luscious texture.
- Cream cheese: Softened to perfection, it brings a tangy richness that balances the sweetness.
- Whipped topping: Think Cool Whip! This light and airy topping adds a delightful finish.
- Chocolate cake mix: The dry mix provides a quick and easy way to add that chocolatey goodness without the hassle of baking from scratch.
- Milk: This helps to moisten the cake mix, ensuring a gooey, delicious texture.
- Butter: Melted butter binds the Oreo crust together, giving it that irresistible crunch.
- Chocolate chips: These little morsels add extra chocolatey goodness on top, making every bite a treat.
For those looking to switch things up, consider using mint-flavored Oreos for a refreshing twist. You can also sprinkle some chopped nuts or additional crushed Oreos on top for added crunch. If you want to keep it simple, all the exact quantities are listed at the bottom of the article for easy printing!
How to Make Oreo Dump Cake
Creating this Oreo Dump Cake is as easy as pie—well, easier! Follow these simple steps, and you’ll have a dessert that’s sure to impress. Let’s dive in!
Step 1: Preheat the Oven
First things first, preheat your oven to 350°F (175°C). This ensures that your cake bakes evenly. While the oven warms up, grab your 9×13-inch baking dish and give it a light greasing. This will help your cake come out easily later on.
Step 2: Create the Oreo Crust
In a large bowl, mix the crushed Oreo cookies with the melted butter. The butter acts like glue, holding the crust together. Once combined, press this mixture evenly into the bottom of your prepared baking dish. You want a solid base, so don’t be shy—use your hands or the back of a measuring cup to pack it down.
Step 3: Prepare the Cream Cheese Layer
Next, take your softened cream cheese and beat it with the sweetened condensed milk in a separate bowl. This creates a smooth, creamy layer that’s simply divine. Once it’s well mixed, pour this luscious mixture over the Oreo crust, spreading it evenly. This layer is where the magic happens!
Step 4: Add the Cake Mix
Now, grab your box of chocolate cake mix. Sprinkle it evenly over the cream cheese layer. Here’s the key: do not stir! The dry mix will create a beautiful texture as it bakes, so just let it sit on top.
Step 5: Pour the Milk
Next, pour the milk evenly over the cake mix layer. Again, resist the urge to stir. This step is crucial for achieving that gooey, delicious texture we all crave in a dump cake.
Step 6: Top with Chocolate Chips
Now for the fun part! Sprinkle those chocolate chips generously on top of the milk layer. They’ll melt into the cake, adding extra chocolatey goodness. Who can say no to more chocolate?
Step 7: Bake
It’s time to bake! Place your dish in the preheated oven and let it bake for 40-45 minutes. You’ll know it’s done when the top is set and the edges are golden brown. The aroma wafting through your kitchen will be irresistible!
Step 8: Cool and Serve
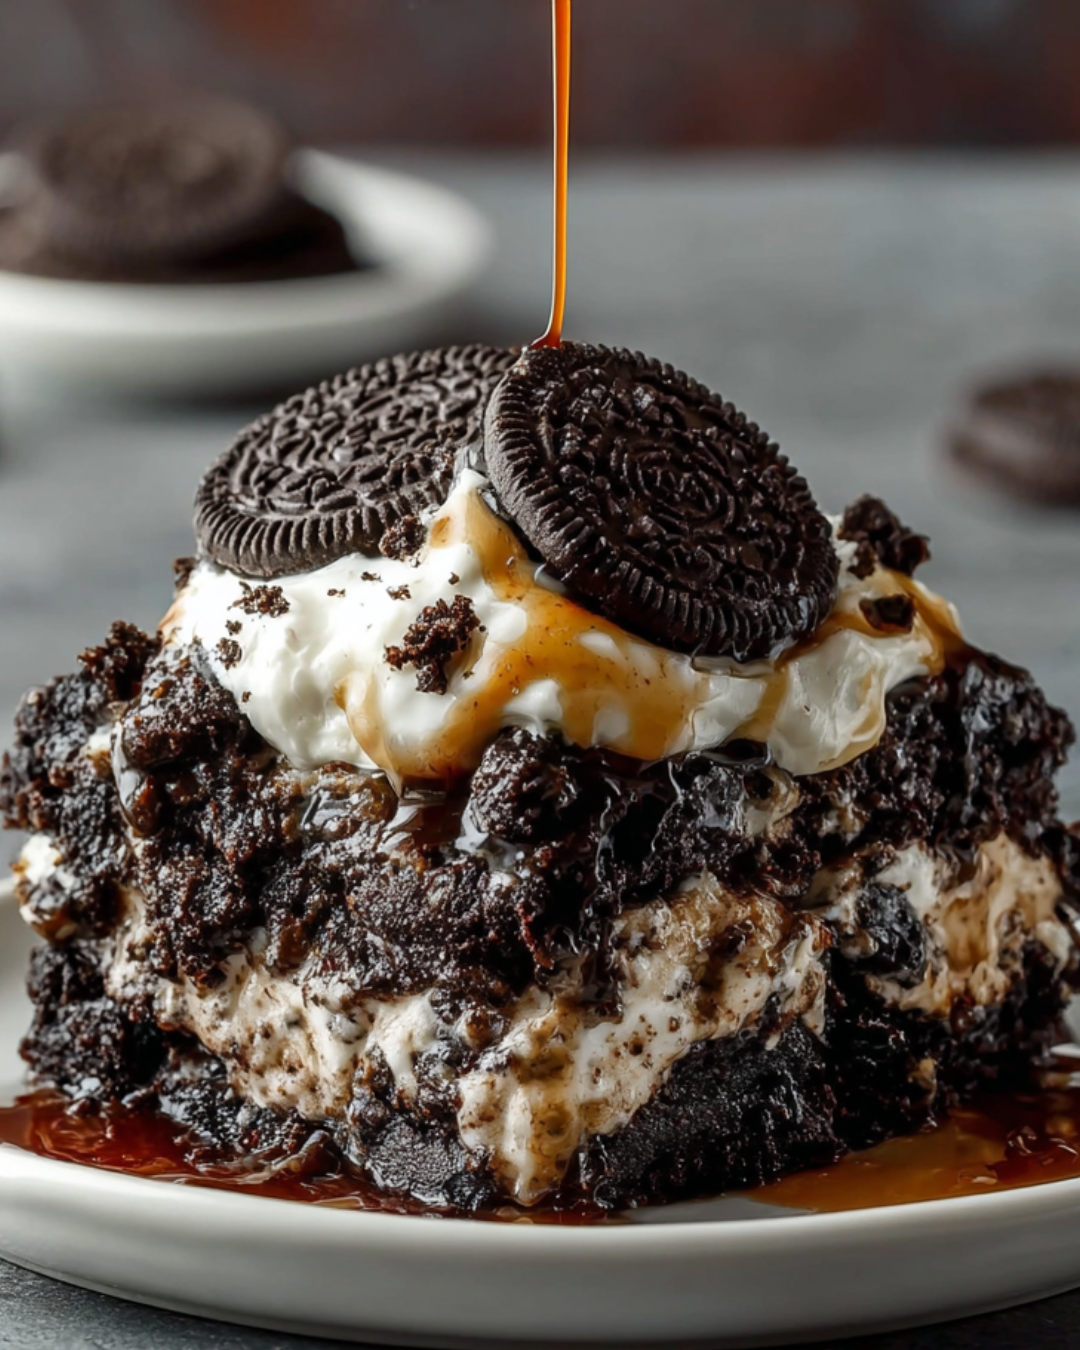
Once baked, remove the cake from the oven and let it cool for about 10-15 minutes. This cooling time is essential for the flavors to meld. Before serving, top it with whipped cream for that perfect finishing touch. Now, dig in and enjoy every bite of this delightful Oreo Dump Cake!
Tips for Success
- Use room temperature cream cheese for easier mixing.
- Don’t skip greasing the baking dish; it helps with easy removal.
- For a richer flavor, try using dark chocolate cake mix.
- Let the cake cool completely before adding whipped topping for a cleaner look.
- Store leftovers in the fridge for up to three days—if there are any!
Equipment Needed
- 9×13-inch baking dish: A standard size for this recipe; a glass or metal dish works well.
- Mixing bowls: Use two bowls—one for the crust and one for the cream cheese layer.
- Electric mixer: Handy for beating the cream cheese; a whisk can work too.
- Measuring cups and spoons: Essential for accurate ingredient measurements.
- Spatula: Perfect for spreading layers evenly.
Variations
- Mint Oreo Dump Cake: Swap regular Oreos for mint-flavored ones for a refreshing twist.
- Peanut Butter Delight: Add dollops of peanut butter between the cream cheese layer and cake mix for a nutty flavor.
- Gluten-Free Option: Use gluten-free chocolate cake mix and gluten-free Oreos to make this dessert suitable for gluten-sensitive friends.
- Fruit Layer: Incorporate a layer of fresh raspberries or strawberries on top of the cream cheese for a fruity contrast.
- Nutty Crunch: Sprinkle chopped nuts, like walnuts or pecans, on top of the chocolate chips for added texture and flavor.
Serving Suggestions
- Pair with a scoop of vanilla ice cream for a delightful contrast.
- Serve with fresh berries on the side for a pop of color and freshness.
- Drizzle with chocolate or caramel sauce for an extra indulgent touch.
- Garnish with mint leaves for a refreshing presentation.
- Enjoy with a cup of coffee or milk to balance the sweetness.
FAQs about Oreo Dump Cake
Got questions about this delicious Oreo Dump Cake? You’re not alone! Here are some common queries that might pop up as you whip up this delightful dessert.
Can I make Oreo Dump Cake ahead of time?
Absolutely! You can prepare it a day in advance. Just store it in the fridge after it cools, and add the whipped topping right before serving.
What if I don’t have sweetened condensed milk?
No worries! You can substitute it with a mixture of regular milk and sugar. Combine 1 cup of milk with 1/3 cup of sugar to mimic the sweetness and creaminess.
Can I use a different type of cake mix?
Definitely! While chocolate cake mix is a classic choice, feel free to experiment with vanilla or red velvet cake mix for a fun twist.
How do I store leftovers?
Store any leftovers in an airtight container in the fridge. It should stay fresh for up to three days—if it lasts that long!
Is this dessert suitable for vegetarians?
Yes! This Oreo Dump Cake is vegetarian-friendly, making it a great option for gatherings with diverse dietary preferences.
Final Thoughts
Creating this Oreo Dump Cake is more than just baking; it’s about sharing joy and indulgence with those you love. The rich layers of chocolate and creamy goodness come together to create a dessert that feels like a warm hug. Whether you’re celebrating a special occasion or simply treating yourself after a long day, this cake is sure to bring smiles. Plus, its simplicity means you can whip it up without stress. So, gather your ingredients, embrace the process, and enjoy every delicious bite of this delightful treat. Trust me, it’s a dessert that will leave a lasting impression!
PrintOreo Dump Cake: Indulge in This Easy Dessert Recipe!
- Total Time: 55-60 minutes
- Yield: 12 servings
- Diet: Vegetarian
Description
Oreo Dump Cake is a delicious and easy dessert that combines layers of crushed Oreo cookies, cream cheese, chocolate cake mix, and chocolate chips, all baked to perfection.
Ingredients
- 2 (15.25 oz) packages of Oreo cookies, crushed
- 1 (15 oz) can of sweetened condensed milk
- 1 (8 oz) package of cream cheese, softened
- 1 (12 oz) container of whipped topping (like Cool Whip)
- 1 (18.25 oz) box of chocolate cake mix
- 1 ½ cups of milk
- 1 cup of butter, melted
- 1 cup of chocolate chips
Instructions
- Preheat your oven to 350°F (175°C). Grease a 9×13-inch baking dish.
- In a large bowl, mix the crushed Oreo cookies and melted butter until well combined. Press this mixture evenly into the bottom of the prepared baking dish to form a crust.
- In another bowl, beat the softened cream cheese with the sweetened condensed milk until smooth. Pour this mixture over the Oreo crust, spreading it evenly.
- Sprinkle the dry chocolate cake mix evenly over the cream cheese layer. Do not stir.
- Pour the milk evenly over the cake mix layer. Again, do not stir.
- Sprinkle the chocolate chips on top of the milk layer.
- Bake in the preheated oven for 40-45 minutes, or until the top is set and the edges are golden brown.
- Remove from the oven and let it cool for about 10-15 minutes. Top with whipped topping before serving.
Notes
- For a minty twist, use mint-flavored Oreo cookies instead of regular Oreos.
- Add chopped nuts or additional crushed Oreos on top for extra crunch and flavor.
- Prep Time: 15 minutes
- Cook Time: 40-45 minutes
- Category: Dessert
- Method: Baking
- Cuisine: American
Nutrition
- Serving Size: 1 piece
- Calories: 320
- Sugar: 18g
- Sodium: 300mg
- Fat: 15g
- Saturated Fat: 8g
- Unsaturated Fat: 7g
- Trans Fat: 0g
- Carbohydrates: 38g
- Fiber: 1g
- Protein: 4g
- Cholesterol: 30mg