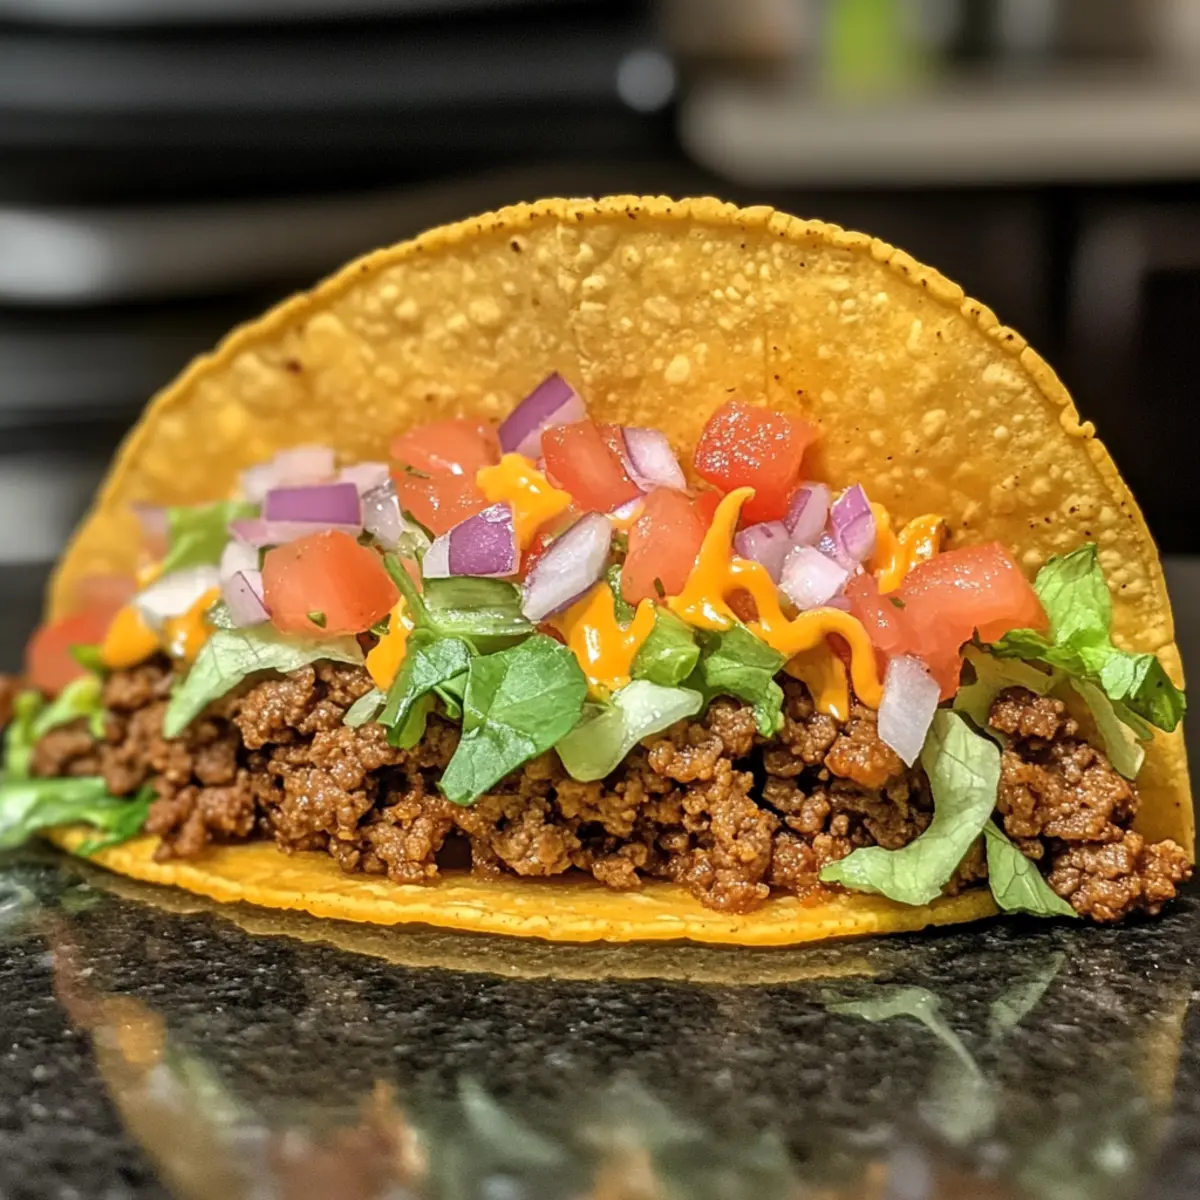
As I rummaged through my pantry one hectic evening, I stumbled upon the perfect remedy for a busy weeknight: Oven-Baked Cheesy Tacos. The idea of a crispy shell cradling savory seasoned beef, topped with gooey melted cheese, instantly brought a smile to my face. Not only are these tacos a quick meal that promises satisfaction, but they also transform into a comforting feast, bringing everyone around the dinner table—no reservations needed! What I love most is how customizable they are; load them up with your favorite fresh toppings or keep it simple. Ready to embark on a flavorful adventure in your kitchen? Let’s dive into this delicious recipe!
Why Are These Tacos So Irresistible?
Quick and Easy: These Oven-Baked Cheesy Tacos whip up in no time, making them perfect for busy weeknights.
Customizable Delight: Tailor each taco to your taste with a range of toppings; think fresh veggies or zesty sauces for an extra kick!
Crowd-Pleasing Comfort: Whether for family dinner or casual gatherings, these tacos are guaranteed to bring everyone together.
Flavor-Packed Goodness: The combination of seasoned beef and gooey cheese enveloped in a crispy shell creates an explosion of savory flavor.
Check out these additional recipes like Flavorful Honey Minutes and Cheesy Green Chile for more comforting meals!
Oven-Baked Cheesy Tacos Ingredients
For the Filling
• Ground Beef – Main protein providing flavor; opt for seasoned filling or substitute with ground turkey, chicken, or plant-based options like lentils or black beans.
• Onion – Provides base flavor and sweetness; finely diced.
• Garlic – Enhances flavor profile; minced.
• Taco Seasoning – Adds essential taco flavors; adjust to personal preference.
• Tomato Sauce/Salsa – Moistens the filling and adds tang; can substitute with fresh tomatoes or pico de gallo.
For the Tacos
• Hard Taco Shells – Structure for the tacos; holds the filling securely.
• Shredded Cheese – Adds creaminess and flavor; use cheddar or a taco blend for gooey goodness in your Oven-Baked Cheesy Tacos.
For the Toppings
• Lettuce, Tomatoes, Red Onion – Adds freshness and crunch; include according to taste.
• Cilantro (Optional) – For a fresh herbaceous kick.
• Sour Cream/Guacamole – For added creaminess and deliciously rich flavor.
Feel free to gather these ingredients and get ready to transform your kitchen into a taco fiesta!
Step‑by‑Step Instructions for Oven-Baked Cheesy Tacos
Step 1: Preheat Oven
Begin by preheating your oven to 400°F (200°C). This allows for a perfectly crispy shell and gooey cheese in your Oven-Baked Cheesy Tacos. While the oven heats, you can gather your taco shells and filling ingredients, setting the stage for a delicious meal.
Step 2: Prepare Taco Shells
Next, take your hard taco shells and arrange them upright in a baking dish. Make sure they are standing sturdy so they can hold the filling beautifully. This step is crucial for a hassle-free assembly and even cooking throughout your Oven-Baked Cheesy Tacos.
Step 3: Cook Beef Mixture
Now, grab a large skillet and heat it over medium heat. Brown your ground beef along with the finely diced onion, stirring frequently until the meat is no longer pink. Drain any excess fat, then add in minced garlic and your taco seasoning. Cook everything together for about a minute, allowing those flavors to meld, before stirring in the tomato sauce or salsa and letting it simmer for 5 minutes.
Step 4: Assemble Tacos
Once your beef mixture is flavorful and ready, it’s time to assemble the tacos. Spoon a generous portion of the beef mixture into each taco shell, ensuring each one is loaded with that savory goodness. Then, top each shell generously with shredded cheese, making sure to cover the filling for the ultimate gooey experience in your Oven-Baked Cheesy Tacos.
Step 5: Bake Tacos
Carefully place the assembled tacos in your preheated oven and bake them for 10-15 minutes. Keep an eye on them until the shells are golden brown and the cheese is bubbling and melted. This is when the magic happens, turning your delicious toppings into a cohesive feast you won’t be able to resist.
Step 6: Add Toppings
Once the baking time is complete, remove the tacos from the oven and let them cool for a minute. Now, it’s time to make your Oven-Baked Cheesy Tacos even more delightful! Add your favorite toppings like fresh lettuce, diced tomatoes, and red onion right before serving for a fresh crunch and a burst of color.
Oven-Baked Cheesy Tacos Variations
Feel free to get creative and customize your tacos just the way you like them!
-
Dairy-Free: Use dairy-free cheese alternatives to enjoy cheesy goodness without the dairy.
-
Gluten-Free: Opt for gluten-free taco shells or even lettuce wraps for a fresh twist to your Oven-Baked Cheesy Tacos.
-
Vegetarian: Substitute ground beef with a mixture of lentils or black beans; sauté with taco seasoning for a hearty vegan option.
-
Spicy Kick: Add sliced jalapeños or a drizzle of hot sauce inside the tacos before baking for an exciting heat.
-
Cheese Variety: Try pepper jack or a zesty Mexican blend instead of the usual cheddar for a delightful flavor upgrade.
-
Fresh Herbs: Incorporate fresh cilantro or green onions into your taco filling for a burst of freshness and added flavor.
-
Topping Twist: Switch up traditional toppings by adding diced avocados or pickled red onions, enhancing flavor and texture.
These options make incredible additions to your tacos for a meal that suits everyone’s taste! And if you’re looking for more comfort food, check out Cheesy Green Chile or Flavorful Honey Minutes to keep your weeknight dinners exciting.
What to Serve with Oven-Baked Cheesy Tacos
Transform your taco night into a full-fledged fiesta with these mouthwatering sides and pairings.
-
Creamy Guacamole: A fresh avocado dip that adds a rich creaminess, perfectly balancing the crispy taco shell and savory beef filling.
-
Zesty Mexican Street Corn: Charred corn mixed with lime, cheese, and spices creates a sweet and tangy accompaniment, elevating your meal’s flavor profile.
-
Crispy Tortilla Chips: Serve with salsa or cheese dip; their crunchiness complements the tacos while providing a satisfying contrast in texture.
-
Fresh Pico de Gallo: This vibrant salsa made with diced tomatoes, onions, and cilantro brings a burst of freshness that uplifts each bite of taco.
-
Spanish Rice: Fluffed rice cooked with spices adds a flavorful side that rounds out your meal while soaking up any extra taco goodness.
-
Chilled Cucumber Salad: Light and refreshing, this salad with crisp cucumbers and a tangy dressing offers a cooling contrast to the hearty tacos.
-
Beer or Margaritas: A chilled lager or a classic margarita can perfectly enhance the flavors of the tacos, making your meal feel festive and fun.
With these delightful pairings, you’ll create an unforgettable dining experience that everyone will enjoy!
Expert Tips for Oven-Baked Cheesy Tacos
-
Draining Beef: Always drain excess fat from the cooked beef well to prevent soggy tacos. This keeps your Oven-Baked Cheesy Tacos from becoming greasy.
-
Pre-Bake Shells: For an extra crispy shell, consider pre-baking your taco shells for a few minutes before filling them. This helps achieve that perfect crunch!
-
Cheese Choices: Feel free to experiment with different cheeses. A pepper jack adds spice, or a Mexican blend brings extra flavor to your Oven-Baked Cheesy Tacos.
-
Watch the Bake Time: Keep an eye on your tacos while they’re baking. Aim for melted, bubbly cheese without burning for the best results.
-
Heaping Fillings: Don’t skimp on the beef mixture! A generous amount of filling ensures your Oven-Baked Cheesy Tacos are flavorful and satisfying.
How to Store and Freeze Oven-Baked Cheesy Tacos
Fridge: Store any leftovers in an airtight container for up to 3 days. This helps retain the flavor and texture of your Oven-Baked Cheesy Tacos.
Freezer: If you want to make them ahead, you can freeze the assembled but uncooked tacos. Wrap tightly in plastic wrap and store in a freezer-safe container for up to 2 months.
Reheating: To reheat, bake from frozen at 400°F (200°C) for 20-25 minutes, or until heated through, ensuring that the cheese melts beautifully.
Toppings: Add fresh toppings like lettuce and tomatoes after reheating to maintain their crispness and enhance the overall flavor of your Oven-Baked Cheesy Tacos.
Make Ahead Options
These Oven-Baked Cheesy Tacos are perfect for meal prep enthusiasts looking to save time during busy weeknights! You can prepare the seasoned beef mixture and store it in an airtight container for up to 3 days in the refrigerator. Alternatively, assemble the tacos without toppings and refrigerate them for up to 24 hours before baking. When you’re ready to serve, simply place the tacos in a preheated oven and bake for 10-15 minutes until the cheese is melted and the shells are golden. This way, you’ll experience the same delightful flavors of a fresh taco dinner with minimal effort, making your evening stress-free and scrumptious!
Oven-Baked Cheesy Tacos Recipe FAQs
What type of ground meat should I use for the filling?
Absolutely! Ground beef is my go-to for these Oven-Baked Cheesy Tacos due to its flavor and texture. However, you can substitute it with ground turkey, chicken, or even plant-based options like lentils or black beans for a nutritious twist!
How long can I store leftovers in the fridge?
Leftovers can be stored in an airtight container for up to 3 days. Just make sure they are completely cooled before refrigerating to maintain freshness and prevent sogginess.
Can I freeze these tacos?
Yes, you can freeze them! For the best results, assemble the tacos without baking and wrap them tightly in plastic wrap. Place them in a freezer-safe container and store for up to 2 months. When you’re ready to enjoy, bake from frozen at 400°F (200°C) for 20-25 minutes until heated through and bubbly.
What are some common issues with baking tacos and how can I fix them?
Some people might find the taco shells get soggy. To avoid this, make sure to drain the cooked ground beef well and consider pre-baking the taco shells for a few minutes before assembly. Also, keeping an eye on the baking time will help ensure cheese melts perfectly without burning, so check them around the 10-minute mark!
Are there any dietary considerations for these Oven-Baked Cheesy Tacos?
Very! These tacos can easily be made gluten-free by opting for gluten-free taco shells. Just be cautious with any sauces or seasoning mixes you select, as they might contain gluten. For allergies, always verify that your seasonings and toppings, such as cheese and sour cream, are free from allergens.
What fresh toppings do you recommend for enhancing the flavor?
The more the merrier! Fresh toppings like shredded lettuce, diced tomatoes, red onions, and a sprinkle of cilantro elevate the flavor and add texture. For a spicy kick, try jalapeños or add diced avocados for creaminess. Enjoy experimenting with what you love best!

Oven-Baked Cheesy Tacos That'll Make Your Taste Buds Dance
Ingredients
Equipment
Method
- Preheat your oven to 400°F (200°C).
- Arrange hard taco shells upright in a baking dish.
- Cook ground beef with finely diced onion in a skillet over medium heat until browned. Drain excess fat.
- Add minced garlic and taco seasoning, cooking for about a minute. Then stir in tomato sauce or salsa and simmer for 5 minutes.
- Assemble tacos by spooning the beef mixture into each shell and topping with shredded cheese.
- Bake in the preheated oven for 10-15 minutes until the shells are golden and cheese is melted.
- Remove from oven, let cool for a minute, then add desired toppings before serving.