Introduction to Peanut Butter Cup Dump Cake
There’s something magical about the combination of chocolate and peanut butter.
Growing up, I remember sneaking spoonfuls of peanut butter straight from the jar, dreaming of the sweet treats I could create.
Now, as a passionate home cook, I’ve discovered the joy of the Peanut Butter Cup Dump Cake.
This dessert is not just a quick solution for a busy day; it’s a delightful way to impress your loved ones.
With minimal effort and maximum flavor, this cake is sure to become a favorite in your household.
Let’s dive into this delicious adventure together!
Why You’ll Love This Peanut Butter Cup Dump Cake
This Peanut Butter Cup Dump Cake is a game-changer for dessert lovers.
It’s incredibly easy to whip up, making it perfect for those busy weeknights or last-minute gatherings.
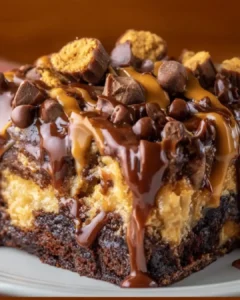
The rich, gooey layers of chocolate and peanut butter create a flavor explosion that will have everyone coming back for seconds.
Plus, it’s a crowd-pleaser, so you can impress your friends and family without breaking a sweat.
What’s not to love?
Ingredients for Peanut Butter Cup Dump Cake
Creating the perfect Peanut Butter Cup Dump Cake starts with gathering the right ingredients.
Here’s what you’ll need:
- Chocolate cake mix: The base of this dessert, providing a rich chocolate flavor. You can use any brand you prefer.
- Creamy peanut butter: This adds that irresistible nutty flavor and creamy texture. Go for the classic creamy variety for the best results.
- Milk: It helps to moisten the batter, making it soft and fluffy. Whole milk works best, but any milk will do.
- Semi-sweet chocolate chips: These little morsels melt beautifully, adding pockets of chocolatey goodness throughout the cake.
- Mini peanut butter cups: Chopped up, they provide delightful bursts of flavor and texture. You can find these in most grocery stores.
- Unsalted butter: Melted, it enriches the batter and helps everything come together smoothly.
- Vanilla extract: A splash of this adds depth to the flavor, enhancing the overall taste of the cake.
- Powdered sugar (optional): For a sweet finishing touch, dusting the cake with powdered sugar before serving is a nice touch.
For those looking to mix things up, consider substituting the chocolate cake mix with a yellow cake mix for a different flavor profile.
All the exact measurements are at the bottom of the article, ready for you to print and take to the kitchen!
How to Make Peanut Butter Cup Dump Cake
Step 1: Preheat and Prepare
Start by preheating your oven to 350°F (175°C).
While it warms up, grab a 9×13-inch baking dish and grease it with non-stick spray or a bit of butter.
This step is crucial; it ensures your cake won’t stick and makes for easy cleanup later.
Trust me, you’ll thank yourself when it’s time to serve this delicious dessert!
Step 2: Mix the Batter
In a large mixing bowl, combine the chocolate cake mix, creamy peanut butter, milk, melted butter, and vanilla extract.
Use a spatula or whisk to mix everything together until just combined.
Be careful not to overmix; a few lumps are perfectly fine.
This batter is the heart of your Peanut Butter Cup Dump Cake, so make sure it’s well-blended but not overworked!
Step 3: Pour and Spread
Once your batter is ready, pour it into the prepared baking dish.
Use a spatula to spread it evenly across the bottom.
This ensures that every bite of your cake has that rich chocolate flavor.
Don’t worry if it looks a bit rustic; it’s all part of the charm of a dump cake!
Step 4: Add Toppings
Now comes the fun part!
Sprinkle the semi-sweet chocolate chips and chopped mini peanut butter cups evenly over the batter.
This is where the magic happens, as these toppings will melt and create gooey pockets of deliciousness.
Feel free to be generous; after all, who doesn’t love extra chocolate and peanut butter?
Step 5: Bake
Place your baking dish in the preheated oven and let it bake for 30-35 minutes.
Keep an eye on it; you’ll know it’s done when the cake is set and a toothpick inserted in the center comes out clean.
The aroma wafting through your kitchen will be irresistible, so be prepared for some eager taste testers!
Step 6: Cool and Serve
Once baked, remove the cake from the oven and let it cool for about 10 minutes.
This cooling time allows the flavors to settle and makes it easier to cut.
If you want to add a touch of sweetness, dust the top with powdered sugar before serving.
Now, slice it up and enjoy the delightful layers of chocolate and peanut butter!

Tips for Success
- Make sure your ingredients are at room temperature for better mixing.
- Don’t skip greasing the baking dish; it’s key for easy removal.
- For a richer flavor, consider adding a layer of crushed graham crackers before the toppings.
- Keep an eye on the baking time; ovens can vary.
- Let the cake cool slightly before serving for the best texture.
Equipment Needed
- 9×13-inch baking dish: Essential for baking the cake. A glass or metal dish works well.
- Mixing bowl: A large bowl for combining ingredients. Any size will do, but bigger is better!
- Spatula or whisk: For mixing the batter smoothly. A sturdy spatula is my go-to.
- Measuring cups: To ensure accurate ingredient amounts. Use standard or liquid measuring cups as needed.
Variations
- Graham Cracker Layer: Add a layer of crushed graham crackers on top of the batter for a s’mores-inspired twist.
- Yellow Cake Mix: Swap the chocolate cake mix for a yellow cake mix for a lighter flavor profile.
- Nut Allergies: Use sun butter or almond butter instead of peanut butter for a nut-free option.
- Gluten-Free: Choose a gluten-free chocolate cake mix to make this dessert suitable for gluten-sensitive friends.
- Extra Crunch: Toss in some chopped nuts, like pecans or walnuts, for added texture and flavor.
Serving Suggestions
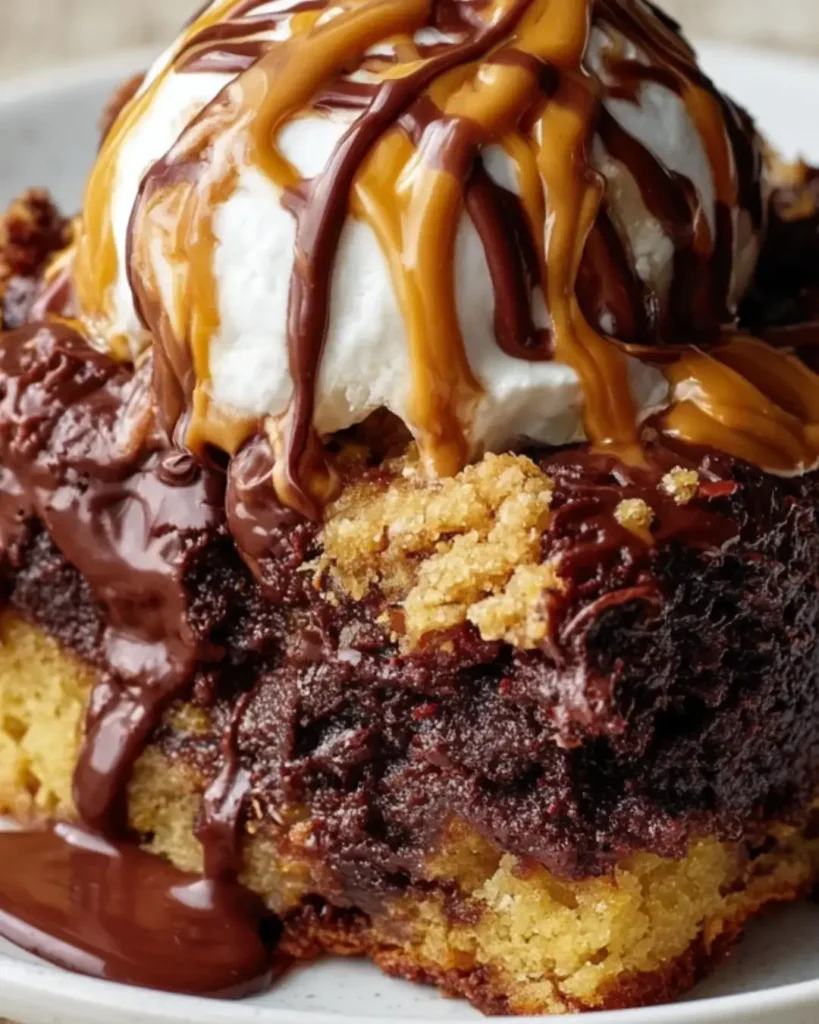
- Pair with a scoop of vanilla ice cream for a delightful contrast of temperatures.
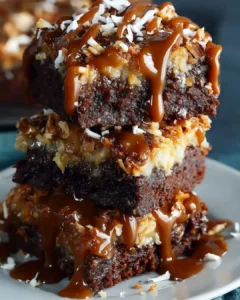
- Serve with a drizzle of chocolate or caramel sauce for extra indulgence.
- Top with whipped cream and a sprinkle of crushed peanuts for added texture.
- Enjoy with a cup of coffee or a glass of cold milk to balance the sweetness.
FAQs about Peanut Butter Cup Dump Cake
Can I make this Peanut Butter Cup Dump Cake ahead of time?
Absolutely! You can prepare the cake a day in advance. Just bake it, let it cool, and store it covered at room temperature. When you’re ready to serve, you can dust it with powdered sugar for that fresh touch.
What can I substitute for peanut butter?
If you have nut allergies or prefer a different flavor, you can use sun butter or almond butter. Both options will still give you that creamy texture and delicious taste.
How do I store leftovers?
Store any leftover Peanut Butter Cup Dump Cake in an airtight container at room temperature for up to three days. If you want to keep it longer, refrigerate it for up to a week.
Can I freeze this cake?
Yes! This cake freezes well. Just wrap it tightly in plastic wrap and then in aluminum foil. It can be frozen for up to three months. Thaw it in the fridge overnight before serving.
What’s the best way to serve this cake?
For the ultimate experience, serve warm with a scoop of vanilla ice cream on top. The melting ice cream combined with the warm cake creates a heavenly dessert that everyone will love!
Final Thoughts
Baking this Peanut Butter Cup Dump Cake is more than just a culinary task; it’s an experience filled with joy and nostalgia.
Each bite transports me back to simpler times, where chocolate and peanut butter were the ultimate indulgence.
The ease of preparation means I can whip it up on a whim, making it perfect for any occasion.
Whether it’s a family gathering or a cozy night in, this cake brings smiles and satisfied cravings.
So, roll up your sleeves, embrace the mess, and enjoy the sweet rewards of this delightful dessert!
PrintPeanut Butter Cup Dump Cake: A Decadent Treat Awaits!
- Total Time: 45-50 minutes
- Yield: 12 servings
- Diet: Vegetarian
Description
A delicious and easy-to-make Peanut Butter Cup Dump Cake that combines chocolate cake mix with creamy peanut butter and chocolate chips for a decadent dessert.
Ingredients
- 1 box chocolate cake mix (15.25 oz)
- 1 cup creamy peanut butter
- 1 cup milk
- 1 cup semi-sweet chocolate chips
- 1 cup mini peanut butter cups, chopped
- 1/2 cup unsalted butter, melted
- 1 teaspoon vanilla extract
- 1/2 cup powdered sugar (optional, for dusting)
Instructions
- Preheat your oven to 350°F (175°C). Grease a 9×13-inch baking dish with non-stick spray or butter.
- In a large mixing bowl, combine the chocolate cake mix, milk, melted butter, peanut butter, and vanilla extract. Stir until just combined; do not overmix.
- Pour the batter into the prepared baking dish, spreading it evenly.
- Sprinkle the chocolate chips and chopped mini peanut butter cups evenly over the batter.
- Bake in the preheated oven for 30-35 minutes, or until the cake is set and a toothpick inserted in the center comes out clean.
- Allow the cake to cool for about 10 minutes before serving. If desired, dust with powdered sugar before serving.
Notes
- For a richer flavor, add a layer of crushed graham crackers on top of the batter before adding the chocolate chips and peanut butter cups.
- Substitute the chocolate cake mix with a yellow cake mix for a different flavor profile.
- Prep Time: 10 minutes
- Cook Time: 30-35 minutes
- Category: Dessert
- Method: Baking
- Cuisine: American
Nutrition
- Serving Size: 1 slice
- Calories: 320
- Sugar: Net Carbs: 38g
- Fat: 15g
- Protein: 6g