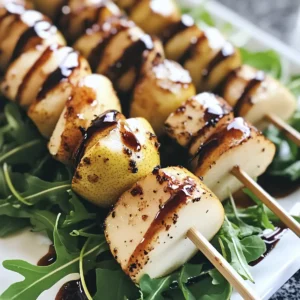
I can’t tell you how many times I’ve been in the kitchen, searching for a quick, impressive appetizer to share during gatherings. That’s when I discovered Pear and Brie Cheese Salad Skewers—an effortless yet elegant treat that never fails to wow my guests. This recipe marries the sweet juiciness of ripe pears with the creamy richness of brie, all while being wrapped in a refreshing blanket of arugula and finished with crunchy walnuts. Not only do these skewers come together in just 20 minutes, but they are also gluten-free and vegetarian, making them a crowd-pleaser for everyone. Whether you’re hosting a dinner party or just looking for a light snack, these tantalizing bites are bound to be the star of the show. So, are you ready to elevate your appetizer game? Let’s dive into this delicious recipe!
Why Make Pear & Brie Skewers?
Simplicity: These skewers come together in just 20 minutes, making them an ideal last-minute appetizer for any gathering.
Elegant Presentation: With their colorful layers of ingredients, these skewers are as beautiful as they are delicious, sure to impress your guests and elevate your hosting skills.
Versatile Flavor: The blend of sweet pears, creamy brie, and peppery arugula offers a deliciously balanced taste. Pair with a drizzle of balsamic glaze for an added flavor punch!
Crowd-Pleaser: Perfect for a variety of dietary preferences, these gluten-free and vegetarian bites cater to the needs of almost any guest, making them an inclusive choice.
If you love easy entertaining, check out our Cranberry Cream Cheese and Sweet Dessert Salad for more perfect party ideas!
Pear & Brie Cheese Salad Skewers Ingredients
For the Skewers
• Pears – Ideal varieties are Bosc or Bartlett; choose ripe but firm pears for sweetness and juiciness.
• Brie Cheese – Adds creaminess and richness; leave the rind intact for easier handling.
• Baby Arugula – Provides a delightful peppery flavor; substitute with baby spinach if desired.
• Raw Walnuts – Offers a crunchy texture and nutty flavor; feel free to use pecans or almonds as alternatives.
For the Drizzle
• Balsamic Glaze – Enhances flavors with its sweet acidity; balsamic vinegar can serve as a simple substitute.
Step‑by‑Step Instructions for Pear & Brie Cheese Salad Skewers
Step 1: Prepare the Pears
Begin by washing the pears thoroughly, then slice them into quarters. Remove the seeds and stems, slicing the quarters into half-inch cubes. Aim for uniform pieces to ensure a consistent presentation on the skewers. Set aside the prepared pear pieces on a plate or cutting board, ready to be combined with the brie and other ingredients.
Step 2: Cut the Brie Cheese
Next, take the creamy brie cheese and cut it into half-inch cubes, keeping the rind intact for easier handling. This will help ensure that the brie stays together when threading onto the skewers. Arrange the brie cubes next to the pear pieces, creating a colorful assembly line of ingredients for your Pear & Brie Cheese Salad Skewers.
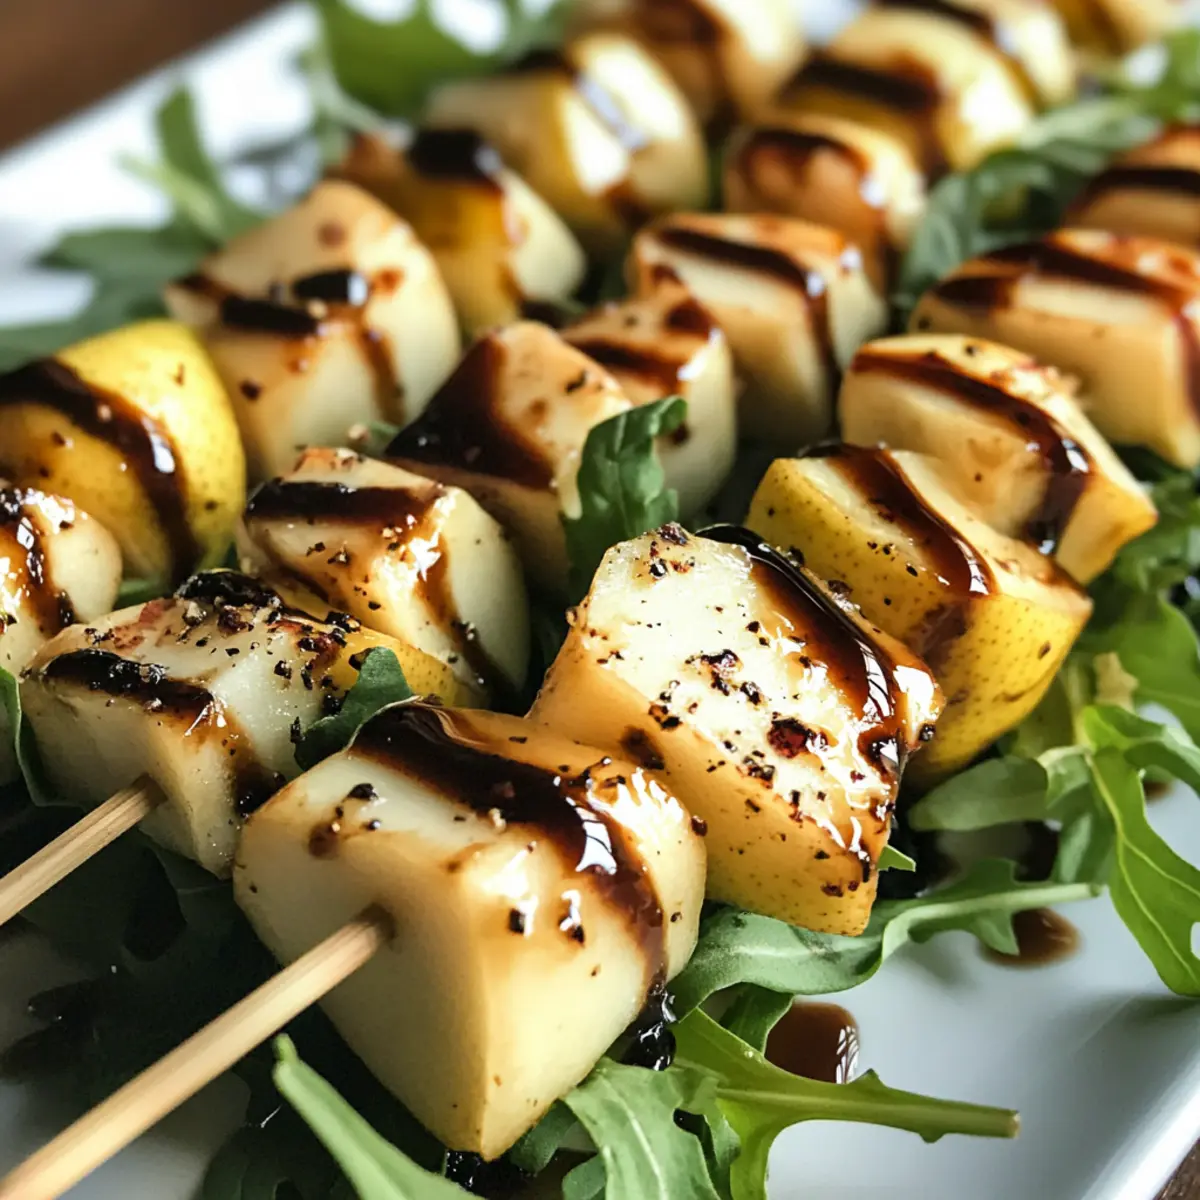
Step 3: Assemble the Skewers
Grab your 4-inch skewers and start assembling the Pear & Brie Cheese Salad Skewers by first threading on a piece of the pear. Follow with a small bundle of fresh arugula, letting the leaves slightly overlap for a charming effect. Finally, add a piece of the brie cheese to secure the layers together, creating a delightful visual appeal as you go.
Step 4: Adhere the Walnuts
To add a crunchy texture to your skewers, gently press chopped walnuts onto the brie cheese. This will help them adhere, providing a delightful bite with each mouthful. Take your time, ensuring that the walnuts stay in place while enhancing both flavor and appearance in your finished Pear & Brie Cheese Salad Skewers.
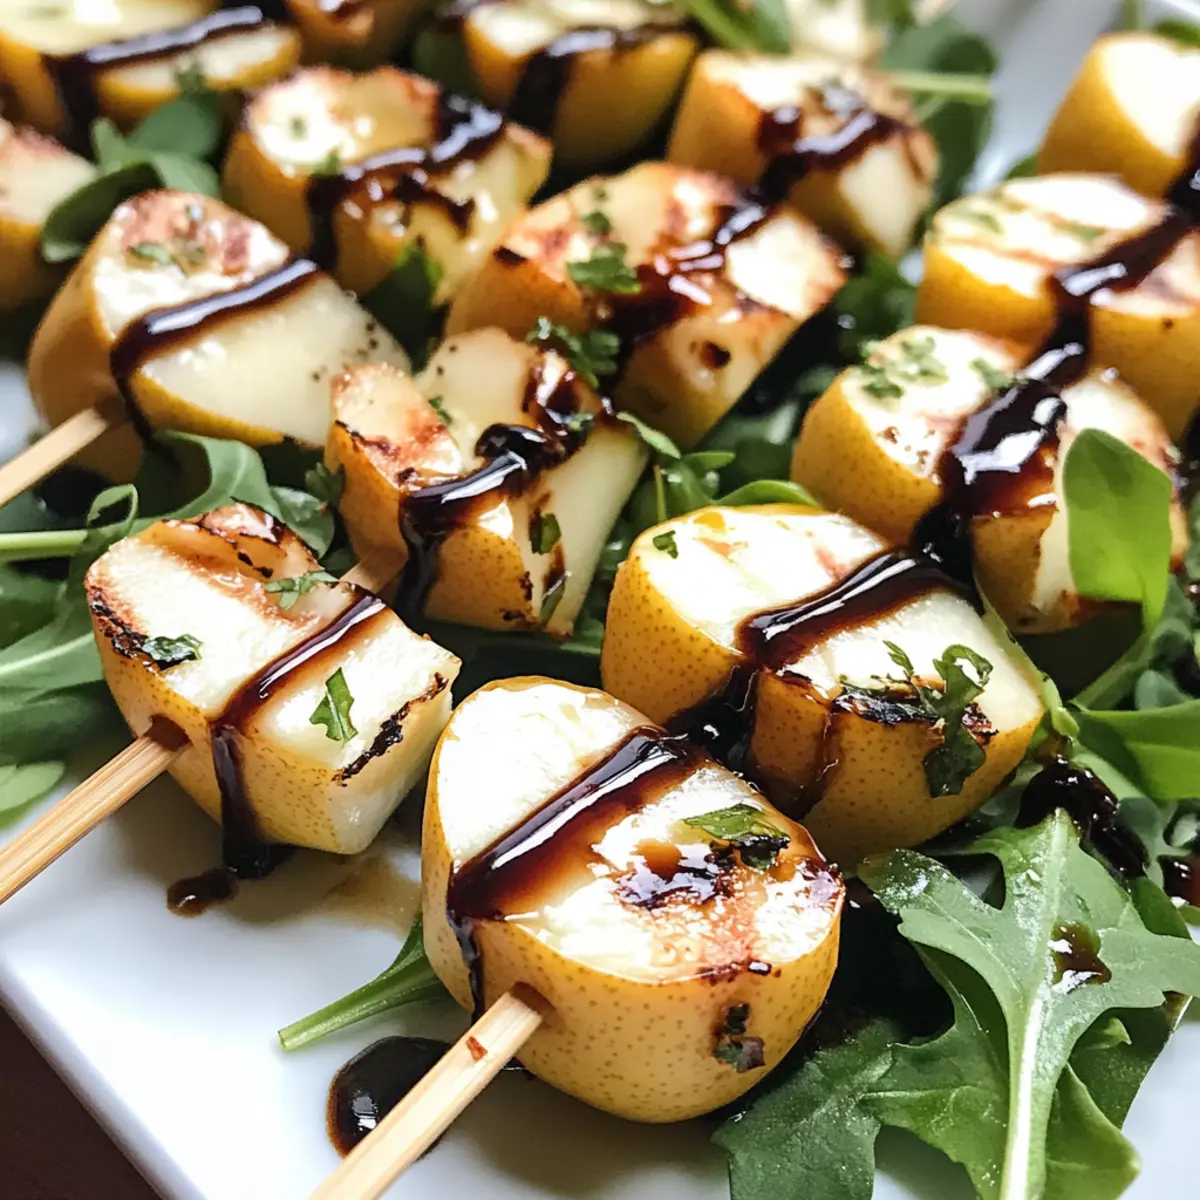
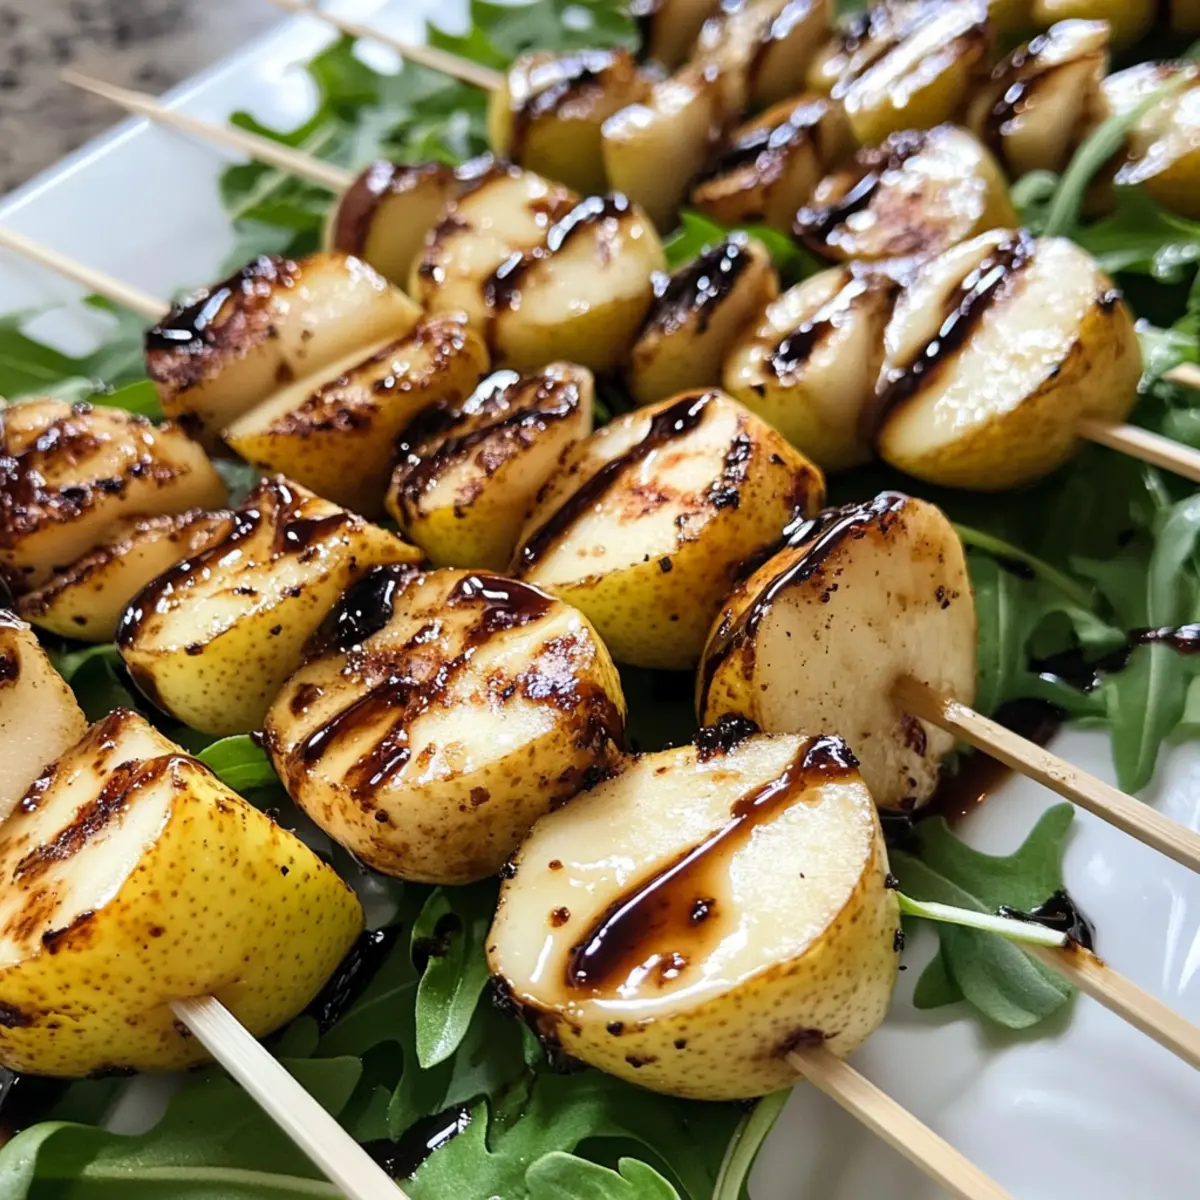
Step 5: Drizzle with Balsamic Glaze
Just before serving, take your balsamic glaze and drizzle it artfully over the assembled skewers. This final touch adds a zesty sweetness that beautifully complements the flavors of the pears, brie cheese, and walnuts. Serve immediately for the freshest taste and visual appeal, perfect for impressing your guests with these elegant appetizers.
What to Serve with Easy Pear and Brie Cheese Salad Skewers?
These delightful bites are just the beginning of a memorable meal, sparking joy and creativity in your entertaining.
-
Crispy Crostini: The crunchy texture of crostini offers a perfect partner, ideal for spreading with leftover brie or a dollop of balsamic glaze.
-
Mixed Green Salad: Tossed with a light vinaigrette, a fresh salad complements the richness of the skewers while adding bright, zesty flavors to the table.
-
Charcuterie Board: Pairing these skewers with a selection of cured meats, olives, and cheeses creates an abundant spread, pleasing both eyes and taste buds.
-
Roasted Vegetables: Serve alongside roasted seasonal vegetables drizzled with olive oil for a warm, earthy contrast to the cool, refreshing skewers.
-
Sparkling Water: A crisp, effervescent drink cleanses the palate beautifully after each savory bite, making it an excellent choice for gatherings.
-
White Wine: A glass of chilled Sauvignon Blanc or Pinot Grigio enhances the flavors of the skewers, perfectly balancing the sweetness of pears and creaminess of brie.
Pear & Brie Cheese Salad Skewers Variations
Feel free to personalize these skewers with delightful twists that bring new flavors and textures to your table!
-
Apple Swap: Replace pears with crisp apples for a refreshing crunch. Honeycrisp or Fuji work beautifully!
-
Cheese Change: Experiment with cheeses like goat cheese or camembert for a tangy twist. The creaminess will still shine through in every bite.
-
Nut Variety: Use pecans or almonds instead of walnuts to add different nutty flavors. Each nut offers its unique texture, making it easy to mix things up.
-
Herb Garnish: Fresh herbs like basil or mint will elevate the flavor profile. They add not only a fragrant aroma but also a touch of color to your skewers.
-
Heat It Up: Sprinkle a pinch of red pepper flakes or drizzle some sriracha over the assembled skewers for a delightful kick. This will balance the sweetness of the pears beautifully!
-
Fruit Fusion: Add additional fruit, such as grapes or figs, for even more complexity. Their sweet and juicy profiles work well with creamy cheeses and crunchy nuts.
-
Vegan Version: Swap brie with a vegan cheese alternative and use maple syrup instead of balsamic glaze for a delicious dairy-free option. Everyone can enjoy a tasty treat!
For more appetizer inspirations, check out our Chili Cream Cheese and the elegant Goat Cheese Stuffed dishes that are sure to impress.
How to Store and Freeze Pear & Brie Cheese Salad Skewers
Fridge: Store any leftover Pear & Brie Cheese Salad Skewers covered in an airtight container for up to 2 days. This helps maintain their freshness and prevents the pears from browning.
Make-Ahead: These skewers can be assembled up to 2 hours in advance. Keep them in the fridge until it’s time to serve, allowing flavors to meld without sacrificing quality.
Room Temperature: If serving at a gathering, these skewers can sit out for about 30 minutes before they need to be refrigerated again. Just be mindful of the freshness of the ingredients.
Freezer: For best results, do not freeze the assembled skewers, as the texture of pears and brie may be compromised. Instead, consider freezing individual components separately, such as cubed brie or walnuts, and assemble when desired.
Expert Tips for Pear & Brie Cheese Salad Skewers
-
Freshness Matters: Use ripe, firm pears for optimal sweetness. Avoid overripe pears, as they can become mushy on the skewers.
-
Assembly Technique: Thread the ingredients snugly but not too tightly to prevent squeezing out flavors. This ensures the Pear & Brie Cheese Salad Skewers stay aesthetically pleasing.
-
Prep Ahead: Assemble the skewers up to two hours in advance to prevent browning of the pears. Store covered in the fridge until you’re ready to serve.
-
Experiment with Cheese: For an exciting twist, try swapping brie with other cheeses like goat cheese or sharp cheddar. This can enhance the flavor profile of your Pear & Brie Cheese Salad Skewers.
-
Garnish Options: Add fresh herbs like basil or mint for additional aroma and a pop of color. It makes a lovely touch for presentation and taste.
Make Ahead Options
These Pear & Brie Cheese Salad Skewers are perfect for meal prep, allowing busy home cooks to save time without sacrificing flavor! You can prep the pear and brie cheese up to 24 hours in advance. Simply cut the pears and brie as directed, then store them in separate airtight containers in the refrigerator to maintain their freshness (this prevents browning). The baby arugula can also be washed and dried ahead of time; just keep it in a sealed container with a paper towel to absorb excess moisture. When you’re ready to serve, simply assemble the skewers by threading the prepared ingredients and adhere the walnuts, finishing with a drizzle of balsamic glaze to elevate the flavors. Enjoy restaurant-quality results with minimal effort!
Pear & Brie Cheese Salad Skewers Recipe FAQs
How do I choose ripe pears?
Absolutely! For the best flavor and texture, opt for Bosc or Bartlett pears that are ripe, but still firm to the touch. They should have a slightly fragrant aroma at the stem end without any dark spots. Avoid overly soft pears, as they can become mushy on the skewers.
How should I store leftover Pear & Brie Cheese Salad Skewers?
You can store any leftover skewers in an airtight container in the fridge for up to 2 days. Just be sure to cover them well to maintain freshness and keep those pears from browning. I often add a damp paper towel inside the container to help with moisture retention.
Can I freeze Pear & Brie Cheese Salad Skewers?
It’s best to avoid freezing the assembled skewers, as the texture of both pears and brie may suffer. Instead, consider freezing the individual components separately: cut brie can be wrapped tightly and frozen for up to 3 months, while walnuts can be frozen for the same duration. Just thaw before assembling!
What should I do if my arugula leaves are too big?
Very! If your arugula leaves seem large, I recommend folding them in half before threading them onto the skewers. This will make them easier to handle while still adding that lovely peppery flavor. Additionally, smaller bundles create a more delightful presentation.
Are there any dietary considerations for these skewers?
Absolutely! The Pear & Brie Cheese Salad Skewers are gluten-free and vegetarian, making them suitable for a variety of dietary preferences. However, if you have guests with nut allergies, feel free to omit the walnuts or substitute them with seeds like sunflower or pumpkin seeds for that extra crunch.

Easy Pear & Brie Cheese Salad Skewers for Effortless Entertaining
Ingredients
Equipment
Method
- Wash the pears thoroughly, slice them into quarters, remove seeds and stems, and cut into half-inch cubes.
- Cut the brie cheese into half-inch cubes, keeping the rind intact for easier handling.
- Assemble the skewers by threading on a piece of pear, a small bundle of arugula, and a cube of brie cheese.
- Gently press chopped walnuts onto the brie cheese to adhere.
- Drizzle balsamic glaze over the assembled skewers just before serving.