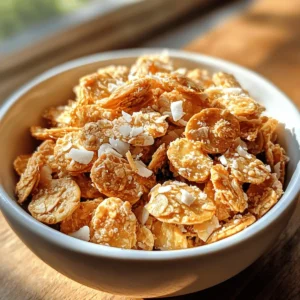
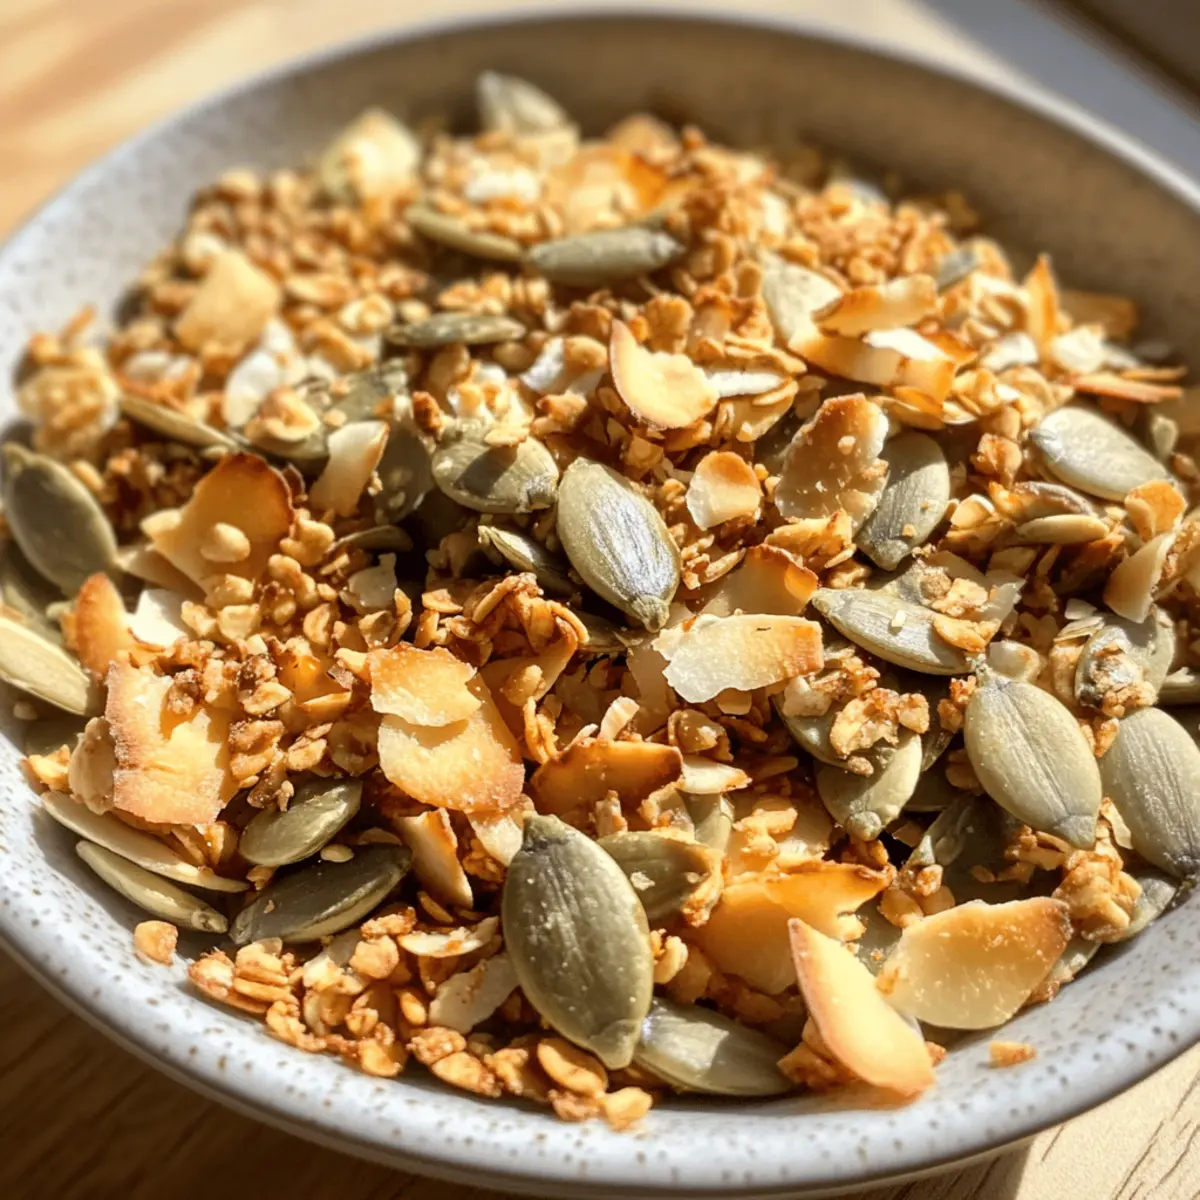
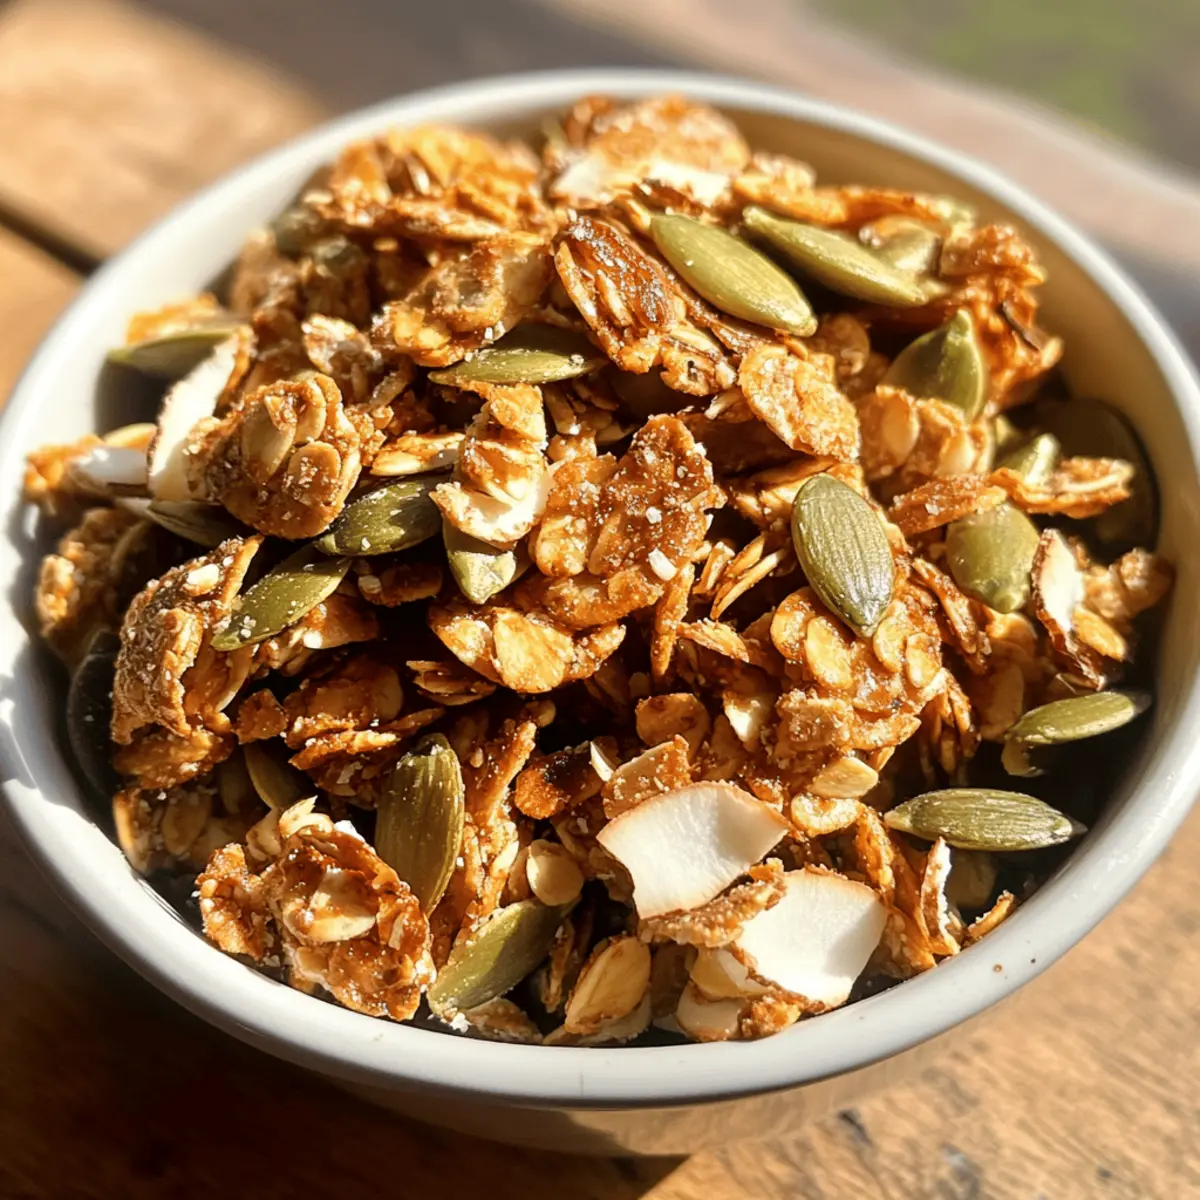
As the golden hues of autumn begin to fill the air, I can’t help but think of a satisfying crunch that captures the season’s warmth—enter my Crunchy Pumpkin Seed and Coconut Clusters! These delightful bites pair the nutty goodness of pumpkin seeds with the toasty sweetness of coconut, transforming snack time into a wholesome experience. Not only are they the perfect on-the-go energy booster, but they’re also a guilt-free option to satisfy your sweet tooth. Vegan, gluten-free, and low in histamine, these clusters are versatile enough to suit a variety of dietary preferences. Whether you’re enjoying them straight from the jar or as a topping on yogurt, these delightful morsels promise a delicious way to break free from fast food monotony. Are you ready to discover how to whip up these gorgeous, crunchy treats? Let’s dive in!
Why Are Pumpkin Seed and Coconut Clusters Irresistible?
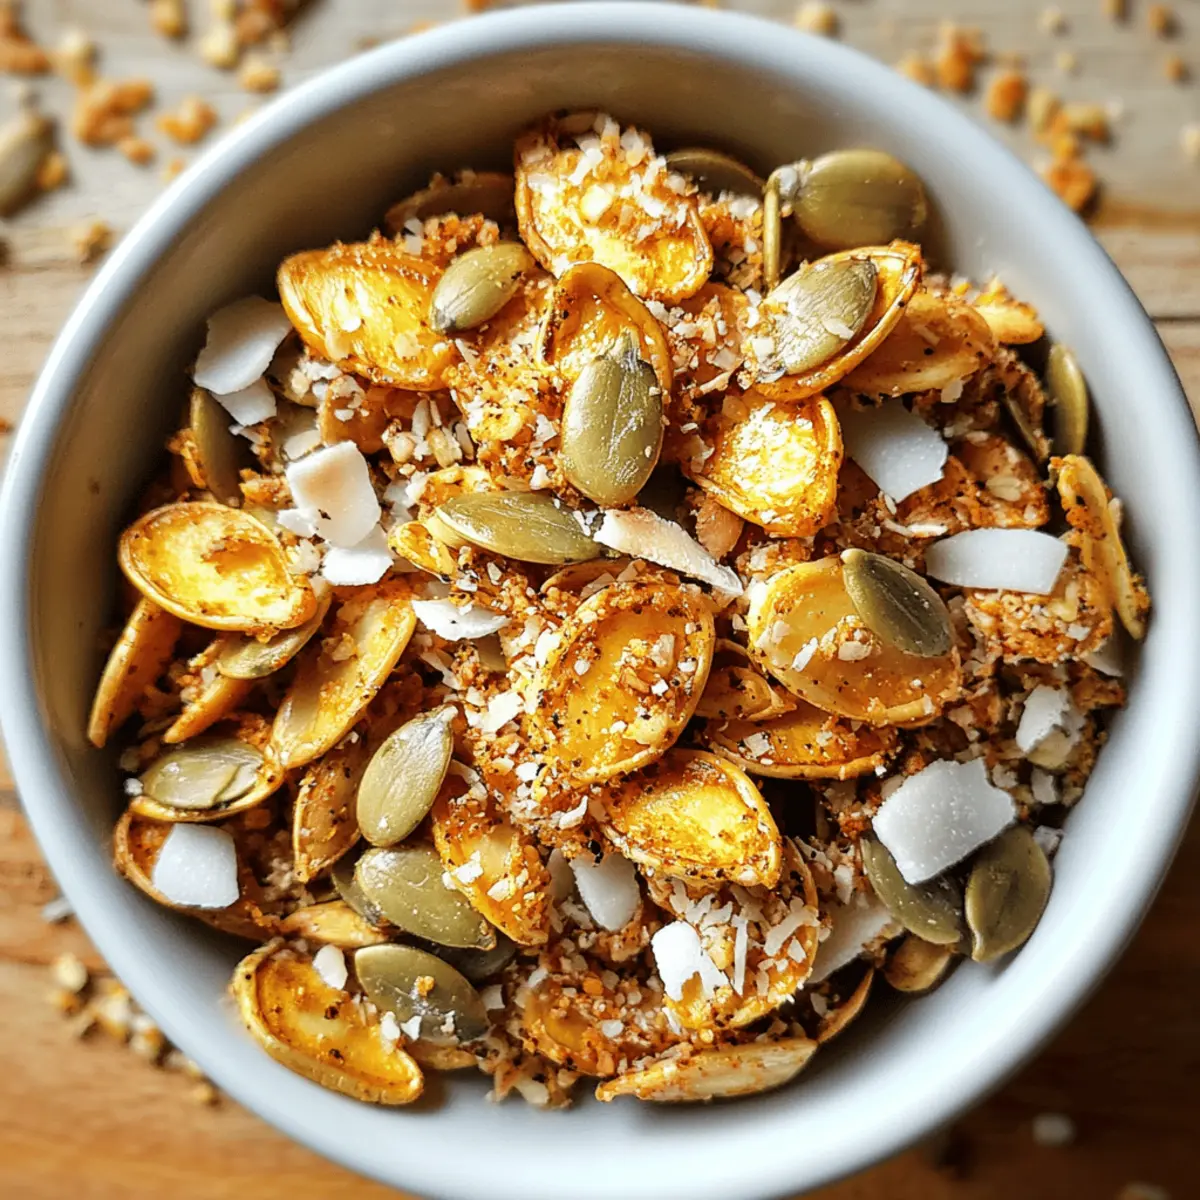
Crunchy Texture: Each bite offers a delightful crunch, perfect for satisfying those mid-afternoon cravings.
Wholesome Ingredients: Made with pumpkin seeds and coconut, they pack a nutritious punch without the guilt.
Vegan and Gluten-Free: These clusters fit seamlessly into a variety of diets, making them a fabulous snack for everyone.
Endless Variations: Add spices, nuts, or even a drizzle of chocolate to customize your own flavorful clusters! Try pairing them with a yogurt to relish the contrast of textures.
Easy to Make: With quick prep and simple ingredients, they come together effortlessly, keeping you away from fast food traps.
Perfect for Meal Prep: Make a big batch and store them for a week, ensuring you always have a healthy snack on hand!
Pumpkin Seed and Coconut Clusters Ingredients
For the Clusters
- Pumpkin Seeds (Pepitas) – These crunchy seeds are packed with nutrients; feel free to substitute with sunflower seeds for a nut-free version.
- Unsweetened Coconut Flakes – Adds delicious texture and natural sweetness; shredded coconut can be an alternative but may change the overall texture.
- Coconut Oil – Binds the ingredients together and infuses a lovely coconut flavor; olive oil works nicely if coconut isn’t your thing.
- Maple Syrup – Sweetens your clusters naturally, ensuring a delightful touch; date syrup is a great low-histamine substitute.
- Vanilla Extract – This enhances the overall flavor of the clusters, elevating your snack experience.
- Pinch of Salt – Balances the sweetness and intensifies the flavors in every bite.
Optional Add-Ins
- Ground Cinnamon – A ½ tsp adds a warm spice note; it perfectly complements the sweetness in your Pumpkin Seed and Coconut Clusters.
- Chia or Flax Seeds – Incorporating these before baking boosts nutrition and adds texture to your crunchy clusters.
Explore your culinary creativity as you whip up these delightful snacks—perfect for any time of the day!
Step‑by‑Step Instructions for Pumpkin Seed and Coconut Clusters
Step 1: Preheat the Oven
Begin by preheating your oven to 325°F (160°C). While the oven heats up, line a baking sheet with parchment paper to prepare for the Pumpkin Seed and Coconut Clusters. This easy, non-stick surface will make removing your crunchy treats a breeze later on.
Step 2: Melt the Mixture
In a small saucepan, combine coconut oil and maple syrup, then place it over low heat. Stir gently until the coconut oil melts completely and the mixture becomes smooth—this should take about 2-3 minutes. Remove from heat and mix in the vanilla extract and a pinch of salt, enhancing the flavor profile of your clusters.
Step 3: Combine Ingredients
In a large mixing bowl, add the pumpkin seeds and coconut flakes. Once your melted mixture has cooled slightly, pour it over the dry ingredients. Use a spatula to fold everything together gently, ensuring that each pumpkin seed and coconut flake is well-coated with the sweet mixture, forming the base for your clusters.
Step 4: Form the Clusters
Spoon the mixture onto the prepared baking sheet, forming small clusters about the size of a tablespoon. Make sure to leave some space between each cluster, allowing them to spread out while baking. This will ensure that your Pumpkin Seed and Coconut Clusters bake evenly and have a delightful crunch.
Step 5: Bake to Perfection
Place the baking sheet in your preheated oven and bake for 12-15 minutes. Halfway through the baking time, carefully stir the clusters to promote even cooking. They should turn a lovely golden brown and become fragrant—this is when you know they’re nearly ready!
Step 6: Cool and Break Apart
Once baked, remove the sheet from the oven and let the clusters cool completely on the pan. This cooling process is essential for achieving that perfect crunch. After about 30 minutes, break the clusters into bite-sized pieces and transfer them to an airtight container for storage. Enjoy your healthy snack anytime!
Storage Tips for Pumpkin Seed and Coconut Clusters
- Room Temperature: Store the clusters in an airtight container at room temperature for up to one week, keeping them crisp and fresh for satisfying snacks any time of day.
- Fridge: For longevity and added crunch, refrigerate the clusters in an airtight container for up to two weeks, ensuring they stay deliciously enjoyable.
- Freezer: If you want to store them for a longer period, freeze the clusters for up to two months. Allow them to thaw at room temperature before enjoying for a delightful healthy snack.
Expert Tips for Pumpkin Seed and Coconut Clusters
-
Even Clusters: Make sure to form uniform sizes when spooning the mixture onto the baking sheet to ensure evenly baked Pumpkin Seed and Coconut Clusters.
-
Sticky Situation: If the mixture is too sticky while forming clusters, wet your hands slightly to help shape them without sticking.
-
Watch the Oven: Keep an eye on the clusters during baking; they can turn from golden to burnt quickly if left unattended.
-
Full Cool Down: Allow the clusters to cool completely before breaking them apart to maximize their crunchiness—all the patience will pay off!
-
Flavor Boost: For an extra flavor kick, consider adding a sprinkle of sea salt or even chocolate chips once cooled for a delightful contrast.
-
Storage Tip: Store your clusters in an airtight container to maintain freshness. They can last up to a week or even longer if refrigerated!
Pumpkin Seed and Coconut Clusters Variations
Unleash your inner chef and have fun customizing these delicious clusters to match your cravings and dietary needs!
-
Cinnamon Spice: Stir in ½ teaspoon of ground cinnamon for a warm, comforting flavor. It beautifully enhances the sweetness of the clusters.
-
Nut-Free Crunch: Swap pumpkin seeds for sunflower or hemp seeds for a nut-free alternative, perfect for those with allergies. Enjoy the unique crunch they bring!
-
Chocolate Drizzle: After baking, drizzle melted dark chocolate over the clusters for a decadent twist. This adds a delightful richness that chocolate lovers will adore.
-
Savory Clusters: Skip sugar and olive oil with herbs like rosemary or thyme for a savory version. These clusters can be a perfect addition to a cheese platter!
-
Extra Protein: Add chia or flax seeds before baking for a nutritional boost. These tiny seeds pack a punch and an additional crunch!
-
Fruit Fusion: Incorporate dried fruits like cranberries or apricots for a touch of sweetness and chewiness. They add a pop of color and flavor to your clusters.
-
Spicy Kick: Mix in a pinch of cayenne pepper or chili powder for a bold twist. It’s a surprising way to wake up your taste buds!
-
Tropical Twist: Enhance the coconut flavor by adding crushed pineapple bits or toasted macadamia nuts. It’s like taking a bite of a tropical paradise!
These variations will keep your snack game exciting! If you’re looking for more ways to enjoy nutritious bites, consider making Double Chocolate Pumpkin or Panda Express Copycat options for different cravings. Enjoy experimenting!
What to Serve with Crunchy Pumpkin Seed and Coconut Clusters
These delicious, crunchy bites are perfect for elevating your snack game or adding pizzazz to your meals.
-
Fresh Fruit Salad: Pair with a colorful mix of berries and citrus for vibrant bursts of flavor and freshness that complement the sweetness of the clusters.
-
Creamy Yogurt: A dollop of Greek or coconut yogurt creates a lovely contrast, enhancing your clusters’ crunch while adding a velvety texture to each bite.
-
Nutty Granola: Serve alongside or atop your favorite granola for an extra crunchy layer, making for a wholesome breakfast or snack to fuel your day.
-
Homemade Smoothies: Blend your go-to fruits with spinach for a nutrient boost; sprinkle clusters on top for added texture and a crunchy finish.
-
Green Tea: Sip on steaming green tea for a calming, antioxidant-rich drink that balances the sweetness of the clusters beautifully.
-
Chocolate Drizzle: Drizzle some melted dark chocolate over your clusters post-baking for an indulgent twist—perfect for satisfying those sweet cravings in a healthy way.
-
Savory Hummus: Pair them with a basil or roasted red pepper hummus for a delightful contrast of flavors; the clusters add a satisfying crunch while the hummus is creamy and rich.
Make Ahead Options
These Crunchy Pumpkin Seed and Coconut Clusters are ideal for meal prep, ensuring you always have a wholesome snack ready when you need it! You can prepare the dry ingredients (pumpkin seeds, coconut flakes, and any optional add-ins) up to 3 days in advance, storing them in an airtight container at room temperature. When you’re ready to bake, simply melt the coconut oil and maple syrup, combine with the dry mix, and bake as directed. For the best quality, let the clusters cool completely before storing them to maintain that delightful crunch, and enjoy your delicious snacks anytime with minimal effort!
Pumpkin Seed and Coconut Clusters Recipe FAQs
Should I use fresh pumpkin seeds or can I use pre-packaged seeds?
Absolutely! Pre-packaged pumpkin seeds (also known as pepitas) are perfectly fine and often more convenient. Just make sure they’re raw or lightly salted if you’re looking to keep your clusters on the healthier side.
How should I store Pumpkin Seed and Coconut Clusters?
Store your clusters in an airtight container at room temperature for up to one week. If you want them to stay extra crunchy, keep them in the fridge for up to two weeks.
Can I freeze Pumpkin Seed and Coconut Clusters?
Yes, you can freeze the clusters! Place them in a single layer on a baking sheet in the freezer until solid, then transfer them to an airtight container or freezer bag. They’ll stay fresh for up to two months. When you’re ready to enjoy, just let them thaw at room temperature or pop them directly into your snack mix!
What if my clusters aren’t sticking together?
No worries! If your Pumpkin Seed and Coconut Clusters aren’t forming well, try adding a bit more melted coconut oil or maple syrup to the mixture—just a tablespoon should do. Ensure all ingredients are well-coated before baking, as this will help them bind together.
Are these clusters safe for allergies?
While the recipe is naturally vegan and gluten-free, you should always double-check ingredients for potential allergens. For nut allergies, stick with pumpkin seeds and consider sunflower seeds as a substitute. Always read the labels if you’re using pre-packaged ingredients to ensure safety.
What’s the best way to achieve extra crunchiness?
To get that perfect crunch in your Pumpkin Seed and Coconut Clusters, allow them to cool fully after baking. As they cool, they will harden more, enhancing their crunchiness. If you find them still a bit soft, you can pop them back in the oven for an additional 2-3 minutes, keeping a close eye to avoid burning.

Crispy Pumpkin Seed and Coconut Clusters for Guilt-Free Snacking
Ingredients
Equipment
Method
- Preheat your oven to 325°F (160°C) and line a baking sheet with parchment paper.
- In a small saucepan, melt coconut oil and maple syrup over low heat for 2-3 minutes. Mix in vanilla extract and a pinch of salt.
- In a large bowl, mix pumpkin seeds and coconut flakes. Pour the melted mixture over and fold gently.
- Spoon mixture onto the baking sheet to form small clusters, leaving space between each.
- Bake for 12-15 minutes, stirring halfway until golden brown.
- Allow to cool completely on the pan before breaking into bite-sized pieces.