Introduction to Red, White, and Blue Jello Cups
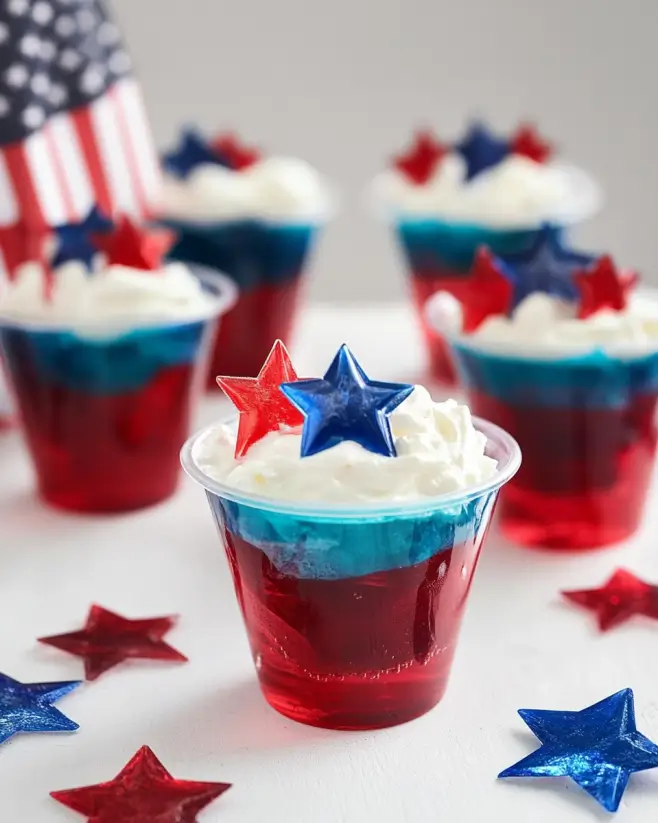
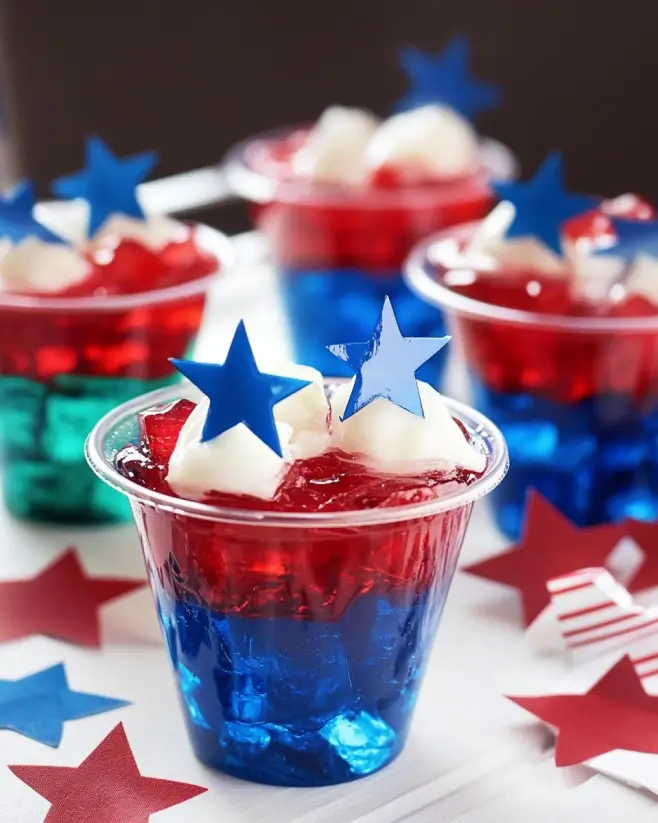
There’s something magical about a dessert that brings a splash of color to the table. Red, White, and Blue Jello Cups are not just a treat; they’re a celebration in a cup! Whether it’s a backyard barbecue, a holiday gathering, or just a fun family night, these vibrant layers of gelatin are sure to impress. They’re quick to whip up, making them a perfect solution for busy days when you want to create something special without spending hours in the kitchen. Plus, who doesn’t love a dessert that looks as good as it tastes?
Why You’ll Love This Red, White, and Blue Jello Cups
These Red, White, and Blue Jello Cups are a breeze to make, perfect for anyone, even if you’re not a kitchen whiz. They come together quickly, with minimal fuss, making them an ideal choice for last-minute gatherings. The taste? A delightful mix of fruity flavors that dance on your palate. Plus, they’re visually stunning, ensuring your dessert table steals the show. Who wouldn’t love that?
Ingredients for Red, White, and Blue Jello Cups
Gathering the right ingredients is the first step to creating these festive Red, White, and Blue Jello Cups. Here’s what you’ll need:
- Boiling water: This is essential for dissolving the gelatin, ensuring a smooth texture.
- Cold water: Helps to cool down the gelatin mixture, making it ready for layering.
- Red gelatin: Choose strawberry or cherry flavor for that vibrant red layer. It adds sweetness and a fruity kick.
- Blue gelatin: Opt for berry or blue raspberry flavor to create a striking blue layer that complements the red.
- Whipped cream: This forms the creamy white layer. You can use store-bought or whip up your own for a fresher taste.
- Blueberries: Fresh blueberries not only add a pop of color but also a burst of flavor.
- Sliced strawberries: These add a lovely touch and enhance the fruity theme of the dessert.
- Extra whipped cream for topping: A dollop on top makes each cup look inviting and adds a creamy finish.
For those looking to get creative, consider adding a splash of vanilla extract to the whipped cream for extra flavor. You can also swap out the fruit toppings for other berries like raspberries or blackberries, depending on your preference. Exact measurements for these ingredients can be found at the bottom of the article, ready for printing!
How to Make Red, White, and Blue Jello Cups
Creating these Red, White, and Blue Jello Cups is a fun and straightforward process. Follow these steps, and you’ll have a festive dessert that’s sure to impress!
Step 1: Prepare the Red Gelatin Layer
Start by boiling 1 cup of water. Once it’s bubbling, pour it into a mixing bowl with the red gelatin. Stir until it’s completely dissolved. This is where the magic begins! The vibrant red color will brighten your day. After it’s mixed, add 1 cup of cold water and stir again. This helps cool it down for the next step.
Step 2: Set the Red Layer
Now, grab your clear cups and pour the red gelatin mixture into each one, filling them about one-third full. It’s like painting a canvas! Place the cups in the refrigerator for about 2 hours. This allows the red layer to set perfectly. You want it firm enough to hold the next layer but still jiggly.
Step 3: Create the White Whipped Cream Layer
While the red layer is chilling, it’s time to whip up the white layer. Take 1 cup of whipped cream and mix it until smooth. This creamy layer adds a delightful contrast to the fruity gelatin. Once the red layer is set, spoon the whipped cream over it, filling the cups to about two-thirds full. Return them to the fridge for another hour to let the whipped cream firm up.
Step 4: Prepare the Blue Gelatin Layer
Next, it’s time for the blue layer! Just like before, boil another cup of water. Pour it over the blue gelatin in a mixing bowl and stir until dissolved. Add 1 cup of cold water, mixing well. This layer will be the crowning glory of your dessert!
Step 5: Set the Blue Layer
Carefully pour the blue gelatin over the white whipped cream layer in each cup, filling them to the top. This step requires a gentle hand to avoid mixing the layers. Once filled, pop them back into the refrigerator for at least 2 more hours. You want the blue layer to set completely, creating that stunning three-layer effect.
Step 6: Garnish and Serve
Finally, it’s time to make these cups look irresistible! Before serving, add a dollop of whipped cream on top of each cup. Then, garnish with fresh blueberries and sliced strawberries. This not only enhances the flavor but also adds a beautiful finish. Now, gather your friends and family, and enjoy your festive Red, White, and Blue Jello Cups!
Tips for Success
- Make sure to let each layer set completely before adding the next. Patience is key!
- Use clear cups to showcase the beautiful layers. It makes for a stunning presentation.
- For a fun twist, try flavored whipped cream by adding vanilla or a splash of almond extract.
- Keep the cups covered in the fridge to prevent them from absorbing any odors.
- Experiment with different fruit toppings for a unique flavor profile!
Equipment Needed
- Mixing bowls: Essential for combining your gelatin and whipped cream. Any size will do!
- Measuring cups: For accurate water measurements. A simple liquid measuring cup works perfectly.
- Clear cups: Ideal for showcasing your layers. You can also use small glass jars.
- Whisk or electric mixer: To whip the cream smoothly. A hand whisk can work too!
Variations
- Fruit Flavors: Experiment with different gelatin flavors like orange or lime for a unique twist.
- Dietary Adjustments: Use sugar-free gelatin for a lighter version that still packs a punch of flavor.
- Non-Dairy Option: Substitute whipped cream with coconut cream for a dairy-free alternative.
- Layered Parfaits: Instead of cups, layer the ingredients in a trifle dish for a stunning centerpiece.
- Colorful Sprinkles: Add red, white, and blue sprinkles on top for an extra festive touch!
Serving Suggestions
- Pair with Grilled Meats: These Jello Cups make a refreshing side to grilled chicken or burgers.
- Serve with Lemonade: A chilled glass of lemonade complements the fruity flavors perfectly.
- Presentation: Arrange cups on a festive platter with patriotic decorations for a stunning display.
- Chill Before Serving: Keep the cups in the fridge until just before serving for a refreshing treat.
FAQs about Red, White, and Blue Jello Cups
Can I make Red, White, and Blue Jello Cups ahead of time?
Absolutely! These festive Jello Cups can be made a day in advance. Just keep them covered in the refrigerator until you’re ready to serve. This makes them a perfect option for parties or gatherings.
What can I use instead of gelatin?
If you’re looking for a vegetarian option, try using agar-agar as a substitute for gelatin. It sets similarly and works well in this recipe, giving you that delightful layered effect.
How long do these Jello Cups last in the fridge?
These Red, White, and Blue Jello Cups can last up to 3-4 days in the refrigerator. Just make sure they are covered to keep them fresh and prevent any odors from seeping in.
Can I use different fruits for topping?
Definitely! While blueberries and strawberries are classic choices, feel free to mix it up. Raspberries, blackberries, or even diced peaches can add a fun twist to your dessert.
Is this recipe suitable for kids?
Yes! Kids love the colorful layers and fruity flavors. Plus, they can help with the layering process, making it a fun family activity. Just keep an eye on the boiling water!
Final Thoughts
Creating Red, White, and Blue Jello Cups is more than just making a dessert; it’s about crafting memories. Each layer tells a story, from the vibrant red to the creamy white and the bold blue. These cups are perfect for any celebration, bringing smiles and a sense of togetherness. Whether you’re enjoying them at a summer barbecue or a festive gathering, they add a touch of fun to the occasion. Plus, the joy of sharing something you made with your own hands is truly rewarding. So, gather your loved ones and dive into this colorful treat!
Red, White, and Blue Jello Cups: A Festive Treat to Try!
Ingredients
Method
- Dissolve the red gelatin in 1 cup of boiling water, stirring until completely dissolved. Add 1 cup of cold water and mix well.
- Pour the red gelatin mixture into clear cups, filling them about one-third full. Refrigerate for about 2 hours or until set.
- Prepare the white layer by mixing 1 cup of whipped cream until smooth. Spoon the whipped cream over the red gelatin layer in each cup, filling them to about two-thirds full. Return to the refrigerator for another hour to set.
- Dissolve the blue gelatin in 1 cup of boiling water, stirring until completely dissolved. Add 1 cup of cold water and mix well.
- Carefully pour the blue gelatin over the white whipped cream layer in each cup, filling them to the top. Refrigerate for at least 2 more hours or until fully set.
- Before serving, top each cup with a dollop of whipped cream and garnish with fresh blueberries and sliced strawberries.
Nutrition
Notes
- For a fun twist, use flavored whipped cream by adding a splash of vanilla extract or a few drops of food coloring.
- You can substitute the fruit toppings with other berries like raspberries or blackberries for a different flavor profile.