As I walked through the bustling farmer’s market, the air was rich with the aroma of freshly bloomed roses. It struck me then how these delicate blossoms could transform a simple dessert into something truly enchanting. Enter the Rose Poke Cake, a delightful fusion of moist cake soaked in a heavenly milky rose mixture and topped with dreamy whipped cream. This easy baking recipe not only allows you to whisk up a romantic dessert for any occasion, but its light and fluffy texture makes it a perfect sweet treat on an ordinary day. Whether you’re celebrating a loved one or simply indulging yourself, this rose-infused delight will elevate your dessert game. Ready to discover a way to add a floral twist to your baking repertoire? Let’s dive into this mouthwatering adventure!

Why is Rose Poke Cake So Special?
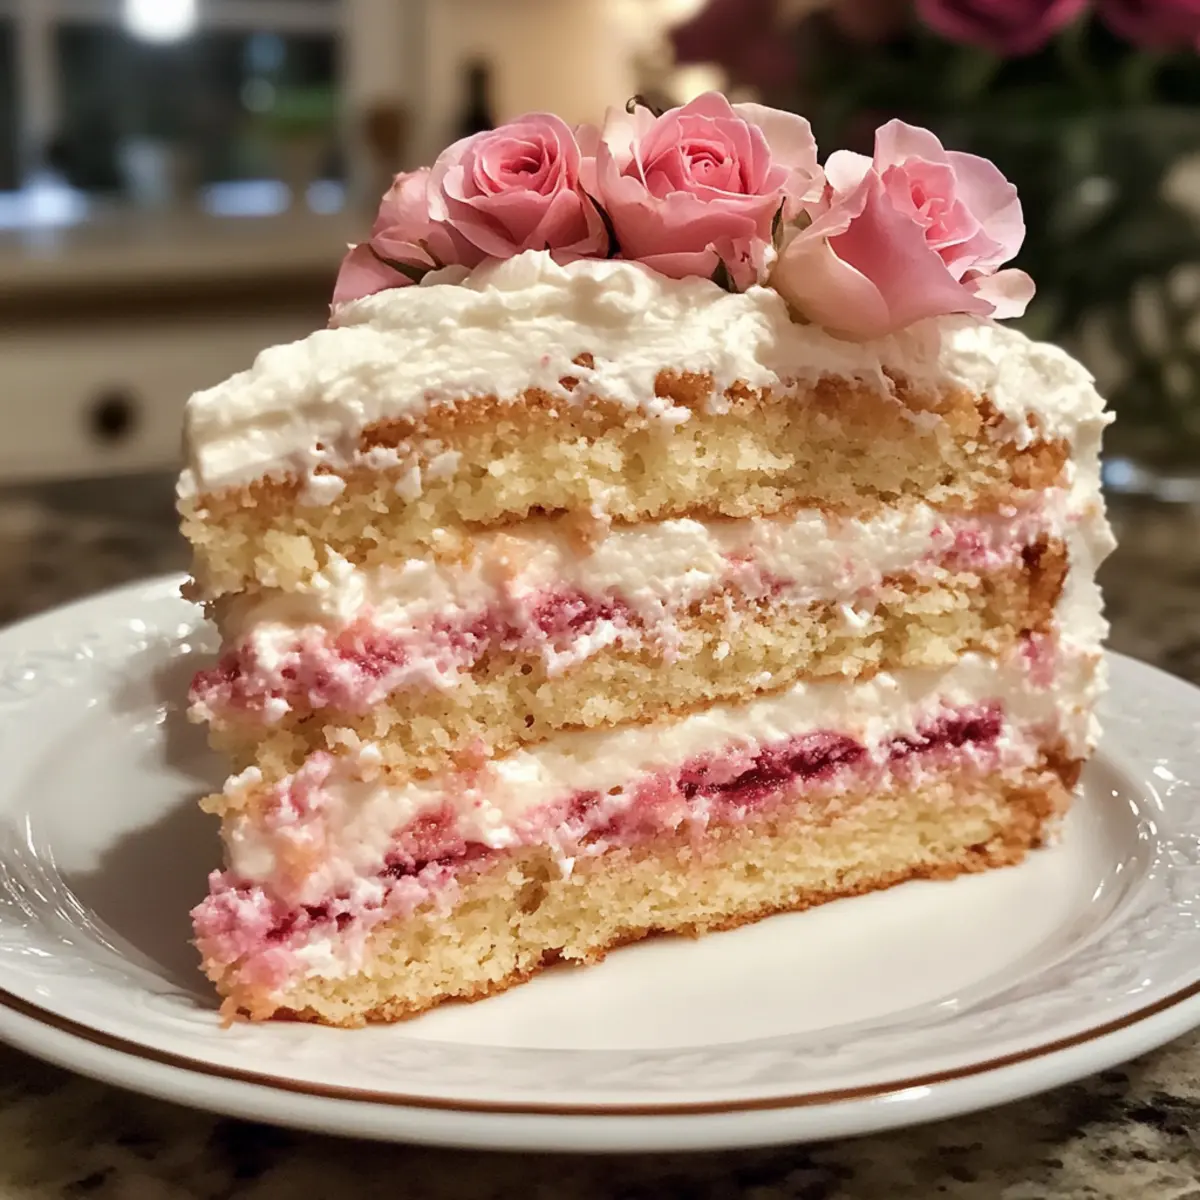
Irresistible Flavor: The enchanting rose flavor gives this poke cake an elegant twist, making it stand out among everyday desserts.
Moist and Fluffy: With the cake soaked in a heavenly milky rose mixture, each bite bursts with delightful moisture and an airy texture that’s simply divine.
Easy to Bake: This recipe is perfect for both novice and expert bakers, allowing you to create a showstopper without fuss.
Perfect for Any Occasion: From intimate dinners to grand celebrations, this cake is sure to be the star of your dessert table, pairing beautifully with tea or as a centerpiece.
Versatile Variations: Customize your cake; use lavender instead of rosewater for a unique twist or mix in cocoa for a different chocolate indulgence!
Once you try this Rose Poke Cake, anyone you share it with will eagerly await your next baking session. Why not also pair your floral-themed afternoon with a slice of Creme Brulee Cheesecake for a truly special treat?
Rose Poke Cake Ingredients
-
For the Cake
• Cake Flour – Structure and tenderness; ensure using good quality flour to achieve a light texture.
• Baking Powder – Leavening agent for rise; check expiration date for effectiveness.
• Unsalted Butter – Adds richness and moisture; can be substituted with margarine or coconut oil for a dairy-free option.
• Sugar – Sweetness and moisture retention; brown sugar can add a richer flavor.
• Vegetable Oil – Moisture and enhances texture; can substitute with canola oil or melted coconut oil.
• Eggs – Binding agent that provides structure; room temperature eggs incorporate better for a fluffier cake.
• Buttermilk – Moisture and tenderness; can use regular milk with vinegar or lemon juice as a substitute.
• Rosewater – Primary flavoring agent giving the cake its distinct taste; adjust to personal preference as too much can be overpowering.
• Pink Pitaya Powder (optional) – Color and slight flavor; substitute with pink food coloring if unavailable. -
For the Soaking Mixture
• Sweetened Condensed Milk – Adds creaminess and sweetness, used in the poke step; no suitable substitutes replicate the same result; can omit for a less sweet cake.
• Additional Rosewater – Enhances the floral flavor; add gradually to taste. -
For the Topping
• Heavy Whipping Cream – Main ingredient for the frosted topping; can substitute with whipped coconut cream for a dairy-free option.
• Powdered Sugar – Sweetness for the topping; adjust the amount based on desired sweetness level. -
For Garnishing
• Dried or Fresh Roses – Decorative garnish; optional but adds visual appeal when serving.
With these simple yet aromatic ingredients, you’ll create a Rose Poke Cake that’s not just dessert but a celebration of flavors, perfect for any special day!
Step‑by‑Step Instructions for Rose Poke Cake
Step 1: Preheat the Oven
Begin by preheating your oven to 350°F (180°C). While the oven warms up, take a 9×13 inch cake pan and grease it generously to prevent sticking. This is essential, as a well-prepared pan ensures your moist Rose Poke Cake comes out beautifully intact after baking.
Step 2: Prepare the Dry Ingredients
In a medium bowl, whisk together the cake flour and baking powder until well combined. This will aerate the flour and evenly distribute the leavening agent, crucial for achieving a light and fluffy texture in your cake. Set aside, allowing the dry mix to blend while you focus on the wet ingredients.
Step 3: Cream the Butter and Sugar
In a large mixing bowl, cream the softened unsalted butter, vegetable oil, and sugar together using an electric mixer on medium speed for about 3 minutes. You’ll know it’s ready when the mixture is light and fluffy, exhibiting a pale color. This step is vital as it adds air into the batter, enhancing the cake’s moistness!
Step 4: Incorporate the Eggs
Add the eggs one at a time to the butter mixture, mixing well after each addition. Be sure to scrape down the sides of the bowl to ensure even blending. This process helps create a smooth batter for your Rose Poke Cake, enhancing its structure and mouthfeel.
Step 5: Combine the Dry and Wet Mixtures
Gradually add half of the dry ingredients to the wet mix, gently folding with a spatula. Next, pour in the buttermilk and rosewater. Once combined, stir in the remaining dry ingredients until just smooth—be cautious not to overmix, as this can impact the tenderness of your cake.
Step 6: Bake the Cake
Pour the cake batter into your prepared pan and spread it evenly. Bake in the preheated oven for 30-35 minutes, or until a toothpick inserted in the center comes out clean. Keep an eye on it; you want a lightly golden top. The aroma of the baking Rose Poke Cake will fill your kitchen beautifully!
Step 7: Poke Holes in the Cake
Once the cake is baked, remove it from the oven and let it cool for about 10 minutes in the pan. Using the end of a wooden spoon, poke holes throughout the top of the cake, making sure to space them evenly. This step allows the milky rose mixture to seep into the cake, ensuring every bite is infused with flavor.
Step 8: Soak with Rose Mixture
In a separate bowl, mix together the sweetened condensed milk and additional rosewater. While the cake is still warm, pour this mixture evenly over the holes, allowing it to absorb into the cake. Let the cake cool completely; this soaking is key to creating the moist and delightful texture of the Rose Poke Cake.
Step 9: Prepare the Whipped Topping
Once the cake is fully cool, whip the heavy cream with powdered sugar and a splash of rosewater in a chilled bowl. Use an electric mixer on medium-high speed until stiff peaks form. This fluffy topping complements the cake perfectly, adding a light, airy finish to your Rose Poke Cake.
Step 10: Frost the Cake
Spread the whipped cream topping over the cooled cake using a spatula, creating a smooth and even layer. If desired, you can create elegant swirls for visual appeal. The fluffy cream beautifully contrasts the moist cake underneath, making each slice irresistible.
Step 11: Add Final Touches
For a touch of elegance, decorate the top of your frosted Rose Poke Cake with dried or fresh roses. This step is optional but adds a visually stunning element that’s perfect for impressing guests or loved ones. Now, refrigerate the cake until ready to serve, keeping the frosting fresh and delightful.
Step 12: Slice and Serve
When it’s time to serve, slice the cake into squares. The floral aroma will surely entice everyone around, inviting them to indulge. This Rose Poke Cake, with its unique flavor and appealing presentation, is the highlight of any sweet occasion!
Storage Tips for Rose Poke Cake
Fridge: Store your Rose Poke Cake covered in the refrigerator for up to 5 days to maintain its moisture and freshness. A cake dome or plastic wrap works well to prevent drying out.
Freezer: If you’d like to prepare it ahead of time, your unassembled cake can be frozen for up to 3 months. Ensure it’s tightly wrapped in plastic wrap and aluminum foil to avoid freezer burn.
Reheating: When ready to enjoy, thaw the cake in the fridge overnight on a serving plate. If needed, reheat individual slices in the microwave for a few seconds to restore some warmth and softness.
Frost Separately: For the best texture, frost the cake after thawing. Store the whipped cream topping separately in the fridge to keep it light and airy.
Make Ahead Options
These delicious Rose Poke Cakes are perfect for meal prep enthusiasts! You can bake the cake up to 3 days in advance, allowing it to cool completely before soaking it with the milky rose mixture. Once soaked, cover tightly with plastic wrap and refrigerate to keep it moist and flavorful until you are ready to serve. The whipped topping can be prepared up to 24 hours ahead; just store it in an airtight container in the fridge. When it’s time to delight your guests, simply spread the whipped cream topping over the cake and garnish with roses before serving. Enjoy impressive, homemade results with minimal last-minute effort!
Rose Poke Cake Variations & Substitutions
Feel free to get creative with this recipe and adjust it to suit your taste buds. Every twist adds a new layer of delightful surprise!
-
Lavender Alternative: Swap out rosewater with lavender extract for a fragrant twist that’s equally enchanting.
-
Cocoa Delight: For chocolate lovers, simply fold in 1/2 cup of cocoa powder to the batter for a rich, chocolatey version, topped with chocolate ganache instead of whipped cream!
-
Dairy-Free: Substitute heavy whipping cream with whipped coconut cream for a deliciously light and dairy-free topping. Perfect for those looking to keep it plant-based.
-
Enhanced Sweetness: If you crave more sweetness, opt for honey or agave syrup instead of sugar, perfect for creating an even more indulgent cake experience!
-
Colorful Twist: Add food coloring to the batter for a vibrant pop. A hint of pink will make your cake visually stunning for any celebration, inviting guests to take a slice.
-
Fruity Flavors: Incorporate 1 cup of diced strawberries or raspberries into the cake batter for an added fruity dimension that pairs beautifully with the floral notes.
-
Nutty Texture: For a delightful crunch, sprinkle a handful of chopped pistachios or almonds on top of the whipped cream. Their earthy flavor complements the rose perfectly.
-
Spicy Kick: For a touch of warmth, mix in a pinch of cardamom powder into the cake batter. Its unique flavor adds depth and pairs wonderfully with the rose essence.
And if you’re in the mood for more divine desserts, don’t forget to check out this indulgent Caramel Brownie Cheesecake or the fresh flavors in Strawberry Lemon Cake!
What to Serve with Moist and Fluffy Rose Poke Cake
Experience the enchantment of a full meal by pairing this delightful cake with the perfect accompaniments.
- Earl Grey Tea: A fragrant cup that complements the rose flavor beautifully, elevating the whole experience.
- Fresh Berry Salad: A medley of berries brings a refreshing zing and balances the sweetness of the cake.
- Vanilla Ice Cream: A creamy scoop melts into the cake, enhancing its moistness with indulgent creaminess.
- Lemon Sorbet: The tartness offers a bright contrast to the rose, cleansing the palate with each refreshing bite.
- Chocolate Dipped Strawberries: These add a touch of indulgent richness while echoing the romantic theme perfectly.
Imagine serving this lovely cake alongside a cup of beautifully steeped Earl Grey tea, the floral notes harmonizing perfectly. Each bite becomes a journey of flavors, creating a truly memorable dessert experience that your loved ones will cherish.
Expert Tips for Rose Poke Cake
-
Room Temperature Ingredients: Ensure all cold ingredients, like butter and eggs, are at room temperature for better mixing and fluffiness in your Rose Poke Cake.
-
Soak While Warm: Pour the sweetened condensed milk mixture over the cake while it’s still warm. This allows for optimal absorption, ensuring every bite is deliciously moist.
-
Avoid Overmixing: Be careful not to overmix your batter once the wet and dry ingredients are combined; stop mixing when fully incorporated to keep the cake tender and light.
-
Chill for Freshness: Chill the assembled cake until serving time to maintain the whipped cream topping’s freshness and delicious texture.
-
Decorate Thoughtfully: If using dried or fresh roses for garnish, ensure they are food-safe and wash them thoroughly before decorating to enhance visual appeal.

Rose Poke Cake Recipe FAQs
How do I choose ripe ingredients for the Rose Poke Cake?
Absolutely! For the best flavor, select fresh, high-quality ingredients. Eggs should be free-range and at room temperature for better incorporation, while the unsalted butter should be softened but not melted. When using buttermilk, look for a brand with a recent expiration date for optimal freshness.
What is the best way to store the Rose Poke Cake?
You can store your Rose Poke Cake in the refrigerator, covered tightly, for up to 5 days. I recommend using a cake dome or wrapping it with plastic wrap to keep it moist and prevent it from drying out. For added flavor, consider adding a hint of rosewater to the storage wrap to maintain that lovely aroma.
Can I freeze the Rose Poke Cake?
Yes! To freeze your Rose Poke Cake, allow it to cool completely and then place it unassembled in an airtight container or wrap it tightly in plastic wrap and aluminum foil. It can be frozen for up to 3 months. When ready to enjoy, thaw it overnight in the refrigerator. Once thawed, frost it with whipped cream for the best texture.
What should I do if my cake is too dry?
If you find your Rose Poke Cake is too dry, there are a few tricks to rescue it. First, make sure you precisely follow the instructions about poking holes and soaking with the rose mixture. If the cake is baked and still dry, you can brush warm milk or a mix of water with rosewater on the surface to enhance moisture. It may not be perfect, but it will be more enjoyable.
Are there any dietary considerations for the Rose Poke Cake?
Very! If you are accommodating allergies, consider using allergy-friendly substitutes. For gluten-free options, using a gluten-free cake flour blend can work well. For a dairy-free version, replace unsalted butter with coconut oil and opt for a non-dairy alternative for buttermilk. Always check labels when you’re unsure, especially for rosewater, as some brands may contain additives.
Can I use fresh roses as a garnish?
Yes! If you’re using fresh roses as a garnish, ensure they are food-safe and have not been treated with pesticides. Rinse them thoroughly under cold water, and remove the stems and excess foliage before placing them on your cake. This adds a beautiful touch and elegance to your dessert presentation!

Irresistibly Moist Rose Poke Cake for Romantic Desserts
Ingredients
Equipment
Method
- Preheat your oven to 350°F (180°C) and grease a 9x13 inch cake pan.
- In a medium bowl, whisk the cake flour and baking powder until combined and set aside.
- In a large mixing bowl, cream the unsalted butter, vegetable oil, and sugar on medium speed for about 3 minutes until light and fluffy.
- Add eggs one at a time to the butter mixture, mixing well after each addition.
- Gradually add half of the dry ingredients, then buttermilk and rosewater. Stir in remaining dry ingredients until smooth.
- Pour batter into the prepared pan and bake for 30-35 minutes, or until a toothpick comes out clean.
- Let cake cool for about 10 minutes, then poke holes throughout the top with a wooden spoon.
- Mix sweetened condensed milk and additional rosewater, then pour over the warm cake.
- Allow the cake to cool completely to absorb the mixture.
- In a chilled bowl, whip the heavy cream with powdered sugar and a splash of rosewater until stiff peaks form.
- Spread the whipped cream topping over the cooled cake evenly.
- Decorate with dried or fresh roses, if desired, and refrigerate until serving.
- Slice the cake into squares and serve.