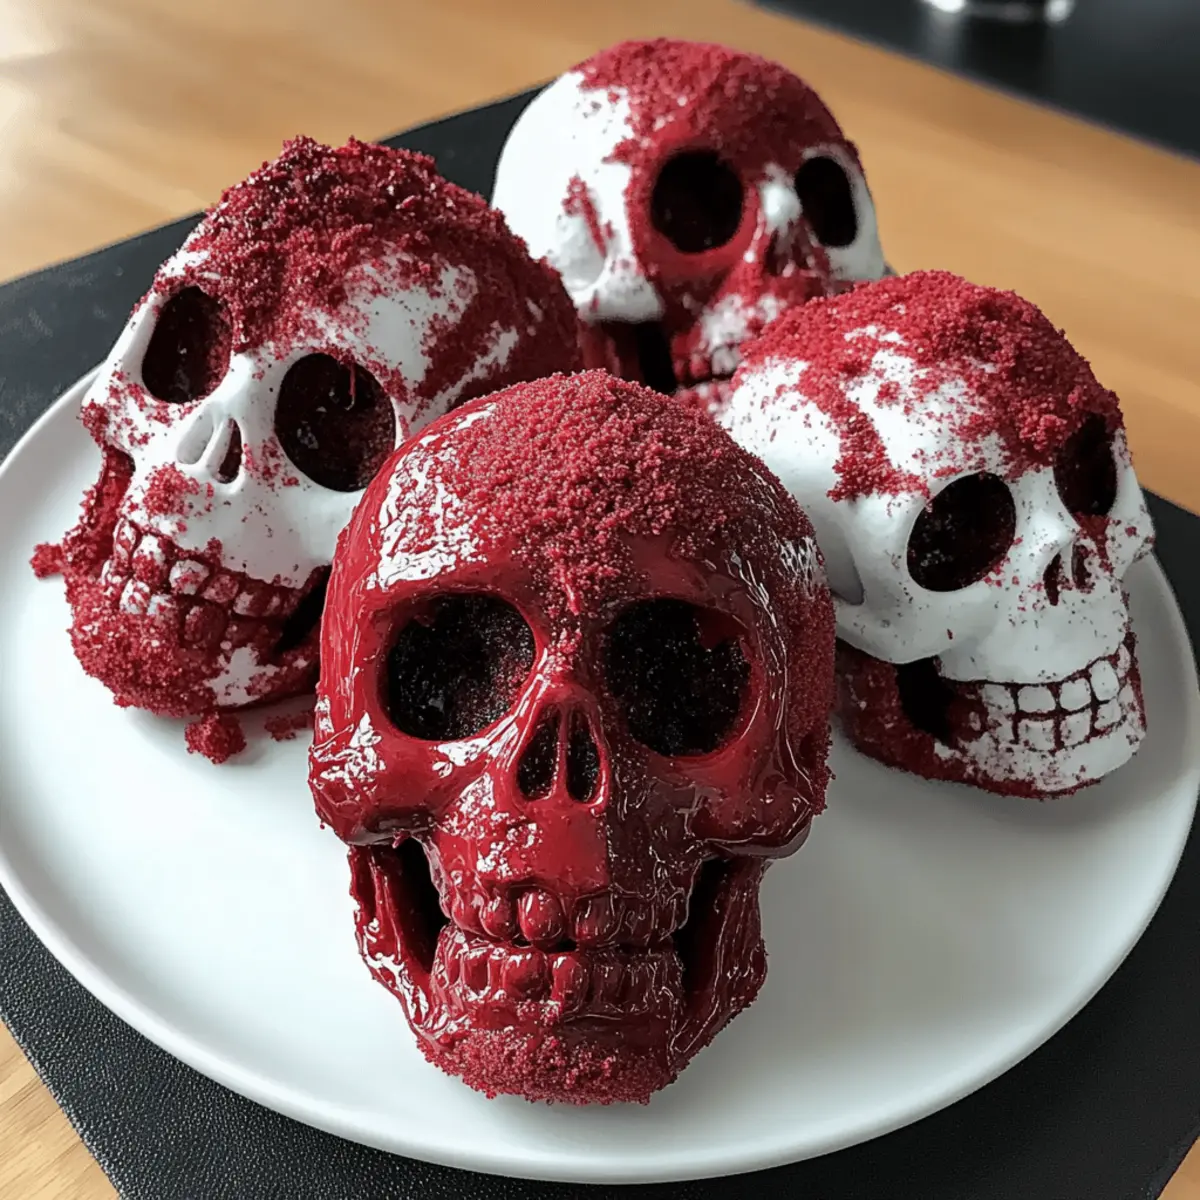
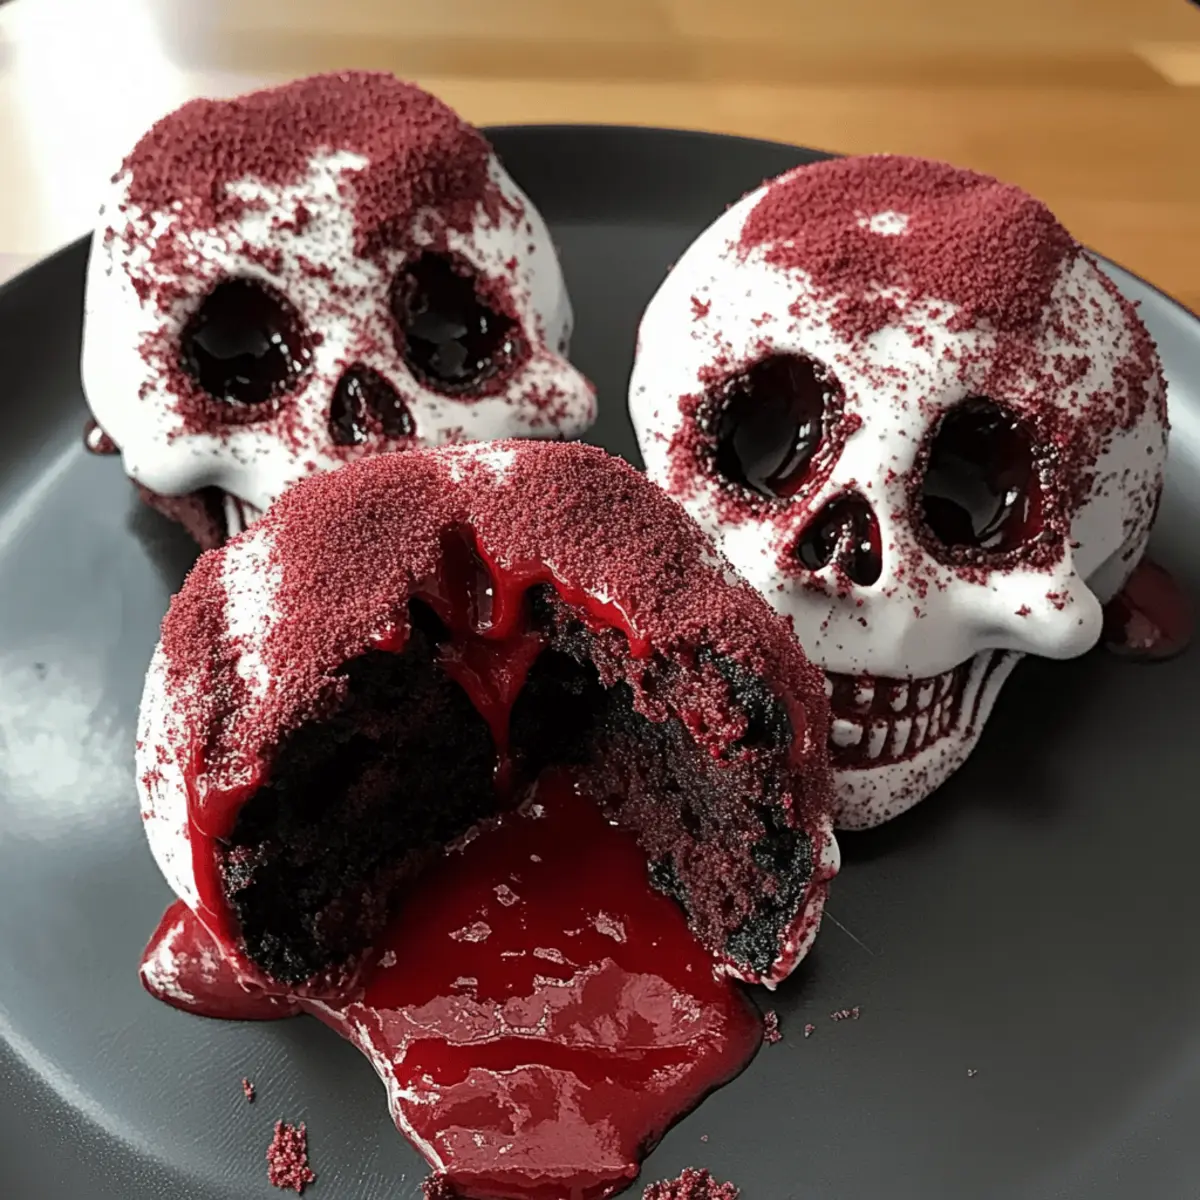
As I sifted through my pantry in search of inspiration for Halloween, I stumbled upon a delightful twist on the traditional dessert: the Skull Lava Cake. This spooky treat marries rich molten chocolate and vibrant red velvet in a mini skull mold, making it the ultimate showstopper for your fall gatherings. And the best part? It’s not only visually striking but also incredibly easy to whip up with just a few pantry staples. This recipe is a crowd-pleaser that will leave your guests raving, and the molten center adds a fun, interactive experience that’s perfect for kids and adults alike. Are you ready to bring some eerie elegance to the dessert table this season? Let’s dive into making these irresistible Skull Lava Cakes that are sure to enchant everyone!
Why is the Skull Lava Cake so special?
Decadent Experience: Each bite delivers a rich and luxurious blend of molten chocolate and luscious red velvet, ensuring a delightful dessert experience.
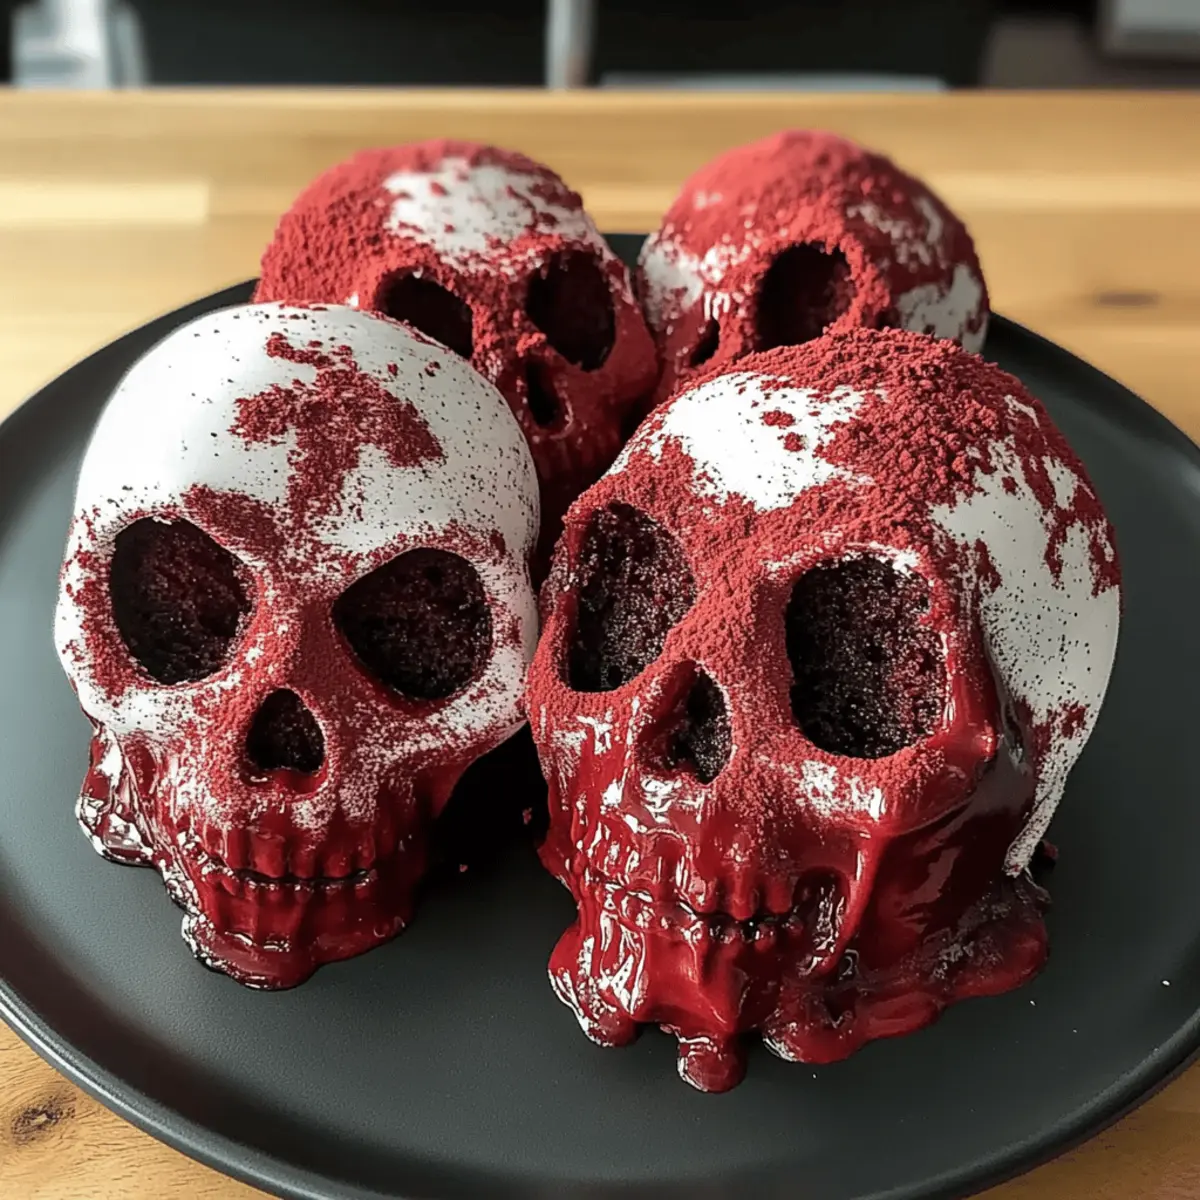
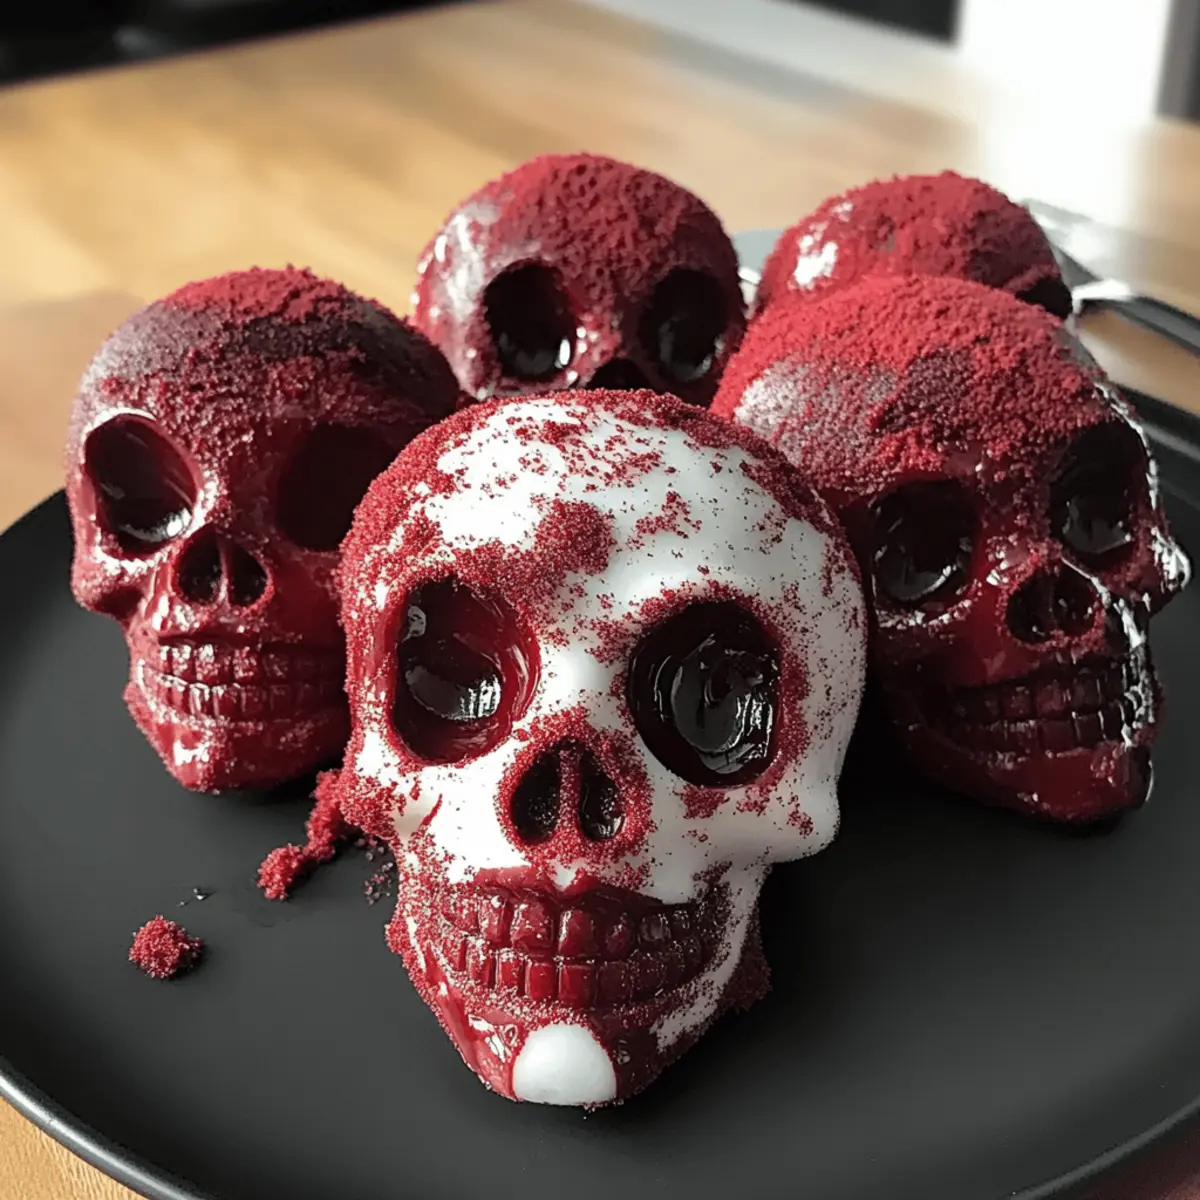
Visually Stunning: The dramatic skull shape makes these cakes a spooky centerpiece that steals the show at any Halloween gathering, sure to impress your guests.
Easy to Customize: With options to include edible glitter or substitute flavors, you can create a unique version of this cake that suits your taste. For something truly festive, consider pairing it with Bloody Red Velvet Popcorn for a complete Halloween spread!
Quick and Simple: With just a handful of ingredients and straightforward steps, this recipe is ideal for both beginner bakers and seasoned chefs looking for a last-minute showstopper.
Interactive Fun: The molten center creates an element of surprise, allowing you to impress both kids and adults as they cut into their cakes and watch the chocolate ooze out.
Indulge in a dessert that’s not only delicious but also creates unforgettable memories this Halloween!
Skull Lava Cake Ingredients
• Prepare to get baking with these simple essentials for your Skull Lava Cake!
For the Cake Batter
- Butter – Provides richness and moisture; use unsalted butter for better control over saltiness.
- Chocolate – Essential for a deep, rich flavor; choose high-quality semisweet chocolate for the best results.
- Eggs – Provides structure and moisture, crucial for achieving that soft, molten center.
- Sugar – Sweetens and aids in creating a tender cake texture; you can opt for light or brown sugar.
- Vanilla Extract – Enhances flavor; use pure extract for a more robust taste.
- Cocoa Powder – Adds the chocolate flavor; dark cocoa can deepen the color, but may alter the taste slightly.
- Food Coloring (optional) – For a more vibrant red hue; gel food coloring works best.
- Flour – Provides structure; all-purpose flour is recommended—avoid overmixing to maintain tenderness.
For the Red Velvet Glaze
- Glaze Ingredients – Designed to add a glossy finish and contrast to the cake’s color, ensuring that your Skull Lava Cake is as visually striking as it is delicious!
Get ready to impress your guests with these delicious Skull Lava Cakes that combine haunting appearance with mouthwatering flavor!
Step‑by‑Step Instructions for Skull Lava Cake
Step 1: Preheat and Prepare the Pan
Begin by preheating your oven to 425°F (218°C). While the oven heats, prepare your skull cake pan by generously greasing it with unsalted butter and dusting it lightly with flour. This will ensure that your Skull Lava Cakes release easily after baking, maintaining their spooky shape.
Step 2: Melt the Chocolate and Butter
In a heatproof bowl, combine the unsalted butter and high-quality semisweet chocolate, then melt them together using a double boiler or in the microwave in 30-second intervals. Stir gently until the mixture is smooth and glossy, allowing it to cool slightly before moving on to the next step.
Step 3: Whisk the Eggs and Sugar
In a separate bowl, vigorously whisk together the eggs and sugar until the mixture becomes pale and thick, about 3-4 minutes. This process incorporates air, helping your cakes achieve that delightful lightness. Add the vanilla extract, cocoa powder, and food coloring if desired, mixing until fully combined.
Step 4: Combine Mixtures
Gently fold the melted chocolate and butter mixture into the egg mixture. Be careful not to deflate the airy texture you’ve created. Once combined, sift in the all-purpose flour and fold until just mixed—this will help keep your Skull Lava Cake’s texture light and tender.
Step 5: Fill the Molds
Spoon the batter into each skull mold, filling them about three-quarters full. Use a spatula to smooth the tops for a nice, even finish. This will not only help with the appearance of your Skull Lava Cake but also allow for even baking as they rise in the oven.
Step 6: Bake to Perfection
Place the filled mold in the preheated oven and bake for 11-13 minutes. The edges should be set, while the centers will remain soft and slightly jiggly—this is key for that molten interior in your Skull Lava Cakes. Keep an eye on them to avoid overbaking.
Step 7: Cool and Unmold
Once baked, remove your Skull Lava Cakes from the oven and let them cool in the pan for about 5 minutes. This resting time is crucial for the cakes to firm up slightly. Carefully invert the pan onto a wire rack to unmold, and allow the cakes to cool completely before glazing.
Step 8: Drizzle with the Glaze
To prepare your red velvet glaze, whisk together the glaze ingredients in a bowl until smooth. Drizzle it generously over each unmolded Skull Lava Cake, letting it pool elegantly in the crevices to enhance the spooky design. This final touch will elevate your Halloween dessert from tasty to truly enchanting!
Skull Lava Cake Variations & Substitutions
Feel free to unleash your creativity and make this Skull Lava Cake truly yours with these delightful twists!
-
Gluten-Free: Substitute all-purpose flour with a gluten-free blend for those with dietary restrictions. It maintains the moist and gooey texture beautifully.
-
Dairy-Free: Use coconut oil and dairy-free chocolate to make this dessert accessible for lactose-sensitive guests. The rich flavors remain intact, ensuring no one misses out on the fun!
-
Flavor Twists: Experiment with flavored extracts like almond or orange instead of vanilla for a unique flavor profile. The aroma will entice your guests even before they take a bite!
-
Nutty Addition: Fold in some finely chopped nuts, like walnuts or pecans, for a delightful crunch that contrasts with the soft molten center. It adds a textural surprise that enhances the overall dessert experience.
-
Fruity Surprise: Insert a dollop of raspberry or cherry jam in the center before baking for an exciting fruity explosion when you cut into the cake. It’s a delicious surprise that pairs perfectly with the red velvet.
-
Extra Mojo: Top with a dollop of whipped cream or a scoop of vanilla ice cream for a creamy accompaniment that balances the richness of the cake. You can even drizzle some Caramel Brownie Cheesecake sauce over the top for an indulgent finish!
-
Vegan Delight: For a completely plant-based version, swap eggs with flax eggs and use dairy-free chocolate. This way, everyone can join in the Halloween festivities with a delicious treat!
-
Spicy Kick: Add a hint of cayenne or chili powder to the chocolate mixture to give your cakes a surprising heat. Your guests will love the twist that tantalizes their taste buds!
These adaptations can help you cater to different dietary needs or simply inspire you to explore new flavor combinations. Enjoy the spooky baking experience!
Make Ahead Options
These Skull Lava Cakes are perfect for making ahead of time, making them a superb option for busy home cooks! You can prepare the batter up to 24 hours in advance; simply store it tightly covered in the refrigerator to keep it fresh. Additionally, after baking, allow the cakes to cool completely and then wrap them tightly in plastic wrap before refrigerating for up to 3 days. To maintain their molten center and delicious quality, do not bake them until right before serving. When you’re ready to impress your guests, bake the chilled molds directly from the refrigerator, adding an extra 1-2 minutes to the baking time. You’ll have a stunning dessert with minimal effort!
What to Serve with Skull Lava Cake
Bring your spooky celebration to life by pairing these delightful treats with complementary dishes that enhance the Halloween spirit and flavors.
-
Creamy Vanilla Ice Cream: The cool, creamy texture of vanilla ice cream beautifully contrasts the warm, molten center of the Skull Lava Cake, creating a heavenly experience.
-
Bloody Red Velvet Popcorn: This whimsical and crunchy popcorn will add a festive touch, making it a perfect, thematic snack that ties in nicely with your red velvet cake.
-
Poison Apple Cocktails: A fun, Halloween-inspired drink; the tartness balances out the sweetness of the lava cake, all while looking delightfully eerie!
-
Gothic Chocolate Mousse: Rich and velvety, it complements the chocolate notes of the lava cake while offering a different texture and depth against the skull’s dramatic design.
-
Spiced Pumpkin Soup: Start your meal with a warm, comforting bowl of pumpkin soup to set the Halloween mood before diving into the decadent dessert.
-
Creepy Custard Eyeballs: These spooky treats will certainly amuse your guests, providing a fun visual element that relates to the delightful theme of your dessert.
-
Harvest Salad with Pomegranate: A refreshing, vibrant salad adds a nutritious balance to the sweet and rich dessert, giving a pop of color to your Halloween table.
-
Hazelnut Coffee: A warm cup of hazelnut coffee rounds out the meal beautifully; its nutty flavor matches perfectly with chocolate, enhancing the overall indulgent experience.
Expert Tips for the Best Skull Lava Cake
-
Perfect Baking Time: Do not overbake: Achieving a molten center relies on precise timing; check your cakes at 11 minutes to ensure gooey deliciousness.
-
Use Quality Chocolate: Choose wisely: High-quality semisweet chocolate enhances flavor; using lower-quality chocolate can result in a lackluster taste.
-
Room Temperature Ingredients: Optimize mixing: Allow your ingredients, especially eggs and butter, to reach room temperature for better emulsification, ensuring a smooth batter.
-
Silicone vs. Metal Molds: Mold choice matters: Silicone molds are easier for unmolding, while metal molds give you sharper details. Experiment to find your favorite!
-
Creative Customizations: Get spooky: Enhance your Skull Lava Cake with subtle touches like edible glitter or a drizzle of white chocolate for extra flair, making it uniquely yours!
These tips will guide you in creating a perfect Skull Lava Cake that will be the highlight of any Halloween gathering!
Storage Tips for Skull Lava Cake
-
Room Temperature: Allow your Skull Lava Cakes to cool completely before storing; they can be kept at room temperature, covered loosely, for up to 1 day.
-
Fridge: To extend freshness, wrap the cooled cakes tightly in plastic wrap and refrigerate for up to 3 days. This helps maintain their moist texture.
-
Freezer: For longer storage, unbaked molds can be wrapped and frozen; when ready to bake, cook directly from frozen, adding 2 extra minutes to the baking time.
-
Reheating: If chilled, reheat your Skull Lava Cakes by microwaving for 10-15 seconds or baking at 300°F (150°C) for 5-7 minutes to restore that gooey center!
Skull Lava Cake Recipe FAQs
What type of chocolate should I use for the Skull Lava Cake?
Using high-quality semisweet chocolate is crucial for achieving that deep, rich flavor in your Skull Lava Cake. The better the chocolate, the more delicious your cakes will be! Avoid using cheaper chocolate, as it can lead to a less satisfying taste.
How should I store my Skull Lava Cake?
Once your Skull Lava Cakes have cooled completely, wrap them tightly in plastic wrap and refrigerate them for up to 3 days. This method helps retain their moist texture and rich flavors. For short-term storage, they can sit at room temperature loosely covered for up to 1 day.
Can I freeze the Skull Lava Cakes?
Absolutely! To freeze, wrap the unbaked cakes tightly in plastic wrap and place them in an airtight container. They can be stored in the freezer for up to 3 months. When you’re ready to bake, simply preheat your oven and bake them straight from frozen, adding an extra 2 minutes to the baking time.
What should I do if my cakes are overbaked?
If you accidentally overbake your Skull Lava Cakes, you can still enjoy them! While the center may not be as gooey, consider serving them with a scoop of ice cream or a drizzle of warm chocolate sauce to add moisture back into the dessert. Keep practicing; your timing will improve!
Are there any dietary considerations I should keep in mind for the Skull Lava Cake?
For those with dietary restrictions, this recipe can easily be adapted. To make it vegan, substitute the eggs with flax eggs (1 tablespoon ground flaxseed mixed with 3 tablespoons water per egg) and use dairy-free chocolate. Always check the labels for potential allergens, especially if you’re serving guests with food sensitivities.
Can I customize the flavor of my Skull Lava Cake?
Very! You can experiment with various cake flavors by using different extracts or adding spices. For a fun twist, place a small piece of chocolate or a fruit filling in the center before baking. This will create a delightful surprise when they cut into the cake!
Skull Lava Cake: Indulge in Spooky Halloween Decadence
Ingredients
Equipment
Method
- Preheat your oven to 425°F (218°C) and prepare your skull cake pan by greasing with unsalted butter and dusting with flour.
- In a heatproof bowl, melt unsalted butter and semisweet chocolate together until smooth.
- In a separate bowl, whisk eggs and sugar until pale and thick, about 3-4 minutes, then add vanilla extract, cocoa powder, and food coloring.
- Gently fold the melted chocolate mixture into the egg mixture, then sift in flour and mix until just combined.
- Spoon the batter into molds, filling them about three-quarters full, and smooth the tops.
- Bake for 11-13 minutes until edges are set but centers remain soft and slightly jiggly.
- Let cakes cool in the pan for about 5 minutes, then invert onto a wire rack to cool completely.
- For the glaze, whisk together the glaze ingredients until smooth and drizzle over the unmolded cakes.

