Introduction to Cookie Monster Cake Jars
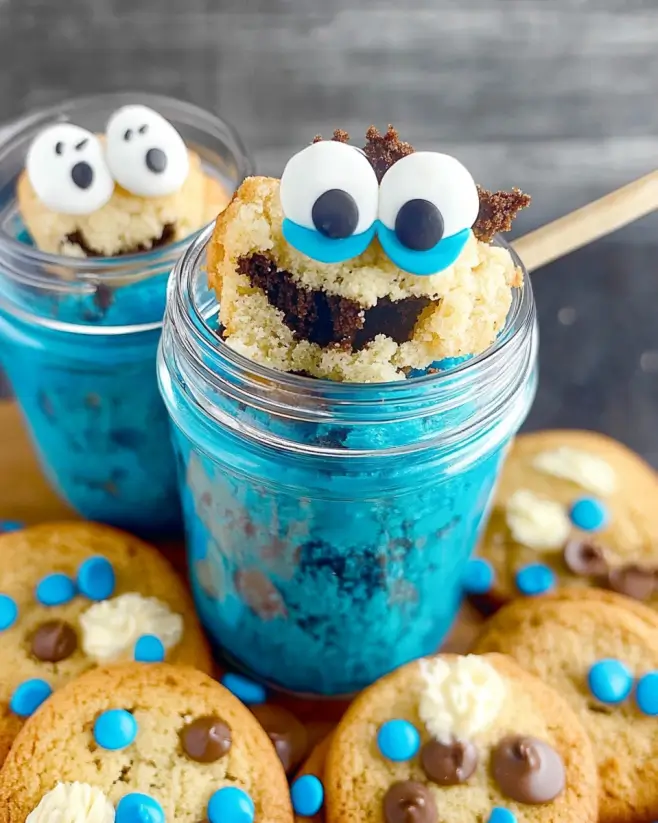
There’s something magical about desserts that bring out the kid in us. Cookie Monster Cake Jars do just that! These delightful treats are not only fun to make but also a feast for the eyes and taste buds. Perfect for a quick solution on a busy day or a sweet surprise for your loved ones, these jars are a playful twist on traditional cake. With layers of crumbled cake, vibrant blue frosting, and a sprinkle of cookie crumbs, they’re sure to impress. Let’s dive into this delicious adventure together!
Why You’ll Love This Cookie Monster Cake Jars
Cookie Monster Cake Jars are the ultimate dessert for anyone who craves a sweet treat without the fuss. They’re quick to whip up, making them perfect for busy weeknights or last-minute gatherings. The layers of cake and frosting create a delightful texture that’s both satisfying and indulgent. Plus, they’re served in individual jars, so everyone gets their own little piece of joy. Who wouldn’t love that?
Ingredients for Cookie Monster Cake Jars
Gathering the right ingredients is the first step to creating your Cookie Monster Cake Jars. Here’s what you’ll need:
- All-purpose flour: The backbone of your cake, providing structure and texture.
- Baking powder: This leavening agent helps the cake rise, giving it that fluffy feel.
- Baking soda: Another leavening agent that works with the baking powder for a perfect rise.
- Salt: Just a pinch enhances the flavors and balances the sweetness.
- Unsalted butter: Softened butter adds richness and moisture to the cake.
- Granulated sugar: Sweetens the cake and contributes to its tender texture.
- Large eggs: They bind the ingredients together and add moisture.
- Vanilla extract: A splash of vanilla brings warmth and depth to the flavor.
- Buttermilk: This adds tanginess and keeps the cake moist and tender.
- Chocolate chip cookies: Crushed cookies add a delightful crunch and flavor to the layers.
- Blue frosting: The star of the show! It adds color and sweetness, making the dessert visually appealing.
- Whipped cream (optional): For an extra layer of creaminess, this is a delightful addition.
- Extra cookie crumbs: These are perfect for topping off your jars, adding a finishing touch.
For exact measurements, check the bottom of the article where you can find everything listed for easy printing. Feel free to get creative with your ingredients! You can swap out the chocolate chip cookies for your favorites or even try different colored frosting to match a theme. The possibilities are endless!
How to Make Cookie Monster Cake Jars
Creating Cookie Monster Cake Jars is a delightful journey that combines baking and layering. Follow these simple steps, and you’ll have a fun dessert that’s sure to impress!
Step 1: Preheat and Prepare
Start by preheating your oven to 350°F (175°C). This is crucial for baking the perfect cake. While the oven warms up, grease and flour a 9×9-inch baking pan. This ensures your cake won’t stick, making it easier to crumble later.
Step 2: Mix Dry Ingredients
In a medium bowl, whisk together the all-purpose flour, baking powder, baking soda, and salt. This step is essential for even distribution of the leavening agents, which helps your cake rise beautifully.
Step 3: Cream Butter and Sugar
In a large bowl, cream the softened butter and granulated sugar together until the mixture is light and fluffy. This process is key to achieving a light cake texture, so take your time and enjoy the process!
Step 4: Add Eggs and Vanilla
Next, incorporate the eggs one at a time, mixing well after each addition. Stir in the vanilla extract, which adds a rich flavor that complements the sweetness of the cake.
Step 5: Combine Wet and Dry Ingredients
Gradually add the dry ingredients to the wet mixture, alternating with the buttermilk. Start and end with the dry ingredients. This method keeps the batter smooth and prevents overmixing, which can lead to a dense cake.
Step 6: Fold in Cookies
Now, gently fold in the crushed chocolate chip cookies. This adds a delightful crunch and flavor to your cake, making each bite a little piece of heaven.
Step 7: Bake the Cake
Pour the batter into the prepared baking pan and smooth the top. Bake for 25-30 minutes, or until a toothpick inserted in the center comes out clean. This is where the magic happens, as your kitchen fills with the sweet aroma of baking cake!
Step 8: Cool and Crumble
Once baked, allow the cake to cool completely in the pan on a wire rack. This step is essential for crumbling the cake into perfect pieces for layering.
Step 9: Layer in Jars
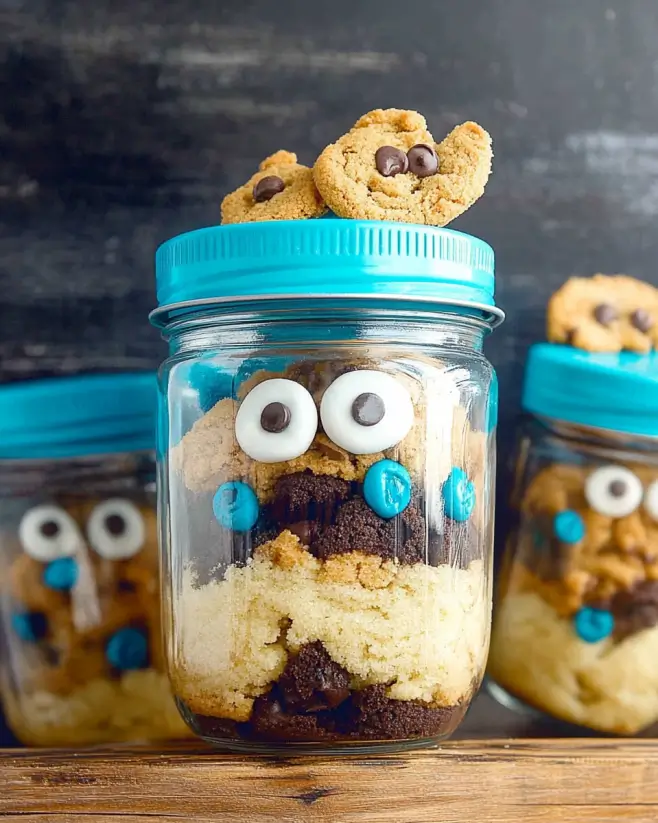
In mason jars or dessert cups, layer the crumbled cake, blue frosting, and whipped cream if you’re using it. Repeat the layers until the jars are filled, finishing with a layer of blue frosting and a sprinkle of extra cookie crumbs on top. This creates a visually appealing dessert that’s as fun to look at as it is to eat!
Step 10: Chill and Serve
Finally, chill the jars in the refrigerator for at least 30 minutes before serving. This enhances the flavors and gives the dessert a refreshing touch. Now, you’re ready to enjoy your Cookie Monster Cake Jars!
Tips for Success
- Make sure your butter is softened for easy creaming with sugar.
- Use room temperature eggs for better incorporation into the batter.
- Don’t skip the chilling step; it enhances the flavors and texture.
- Experiment with different cookie flavors for unique twists.
- Keep an eye on the baking time; ovens can vary.
Equipment Needed
- 9×9-inch baking pan: A square pan works best, but you can use a round one if that’s what you have.
- Mixing bowls: A medium and a large bowl will do the trick.
- Whisk: A hand whisk or electric mixer for creaming butter and sugar.
- Mason jars or dessert cups: Any small jars or cups will work for layering.
- Wire rack: Essential for cooling the cake; a plate can substitute in a pinch.
Variations
- Gluten-Free Option: Substitute all-purpose flour with a gluten-free blend to make this dessert suitable for those with gluten sensitivities.
- Vegan Twist: Use plant-based butter, flax eggs, and non-dairy milk to create a vegan version of these delightful jars.
- Flavorful Frosting: Experiment with different frosting flavors like chocolate, strawberry, or even peanut butter for a unique taste.
- Fruit Additions: Layer in some fresh berries or banana slices for a fruity twist that complements the sweetness.
- Cookie Variety: Swap out chocolate chip cookies for oatmeal raisin, snickerdoodle, or your favorite cookie for a different flavor profile.
Serving Suggestions
- Pair with Milk: A classic glass of cold milk complements the sweetness perfectly.
- Top with Sprinkles: Add colorful sprinkles for a festive touch, especially for parties.
- Serve with Coffee: A warm cup of coffee balances the sweetness of the jars.
- Presentation: Arrange jars on a decorative platter for an eye-catching display.
- Garnish: Fresh mint leaves can add a pop of color and freshness.
FAQs about Cookie Monster Cake Jars
Can I make Cookie Monster Cake Jars ahead of time?
Absolutely! These jars can be prepared a day in advance. Just layer them up and store them in the fridge. This actually enhances the flavors, making them even more delicious!
What can I substitute for buttermilk?
If you don’t have buttermilk on hand, you can easily make a substitute. Mix one cup of milk with a tablespoon of vinegar or lemon juice. Let it sit for about 5 minutes, and you’re good to go!
Can I use different frosting colors?
Definitely! Feel free to get creative with your frosting. Using different colors can match any theme or occasion, making your Cookie Monster Cake Jars even more fun!
How long do these cake jars last in the fridge?
These delightful jars can last up to 3-4 days in the fridge. Just make sure they’re sealed properly to keep them fresh and tasty!
Can I use store-bought cookies instead of baking my own?
Of course! Store-bought cookies work perfectly in this recipe. Just crush them up, and you’ll have a delicious shortcut to your Cookie Monster Cake Jars!
Final Thoughts
Creating Cookie Monster Cake Jars is more than just baking; it’s about bringing joy to your kitchen and sharing sweet moments with loved ones. Each layer tells a story, from the fluffy cake to the vibrant frosting, making every bite a delightful experience. These jars are perfect for any occasion, whether it’s a casual family dinner or a festive gathering. Plus, the smiles on everyone’s faces when they dig in? Priceless! So, roll up your sleeves, embrace the fun, and let these whimsical treats add a sprinkle of happiness to your day!
Cookie Monster Cake Jars: Indulge in a Fun Dessert!
Ingredients
Method
- Preheat your oven to 350°F (175°C). Grease and flour a 9x9-inch baking pan.
- In a medium bowl, whisk together the flour, baking powder, baking soda, and salt.
- In a large bowl, cream the softened butter and sugar together until light and fluffy.
- Add the eggs one at a time, mixing well after each addition.
- Stir in the vanilla extract.
- Gradually add the dry ingredients to the wet mixture, alternating with the buttermilk, beginning and ending with the dry ingredients.
- Fold in the crushed chocolate chip cookies.
- Pour the batter into the prepared baking pan and smooth the top.
- Bake for 25-30 minutes, or until a toothpick inserted in the center comes out clean.
- Allow the cake to cool completely in the pan on a wire rack.
- Once cooled, crumble the cake into a large bowl.
- In mason jars or dessert cups, layer the crumbled cake, blue frosting, and whipped cream if using.
- Repeat layers until jars are filled, finishing with a layer of blue frosting and a sprinkle of extra cookie crumbs on top.
- Chill in the refrigerator for at least 30 minutes before serving.
Nutrition
Notes
- For a fun twist, try using different colored frosting to match a theme or occasion.
- You can also substitute the chocolate chip cookies with your favorite cookies for a unique flavor.