Introduction to Peanut Butter and Jelly Poke Cake
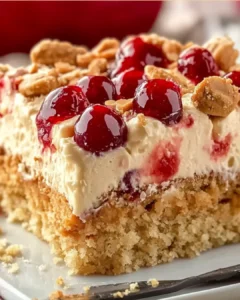
There’s something undeniably comforting about the classic combination of peanut butter and jelly. It takes me back to my childhood, where lunchboxes were filled with those sweet, sticky sandwiches. Now, I’ve transformed that nostalgic flavor into a delightful dessert: Peanut Butter and Jelly Poke Cake. This cake is not just a treat; it’s a quick solution for busy days or a showstopper for gatherings. With its moist texture and rich flavors, it’s bound to impress your loved ones. Let’s dive into this easy recipe that brings a taste of childhood right to your table!
Why You’ll Love This Peanut Butter and Jelly Poke Cake
This Peanut Butter and Jelly Poke Cake is a game-changer for dessert lovers. It’s incredibly easy to whip up, making it perfect for those hectic weeknights or last-minute gatherings. The moist cake absorbs the rich peanut butter and jelly, creating a flavor explosion in every bite. Plus, it’s a crowd-pleaser that brings smiles to faces, reminding everyone of simpler times. Who wouldn’t love that?
Ingredients for Peanut Butter and Jelly Poke Cake
Gathering the right ingredients is the first step to creating this delightful Peanut Butter and Jelly Poke Cake. Here’s what you’ll need:
- All-purpose flour: The backbone of your cake, providing structure and texture.
- Granulated sugar: Sweetens the cake and helps it achieve that lovely golden color.
- Baking powder: This leavening agent ensures your cake rises beautifully.
- Salt: A pinch enhances the flavors, balancing the sweetness.
- Unsalted butter: Adds richness and moisture; make sure it’s softened for easy mixing.
- Milk: Contributes to the cake’s moistness and helps blend the ingredients smoothly.
- Large eggs: They bind everything together and add a lovely texture.
- Vanilla extract: A splash of this adds warmth and depth to the flavor.
- Creamy peanut butter: The star of the show! It brings that classic flavor we all love.
- Grape or strawberry jelly: Choose your favorite for that fruity sweetness that complements the peanut butter.
- Whipped topping: This light and airy layer adds a delightful finish to your cake.
- Chopped peanuts (optional): For those who love a little crunch, sprinkle these on top for added texture.
For exact measurements, check the bottom of the article where you can find everything listed for easy printing. Feel free to get creative with your ingredients; for instance, using chocolate peanut butter can add a rich twist to this classic dessert!
How to Make Peanut Butter and Jelly Poke Cake
Step 1: Preheat and Prepare
Start by preheating your oven to 350°F (175°C). While it warms up, grab a 9×13-inch baking pan and grease it with butter or cooking spray. Dust it lightly with flour to ensure your cake slides out easily later. This step is crucial for a perfect bake!
Step 2: Mix Dry Ingredients
In a large mixing bowl, combine the all-purpose flour, granulated sugar, baking powder, and salt. Whisk them together until they’re well blended. This dry mix is the foundation of your Peanut Butter and Jelly Poke Cake, so make sure there are no lumps!
Step 3: Combine Wet Ingredients
Now, it’s time to add the wet ingredients. Toss in the softened butter, milk, eggs, and vanilla extract into the dry mix. Beat everything together with an electric mixer on medium speed for about two minutes. You want a smooth, creamy batter that’s ready for the oven!
Step 4: Bake the Cake
Pour the batter into your prepared baking pan, spreading it evenly. Slide it into the preheated oven and bake for 30-35 minutes. Keep an eye on it! When a toothpick inserted in the center comes out clean, your cake is ready to come out and cool.
Step 5: Poke Holes
Once the cake has cooled for about 10 minutes, it’s time to poke holes. Use the handle of a wooden spoon or a fork to create holes all over the top, about an inch apart. This step allows the peanut butter and jelly mixture to seep in, making every bite deliciously moist!
Step 6: Add Peanut Butter and Jelly Mixture
In a small bowl, mix together the creamy peanut butter and jelly until smooth. Spoon this delightful mixture evenly over the holes you just made. Watch as it seeps into the cake, infusing it with that classic flavor combination we all love!
Step 7: Top with Whipped Topping
After the cake has cooled completely, it’s time for the finishing touch. Spread a generous layer of whipped topping over the entire surface. This light and fluffy layer adds a perfect contrast to the rich flavors below. It’s like a cloud of sweetness!
Step 8: Chill Before Serving
Finally, refrigerate your Peanut Butter and Jelly Poke Cake for at least one hour. This chilling time allows the flavors to meld beautifully. When you’re ready to serve, slice it up and enjoy a slice of nostalgia!

Tips for Success
- Make sure your butter is softened for easy mixing; it helps create a smooth batter.
- Don’t skip the chilling step! It enhances the flavors and makes the cake even more delicious.
- Use a toothpick to check for doneness; it should come out clean when the cake is ready.
- Feel free to experiment with different jellies or preserves for a unique twist.
- For added texture, sprinkle chopped peanuts on top just before serving.
Equipment Needed
- 9×13-inch baking pan: Essential for baking the cake; a similar-sized dish works too.
- Mixing bowls: Use any size; just ensure they’re large enough for your ingredients.
- Electric mixer: A hand mixer is perfect; a whisk can work if you’re feeling strong!
- Wooden spoon or fork: For poking holes in the cake; any sturdy utensil will do.
- Measuring cups and spoons: Accurate measurements are key; use any measuring tools you have on hand.
Variations
- Chocolate Peanut Butter Poke Cake: Swap regular peanut butter for chocolate peanut butter for a rich, decadent twist.
- Fruit Preserves: Experiment with different fruit preserves like raspberry or apricot for a unique flavor profile.
- Gluten-Free Option: Use a gluten-free all-purpose flour blend to make this cake suitable for gluten-sensitive friends.
- Nut-Free Version: Replace peanut butter with sunbutter or almond butter for a nut-free alternative.
- Vegan Adaptation: Substitute eggs with flax eggs and use plant-based milk and whipped topping for a vegan-friendly dessert.
Serving Suggestions
- Pair with Ice Cream: A scoop of vanilla or chocolate ice cream complements the cake’s flavors perfectly.
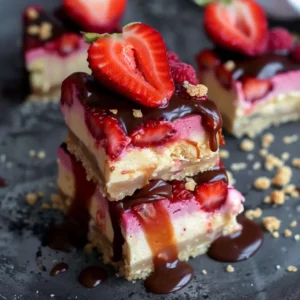
- Fresh Fruit: Serve with sliced strawberries or bananas for a refreshing contrast.
- Presentation: Garnish with a drizzle of chocolate sauce or a sprinkle of chopped peanuts for added flair.
- Drink Pairing: Enjoy with a glass of cold milk or a cup of coffee for a delightful treat.
FAQs about Peanut Butter and Jelly Poke Cake
Can I use different flavors of jelly for this cake?
Absolutely! While grape and strawberry jelly are classic choices, feel free to experiment with your favorite fruit preserves. Raspberry, apricot, or even mixed berry can add a unique twist to your Peanut Butter and Jelly Poke Cake.
How long can I store the Peanut Butter and Jelly Poke Cake?
This cake can be stored in the refrigerator for up to 3-4 days. Just make sure to cover it well to keep it fresh. The flavors actually improve as it sits, making it even more delicious!
Can I make this cake ahead of time?
Yes! This Peanut Butter and Jelly Poke Cake is perfect for making ahead. Just prepare it a day in advance, chill it, and let the flavors meld. It’s a great option for parties or gatherings!
Is this cake suitable for kids?
<pDefinitely! Kids love the sweet combination of peanut butter and jelly. Just be mindful of any nut allergies if you’re serving it to a group. You can always substitute with sunbutter for a nut-free version.
Can I freeze the Peanut Butter and Jelly Poke Cake?
Yes, you can freeze this cake! Just make sure it’s well wrapped in plastic wrap and aluminum foil. When you’re ready to enjoy it, let it thaw in the refrigerator overnight for the best texture.
Final Thoughts
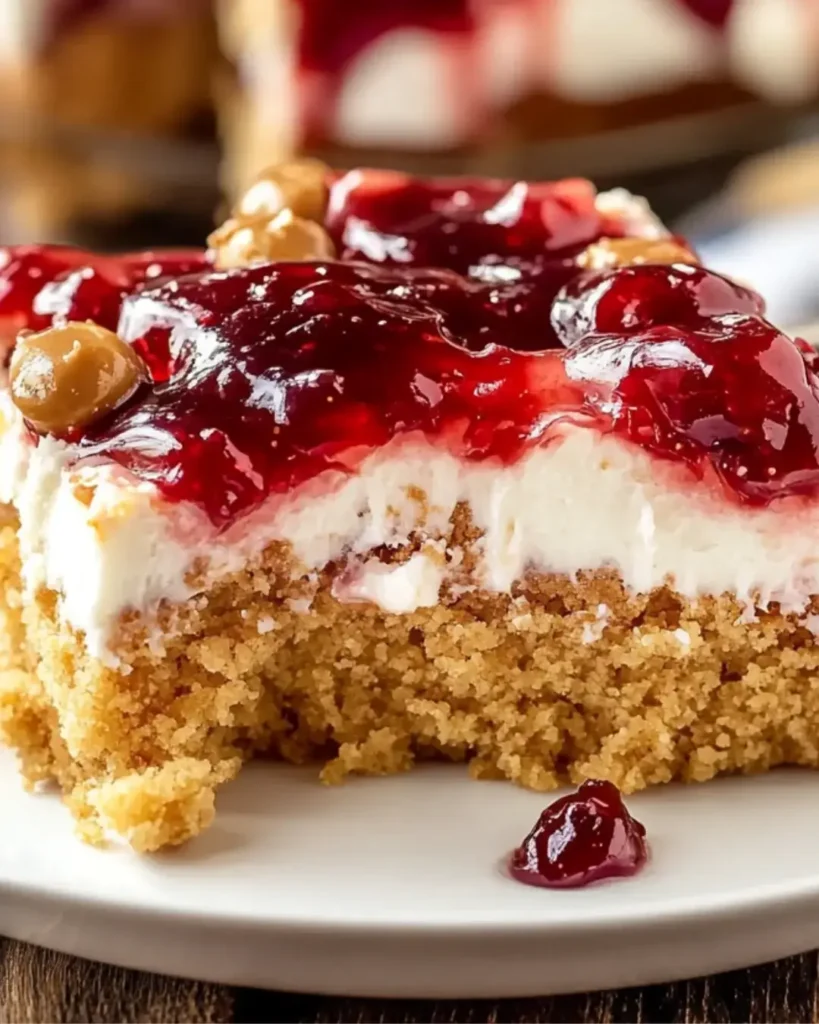
Creating this Peanut Butter and Jelly Poke Cake is more than just baking; it’s about reliving cherished memories and sharing joy with those you love. Each slice is a delightful reminder of childhood, where simple flavors brought happiness. The moist cake, infused with creamy peanut butter and sweet jelly, is a crowd-pleaser that sparks smiles and nostalgia. Whether it’s a family gathering or a casual weeknight treat, this cake is sure to impress. So, roll up your sleeves, gather your ingredients, and let the magic of this dessert bring warmth and sweetness to your table!
PrintPeanut Butter and Jelly Poke Cake: A Must-Try Dessert!
- Total Time: 1 hour 55 minutes
- Yield: 12 servings
- Diet: Vegetarian
Description
Peanut Butter and Jelly Poke Cake is a delicious dessert that combines the classic flavors of peanut butter and jelly in a moist cake, perfect for any occasion.
Ingredients
- 2 cups all-purpose flour
- 1 ½ cups granulated sugar
- 1 tablespoon baking powder
- ½ teaspoon salt
- ½ cup unsalted butter, softened
- 1 cup milk
- 2 large eggs
- 1 teaspoon vanilla extract
- 1 cup creamy peanut butter
- 1 cup grape or strawberry jelly
- 1 cup whipped topping (like Cool Whip)
- Chopped peanuts for garnish (optional)
Instructions
- Preheat your oven to 350°F (175°C). Grease and flour a 9×13-inch baking pan.
- In a large mixing bowl, combine the flour, sugar, baking powder, and salt. Mix well.
- Add the softened butter, milk, eggs, and vanilla extract to the dry ingredients. Beat with an electric mixer on medium speed for about 2 minutes until well combined.
- Pour the batter into the prepared baking pan and spread it evenly. Bake for 30-35 minutes or until a toothpick inserted in the center comes out clean.
- Remove the cake from the oven and let it cool in the pan for about 10 minutes.
- Using the handle of a wooden spoon or a fork, poke holes all over the top of the cake, about 1 inch apart.
- In a small bowl, mix the peanut butter and jelly together until smooth. Spoon the mixture evenly over the poked holes in the cake, allowing it to seep in.
- Let the cake cool completely, then spread the whipped topping over the top.
- If desired, sprinkle chopped peanuts on top for added crunch.
- Refrigerate the cake for at least 1 hour before serving to allow the flavors to meld.
Notes
- For a richer flavor, try using chocolate peanut butter instead of regular peanut butter.
- You can also substitute the jelly with your favorite fruit preserves for a unique twist.
- Prep Time: 20 minutes
- Cook Time: 35 minutes
- Category: Dessert
- Method: Baking
- Cuisine: American
Nutrition
- Serving Size: 1 slice
- Calories: 320
- Sugar: 20g
- Sodium: 200mg
- Fat: 15g
- Saturated Fat: 3g
- Unsaturated Fat: 12g
- Trans Fat: 0g
- Carbohydrates: 38g
- Fiber: 1g
- Protein: 6g
- Cholesterol: 40mg