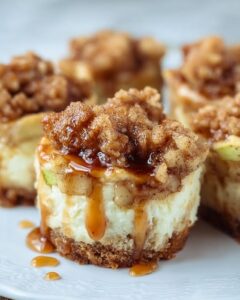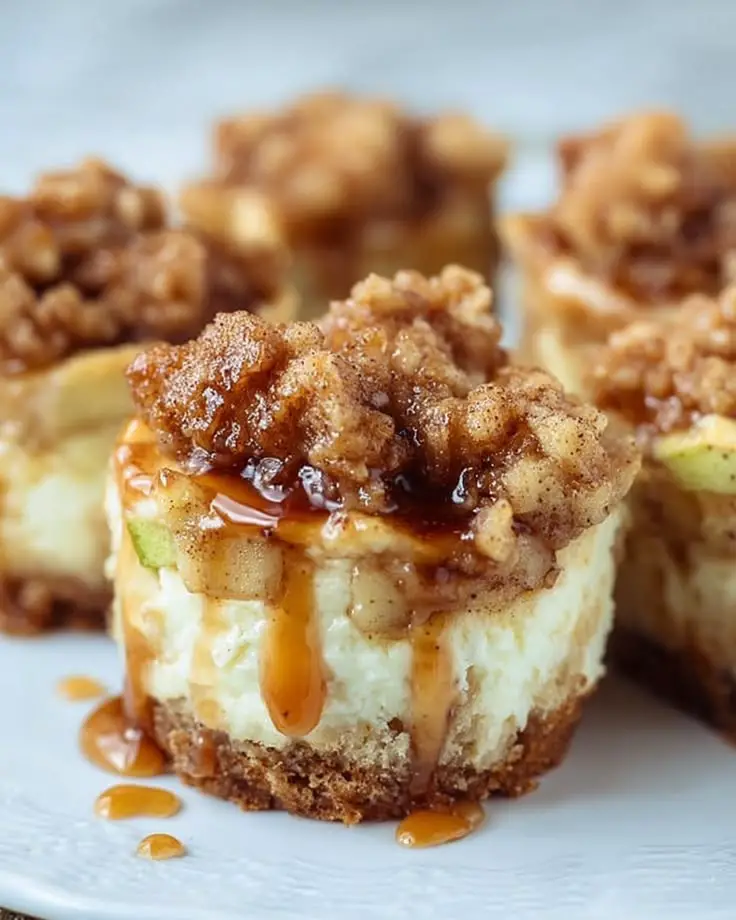
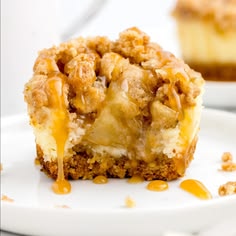
Introduction to Apple Crisp Mini Cheesecakes
There’s something magical about desserts that bring back memories of home. Apple Crisp Mini Cheesecakes do just that, combining the creamy goodness of cheesecake with the warm, comforting flavors of apple crisp. This recipe is perfect for those busy days when you want to whip up something special without spending hours in the kitchen. Whether you’re looking to impress your loved ones or simply treat yourself, these mini cheesecakes are a delightful solution. They’re easy to make, and the best part? You can enjoy them chilled or at room temperature, making them versatile for any occasion.
Why You’ll Love This Apple Crisp Mini Cheesecakes
These Apple Crisp Mini Cheesecakes are a game-changer for dessert lovers. They’re quick to prepare, taking just about an hour of your time, and they pack a flavor punch that will leave everyone asking for seconds. The creamy cheesecake pairs perfectly with the sweet, spiced apples and crunchy topping. Plus, their mini size makes them perfect for sharing—or not! You can indulge without the guilt of a full slice.
Ingredients for Apple Crisp Mini Cheesecakes
Gathering the right ingredients is the first step to creating these delightful Apple Crisp Mini Cheesecakes. Here’s what you’ll need:
- Graham crackers: These form the base of your crust, providing a sweet and crunchy foundation.
- Unsalted butter: This adds richness to the crust and helps bind the ingredients together.
- Granulated sugar: A touch of sweetness enhances the crust and the cheesecake filling.
- Ground cinnamon: This warm spice brings a cozy flavor that complements the apples beautifully.
- Cream cheese: The star of the show! It gives the cheesecake its creamy texture.
- Sour cream: Adds tanginess and creaminess to the filling, balancing the sweetness.
- Vanilla extract: A splash of this elevates the flavor profile, making it more aromatic.
- Eggs: Essential for binding the filling and giving it structure.
- Apples: Fresh, diced apples provide that classic apple crisp flavor. Choose your favorite variety!
- Brown sugar: This adds a deeper sweetness and caramel notes to the apple mixture.
- Lemon juice: A little acidity brightens the flavors and keeps the apples from browning.
- Nutmeg: A pinch of this spice adds warmth and complexity to the apple topping.
- Old-fashioned rolled oats: These create a crunchy topping that mimics traditional apple crisp.
- All-purpose flour: Helps bind the crisp topping together for that perfect crumble.
- Pinch of salt: Enhances all the flavors, balancing the sweetness.
For those looking to mix things up, feel free to substitute different fruits for the topping, like pears or berries. If you need a gluten-free option, simply swap in gluten-free graham crackers. You can find the exact measurements for each ingredient at the bottom of the article, ready for printing!
How to Make Apple Crisp Mini Cheesecakes
Creating these Apple Crisp Mini Cheesecakes is a delightful journey that combines simple steps with delicious results. Let’s dive into the process!
Step 1: Preheat the Oven
Start by preheating your oven to 350°F (175°C). This step is crucial because it ensures even baking. If you skip this, your cheesecakes might not set properly, leading to a gooey mess instead of a creamy delight.
Step 2: Make the Crust
In a bowl, mix the crushed graham crackers, sugar, cinnamon, and melted butter until everything is well combined. The mixture should resemble wet sand. Press it firmly into the bottom of each muffin liner. This step is vital; a well-pressed crust holds everything together and provides that satisfying crunch.
Step 3: Bake the Crust
Pop the crusts into the oven and bake for about 5 minutes. You want them to be slightly golden but not too hard. Once done, let them cool slightly before adding the cheesecake filling. This cooling time helps prevent the filling from melting into the crust.
Step 4: Prepare the Apples
While the crust cools, melt some butter in a skillet over medium heat. Add the diced apples, brown sugar, cinnamon, nutmeg, and lemon juice. Cook for 4–5 minutes until the apples soften and become fragrant. This step develops the flavors, making your mini cheesecakes taste like a warm hug.
Step 5: Make the Cheesecake Filling
In a mixing bowl, beat the softened cream cheese and sugar until smooth. Add the sour cream, vanilla, and cinnamon, mixing until combined. Then, add the eggs one at a time, mixing just until incorporated. This method ensures a silky filling without overmixing, which can lead to cracks.
Step 6: Assemble the Cheesecakes
Now, it’s time to layer! Spoon the cheesecake mixture evenly over the cooled crusts, filling each cup about ¾ full. Then, add a generous spoonful of the cinnamon apples on top. This layering creates a beautiful contrast of flavors and textures.
Step 7: Make the Crisp Topping
In a separate bowl, combine the oats, flour, brown sugar, cinnamon, salt, and melted butter. Mix until crumbly. This topping should be slightly moist but still crumbly, giving that classic crisp texture. Sprinkle it generously over each cheesecake for that perfect crunch.
Step 8: Bake the Mini Cheesecakes
Return the cheesecakes to the oven and bake for 20–25 minutes. You’ll know they’re done when the centers are set but still slightly soft. A little jiggle is okay! This ensures a creamy texture that melts in your mouth.
Step 9: Cool and Refrigerate
After baking, let the mini cheesecakes cool in the pan for about 20 minutes. Then, transfer them to the refrigerator for at least 2 hours. Chilling is essential; it helps the flavors meld and the texture firm up, making them easier to serve.
Step 10: Serve and Enjoy
When you’re ready to serve, you can enjoy these mini cheesecakes chilled or let them sit at room temperature for about 10 minutes. They’re perfect on their own, but a dollop of whipped cream or a drizzle of caramel sauce can elevate the experience even more!
Tips for Success
- Use room temperature cream cheese for a smoother filling.
- Don’t overmix the cheesecake batter to prevent cracks.
- Press the crust firmly to ensure it holds together.
- Let the cheesecakes cool completely before refrigerating.
- Experiment with different fruits for the topping to keep things fresh.
Equipment Needed
- Muffin pan: A standard 12-cup muffin pan works best, but you can use silicone molds for easy removal.
- Mixing bowls: A large bowl for the filling and a smaller one for the crust and topping.
- Whisk or electric mixer: For smooth cheesecake filling, a hand mixer is ideal.
- Measuring cups and spoons: Essential for accurate ingredient measurements.
- Spatula: Perfect for scraping down the sides of the bowl and layering ingredients.
Variations
- Gluten-Free: Swap out regular graham crackers for gluten-free versions to make these mini cheesecakes suitable for gluten-sensitive friends.
- Fruit Alternatives: Experiment with different fruits like pears, peaches, or mixed berries for a unique twist on the classic flavor.
- Nutty Crunch: Add chopped nuts like pecans or walnuts to the crisp topping for an extra layer of texture and flavor.
- Spiced Up: Incorporate spices like ginger or allspice into the apple mixture for a warm, spiced flavor profile.
- Vegan Option: Use vegan cream cheese and substitute eggs with flaxseed meal or applesauce for a plant-based version.
Serving Suggestions
- Pair with a scoop of vanilla ice cream for a delightful contrast in temperature.
- Serve alongside a warm cup of spiced chai or apple cider to enhance the flavors.
- Garnish with fresh mint leaves for a pop of color and freshness.
- Drizzle with caramel sauce or chocolate for an indulgent touch.
FAQs about Apple Crisp Mini Cheesecakes
Can I make Apple Crisp Mini Cheesecakes ahead of time?
Absolutely! These mini cheesecakes can be made a day in advance. Just store them in the refrigerator until you’re ready to serve. This actually allows the flavors to meld beautifully.
What type of apples work best for this recipe?
I recommend using a mix of sweet and tart apples, like Granny Smith and Honeycrisp. This combination gives a nice balance of flavor and texture in your Apple Crisp Mini Cheesecakes.
Can I freeze these mini cheesecakes?
Yes, you can freeze them! Just make sure they are well-wrapped in plastic wrap and then placed in an airtight container. They can last up to three months in the freezer. Thaw them in the fridge before serving.
What can I substitute for cream cheese?
If you’re looking for a lighter option, you can use Greek yogurt or a vegan cream cheese alternative. Just keep in mind that the texture and flavor may vary slightly.
How do I know when the mini cheesecakes are done baking?
Look for the centers to be set but still slightly jiggly. They will firm up as they cool. This ensures a creamy texture that’s not overbaked, making your Apple Crisp Mini Cheesecakes a delightful treat!
Final Thoughts
Creating Apple Crisp Mini Cheesecakes is more than just baking; it’s about crafting memories and sharing joy. Each bite offers a delightful blend of creamy cheesecake and spiced apples, reminiscent of cozy family gatherings. The mini format makes them perfect for any occasion, whether it’s a casual weeknight treat or a festive celebration. Plus, the ease of preparation means you can whip them up without stress. So, gather your ingredients, invite some friends over, and enjoy the sweet satisfaction of these delicious mini cheesecakes. Trust me, they’ll become a favorite in no time!
PrintApple Crisp Mini Cheesecakes: A Delicious Recipe Treat!
- Total Time: 2 hours 30 minutes
- Yield: 12 mini cheesecakes
- Diet: Vegetarian
Description
Apple Crisp Mini Cheesecakes are a delightful dessert that combines the creamy texture of cheesecake with the warm flavors of apple crisp, all in a convenient mini format.
Ingredients
- 150 g graham crackers, finely crushed
- 60 g unsalted butter, melted
- 25 g granulated sugar
- ½ teaspoon (2.5 mL) ground cinnamon
- 450 g cream cheese, softened
- 100 g granulated sugar
- 2 large eggs
- 120 g sour cream
- 1 teaspoon (5 mL) vanilla extract
- ½ teaspoon (2.5 mL) ground cinnamon
- 2 medium apples, peeled, cored, and finely diced — about 250 g
- 30 g brown sugar
- 15 g unsalted butter
- 1 teaspoon (2.5 g) cornstarch
- 1 teaspoon (5 mL) lemon juice
- ½ teaspoon (2.5 mL) ground cinnamon
- ¼ teaspoon (1.25 mL) nutmeg
- 60 g old-fashioned rolled oats
- 40 g all-purpose flour
- 50 g brown sugar
- 40 g unsalted butter, melted
- ½ teaspoon (2.5 mL) ground cinnamon
- Pinch of salt
Instructions
- Preheat the oven: Heat oven to 350°F (175°C). Line a 12-cup muffin pan with paper liners.
- Make the crust: Mix the crushed graham crackers, sugar, cinnamon, and melted butter until evenly combined.
- Divide the mixture between the 12 liners, using about 1½ tablespoons per cup. Press firmly into the bottom.
- Bake for 5 minutes, then set aside to cool slightly.
- Prepare the apples: Melt the butter in a skillet over medium heat. Add the diced apples, brown sugar, cinnamon, nutmeg, and lemon juice. Cook for 4–5 minutes, until the apples begin to soften.
- Stir the cornstarch with 1 tablespoon of water. Add it to the apples and cook for another 1 minute, until slightly thickened. Remove from heat.
- Make the cheesecake filling: Beat the softened cream cheese and sugar until smooth. Add the sour cream, vanilla, and cinnamon. Beat in the eggs one at a time, mixing just until combined.
- Assemble: Spoon the cheesecake mixture evenly over the crusts, filling each cup about ¾ full.
- Add a spoonful of the cinnamon apples to the top of each cheesecake.
- Make the crisp topping: Combine the oats, flour, brown sugar, cinnamon, salt, and melted butter until crumbly.
- Sprinkle the crisp mixture generously over each cheesecake.
- Bake: Bake for 20–25 minutes, until the cheesecake centers are set but still slightly soft in the middle.
- Cool: Let the mini cheesecakes cool in the pan for about 20 minutes, then refrigerate for at least 2 hours.
- Serve: Enjoy chilled or let them sit at room temperature for about 10 minutes before serving.
Notes
- For a gluten-free version, use gluten-free graham crackers.
- These mini cheesecakes can be made a day in advance and stored in the refrigerator.
- Feel free to substitute different fruits for the topping, such as pears or berries.
- Prep Time: 30 minutes
- Cook Time: 30 minutes
- Category: Dessert
- Method: Baking
- Cuisine: American
Nutrition
- Serving Size: 1 mini cheesecake
- Calories: 250
- Sugar: 18 g
- Sodium: 150 mg
- Fat: 12 g
- Saturated Fat: 7 g
- Unsaturated Fat: 3 g
- Trans Fat: 0 g
- Carbohydrates: 32 g
- Fiber: 1 g
- Protein: 4 g
- Cholesterol: 50 mg