Introduction to Better Than Ever Vintage Cake
There’s something magical about a cake that brings back memories of simpler times. The Better Than Ever Vintage Cake does just that. It’s not just a dessert; it’s a slice of nostalgia, a sweet reminder of family gatherings and celebrations. This cake is perfect for those busy days when you want to impress your loved ones without spending hours in the kitchen. With its rich chocolate flavor and luscious caramel filling, it’s a guaranteed crowd-pleaser. Trust me, once you serve this beauty, you’ll be the star of the dessert table!
Why You’ll Love This Better Than Ever Vintage Cake
This Better Than Ever Vintage Cake is a dream come true for anyone who loves dessert but craves simplicity. It’s quick to whip up, making it perfect for last-minute gatherings or a cozy family dinner. The combination of rich chocolate and sweet caramel creates a flavor explosion that will have everyone asking for seconds. Plus, it’s a versatile treat that can be dressed up or down, depending on the occasion!
Ingredients for Better Than Ever Vintage Cake
Gathering the right ingredients is the first step to creating your Better Than Ever Vintage Cake. Here’s what you’ll need:
- Chocolate cake mix: The base of our cake, providing that rich chocolate flavor. Opt for a high-quality mix for the best results.
- Large eggs: These add moisture and structure to the cake, helping it rise beautifully.
- Whole milk: This ingredient keeps the cake moist and enhances the chocolate flavor.
- Vegetable oil: A key player in keeping the cake tender and fluffy.
- Vanilla extract: Just a splash adds depth and warmth to the overall flavor.
- Sweetened condensed milk: This creamy goodness is essential for our luscious filling, adding sweetness and richness.
- Caramel sauce or dulce de leche: The star of the show! This sweet sauce soaks into the cake, creating a delightful caramel flavor.
- Heavy whipping cream: For the whipped topping, it needs to be chilled for the best texture.
- Powdered sugar: This sweetens the whipped cream and helps it hold its shape.
- Toffee bits: These crunchy bits add a delightful texture and extra sweetness.
- Mini chocolate chips: A fun addition that enhances the chocolate experience.
- Chocolate shavings: For a touch of elegance and extra chocolate flavor.
- Caramel sauce: A drizzle on top for that finishing touch of sweetness.
For exact measurements, check the bottom of the article where you can find everything listed for easy printing. Feel free to customize your ingredients based on what you have on hand or your personal preferences!
How to Make Better Than Ever Vintage Cake
Prepare the Oven
Start by preheating your oven to 350°F. This step is crucial for ensuring your Better Than Ever Vintage Cake bakes evenly. While the oven heats up, grease a 9-by-13-inch baking dish. A little oil or butter will do the trick, preventing any sticky situations later on!
Make the Cake Batter
In a large mixing bowl, combine the chocolate cake mix, eggs, whole milk, vegetable oil, and vanilla extract. Beat the mixture until it’s smooth and well combined. This is where the magic begins! The aroma of chocolate will start to fill your kitchen, making it hard to resist licking the bowl.
Bake the Cake
Pour the batter into your prepared baking dish. Bake for 28 to 35 minutes. To check if it’s done, insert a toothpick into the center. If it comes out clean, you’re good to go! The cake should be springy to the touch, signaling that it’s ready for the next step.
Poke the Cake
Once the cake has cooled for about 10 minutes, it’s time to poke holes. Using the handle of a wooden spoon, gently poke holes evenly across the entire cake. This allows the caramel filling to seep in, creating that deliciously moist texture we all love.
Prepare the Filling
In a separate bowl, whisk together the sweetened condensed milk, caramel sauce, and a splash of vanilla extract until smooth. This filling is the heart of your Better Than Ever Vintage Cake, adding a rich sweetness that pairs perfectly with the chocolate.
Soak the Cake
Slowly pour the caramel mixture over the cake, ensuring it seeps into all those holes. Use a spatula to spread it evenly. This step is where the cake transforms into a decadent dessert, soaking up all that sweet goodness.
Chill the Cake
Refrigerate the cake for at least one hour. This chilling time allows the flavors to meld beautifully. Plus, it makes slicing the cake easier later on. Trust me, the wait will be worth it!
Make the Whipped Topping
While the cake chills, it’s time to whip up the topping. In a mixing bowl, beat the chilled heavy whipping cream, powdered sugar, and vanilla extract until stiff peaks form. This fluffy topping is the perfect complement to the rich cake.
Frost the Cake
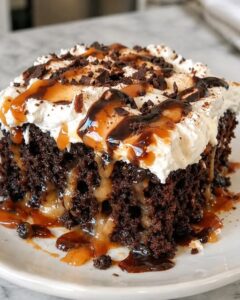
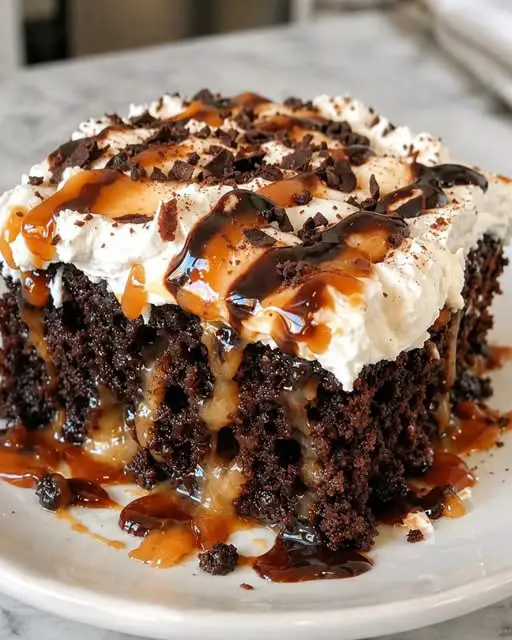
Once the cake is chilled, spread the whipped cream evenly over the top. Don’t be shy—this is your chance to create a beautiful layer of fluffy goodness. The contrast of the white cream against the dark chocolate is simply stunning!
Decorate the Cake
Now for the fun part! Sprinkle toffee bits, mini chocolate chips, and chocolate shavings over the whipped cream. Drizzle some caramel sauce on top for that extra touch of sweetness. Your Better Than Ever Vintage Cake is now a feast for the eyes!
Serve the Cake
Refrigerate the cake for another 30 minutes before slicing. This helps the layers set and makes for neat, beautiful pieces. When you serve it, watch as everyone’s eyes light up. You’ve just created a dessert that’s sure to impress!
Tips for Success
- Use high-quality chocolate cake mix for a richer flavor.
- Ensure your heavy whipping cream is very cold for the best whipped topping.
- Don’t rush the chilling process; it enhances the cake’s flavor and texture.
- Feel free to customize toppings based on your taste—get creative!
- For a fun twist, add a pinch of sea salt to the caramel drizzle.
Equipment Needed
- 9-by-13-inch baking dish: A standard size for this cake; a glass or metal dish works well.
- Mixing bowls: Use a large bowl for the batter and a smaller one for the filling.
- Electric mixer: Handy for whipping cream; a whisk can work too, but it takes longer.
- Spatula: Essential for spreading the caramel and whipped cream evenly.
- Toothpick: For testing the cake’s doneness; a skewer can also do the job.
Variations
- Gluten-Free Option: Substitute the chocolate cake mix with a gluten-free blend to accommodate dietary needs.
- Nutty Delight: Add chopped walnuts or pecans to the batter for a crunchy texture and nutty flavor.
- Fruit Twist: Incorporate fresh raspberries or sliced strawberries between the cake layers for a fruity surprise.
- Chocolate Lovers: Use chocolate ganache instead of whipped cream for an ultra-rich topping.
- Vegan Version: Replace eggs with flaxseed meal and use plant-based milk and whipped coconut cream for a vegan-friendly treat.
Serving Suggestions
- Pair with a scoop of vanilla ice cream for a delightful contrast in temperature and flavor.
- Serve alongside fresh berries to add a pop of color and freshness.
- Drizzle extra caramel sauce on individual slices for an indulgent touch.
- Enjoy with a cup of coffee or a glass of milk to balance the sweetness.
- Present on a decorative cake stand for an elegant display at gatherings.
FAQs about Better Than Ever Vintage Cake
Can I make Better Than Ever Vintage Cake ahead of time?
Absolutely! This cake actually tastes better after chilling overnight. Just make sure to cover it well to keep it fresh.
What can I substitute for sweetened condensed milk?
If you’re looking for a substitute, try using a mixture of evaporated milk and sugar. It won’t be as rich, but it will still work well in the filling.
How do I store leftovers?
Store any leftover cake in an airtight container in the refrigerator. It should stay fresh for up to 3 days, but trust me, it won’t last that long!
Can I freeze Better Than Ever Vintage Cake?
Yes, you can freeze it! Just wrap individual slices tightly in plastic wrap and then place them in a freezer-safe container. Thaw in the fridge before serving.
What’s the best way to serve this cake?
For the best experience, serve it chilled with a drizzle of caramel sauce and a scoop of vanilla ice cream. It’s a match made in dessert heaven!
Final Thoughts
Creating the Better Than Ever Vintage Cake is more than just baking; it’s about crafting memories. Each slice is a delightful blend of rich chocolate and sweet caramel, evoking smiles and laughter around the table. Whether it’s a family gathering or a casual weeknight treat, this cake brings joy to every occasion. The best part? It’s simple enough for any home cook to master. So, roll up your sleeves, gather your ingredients, and let this cake become a cherished part of your dessert repertoire. Trust me, your loved ones will thank you for it!
PrintBetter Than Ever Vintage Cake: Discover Its Unique Flavor!
- Total Time: 1 hour 55 minutes
- Yield: 12 servings
- Diet: Vegetarian
Description
Better Than Ever Vintage Cake is a decadent dessert featuring a rich chocolate cake soaked in sweet caramel filling and topped with a luscious whipped cream and delightful toppings.
Ingredients
- 1 box (15.25 oz) chocolate cake mix
- 3 large eggs
- 1 cup whole milk
- ½ cup vegetable oil
- 1 teaspoon vanilla extract
- 1 can (14 oz) sweetened condensed milk
- 1 jar (12 oz) caramel sauce or dulce de leche
- ½ teaspoon vanilla extract
- 2 cups heavy whipping cream, chilled
- ½ cup powdered sugar
- 1 teaspoon vanilla extract
- ½ cup toffee bits
- ¼ cup mini chocolate chips
- ¼ cup chocolate shavings
- 2 tablespoons caramel sauce, for drizzling
Instructions
- Prepare the oven: Preheat oven to 350°F. Grease a 9-by-13-inch baking dish.
- Make the cake batter: In a large bowl, combine chocolate cake mix, eggs, milk, vegetable oil, and vanilla extract. Beat until smooth.
- Bake: Pour the batter into the prepared baking dish. Bake for 28–35 minutes, or until a toothpick inserted into the center comes out clean.
- Poke the cake: Allow the cake to cool for about 10 minutes. Using the handle of a wooden spoon, poke holes evenly across the entire cake.
- Prepare the filling: Whisk together sweetened condensed milk, caramel sauce, and vanilla extract until smooth.
- Soak the cake: Slowly pour the caramel mixture over the cake, allowing it to seep into the holes. Spread evenly with a spatula.
- Chill: Refrigerate the cake for at least 1 hour to allow the filling to absorb.
- Make the whipped topping: Beat chilled heavy whipping cream, powdered sugar, and vanilla extract until stiff peaks form.
- Frost the cake: Spread the whipped cream evenly over the chilled cake.
- Decorate: Sprinkle with toffee bits, mini chocolate chips, and chocolate shavings. Drizzle caramel sauce over the top.
- Serve: Refrigerate for another 30 minutes before slicing for neat, beautiful pieces.
Notes
- Ensure the heavy whipping cream is very cold for best results.
- For a richer flavor, use high-quality chocolate cake mix.
- Feel free to customize toppings based on personal preference.
- Prep Time: 20 minutes
- Cook Time: 35 minutes
- Category: Dessert
- Method: Baking
- Cuisine: American
Nutrition
- Serving Size: 1 slice
- Calories: 450
- Sugar: 35g
- Sodium: 200mg
- Fat: 25g
- Saturated Fat: 15g
- Unsaturated Fat: 5g
- Trans Fat: 0g
- Carbohydrates: 50g
- Fiber: 2g
- Protein: 6g
- Cholesterol: 80mg