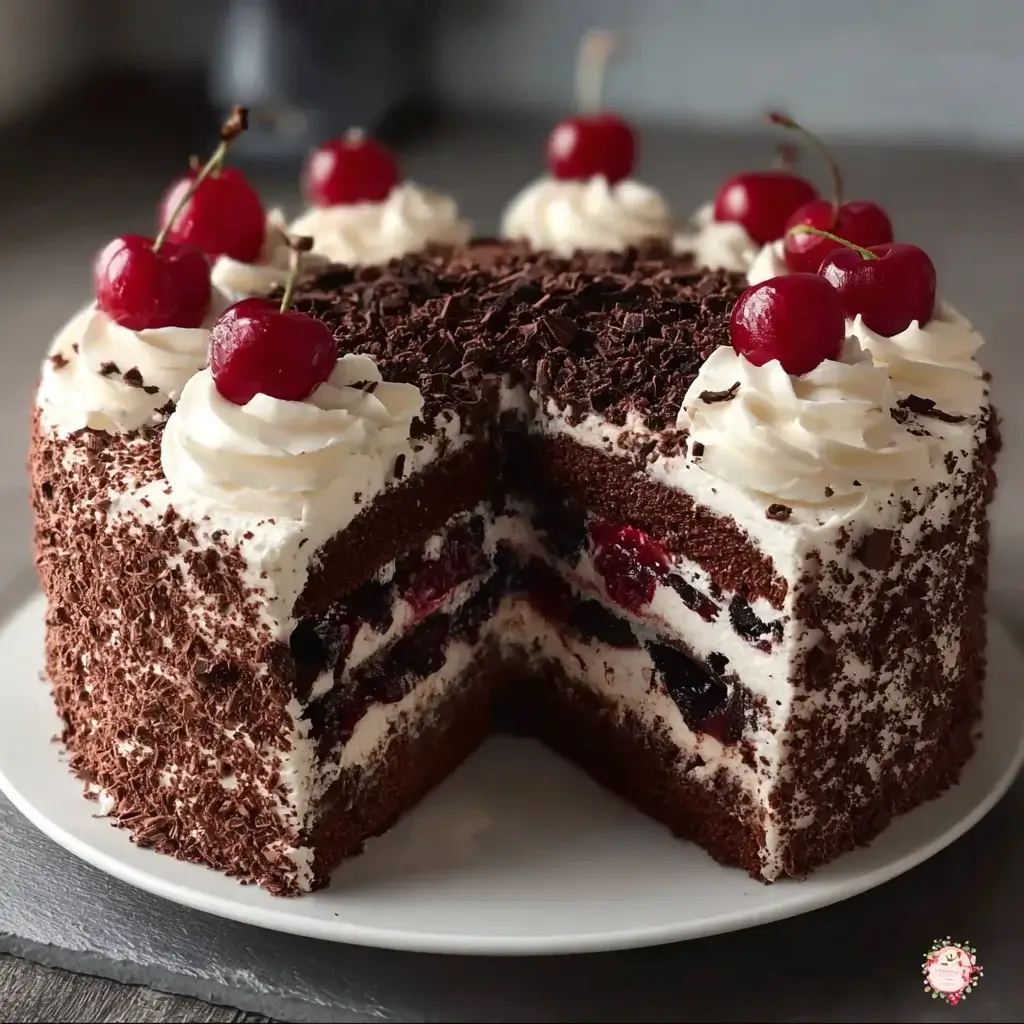
Introduction to Black Forest Cake
There’s something magical about a slice of Black Forest Cake that takes me back to my childhood. The rich chocolate layers, the sweet cherry filling, and the fluffy whipped cream create a symphony of flavors that dance on your palate. This classic German dessert isn’t just a treat; it’s a celebration. Whether you’re looking to impress guests at a dinner party or simply want to indulge after a long day, this cake is your go-to. It’s surprisingly easy to make, and trust me, your loved ones will be begging for seconds!
Why You’ll Love This Black Forest Cake
This Black Forest Cake is a delightful blend of flavors that will make your taste buds sing. It’s not just delicious; it’s also incredibly easy to whip up, even on a busy weeknight. The combination of rich chocolate and tart cherries creates a perfect balance that everyone will adore. Plus, it’s a showstopper! Serve it at gatherings, and watch as your friends and family rave about your baking skills.
Ingredients for Black Forest Cake
Gathering the right ingredients is the first step to creating your masterpiece. For this Black Forest Cake, you’ll need a mix of pantry staples and a few special items that bring the cake to life.
- All-purpose flour: The backbone of your cake, providing structure and texture.
- Granulated sugar: Sweetens the cake and helps it rise, giving that perfect fluffy bite.
- Unsweetened cocoa powder: Adds rich chocolate flavor without extra sweetness.
- Baking powder and baking soda: These leavening agents ensure your cake rises beautifully.
- Salt: A pinch enhances all the flavors, balancing the sweetness.
- Large eggs: They bind the ingredients together and add moisture.
- Whole milk: Contributes to a moist cake and rich flavor.
- Vegetable oil: Keeps the cake tender and adds moisture.
- Vanilla extract: A splash of this adds warmth and depth to the flavor.
- Boiling water: This may sound odd, but it helps to bloom the cocoa, intensifying the chocolate flavor.
- Cherry pie filling: The star of the show! It adds sweetness and tartness, making each bite a delight.
- Heavy whipping cream: Essential for that luscious whipped topping that makes this cake so indulgent.
- Powdered sugar: Sweetens the whipped cream and helps it hold its shape.
- Chocolate shavings: These are for garnish, adding a touch of elegance and extra chocolatey goodness.
For those looking to elevate the flavor, consider adding a splash of cherry liqueur to the filling. If cherries aren’t your thing, fresh cherries or raspberries can be a delightful substitute. You can find the exact quantities for each ingredient at the bottom of the article, ready for printing!
How to Make Black Forest Cake
Step 1: Preheat and Prepare
Start by preheating your oven to 350°F (175°C). This ensures your Black Forest Cake bakes evenly. While the oven warms up, grab two 9-inch round cake pans. Grease them with butter or cooking spray, then dust with flour. This step is crucial; it prevents the cake from sticking. Trust me, there’s nothing worse than a cake that won’t come out of the pan!
Step 2: Mix Dry Ingredients
In a large mixing bowl, combine the all-purpose flour, granulated sugar, cocoa powder, baking powder, baking soda, and salt. Whisk them together until well blended. This is where the magic begins! Mixing the dry ingredients first ensures that the leavening agents are evenly distributed. It sets the stage for a perfectly risen cake. You want that rich chocolate flavor to shine through!
Step 3: Add Wet Ingredients
Now it’s time to add the wet ingredients. Crack in the eggs, pour in the whole milk, vegetable oil, and vanilla extract. Beat the mixture on medium speed for about two minutes. This helps to incorporate air, making your cake light and fluffy. Then, carefully stir in the boiling water. Yes, it’s hot, but it intensifies the chocolate flavor, making every bite a delight!
Step 4: Bake the Cakes
Pour the batter evenly into your prepared cake pans. Don’t worry if it looks a bit thin; that’s normal! Place the pans in the preheated oven and bake for 30 to 35 minutes. Keep an eye on them! You’ll know they’re done when a toothpick inserted in the center comes out clean. Once baked, let them cool in the pans for about 10 minutes before transferring them to wire racks.
Step 5: Cool and Slice
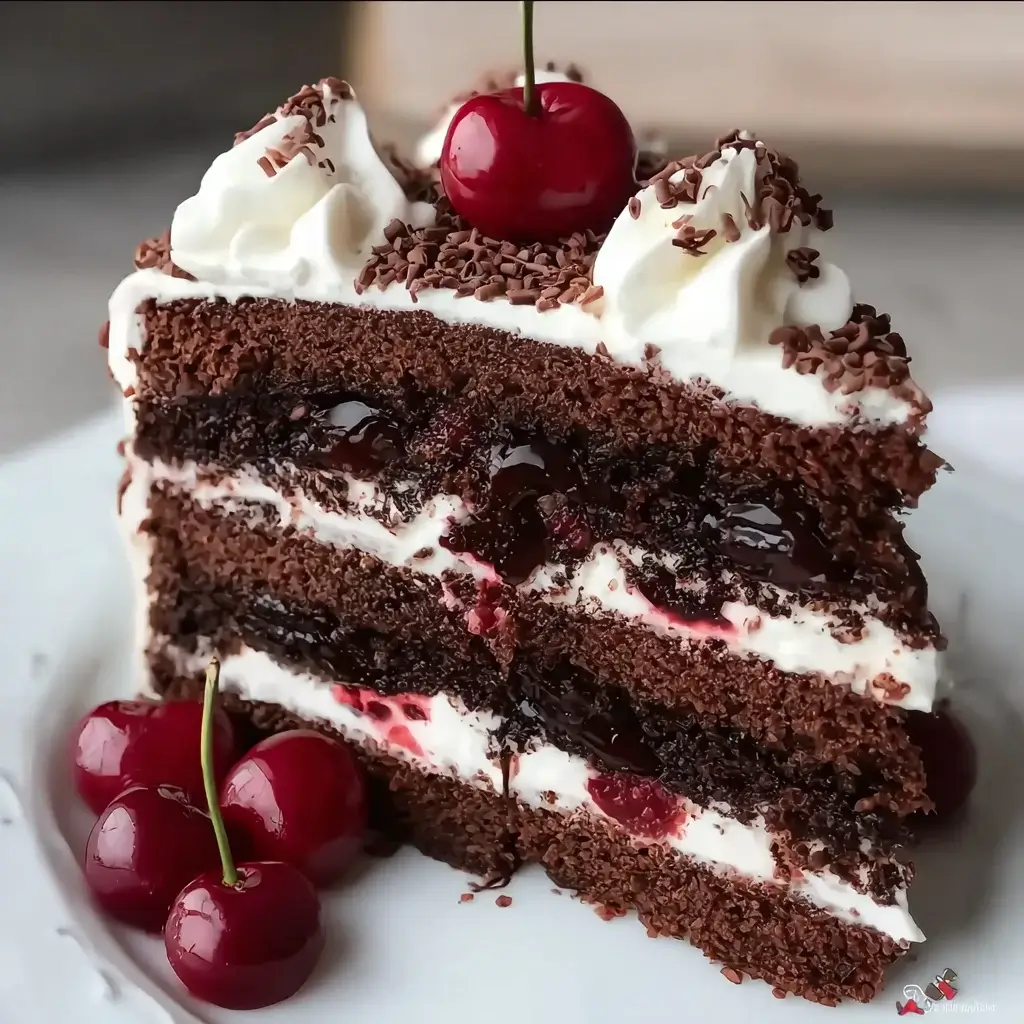
After the cakes have cooled for a bit, it’s time to slice them. Carefully remove them from the pans and let them cool completely on the wire racks. Once cool, use a serrated knife to slice each cake in half horizontally. This will give you four layers to work with. Take your time; even layers make for a stunning presentation!
Step 6: Assemble the Cake
Now comes the fun part—assembling your Black Forest Cake! Place one layer on a serving plate. Spread a generous layer of cherry pie filling over the top, followed by a layer of whipped cream. Repeat this process with the next two layers. Finally, place the last layer on top. Don’t skimp on the filling; it’s what makes this cake so special!
Step 7: Frost and Garnish
It’s time to frost! Use the remaining whipped cream to cover the top and sides of the cake. Smooth it out for a clean finish. For the final touch, sprinkle chocolate shavings on top and add a few extra cherries if you like. This not only looks beautiful but also adds that extra chocolatey goodness. Refrigerate for at least an hour before serving to let the flavors meld together!

Tips for Success
- Use room temperature ingredients for better mixing and a fluffier cake.
- Don’t skip the cooling step; it helps the layers hold together better.
- For a richer flavor, consider adding a splash of cherry liqueur to the filling.
- Keep your knife clean when slicing the cake for neat layers.
- Chill your whipped cream before whipping for better volume and stability.
Equipment Needed
- Two 9-inch round cake pans (or use one 9×13-inch pan for a single-layer cake).
- Mixing bowls (a large one for dry ingredients and a medium one for wet).
- Electric mixer (a whisk works too, but it’ll take longer).
- Measuring cups and spoons for accuracy.
- Serrated knife for slicing the cakes evenly.
Variations
- Gluten-Free Option: Substitute all-purpose flour with a gluten-free flour blend to make this cake suitable for those with gluten sensitivities.
- Fruit Alternatives: Swap out the cherry pie filling for fresh strawberries, raspberries, or blueberries for a different fruity twist.
- Vegan Version: Use flax eggs instead of regular eggs, almond milk in place of whole milk, and coconut cream for the whipped topping.
- Chocolate Lovers: Add chocolate chips to the batter for an extra chocolatey experience.
- Layered Delight: Incorporate a layer of chocolate ganache between the cake layers for a rich, decadent addition.
Serving Suggestions
- Pair your Black Forest Cake with a scoop of vanilla ice cream for a delightful contrast.
- Serve with a side of fresh berries to enhance the fruity flavors.
- For drinks, consider a rich coffee or a glass of cherry liqueur.
- Garnish each slice with a sprig of mint for a pop of color.
FAQs about Black Forest Cake
What is Black Forest Cake made of?
Black Forest Cake is made of rich chocolate cake layers, cherry pie filling, and fluffy whipped cream. The combination of these ingredients creates a delightful dessert that’s both indulgent and refreshing.
Can I use fresh cherries instead of cherry pie filling?
Absolutely! Fresh cherries can be a fantastic substitute for cherry pie filling. Just make sure to pit and slice them before layering. They’ll add a burst of freshness to your cake!
How do I store leftover Black Forest Cake?
Store any leftover cake in an airtight container in the refrigerator. It should stay fresh for about 3 to 4 days. Just be sure to keep it chilled to maintain the whipped cream’s texture.
Can I make Black Forest Cake ahead of time?
Yes! You can bake the cake layers a day in advance. Just wrap them tightly in plastic wrap and store them in the fridge. Assemble the cake the day you plan to serve it for the best flavor and texture.
Is Black Forest Cake suitable for special diets?
While traditional Black Forest Cake is not vegan or gluten-free, you can easily adapt the recipe. Use gluten-free flour and substitute eggs and dairy with plant-based alternatives for a delicious version that fits various dietary needs.
Final Thoughts
Creating a Black Forest Cake is more than just baking; it’s about crafting memories. The process of layering rich chocolate with sweet cherries and fluffy cream brings joy not only to the baker but also to everyone who gets to enjoy a slice. Each bite is a celebration of flavors that can brighten any occasion, from birthdays to casual family dinners. So, roll up your sleeves, embrace the mess, and let the aroma of chocolate fill your kitchen. Trust me, the smiles and compliments you’ll receive will make every moment spent worth it!
Black Forest Cake: Discover the Secret Recipe Today!
Ingredients
Method
- Preheat your oven to 350°F (175°C). Grease and flour two 9-inch round cake pans.
- In a large mixing bowl, combine the flour, granulated sugar, cocoa powder, baking powder, baking soda, and salt. Mix well.
- Add the eggs, milk, vegetable oil, and vanilla extract to the dry ingredients. Beat on medium speed for 2 minutes.
- Carefully stir in the boiling water (the batter will be thin). Pour the batter evenly into the prepared cake pans.
- Bake for 30 to 35 minutes, or until a toothpick inserted in the center comes out clean. Let the cakes cool in the pans for 10 minutes, then remove from pans and cool completely on wire racks.
- Once the cakes are completely cool, slice each cake in half horizontally to create four layers.
- Place one layer on a serving plate. Spread a layer of cherry pie filling over the top, then add a layer of whipped cream (made by beating the heavy cream, powdered sugar, and vanilla extract until soft peaks form).
- Repeat the process with the next two layers, then place the final layer on top.
- Frost the top and sides of the cake with the remaining whipped cream. Garnish with chocolate shavings and additional cherry pie filling if desired.
- Refrigerate for at least 1 hour before serving to allow the flavors to meld.
Nutrition
Notes
- For a richer flavor, add a splash of cherry liqueur to the cherry filling before spreading it on the cake layers.
- Substitute the cherry pie filling with fresh cherries or raspberries for a different fruit flavor.


