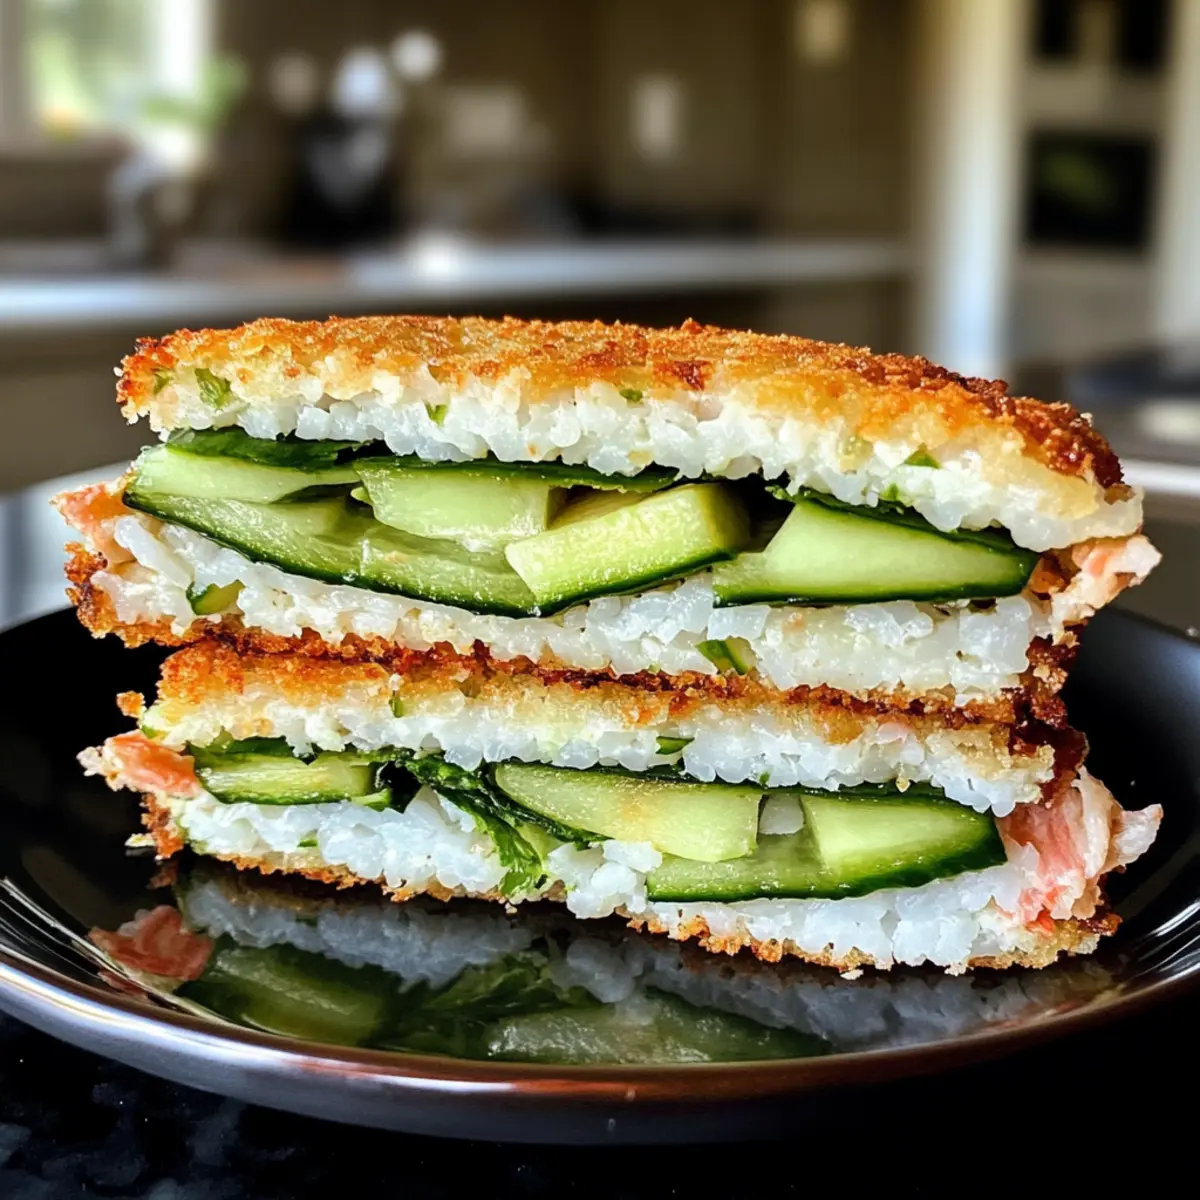
There’s something magical about the combination of crispy, savory, and fresh flavors coming together in your hands, don’t you think? Today, I’m excited to share my take on the California Roll Rice Paper Sushi Sandwich, or Onigirazu, that transforms traditional sushi into a portable delight. This recipe wraps all the classics—imitation crab, creamy avocado, and crunchy cucumber—inside a crispy rice paper shell that’s not only a feast for the eyes but is incredibly easy to whip up for lunch or a snack. It’s the perfect way to impress guests or treat yourself without spending hours in the kitchen! So, why not take a culinary trip to Japan with me today? Keep reading to discover how to create this crispy, flavorful sushi sandwich that will have you coming back for more!
Why try this sushi sandwich recipe?
Crispy Delight: The rice paper gives this sandwich a unique crunch, making every bite a delightful experience.
Flavor Fusion: Combining the classic California roll flavors with a crispy twist presents a fresh take on traditional sushi.
Quick & Easy: Perfect for busy days, this recipe comes together in under 30 minutes, ideal for lunch on the go!
Customizable Fillings: Feel free to mix and match ingredients; try smoked salmon or tempura veggies for a unique twist. Check out my Chicken Spring Rolls for another fun Asian-inspired snack!
Crowd-Pleasing: Whether it’s a casual lunch or an elegant get-together, this dish is sure to impress family and friends alike.
Healthier Choice: With fresh ingredients and the option to pack in veggies, this sushi sandwich is a nutritious alternative to takeout.
California Roll Rice Paper Sushi Sandwich Ingredients
For the Sushi Rice
• Sushi Rice – Rinse well before cooking to ensure it’s fluffy and tender.
• Rice Wine Vinegar – Adds the perfect tanginess to your sushi rice; try other vinegars if necessary but note the flavor variations.
For the Filling
• Imitation Crab – A primary protein source for a subtle seafood flavor; feel free to substitute with cooked shrimp or crab.
• Sriracha – A delightful way to introduce a spicy kick; adjust according to your spice tolerance.
• Kewpie Mayo – Provides a creamy richness that binds the crab mixture; regular mayo can be used as an alternative.
• Persian Cucumber – Adds a satisfying crunch and fresh flavor; any cucumber variety works, but Persian is favored for its sweetness.
• Avocado – Enhances creaminess and balances texture; using ripe avocados is recommended for the best results.
For Assembly
• Rice Paper – The star ingredient that wraps your sushi sandwich, offering a crispy texture once pan-fried; make sure to rehydrate properly.
• Nori Sheets – Adds a traditional sushi element and umami flavor; omit for a lighter sandwich experience.
• Sesame Seeds – For garnish, contributing nutty flavor and crunch; they’re optional, but definitely worth it!
• Neutral Oil – Essential for pan-frying; opt for canola or vegetable oil for a milder flavor.
With these fresh ingredients, you’re all set to create a delightful California Roll Rice Paper Sushi Sandwich that will impress anyone lucky enough to share it with you!
Step‑by‑Step Instructions for California Roll Rice Paper Sushi Sandwich
Step 1: Prepare Sushi Rice
Begin by rinsing 2 cups of sushi rice under cold water until the water runs clear, which helps achieve a fluffy texture. Cook the rice according to package instructions, usually around 15-20 minutes, and then let it cool. Mix in a splash of rice wine vinegar and a pinch of salt for extra flavor, gently folding it to avoid crushing the grains.
Step 2: Make Crab Filling
While the rice cools, shred 8 sticks of imitation crab into a bowl. Add in a tablespoon of sriracha and two tablespoons of kewpie mayo, mixing until the crab is well-coated. This creamy, spicy filling brings the flavors of the California Roll Rice Paper Sushi Sandwich to life. Taste and adjust the spice level according to your preference, adding more sriracha if desired.
Step 3: Assemble Sandwich
Lay out an oiled sheet of parchment paper or a clean countertop. Place two rehydrated rice paper sheets on top of each other, then lay a nori sheet on top, cutting a slit from the bottom to the center. This minor cut will help in folding the California Roll Rice Paper Sushi Sandwich neatly without tearing.
Step 4: Layer the Fillings
Start by spreading the crab mixture across the center of the nori sheet, ensuring an even layer. Top the crab with thinly sliced cucumber and creamy avocado, arranging them nicely. Spoon sushi rice into the top and bottom right sections of the nori to help hold the fillings in place when folding the sandwich.
Step 5: Fold
To close the sandwich, bring the bottom left section of the rice paper up over the fillings, then fold the sides towards the center, enclosing the mixture. Press to seal securely, ensuring no fillings spill out. This ensures a compact California Roll Rice Paper Sushi Sandwich that’s easy to handle and eat.
Step 6: Pan-Fry
Heat 2 tablespoons of neutral oil in a skillet over medium heat. Once the oil is shimmering, place the sandwich in the pan and fry for about 3-4 minutes on each side until golden brown and crispy. Keep an eye out for the beautiful golden color as it indicates that your sushi sandwich is perfectly cooked and ready to enjoy.
Step 7: Serve Warm
Once both sides are crispy, carefully remove the sushi sandwich from the pan and place it on a cutting board. Allow it to cool for a moment before slicing it in half to reveal the delightful layers inside. Serve with a side of spicy mayo for dipping, and relish your delicious California Roll Rice Paper Sushi Sandwich warm!
Make Ahead Options
These Crispy California Roll Rice Paper Sushi Sandwiches are fantastic for meal prep, saving you time on busy weekdays! You can prepare the sushi rice and the crab filling up to 24 hours in advance, simply store them in airtight containers in the refrigerator to maintain freshness. Additionally, slice the cucumber and avocado ahead of time, but keep the avocado in a separate container with a squeeze of lemon juice to prevent browning. When you’re ready to enjoy, assemble your sandwiches by layering the rice, fillings, and folding them together, then pan-fry for a quick crisp—creating delicious results with minimal effort!
California Roll Rice Paper Sushi Sandwich Variations
Feel free to get creative and customize your sushi sandwich with these delightful variations!
- Dairy-Free: Use avocado and eliminate any dairy in the mayo; enjoy creamy richness without the cream!
- Vegetarian Delight: Replace the imitation crab with marinated tofu or tempura vegetables, providing a satisfying meatless option.
- Spicy Twist: Add a drizzle of chili oil or extra sriracha to the crab filling for an intense heat that will tantalize your taste buds.
- Crunch Boost: Toss in some crispy tempura bits or crushed nuts for added texture and a delightful crunch in every bite.
- Sushi Rolls: Instead of a sandwich, roll it up as traditional sushi using nori and serve with soy sauce for dipping.
- Flavor Fusion: Try diced mango or fresh herbs like cilantro or mint to bring a refreshing twist to your filling. The juicy mango complements the savory crab beautifully!
- Protein-Packed: Swap imitation crab for grilled chicken or sliced steak for a hearty, protein-rich sandwich that’s sure to satisfy any appetite.
These variations can perfectly suit any occasion—if you’re looking for something nutritious yet tasty, check out my Ground Beef Rice recipe for another hearty option to delight your taste buds! Adventure awaits in the kitchen, so let your imagination run wild!
Storage Tips for California Roll Rice Paper Sushi Sandwich
Fridge: Store any leftover sushi sandwiches in an airtight container in the fridge for up to 1 day. This helps maintain freshness but enjoy them best when made fresh.
Reheating: To restore crispiness, reheat the California Roll Rice Paper Sushi Sandwich in a pan over medium heat for about 2-3 minutes on each side, rather than using a microwave, which may make it soggy.
Room Temperature: If serving immediately, keep these sandwiches at room temperature for up to 2 hours to prevent the rice paper from becoming too soft. Enjoy them fresh for the best experience!
What to Serve with Crispy California Roll Rice Paper Sushi Sandwich
Looking to create the perfect meal experience alongside your crispy sushi sandwich? Let’s explore some delightful pairings that will elevate your dining experience.
-
Crispy Tempura Vegetables: These light and crunchy bites offer a perfect contrast to the sushi sandwich while adding a touch of umami flavor.
-
Fresh Edamame: Lightly salted edamame brings a pop of freshness and protein, perfectly balancing the rich flavors of the sushi.
-
Cucumber Salad: A light, tangy cucumber salad not only refreshes the palate but also compliments the textures of the sandwich beautifully.
-
Miso Soup: A warm bowl of miso soup provides a comforting and savory note to your meal, enhancing the overall flavors of your sushi sandwich.
The balance of warm soup with the crispy sandwich creates a wonderful contrast in temperatures, making every bite exciting!
-
Spicy Mayo Dipping Sauce: Serve extra spicy mayo for dipping; it’s a perfect match for the sandwich and adds an additional layer of flavor.
-
Pineapple Chunks: Sweet, juicy pineapple can cleanse the palate between bites, perfectly highlighting the richness of the flavors in your California Roll Rice Paper Sushi Sandwich.
-
Japanese Green Tea: A refreshing glass of brewed green tea complements the meal while adding a lightness that pairs well with the sushi.
-
Fruit Mochi: For dessert, sweet, chewy fruit mochi offers a delightful end to your meal, echoing the sweet notes of the California roll.
Expert Tips for California Roll Rice Paper Sushi Sandwich
• Don’t Overstuff: Keep your fillings moderate to ensure easier folding and prevent spills; it makes the sandwich more manageable.
• Rehydrate Properly: Soak the rice paper just long enough to soften but not too long that it becomes fragile; practice makes perfect!
• Heat Matters: Use moderate heat when pan-frying; too high can burn the rice paper while the inside remains cold—balance is key for the perfect California Roll Rice Paper Sushi Sandwich.
• Seal It Well: Press the edges firmly when folding to create a tight seal; this prevents any delicious fillings from escaping during cooking.
• Fresh is Best: Always opt for fresh, ripe ingredients for the best flavor and texture, especially with avocados to enhance the overall taste.
California Roll Rice Paper Sushi Sandwich Recipe FAQs
What type of sushi rice should I use?
You should use short-grain sushi rice for the best results, as it becomes sticky when cooked and holds together nicely in the sandwich. Rinse the rice well before cooking to remove excess starch, which can help achieve a fluffy texture.
How do I store leftover California Roll Rice Paper Sushi Sandwiches?
Store any leftover sushi sandwiches in an airtight container in the fridge for up to 1 day. For the best experience, reheat them in a pan over medium heat for about 2-3 minutes on each side to restore crispiness. This avoids the sogginess that can occur in a microwave.
Can I freeze the California Roll Rice Paper Sushi Sandwich?
Absolutely! To freeze them, wrap each sandwich tightly in plastic wrap and then place them in a freezer-safe bag. They can be frozen for up to 3 months. When ready to enjoy, thaw in the fridge overnight and then pan-fry to restore the crispy texture before serving.
What should I do if the rice paper tears while assembling?
No worries! If you find that your rice paper tears, simply use a small piece of another rice paper to patch it up. Alternatively, you can layer the ingredients more carefully to ensure the fillings are balanced, or consider using a new piece of rice paper to start fresh.
Are there any dietary restrictions I should consider?
If you or your guests have seafood allergies, you can easily substitute the imitation crab with cooked shrimp or even tofu for a vegetarian option. Additionally, ensure all sauces, like sriracha and kewpie mayo, are free from allergens like gluten if that is a concern. Always check the labels when trying new ingredients!
How can I make my California Roll Rice Paper Sushi Sandwich spicier?
To kick up the heat, consider adding more sriracha to the crab filling or even mixing in some finely diced jalapeños or chili flakes into the filling. For those who love extra spice, serve with a side of spicy mayo or drizzle some hot sauce on top right before serving!
Crispy California Roll Rice Paper Sushi Sandwich Delight
Ingredients
Equipment
Method
- Rinse sushi rice under cold water until the water runs clear. Cook according to package instructions, about 15-20 minutes. Let cool and mix in rice wine vinegar and a pinch of salt.
- Shred the imitation crab into a bowl. Mix in sriracha and kewpie mayo until well-coated.
- Assemble by layering rehydrated rice paper on top of a nori sheet. Cut a slit in the nori for easier folding.
- Spread the crab mixture in the center of the nori, then add sliced cucumber and avocado. Spoon rice into corners of the nori.
- Fold the rice paper over the fillings, sealing tightly.
- Pan-fry in neutral oil over medium heat for 3-4 minutes on each side until golden and crispy.
- Serve warm, sliced in half, with spicy mayo for dipping.