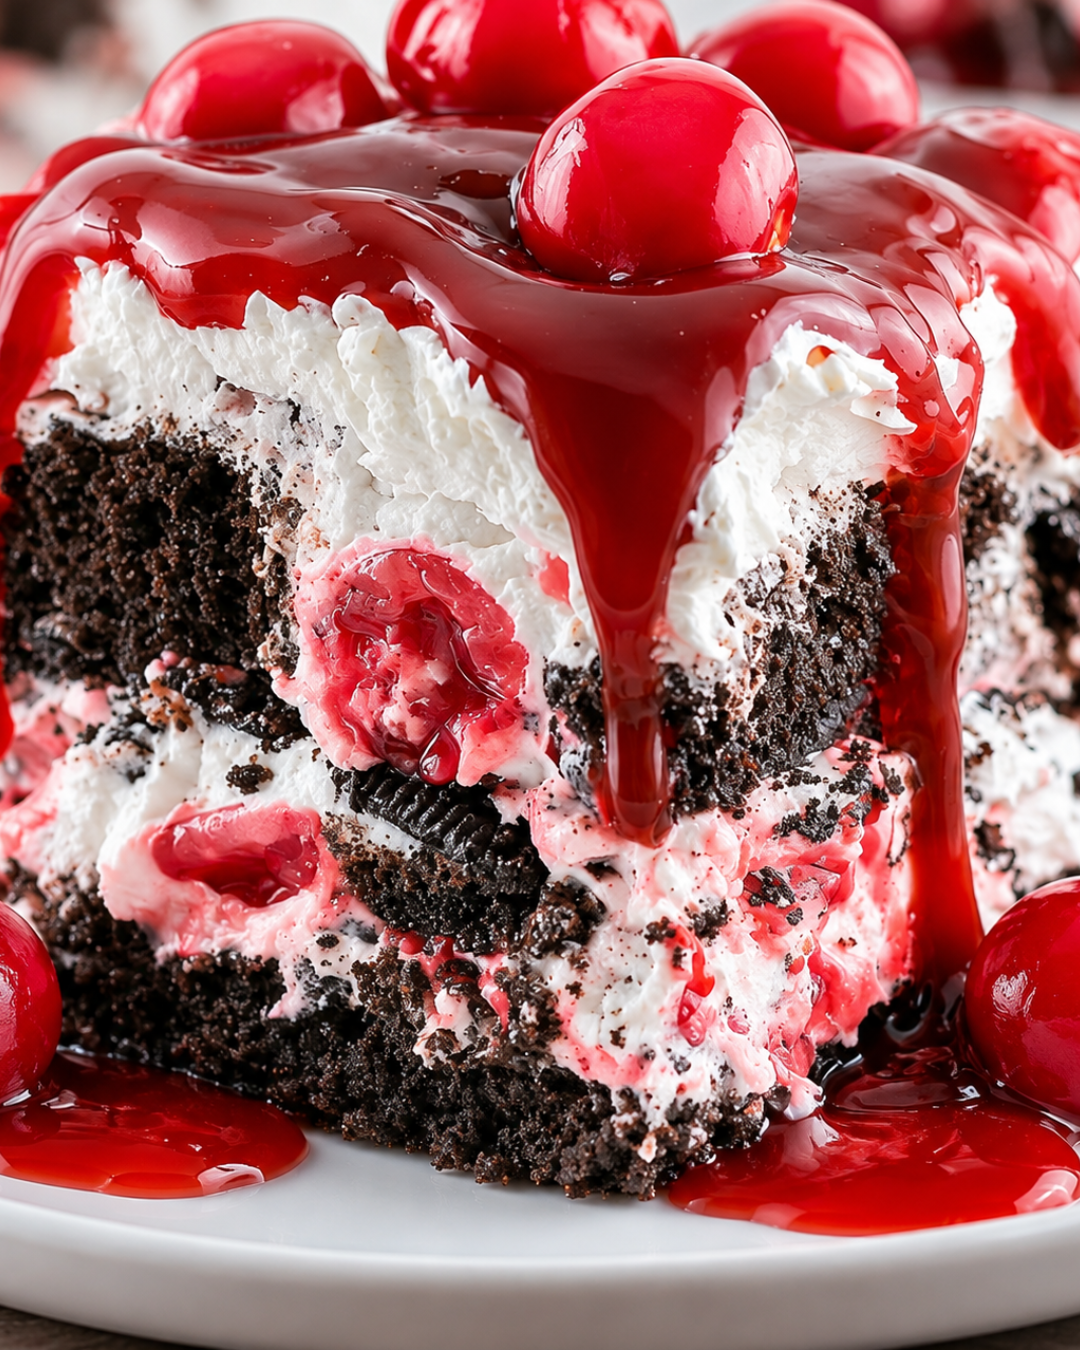
Introduction to Cherry Oreo Dream Cake
There’s something magical about desserts that bring back memories, isn’t there? The Cherry Oreo Dream Cake is one of those delightful treats that can transport you back to simpler times. It’s a no-bake wonder that’s perfect for busy days when you want to impress your loved ones without spending hours in the kitchen. With layers of creamy goodness and a crunchy Oreo crust, this cake is not just a dessert; it’s a celebration of flavors. Whether it’s a family gathering or a casual weeknight treat, this recipe is sure to bring smiles all around.
Why You’ll Love This Cherry Oreo Dream Cake
This Cherry Oreo Dream Cake is a game-changer for dessert lovers. It’s incredibly easy to whip up, making it perfect for those hectic weeknights or last-minute gatherings. The combination of rich creaminess and the tartness of cherries creates a flavor explosion that’s hard to resist. Plus, it’s a no-bake recipe, so you can enjoy a delicious treat without heating up the kitchen. Who wouldn’t love that?
Ingredients for Cherry Oreo Dream Cake
Gathering the right ingredients is the first step to creating this delightful Cherry Oreo Dream Cake. Here’s what you’ll need:
- Oreo cookies: The star of the crust! Their chocolatey crunch adds a rich flavor.
- Butter: Melted butter binds the Oreo crumbs together, creating a sturdy base.
- Cream cheese: This softens the filling, giving it that creamy texture we all love.
- Powdered sugar: Sweetens the cream layer without the graininess of granulated sugar.
- Vanilla extract: A splash of vanilla enhances the overall flavor profile.
- Heavy whipping cream: Whipped to perfection, it adds lightness and volume to the filling.
- Crushed Oreo cookies: These are folded into the cream layer for extra crunch and flavor.
- Cherry pie filling: The fruity topping that brings a burst of sweetness and color.
- Maraschino cherries: Optional, but they make for a fun and festive garnish.
- Whipped cream: A fluffy topping that adds a light finish to the cake.
- Additional Oreo cookies: Crushed or halved for decoration, they add a nice touch.
For exact measurements, check the bottom of the article where you can find everything listed for easy printing. Enjoy the process of gathering these ingredients; each one plays a vital role in making this cake a true dream!
How to Make Cherry Oreo Dream Cake
Creating the Cherry Oreo Dream Cake is a delightful journey that’s as easy as pie—well, no-bake pie, to be exact! Follow these simple steps, and you’ll have a show-stopping dessert ready in no time.
Step 1: Make the Crust
Start by crushing the Oreo cookies into fine crumbs. You can use a food processor or place them in a zip-top bag and crush them with a rolling pin. Once you have those delicious crumbs, mix them with melted butter until everything is evenly coated. This mixture is the foundation of your cake, so press it firmly into the bottom of an 8×8-inch baking dish. A solid crust is key to holding all that creamy goodness!
Step 2: Refrigerate the Crust
After pressing the crust into the dish, it’s time to chill! Pop it in the refrigerator for about 15-20 minutes. This step helps the butter set, ensuring your crust holds its shape when you add the layers. Trust me, a well-chilled crust makes all the difference!
Step 3: Prepare the Cream Layer
While the crust is chilling, let’s whip up the cream layer. In a mixing bowl, beat the softened cream cheese, powdered sugar, and vanilla extract until smooth and creamy. This mixture should be luscious and free of lumps. It’s the heart of your Cherry Oreo Dream Cake, so take your time to get it just right!
Step 4: Whip the Cream
In a separate bowl, whip the heavy cream until stiff peaks form. This means when you lift the whisk, the cream should hold its shape. Gently fold the whipped cream into the cream cheese mixture. Be careful not to deflate the whipped cream; you want to keep that light, airy texture. This is what makes the cake feel like a dream!
Step 5: Assemble the Cake
Now comes the fun part—assembly! Spread the cream mixture evenly over the chilled Oreo crust. Then, spoon the cherry pie filling over the cream layer, gently spreading it into an even layer. The vibrant red cherries against the creamy white filling is a sight to behold!
Step 6: Add Toppings
To finish off your masterpiece, top it with a generous layer of whipped cream. Sprinkle crushed Oreos on top for that extra crunch, and if you’re feeling fancy, add some maraschino cherries for a pop of color. It’s all about presentation, and these toppings make it look irresistible!
Step 7: Chill and Serve
Finally, cover the cake and refrigerate it for at least 4 hours, or preferably overnight. This allows all the flavors to meld beautifully. If you want cleaner slices, consider freezing it for about 30 minutes before cutting. When you’re ready to serve, slice it chilled and watch everyone’s eyes light up!
Tips for Success
- Use room temperature cream cheese for a smoother filling.
- Don’t skip the chilling time; it helps the layers set properly.
- For a richer flavor, try adding a splash of almond extract to the cream layer.
- Feel free to mix in some chopped nuts for added texture.
- Keep leftovers covered in the fridge for up to three days.
Equipment Needed
- Mixing bowls: A set of various sizes is handy; you can use any large bowl you have.
- Electric mixer: A hand mixer works great, but a whisk can do the job too.
- 8×8-inch baking dish: Any similar-sized dish will work if you don’t have this exact one.
- Measuring cups and spoons: Essential for accuracy; you can use any standard kitchen measuring tools.
Variations
- Chocolate Cherry Delight: Use chocolate Oreo cookies instead of regular ones for a richer flavor.
- Nutty Crunch: Add chopped walnuts or pecans to the cream layer for an extra crunch.
- Fruit Medley: Swap the cherry pie filling for blueberry or strawberry for a different fruity twist.
- Vegan Option: Use vegan cream cheese and coconut whipped cream for a plant-based version.
- Gluten-Free: Substitute gluten-free Oreo cookies to make this dessert suitable for gluten-sensitive guests.
Serving Suggestions
- Pair with a scoop of vanilla ice cream for a delightful contrast in temperature.
- Serve alongside fresh fruit, like strawberries or raspberries, to enhance the flavors.
- For drinks, consider a chilled glass of sweet iced tea or a light sparkling wine.
- Garnish each slice with a sprig of mint for a pop of color.
FAQs about Cherry Oreo Dream Cake
Curious about the Cherry Oreo Dream Cake? Here are some common questions that might pop into your mind:
Can I make this Cherry Oreo Dream Cake ahead of time?
Absolutely! This no-bake cake is perfect for making ahead. Just prepare it a day in advance and let it chill overnight. The flavors will meld beautifully, making it even more delicious!
How long can I store leftovers?
Leftovers can be stored in the refrigerator for up to three days. Just make sure to cover it well to keep it fresh. Trust me, it won’t last long!
Can I use fresh cherries instead of cherry pie filling?
Yes, you can! Fresh cherries will add a delightful burst of flavor. Just make sure to pit and slice them before layering. You might want to add a bit of sugar to sweeten them up.
Is there a way to make this dessert gluten-free?
Definitely! Simply swap out regular Oreo cookies for gluten-free ones. This way, everyone can enjoy this dreamy dessert without worry.
What can I substitute for cream cheese?
If you’re looking for a substitute, try using mascarpone cheese or a dairy-free cream cheese alternative. Both will give you a creamy texture without compromising flavor.
Final Thoughts
Creating the Cherry Oreo Dream Cake is more than just baking; it’s about crafting memories. Each layer tells a story, from the crunchy Oreo crust to the creamy filling topped with vibrant cherries. This dessert is a crowd-pleaser, perfect for any occasion, whether it’s a family gathering or a casual weeknight treat. The joy of sharing a slice with loved ones, watching their faces light up with delight, is truly priceless. So, roll up your sleeves, gather your ingredients, and let this cake bring a little sweetness into your life. You won’t regret it!
PrintCherry Oreo Dream Cake: A Delightfully Easy Recipe!
- Total Time: 4 hours 20 minutes
- Yield: 8 servings
- Diet: Vegetarian
Description
A delightful and easy recipe for Cherry Oreo Dream Cake, featuring layers of Oreo crust, cream filling, and cherry topping.
Ingredients
- 24 Oreo cookies
- 5 tbsp butter, melted
- 8 oz (226 g) cream cheese, softened
- ½ cup powdered sugar
- 1 tsp vanilla extract
- 1 cup heavy whipping cream
- ½ cup crushed Oreo cookies
- 1 can (21 oz / 595 g) cherry pie filling
- ½ cup chopped maraschino cherries, optional
- 1 cup whipped cream
- 6–8 Oreo cookies, crushed or halved
- Maraschino cherries, for garnish
Instructions
- Make the crust: Crush the Oreo cookies into fine crumbs. Mix with melted butter until evenly coated.
- Press the mixture firmly into the bottom of an 8×8-inch baking dish. Refrigerate for 15–20 minutes.
- Make the cream layer: Beat the cream cheese, powdered sugar, and vanilla until smooth.
- In a separate bowl, whip the heavy cream until stiff peaks form. Gently fold it into the cream cheese mixture, then fold in the crushed Oreos.
- Spread the cream mixture evenly over the chilled Oreo crust.
- Spoon the cherry pie filling over the cream layer and gently spread it into an even layer.
- Top with whipped cream, crushed Oreos, and maraschino cherries.
- Cover and refrigerate for at least 4 hours, preferably overnight, until fully set.
- Slice chilled and serve.
Notes
- For an extra-rich ‘dream cake’ texture, freeze it for 30 minutes before slicing. This makes the layers cleaner while keeping the filling creamy.
- Prep Time: 20 minutes
- Cook Time: 0 minutes
- Category: Dessert
- Method: No-bake
- Cuisine: American
Nutrition
- Serving Size: 1 slice
- Calories: 350
- Sugar: 25g
- Sodium: 200mg
- Fat: 22g
- Saturated Fat: 10g
- Unsaturated Fat: 8g
- Trans Fat: 0g
- Carbohydrates: 30g
- Fiber: 1g
- Protein: 4g
- Cholesterol: 40mg