Introduction to Christmas Cherry Balls
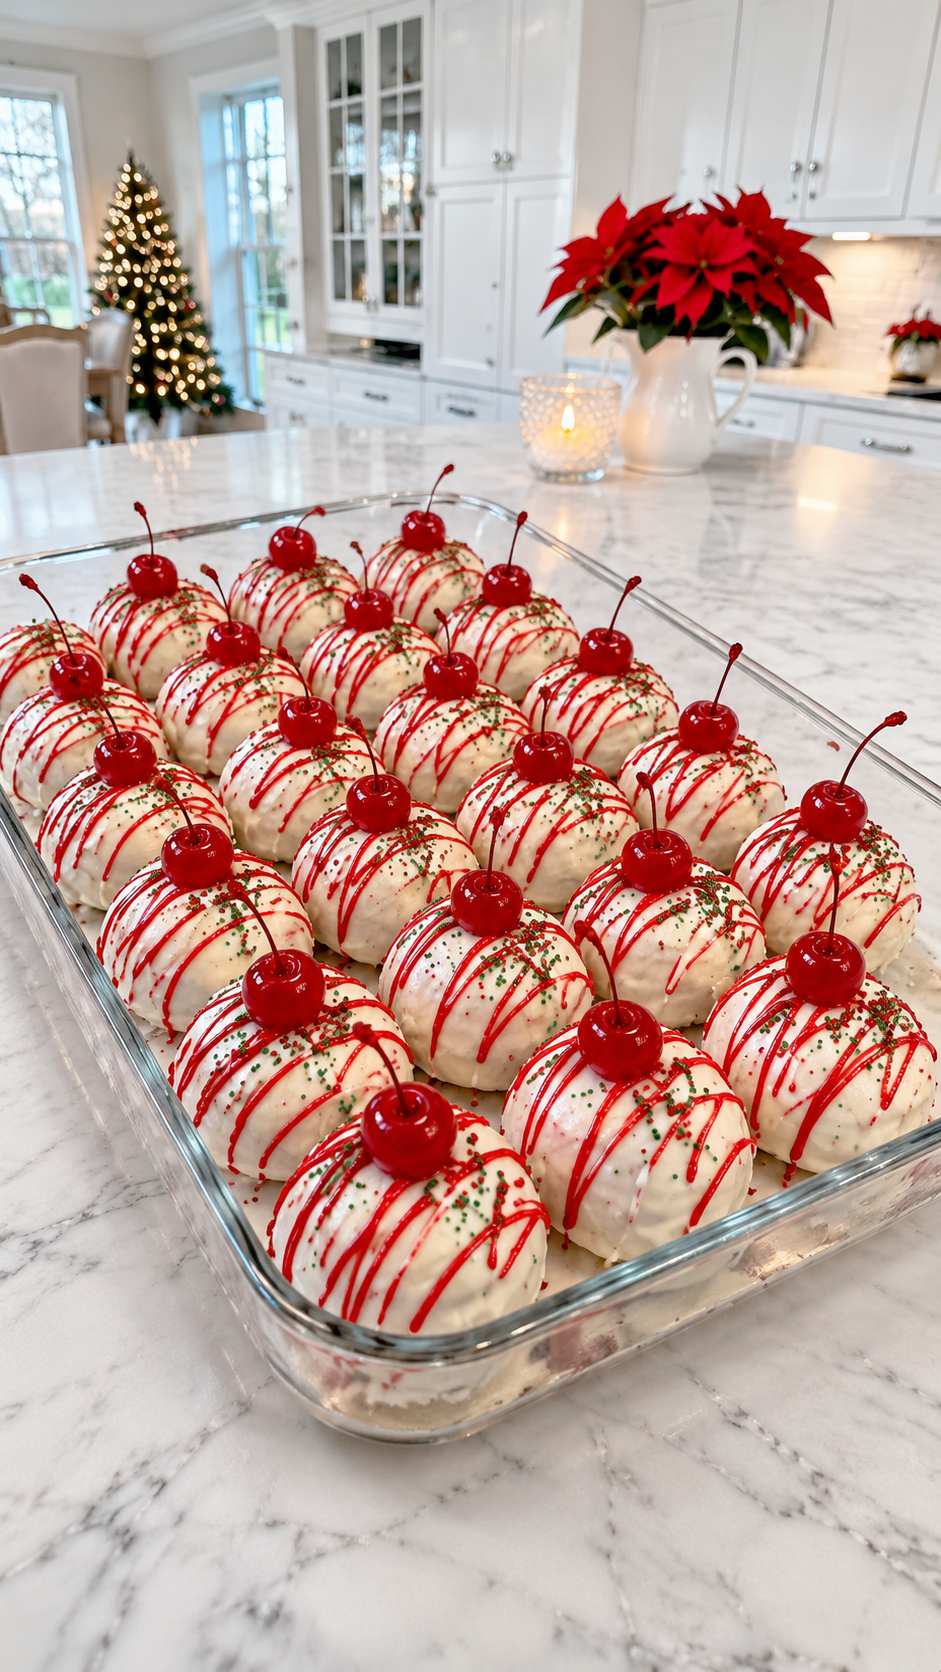
Every holiday season, I find myself reminiscing about the sweet treats that filled my childhood. One of my all-time favorites has to be Christmas Cherry Balls. These delightful bites are not just a feast for the eyes; they’re a quick solution for busy days filled with holiday cheer. With their vibrant colors and rich flavors, they’re sure to impress your loved ones. Plus, they require no baking, making them perfect for those of us who want to whip up something special without spending hours in the kitchen. Let’s dive into this festive treat!
Why You’ll Love This Christmas Cherry Balls
Christmas Cherry Balls are the ultimate holiday treat that combines ease and flavor in every bite. They come together in just 15 minutes, making them a perfect last-minute addition to your festive spread. The delightful mix of crushed vanilla wafers, sweet coconut, and maraschino cherries creates a taste explosion that will have everyone reaching for seconds. Plus, they’re no-bake, so you can spend more time enjoying the season with family and friends!
Ingredients for Christmas Cherry Balls
Gathering the right ingredients is key to making these festive delights. Here’s what you’ll need:
- Finely crushed vanilla wafers: These provide the base and a sweet crunch. You can substitute with graham crackers if needed.
- Sweetened shredded coconut: This adds a tropical flair and chewy texture. Unsweetened coconut works too, just adjust the sugar.
- Unsalted butter: Softened butter binds everything together and adds richness. Margarine can be used as a substitute.
- Powdered sugar: This sweetens the mixture and gives it a smooth finish. You can use coconut sugar for a healthier option.
- Finely chopped maraschino cherries: These are the star of the show, bringing a burst of flavor and color. Make sure they’re well-drained to avoid excess moisture.
- Vanilla extract: A splash of this enhances the overall flavor. Feel free to use almond extract for a different twist.
- Maraschino cherry juice: This adds moisture and a hint of cherry flavor. You can replace it with a splash of fruit juice if you prefer.
- Additional shredded coconut: For rolling the balls, giving them a festive look. Crushed nuts or sprinkles can be fun alternatives.
- Optional powdered sugar for coating: This adds an extra touch of sweetness and a beautiful finish.
For exact measurements, check the bottom of the article where you can find everything listed for easy printing!
How to Make Christmas Cherry Balls
Step 1: Prepare the Mixture
Start by grabbing a large mixing bowl. Beat the softened butter and powdered sugar together until the mixture is creamy and smooth. This step is crucial; it creates a fluffy base for your Christmas Cherry Balls. Next, add in the vanilla extract and maraschino cherry juice. Mix everything until well combined. The aroma of vanilla and cherries will fill your kitchen, setting the perfect festive mood. Trust me, this mixture is just the beginning of something delicious!
Step 2: Combine Ingredients
Now it’s time to bring in the fun ingredients! Stir in the finely crushed vanilla wafers, sweetened shredded coconut, and the finely chopped maraschino cherries. Use a spatula or wooden spoon to mix everything thoroughly. You want to ensure that every bit of the mixture is coated with that creamy goodness. As you mix, you’ll notice the colors and textures coming together beautifully. It’s like a holiday party in a bowl, and you’re the host!
Step 3: Chill the Dough
Once your mixture is well combined, cover the bowl with plastic wrap and pop it in the refrigerator. Chilling the dough for about 30 to 45 minutes is essential. This step helps the mixture firm up, making it easier to handle when you start rolling the balls. Plus, it allows the flavors to meld together, enhancing the overall taste of your Christmas Cherry Balls.
Step 4: Form the Balls
After the dough has chilled, it’s time to get your hands a little messy! Scoop about one tablespoon of the mixture and roll it between your palms to form small balls. Aim for a size that’s easy to pop in your mouth—about an inch in diameter works well. As you roll, you’ll feel the sticky mixture transform into delightful little spheres. Place each ball on a parchment-lined baking sheet, giving them some space to breathe. You’re almost there!
Step 5: Coat the Balls
Now comes the fun part—coating your cherry balls! Roll each one in the additional shredded coconut or powdered sugar until they’re completely covered. This not only adds a festive touch but also enhances the flavor. If you’re feeling adventurous, try mixing in some crushed nuts or colorful sprinkles for a unique twist. Your Christmas Cherry Balls will look as good as they taste!
Step 6: Refrigerate and Serve
Finally, arrange your coated cherry balls back on the parchment-lined baking sheet. Refrigerate them for at least one hour to let them firm up completely. Once they’re chilled, they’re ready to serve! You can enjoy them right away or store them in an airtight container in the fridge. Either way, these festive treats are sure to be a hit at your holiday gatherings!
Tips for Success
- Ensure your maraschino cherries are well-drained to prevent excess moisture in the mixture.
- For a firmer dough, chill it longer if needed; this makes rolling easier.
- Experiment with different coatings like crushed nuts or colorful sprinkles for a festive flair.
- Use a cookie scoop for uniform ball sizes, ensuring even coating and presentation.
- These treats can be made ahead of time and stored in the fridge for up to a week!
Equipment Needed
- Mixing bowl: A large bowl for combining ingredients. A medium bowl works too if you’re short on space.
- Spatula or wooden spoon: For mixing. A sturdy fork can also do the trick.
- Parchment paper: To line your baking sheet. Wax paper is a suitable alternative.
- Cookie scoop: For uniform balls. Your hands work just fine if you don’t have one!
Variations
- Chocolate-Dipped: After chilling, dip each cherry ball in melted chocolate for a decadent twist.
- Nutty Delight: Add finely chopped nuts like pecans or walnuts to the mixture for added crunch and flavor.
- Fruit Fusion: Substitute maraschino cherries with dried cranberries or chopped dried apricots for a different fruity flavor.
- Gluten-Free: Use gluten-free vanilla wafers or crushed almonds instead of regular wafers to make these treats gluten-free.
- Vegan Option: Replace butter with coconut oil and use a plant-based powdered sugar for a vegan-friendly version.
Serving Suggestions
- Pair your Christmas Cherry Balls with a warm cup of hot cocoa or spiced cider for a cozy treat.
- Serve them on a festive platter, garnished with fresh mint leaves for a pop of color.
- Include them in a holiday dessert table alongside cookies and fudge for a delightful spread.
FAQs about Christmas Cherry Balls
Can I make Christmas Cherry Balls ahead of time?
Absolutely! These festive treats can be made a few days in advance. Just store them in an airtight container in the refrigerator. They’ll stay fresh and delicious, allowing you to enjoy more time with family and friends during the holidays.
What can I use instead of maraschino cherries?
If maraschino cherries aren’t your thing, you can substitute them with dried cranberries or chopped dried apricots. Both options will add a unique twist to your Christmas Cherry Balls while keeping that festive spirit alive!
How do I store leftover Christmas Cherry Balls?
Store any leftovers in an airtight container in the refrigerator. They’ll keep well for up to a week. Just make sure to separate layers with parchment paper to prevent sticking!
Can I freeze Christmas Cherry Balls?
<pYes, you can freeze them! Just place the balls in a single layer on a baking sheet until frozen, then transfer them to a freezer-safe container. They’ll last for about a month. Thaw them in the fridge before serving for the best texture.
What’s the best way to serve Christmas Cherry Balls?
Serve these delightful treats chilled on a festive platter. You can garnish them with fresh mint leaves or even drizzle some melted chocolate on top for an extra touch of indulgence. They’re sure to be a hit at any holiday gathering!
Final Thoughts
Creating Christmas Cherry Balls is more than just whipping up a dessert; it’s about crafting memories that linger long after the last bite. The joy of mixing, rolling, and coating these festive treats brings a sense of togetherness that embodies the holiday spirit. Each bite is a delightful explosion of flavor, reminding us of the warmth of family gatherings and the laughter shared around the table. So, whether you’re making them for a party or just to enjoy at home, these cherry balls are sure to spread cheer and sweetness throughout your holiday season!
PrintChristmas Cherry Balls: Delight in This Festive Treat!
- Total Time: 1 hour 15 minutes
- Yield: 24 cherry balls
- Diet: Vegetarian
Description
Christmas Cherry Balls are a delightful festive treat made with crushed vanilla wafers, shredded coconut, and maraschino cherries, perfect for holiday celebrations.
Ingredients
- 2 cups finely crushed vanilla wafers
- 1½ cups sweetened shredded coconut
- ½ cup unsalted butter, softened
- 1 cup powdered sugar
- ½ cup finely chopped maraschino cherries, well drained
- 1 teaspoon vanilla extract
- 2 tablespoons maraschino cherry juice
- ½ cup additional shredded coconut for rolling
- ¼ cup powdered sugar for coating, optional
Instructions
- In a large mixing bowl, beat the softened butter and powdered sugar until creamy.
- Add the vanilla extract and maraschino cherry juice. Mix until combined.
- Stir in the crushed vanilla wafers, shredded coconut, and chopped maraschino cherries.
- Mix thoroughly until a thick, sticky dough forms. If the mixture feels too soft, add a little more crushed vanilla wafers.
- Cover the bowl and refrigerate for 30–45 minutes until firm enough to handle.
- Scoop about 1 tablespoon of the mixture and roll between your palms to form small balls.
- Roll each ball in shredded coconut or powdered sugar until completely coated.
- Arrange the cherry balls on a parchment-lined baking sheet.
- Refrigerate for at least 1 hour until firm.
- Serve chilled or store in an airtight container in the refrigerator.
Notes
- Ensure maraschino cherries are well drained to avoid excess moisture.
- These treats can be made ahead of time and stored in the refrigerator.
- Feel free to customize the coating with different toppings like crushed nuts or sprinkles.
- Prep Time: 15 minutes
- Cook Time: 0 minutes
- Category: Dessert
- Method: No-bake
- Cuisine: American
Nutrition
- Serving Size: 1 cherry ball
- Calories: 120
- Sugar: 10g
- Sodium: 50mg
- Fat: 6g
- Saturated Fat: 4g
- Unsaturated Fat: 2g
- Trans Fat: 0g
- Carbohydrates: 15g
- Fiber: 1g
- Protein: 1g
- Cholesterol: 15mg