Introduction to Christmas Cherry Balls
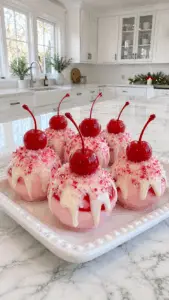
The holiday season brings a whirlwind of joy, laughter, and, of course, delicious treats. Among the festive favorites, Christmas Cherry Balls stand out as delightful bites that capture the spirit of celebration. These little gems are not just easy to make; they’re a quick solution for busy days filled with holiday preparations. Imagine surprising your loved ones with these colorful, sweet treats that look as good as they taste. Whether you’re hosting a gathering or simply indulging at home, these Christmas Cherry Balls are sure to spread cheer and create lasting memories.
Why You’ll Love This Christmas Cherry Balls
Christmas Cherry Balls are the perfect blend of simplicity and flavor. They come together in no time, making them an ideal treat for busy holiday schedules. The creamy, sweet filling paired with the crunch of peppermint creates a delightful contrast that’s hard to resist. Plus, they’re a hit with both kids and adults alike, ensuring everyone at your gathering will be reaching for seconds. Who wouldn’t love that?
Ingredients for Christmas Cherry Balls
Gathering the right ingredients is the first step to creating these festive delights. Here’s what you’ll need:
- Cream Cheese: This is the creamy base that gives the balls their rich texture. Make sure it’s softened for easy mixing.
- Powdered Sugar: Sweetness is key! This sugar dissolves easily, ensuring a smooth filling.
- Vanilla Wafers: These add a delightful crunch and flavor. You can substitute with graham crackers if needed.
- Maraschino Cherries: Chopped cherries bring a burst of sweetness and color. Drain and dry them well to avoid excess moisture.
- Vanilla Extract: A splash of this enhances the overall flavor, making each bite even more delicious.
- Candy Melts: Pink and white candy melts create a beautiful coating. Feel free to use any color that suits your festive theme!
- Crushed Peppermint Candy: This adds a refreshing crunch and holiday flair. You can swap it for crushed nuts if you prefer.
- Stemmed Maraschino Cherries: These are for garnishing, giving each ball a charming finish.
For exact measurements, check the bottom of the article where you can find everything listed for easy printing. Happy cooking!
How to Make Christmas Cherry Balls
Creating Christmas Cherry Balls is a delightful journey that fills your kitchen with festive cheer. Follow these simple steps, and you’ll have a tray of these sweet treats ready to impress your family and friends.
Step 1: Prepare the Mixture
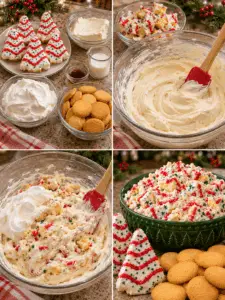
Start by beating the softened cream cheese until it’s smooth and creamy. This is the foundation of your filling, so take your time. Gradually mix in the powdered sugar, ensuring there are no lumps. Next, stir in the vanilla extract, crushed vanilla wafers, and finely chopped maraschino cherries. The mixture should be thick and well combined, bursting with flavor.
Step 2: Chill the Mixture
Once your mixture is ready, it’s time to chill. Cover the bowl with plastic wrap and refrigerate for about an hour. This step is crucial as it firms up the mixture, making it easier to shape into balls. Trust me, patience pays off here!
Step 3: Shape the Balls
After chilling, take the mixture out of the fridge. With clean hands, roll it into 24 equal-sized balls. Place them on a parchment-lined baking sheet. This prevents sticking and makes cleanup a breeze. For an extra firm texture, pop the tray in the freezer for about 20 minutes.
Step 4: Melt the Candy Coating
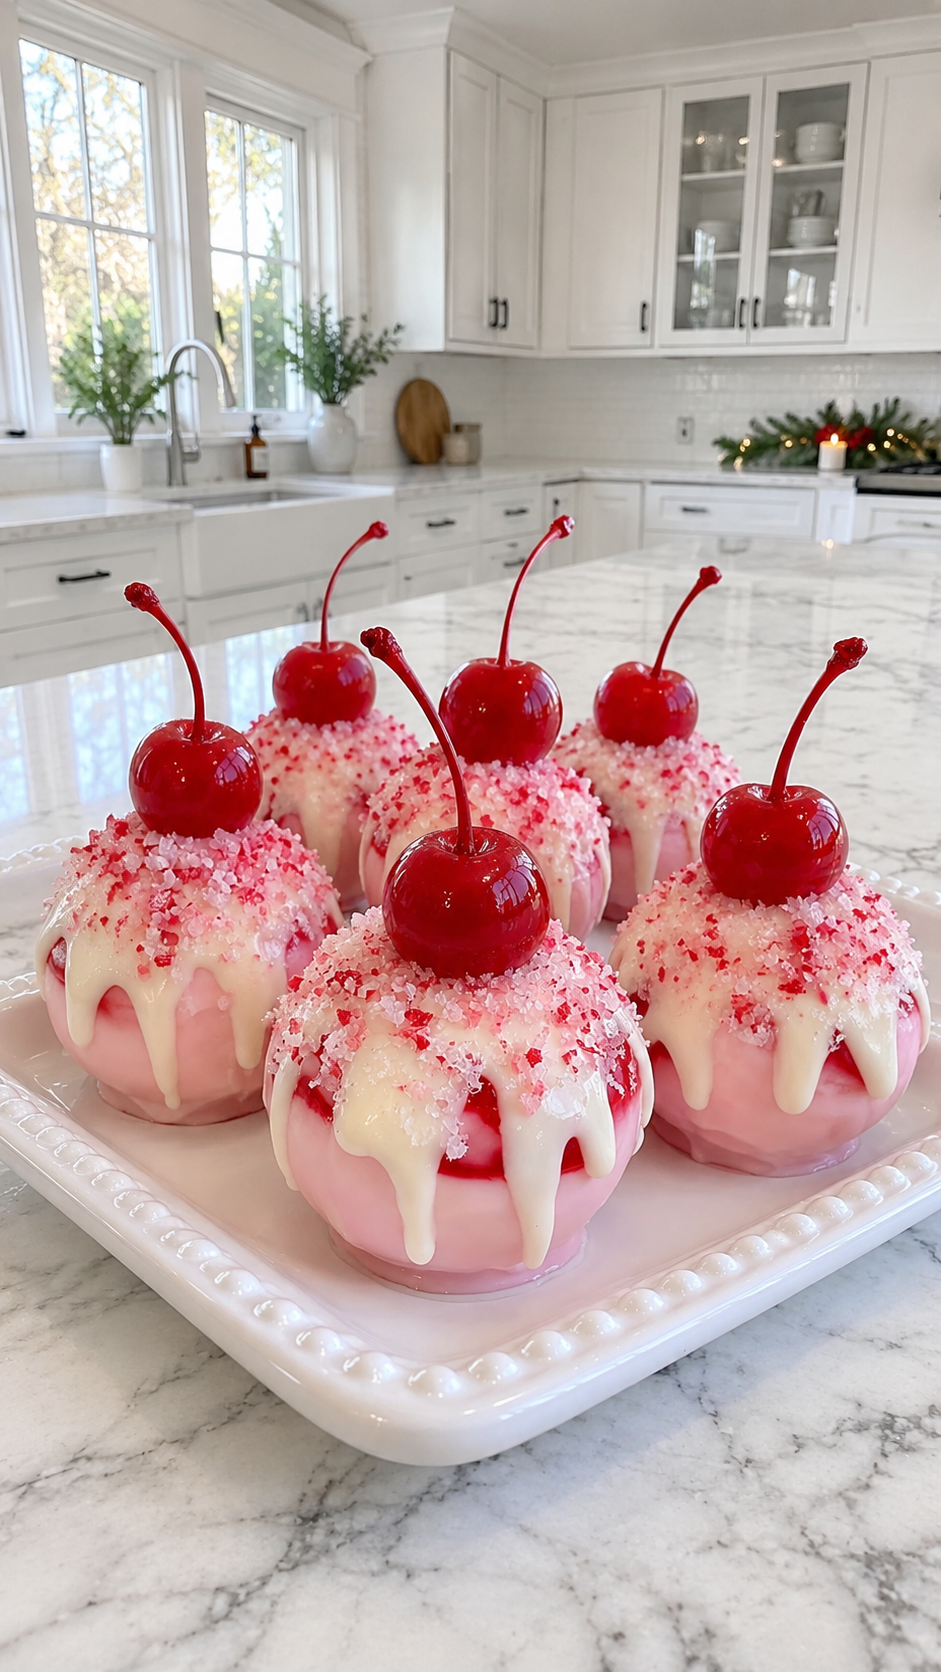
While the balls are chilling, it’s time to melt the pink candy melts. Follow the package instructions for the best results. Once melted, dip each ball into the coating, allowing any excess to drip off. Return them to the parchment-lined sheet and let them set for about 15 minutes. The vibrant color will make your treats pop!
Step 5: Add the White Drizzle
Next, melt the white candy melts. Using a spoon, drizzle a bit over each pink-coated ball, letting it cascade down the sides. This adds a beautiful contrast and makes them look even more festive. Don’t worry about perfection; the drizzles add character!
Step 6: Garnish and Chill
Immediately sprinkle the tops with crushed peppermint candy for that holiday crunch. Then, press a stemmed maraschino cherry onto each ball for a charming finish. Finally, refrigerate the completed treats for about 30 minutes before serving. This helps everything set nicely and enhances the flavors.
Tips for Success
- Ensure your cream cheese is at room temperature for easy mixing.
- Thoroughly dry the maraschino cherries to avoid a soggy mixture.
- Use a cookie scoop for uniform ball sizes; it makes shaping easier.
- Experiment with different candy melt colors for a fun twist.
- Store leftovers in an airtight container to keep them fresh.
Equipment Needed
- Mixing Bowl: A large bowl for combining ingredients. A stand mixer works great, but a hand mixer will do just fine.
- Measuring Cups and Spoons: Essential for accuracy. If you don’t have these, use a regular coffee mug for rough estimates.
- Parchment Paper: For lining your baking sheet. If you’re out, a silicone mat is a perfect alternative.
- Cookie Scoop: Helps in shaping uniform balls. A tablespoon works well if you don’t have one.
- Microwave-Safe Bowl: For melting candy melts. Any heat-safe bowl will work in a pinch.
Variations
- Chocolate Cherry Balls: Swap out the candy melts for dark or milk chocolate for a rich twist.
- Nutty Delight: Add finely chopped nuts like walnuts or pecans to the mixture for added crunch and flavor.
- Gluten-Free Option: Use gluten-free vanilla wafers or crushed gluten-free cookies to make these treats suitable for everyone.
- Mint Chocolate: Incorporate a few drops of peppermint extract into the mixture for a minty flavor that pairs beautifully with chocolate.
- Fruit Fusion: Experiment with different fruits like dried cranberries or chopped strawberries for a unique taste.
Serving Suggestions
- Pair Christmas Cherry Balls with a warm cup of hot cocoa for a cozy treat.
- Serve them on a festive platter, garnished with fresh mint leaves for a pop of color.
- These treats make a delightful addition to a holiday dessert table alongside cookies and pies.
- Consider offering a variety of drinks, like eggnog or spiced cider, to complement the flavors.
- Wrap them in clear cellophane bags as charming gifts for friends and family.
FAQs about Christmas Cherry Balls
As you embark on your journey to create these festive treats, you might have a few questions. Here are some common queries about Christmas Cherry Balls that can help you along the way:
Can I make Christmas Cherry Balls ahead of time?
Absolutely! These treats can be made a few days in advance. Just store them in an airtight container in the refrigerator to keep them fresh.
What can I use instead of maraschino cherries?
If maraschino cherries aren’t your thing, you can substitute them with dried cherries or even chopped strawberries for a different flavor profile.
How do I store leftover Christmas Cherry Balls?
Keep any leftovers in an airtight container in the fridge. They’ll stay fresh for up to four days, but trust me, they won’t last that long!
Can I freeze Christmas Cherry Balls?
Yes, you can freeze them! Just make sure they’re well-wrapped to prevent freezer burn. Thaw them in the fridge before serving.
What’s the best way to serve these treats?
Serve them chilled on a festive platter, perhaps alongside a warm drink like hot cocoa or spiced cider. They’re sure to be a hit!
Final Thoughts
Creating Christmas Cherry Balls is more than just a recipe; it’s a delightful experience that brings joy to your kitchen and your loved ones. The vibrant colors and festive flavors make these treats a centerpiece for any holiday gathering. Each bite is a reminder of the warmth and cheer that the season brings. Whether you’re sharing them with family or gifting them to friends, these little delights are sure to spread smiles. So, roll up your sleeves, embrace the holiday spirit, and let these Christmas Cherry Balls become a cherished tradition in your home!
PrintChristmas Cherry Balls: Delightful Treats for Festive Cheer!
- Total Time: 1 hour 50 minutes
- Yield: 24 balls
- Diet: Vegetarian
Description
Christmas Cherry Balls are delightful treats made with cream cheese, vanilla wafers, and maraschino cherries, coated in colorful candy melts and topped with crushed peppermint.
Ingredients
- 8 oz cream cheese, softened
- 3 cups powdered sugar
- 2 cups finely crushed vanilla wafers
- ½ cup maraschino cherries, drained, thoroughly dried, and finely chopped
- 1 teaspoon vanilla extract
- 12 oz pink candy melts
- 6 oz white candy melts
- ⅓ cup crushed peppermint candy
- 24 stemmed maraschino cherries, drained and patted dry
Instructions
- Beat cream cheese until smooth. Gradually mix in powdered sugar, then stir in vanilla, crushed wafers, and chopped cherries.
- Refrigerate for 1 hour, until firm enough to shape.
- Roll into 24 balls and place on a parchment-lined baking sheet. Freeze for 20 minutes.
- Melt pink candy melts according to package directions. Dip each ball, let excess coating drip off, and return to the parchment. Let set for 15 minutes.
- Melt white candy melts. Spoon a little over each ball, allowing it to drip down the sides.
- Immediately sprinkle with crushed peppermint and press a stemmed cherry onto each top.
- Refrigerate for 30 minutes before serving. Keep refrigerated in an airtight container for up to 4 days.
Notes
- Ensure cherries are thoroughly dried to prevent excess moisture.
- Store in an airtight container to maintain freshness.
- These treats can be made ahead of time and stored in the refrigerator.
- Prep Time: 1 hour
- Cook Time: 20 minutes
- Category: Dessert
- Method: No-Bake
- Cuisine: American
Nutrition
- Serving Size: 1 ball
- Calories: 150
- Sugar: 12g
- Sodium: 50mg
- Fat: 7g
- Saturated Fat: 4g
- Unsaturated Fat: 2g
- Trans Fat: 0g
- Carbohydrates: 20g
- Fiber: 0g
- Protein: 1g
- Cholesterol: 20mg