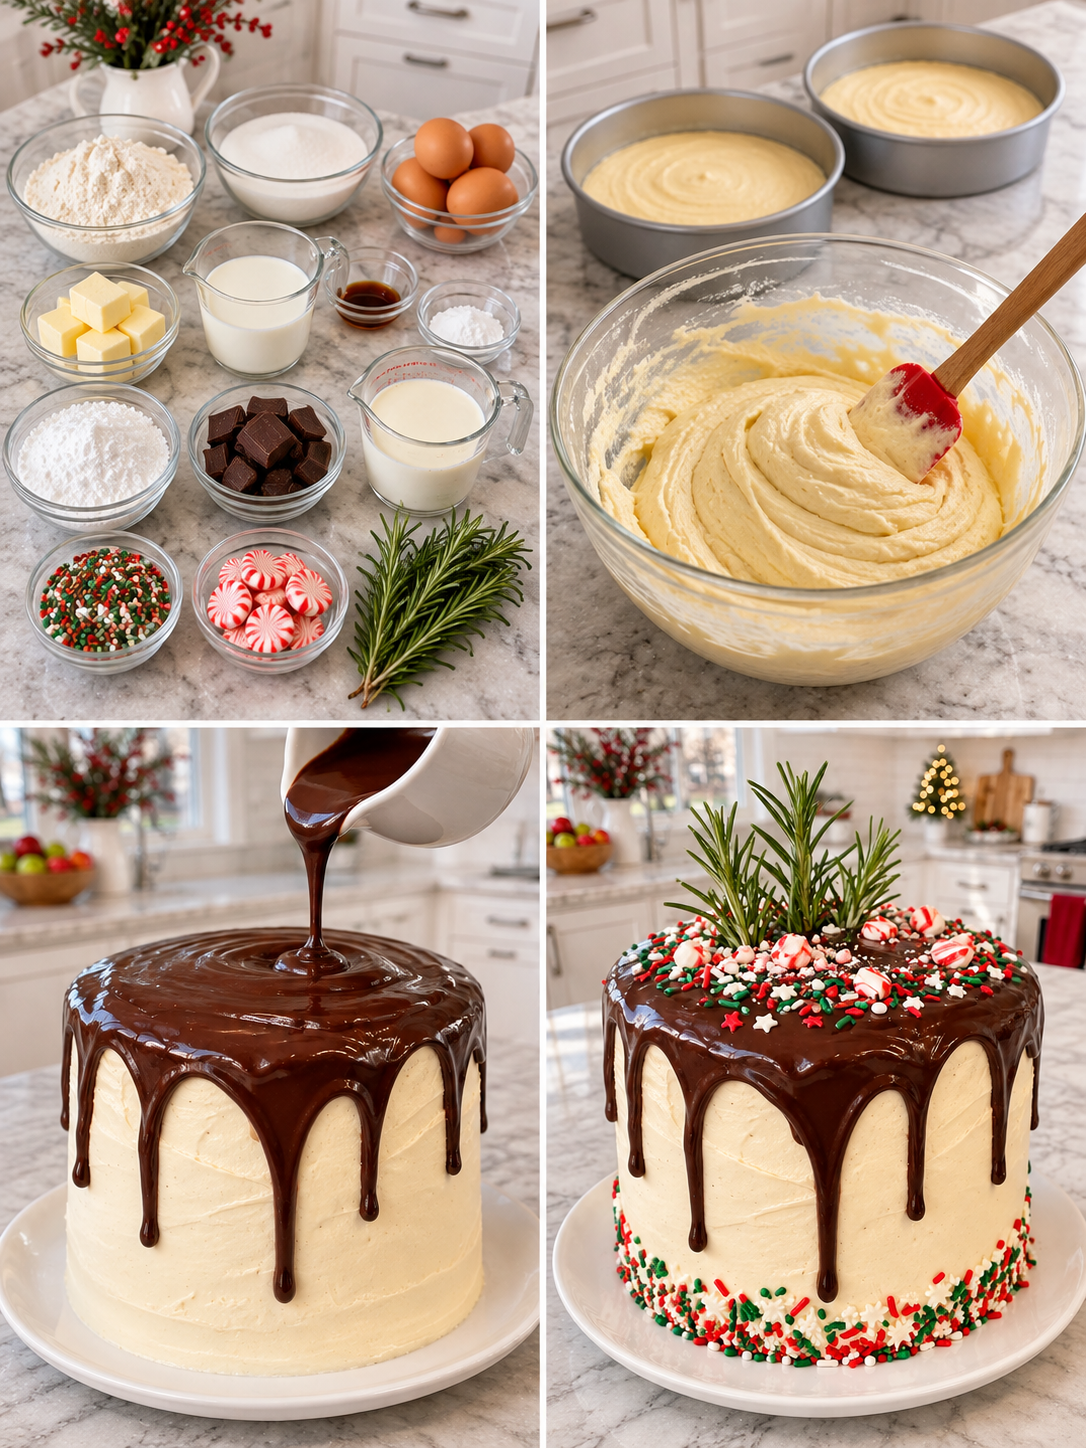
Introduction to Christmas Drip Cake
There’s something magical about the holiday season, isn’t there? The twinkling lights, the scent of pine, and the joy of gathering with loved ones. This Christmas Drip Cake is not just a dessert; it’s a centerpiece that brings smiles and sweet memories to your holiday table.
Whether you’re a seasoned baker or just starting out, this recipe is a delightful way to impress your family and friends. With its stunning layers and festive decorations, it’s sure to be the star of your holiday celebrations. Let’s dive into this delicious adventure together!
Why You’ll Love This Christmas Drip Cake
This Christmas Drip Cake is a showstopper that’s surprisingly easy to make.
With just a few simple steps, you can create a dessert that looks like it came straight from a bakery.
The rich flavors of buttery cake and silky ganache will have everyone coming back for seconds.
Plus, it’s a fantastic way to get the kids involved in the kitchen, making holiday memories together.
Ingredients for Christmas Drip Cake
Creating the perfect Christmas Drip Cake starts with gathering the right ingredients. Here’s what you’ll need to whip up this festive delight:
- All-purpose flour: The backbone of your cake, providing structure and texture.
- Baking powder: This leavening agent helps your cake rise, making it light and fluffy.
- Salt: A pinch enhances the flavors, balancing the sweetness.
- Unsalted butter: Adds richness and moisture; make sure it’s softened for easy mixing.
- Granulated sugar: Sweetens the cake and contributes to its tender crumb.
- Eggs: They bind the ingredients together and add moisture and richness.
- Vanilla extract: A must for flavor; it brings warmth and depth to your cake.
- Whole milk: Keeps the batter moist and adds creaminess.
- Powdered sugar: Essential for the buttercream, giving it that sweet, smooth texture.
- Heavy cream: Used in both the buttercream and ganache for a luscious finish.
- Gel food coloring: Red and green will give your cake a festive touch; feel free to get creative!
- Semi-sweet chocolate chips: The star of your ganache, providing a rich chocolate flavor.
- Christmas sprinkles: These add a fun, festive flair to your cake’s decoration.
- Mini candy canes: Perfect for a crunchy, minty topping.
- Red and green candies: Use these for extra color and sweetness.
- White chocolate curls: A beautiful garnish that adds elegance.
- Small edible Christmas decorations: These can personalize your cake and make it truly special.
For exact measurements, check the bottom of the article where you can find everything you need for printing. Happy baking!
How to Make Christmas Drip Cake
Creating a Christmas Drip Cake is a delightful journey that fills your kitchen with warmth and festive cheer. Follow these simple steps, and you’ll have a stunning cake that’s sure to impress.
Step 1: Prepare the Oven
Start by preheating your oven to 350°F.
Grease and line three 8-inch round cake pans with parchment paper.
This ensures your cakes come out easily and don’t stick.
Step 2: Mix the Dry Ingredients
In a bowl, whisk together the all-purpose flour, baking powder, and salt.
This step is crucial for a light and fluffy cake.
Set it aside while you work on the wet ingredients.
Step 3: Cream the Butter and Sugar
In a large mixing bowl, beat the softened unsalted butter and granulated sugar together until light and fluffy.
This usually takes about 3–4 minutes.
The mixture should look pale and airy, which means you’re on the right track!
Step 4: Add the Eggs
Now, beat in the eggs one at a time.
Make sure to mix well after each addition.
Then, stir in the vanilla extract for that warm, inviting flavor.
Step 5: Combine the Batter
Gradually add the dry ingredients to the butter mixture, alternating with the whole milk.
Start and end with the dry ingredients.
Mix just until combined; overmixing can lead to a dense cake.
Step 6: Bake
Divide the batter evenly among the prepared pans.
Bake for 30–35 minutes, or until a toothpick inserted into the center comes out clean.
Your kitchen will smell heavenly during this time!
Step 7: Cool the Cakes
Once baked, let the cakes cool in the pans for about 10 minutes.
Then, transfer them to wire racks to cool completely.
This step is essential to prevent sogginess.
Step 8: Make the Buttercream
In a clean bowl, beat the softened butter until creamy.
Gradually add the powdered sugar, vanilla extract, and heavy cream.
Beat until smooth and fluffy; this will be your cake’s delicious frosting.
Step 9: Assemble the Cake
Place one cake layer on a serving plate.
Spread a generous amount of buttercream evenly over the top.
Repeat this process with the remaining layers, creating a beautiful stack.
Step 10: Frost the Cake
Cover the entire cake with a thin crumb coat of buttercream.
This helps seal in any crumbs.
Refrigerate for about 20 minutes to set the crumb coat.
Step 11: Prepare the Ganache
Heat the heavy cream until it’s steaming but not boiling.
Pour it over the semi-sweet chocolate chips and let it sit for 2 minutes.
Stir until smooth, then allow it to cool slightly until it thickens but remains pourable.
Step 12: Create the Drip
Once the cake is chilled, slowly spoon the ganache around the top edges.
Let it drip naturally down the sides.
Spread any remaining ganache over the top for a luscious finish.
Step 13: Decorate
Now comes the fun part!
Pipe festive buttercream swirls on top and add your Christmas sprinkles, mini candy canes, and chocolate curls.
Feel free to get creative with your decorations!
Step 14: Serve
Let the ganache set before slicing into your masterpiece.
Serve this beautiful Christmas Drip Cake to your family and friends.
Watch their faces light up with joy as they take their first bite!
Tips for Success
- Always use room temperature ingredients for a smoother batter.
- Don’t skip the chilling steps; they help the frosting and ganache set perfectly.
- For a richer flavor, opt for high-quality chocolate in your ganache.
- Customize your decorations to match your holiday theme or personal taste.
- Keep an eye on your cakes while baking; ovens can vary in temperature.
Equipment Needed
- Mixing bowls: Use any size, but a large one is best for batter.
- Electric mixer: A hand mixer works fine if you don’t have a stand mixer.
- Measuring cups and spoons: Essential for accuracy in baking.
- Cake pans: Three 8-inch round pans are ideal; you can use two and bake in batches.
- Cooling racks: These help cakes cool evenly; a plate can work in a pinch.
Variations
- Chocolate Drip Cake: Substitute half of the all-purpose flour with cocoa powder for a rich chocolate flavor.
- Gluten-Free Option: Use a gluten-free all-purpose flour blend to make this cake gluten-free.
- Vegan Version: Replace eggs with flaxseed meal and use plant-based butter and milk for a vegan-friendly cake.
- Flavor Infusions: Add peppermint extract to the buttercream for a refreshing twist or orange zest for a citrusy kick.
- Fruit Fillings: Layer in some raspberry or strawberry jam between the cake layers for added sweetness and flavor.
Serving Suggestions
- Pair with Coffee: A warm cup of coffee or hot cocoa complements the sweetness perfectly.
- Festive Platter: Serve slices on a decorative platter with fresh berries for a pop of color.
- Ice Cream: A scoop of vanilla or peppermint ice cream adds a delightful creaminess.
- Holiday Drinks: Consider serving with eggnog or mulled wine for a festive touch.
FAQs about Christmas Drip Cake
Can I make the Christmas Drip Cake ahead of time?
Absolutely! You can bake the cake layers a day in advance. Just wrap them tightly in plastic wrap and store them in the fridge. Frosting and decorating can be done the day you plan to serve it for the freshest taste.
What can I use instead of heavy cream for the ganache?
If you’re looking for a lighter option, you can use half-and-half or whole milk. However, keep in mind that the ganache may not be as rich and creamy.
How do I store leftover Christmas Drip Cake?
Store any leftovers in an airtight container in the fridge. It should stay fresh for about 3–4 days. Just be sure to let it come to room temperature before serving for the best flavor.
Can I freeze the Christmas Drip Cake?
Yes, you can freeze the cake! Wrap the layers tightly in plastic wrap and then in aluminum foil. They can be frozen for up to three months. Just thaw in the fridge overnight before decorating.
What if I don’t have gel food coloring?
No worries! You can use liquid food coloring, but be cautious with the amount, as it can affect the cake’s texture. Alternatively, you can skip the coloring altogether for a classic look.
Final Thoughts
Baking this Christmas Drip Cake is more than just following a recipe; it’s about creating moments that linger long after the last slice is gone.
The joy of watching your loved ones gather around the table, eyes wide with delight, is truly priceless.
Each layer tells a story, from the rich chocolate ganache to the festive decorations that spark laughter and cheer.
So, roll up your sleeves and embrace the holiday spirit.
This cake isn’t just a dessert; it’s a celebration of love, laughter, and the magic of the season. Enjoy every delicious bite!
PrintChristmas Drip Cake: Discover the Ultimate Holiday Recipe!
- Total Time: 1 hour 30 minutes
- Yield: 12 servings
- Diet: Vegetarian
Description
A festive and visually stunning Christmas Drip Cake perfect for holiday celebrations.
Ingredients
- 2½ cups all-purpose flour
- 2½ teaspoons baking powder
- ½ teaspoon salt
- ¾ cup unsalted butter, softened
- 1¾ cups granulated sugar
- 4 large eggs
- 1 tablespoon vanilla extract
- 1 cup whole milk
- 1½ cups unsalted butter, softened (for buttercream)
- 5 cups powdered sugar
- 2 teaspoons vanilla extract (for buttercream)
- 3–4 tablespoons heavy cream (for buttercream)
- Red and green gel food coloring
- 6 oz semi-sweet chocolate chips (for ganache)
- ½ cup heavy cream (for ganache)
- Christmas sprinkles (for decoration)
- Mini candy canes (for decoration)
- Red and green candies (for decoration)
- White chocolate curls (for decoration)
- Small edible Christmas decorations (for decoration)
Instructions
- Prepare the oven: Preheat oven to 350°F. Grease and line three 8-inch round cake pans with parchment paper.
- Mix the dry ingredients: In a bowl, whisk together flour, baking powder, and salt.
- Cream the butter and sugar: In a separate large bowl, beat butter and sugar until light and fluffy, about 3–4 minutes.
- Add the eggs: Beat in eggs one at a time. Mix in vanilla extract.
- Combine the batter: Add the dry ingredients alternately with milk, beginning and ending with the dry ingredients. Mix just until combined.
- Bake: Divide the batter evenly among the prepared pans. Bake for 30–35 minutes, or until a toothpick inserted into the center comes out clean.
- Cool the cakes: Let cakes cool in the pans for 10 minutes before transferring to wire racks. Cool completely.
- Make the buttercream: Beat softened butter until creamy. Gradually add powdered sugar, vanilla, and heavy cream. Beat until smooth and fluffy.
- Assemble the cake: Place one cake layer on a serving plate. Spread buttercream evenly over the top. Repeat with the remaining layers. Cover the entire cake with a thin crumb coat and refrigerate for 20 minutes.
- Frost the cake: Apply a smooth final layer of buttercream. Chill for another 15–20 minutes to help the frosting set.
- Prepare the ganache: Heat heavy cream until steaming but not boiling. Pour over chocolate chips and let sit for 2 minutes. Stir until smooth. Allow it to cool until slightly thickened but still pourable.
- Create the drip: Slowly spoon ganache around the top edges of the chilled cake, allowing it to drip naturally down the sides. Spread the remaining ganache over the top.
- Decorate: Pipe festive buttercream swirls on top. Add Christmas sprinkles, candy canes, chocolate curls, and red and green candies.
- Serve: Let the ganache set before slicing. Enjoy your beautiful Christmas drip cake!
Notes
- Ensure all ingredients are at room temperature for best results.
- Use high-quality chocolate for the ganache for a richer flavor.
- Feel free to customize decorations based on personal preferences.
- Prep Time: 30 minutes
- Cook Time: 35 minutes
- Category: Dessert
- Method: Baking
- Cuisine: American
Nutrition
- Serving Size: 1 slice
- Calories: 450
- Sugar: 45g
- Sodium: 200mg
- Fat: 25g
- Saturated Fat: 15g
- Unsaturated Fat: 5g
- Trans Fat: 0g
- Carbohydrates: 55g
- Fiber: 1g
- Protein: 4g
- Cholesterol: 80mg