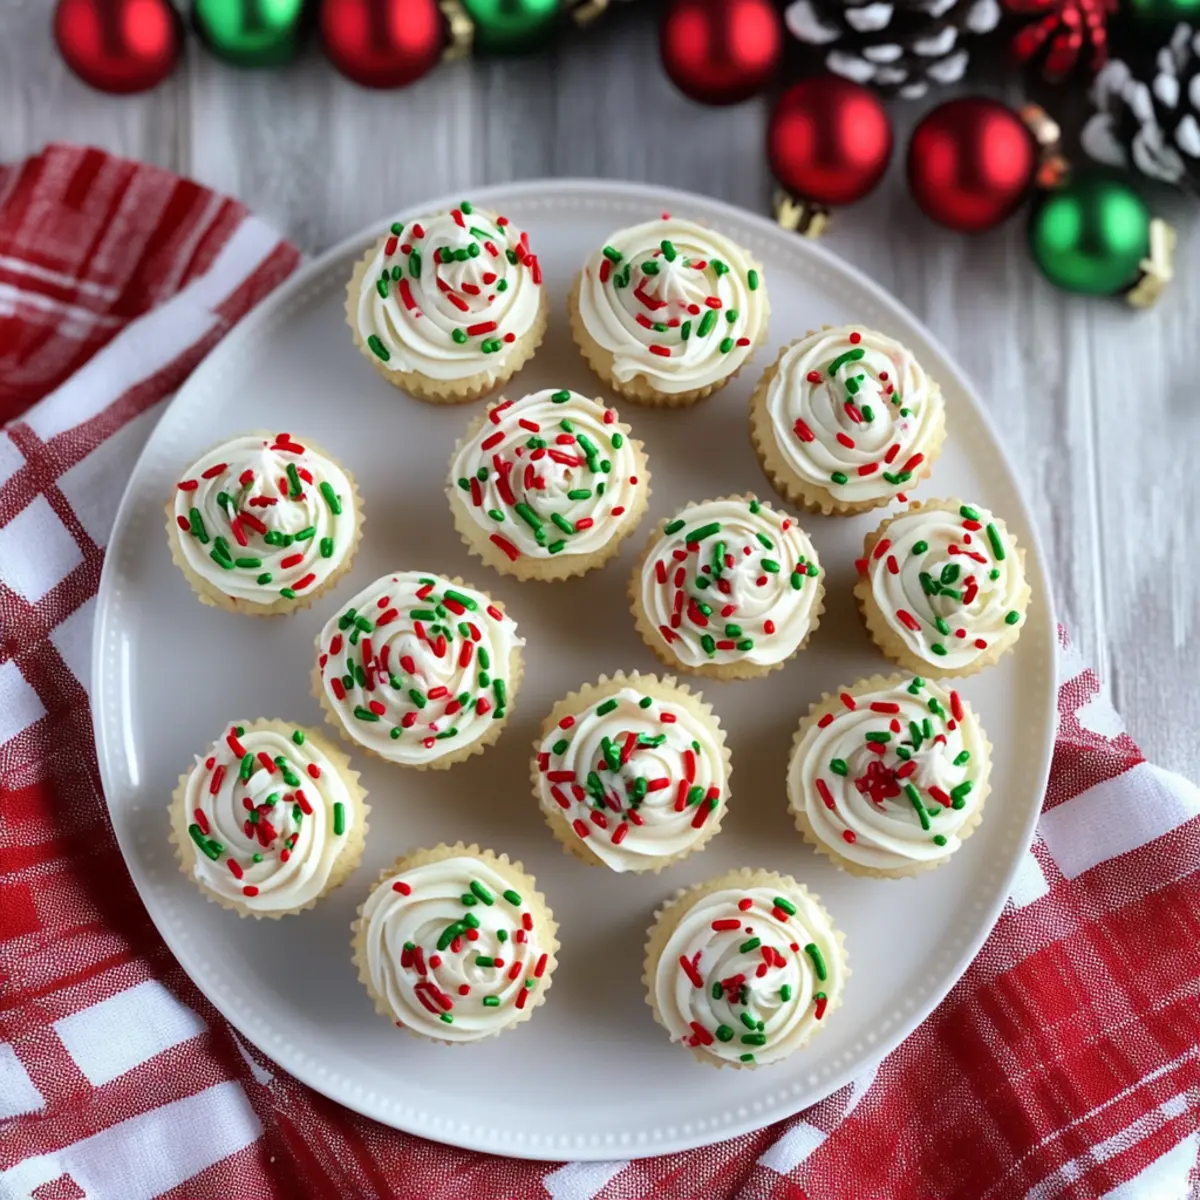
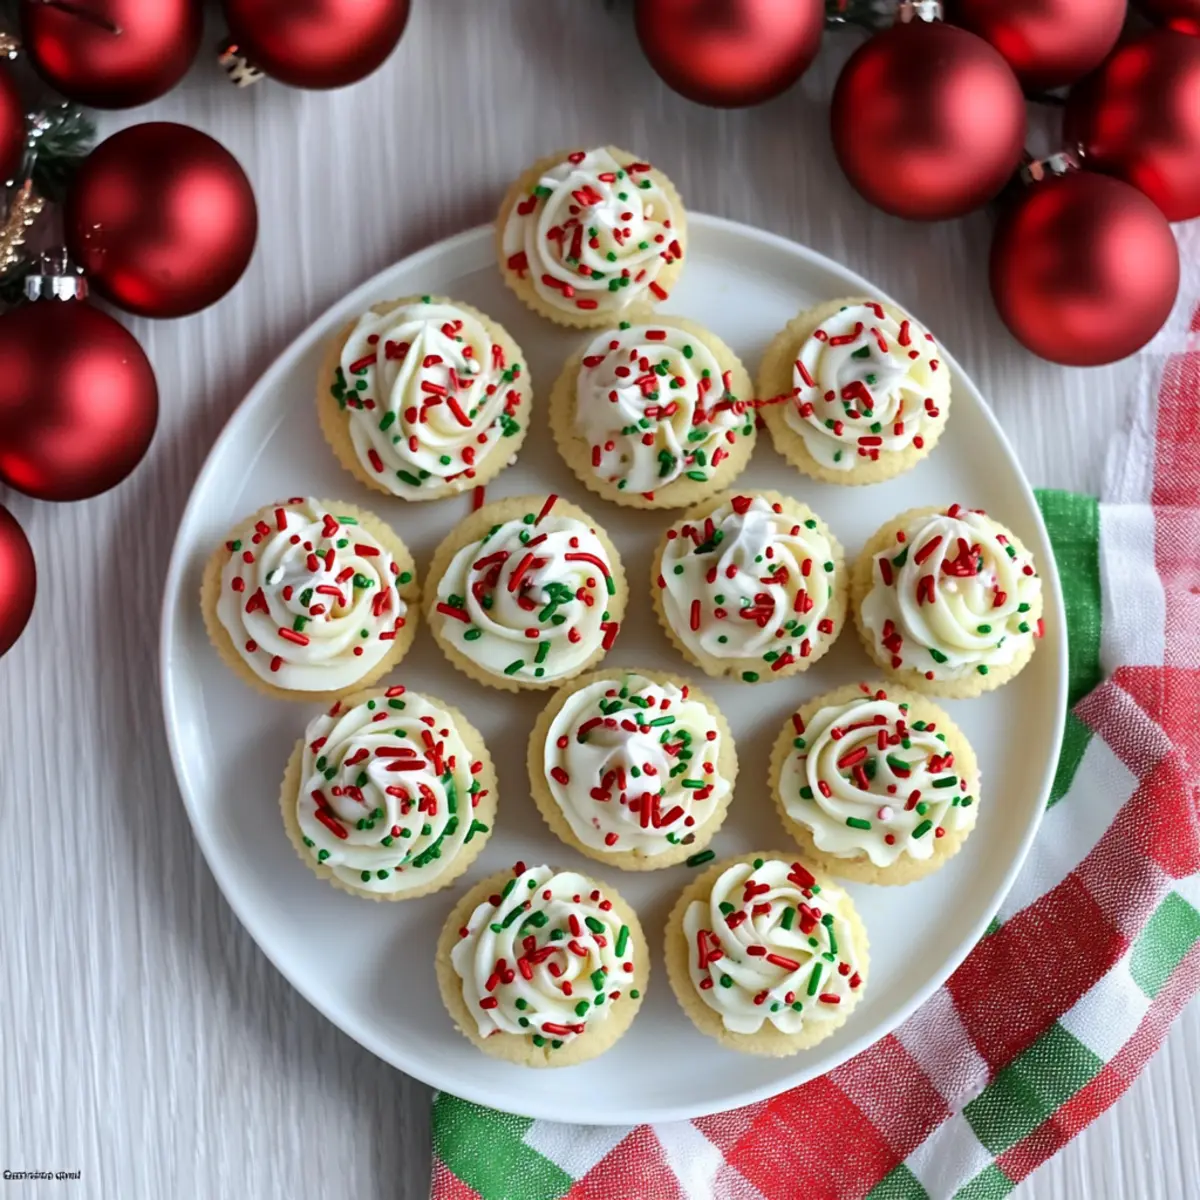
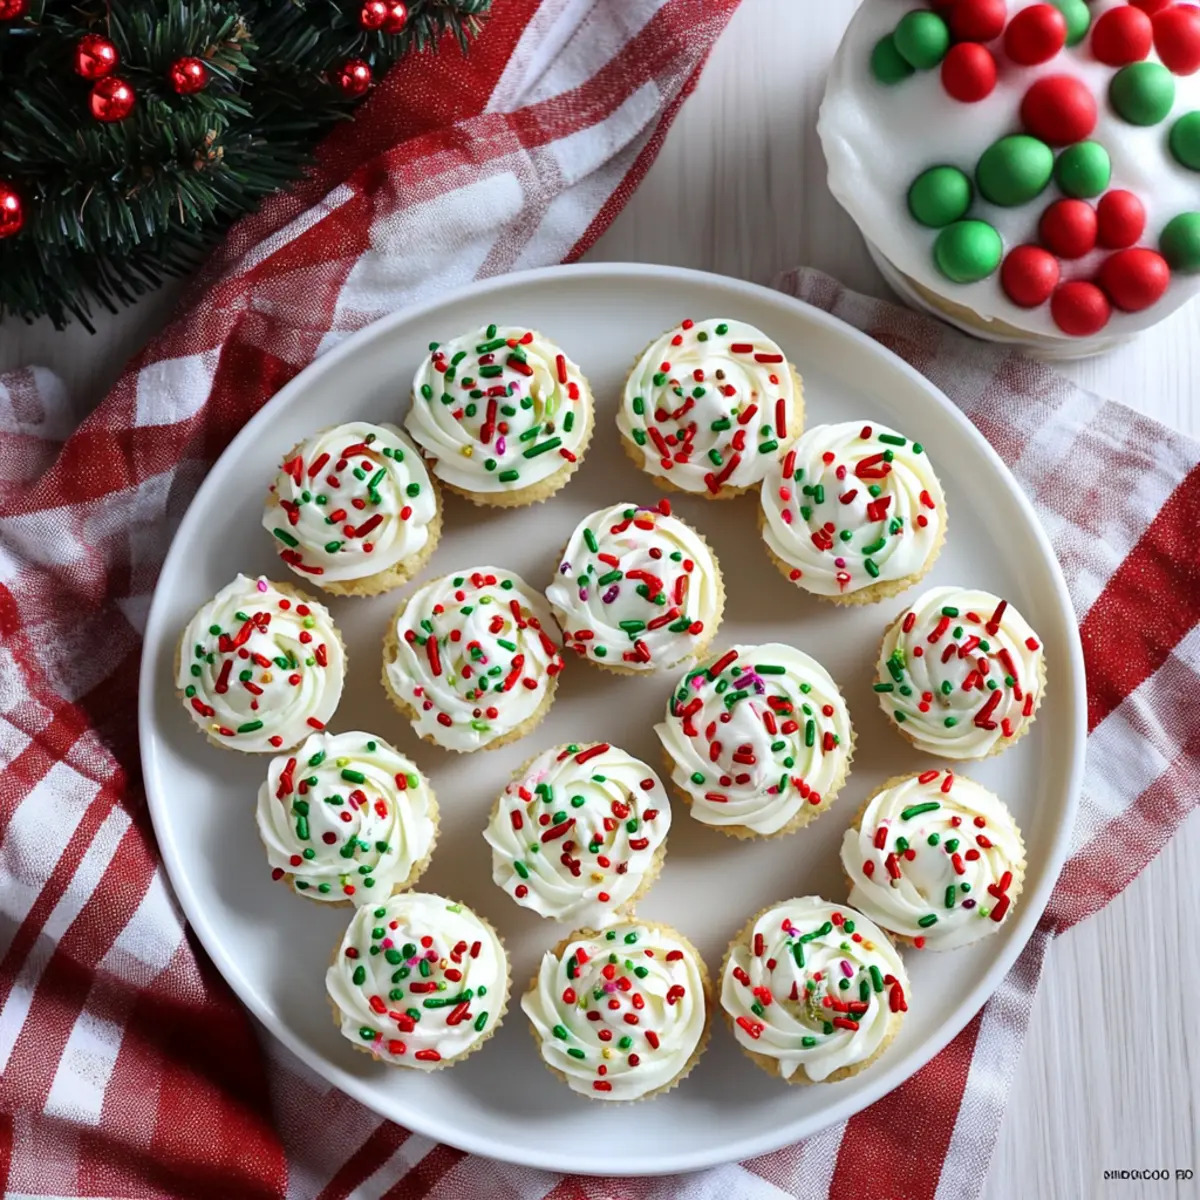
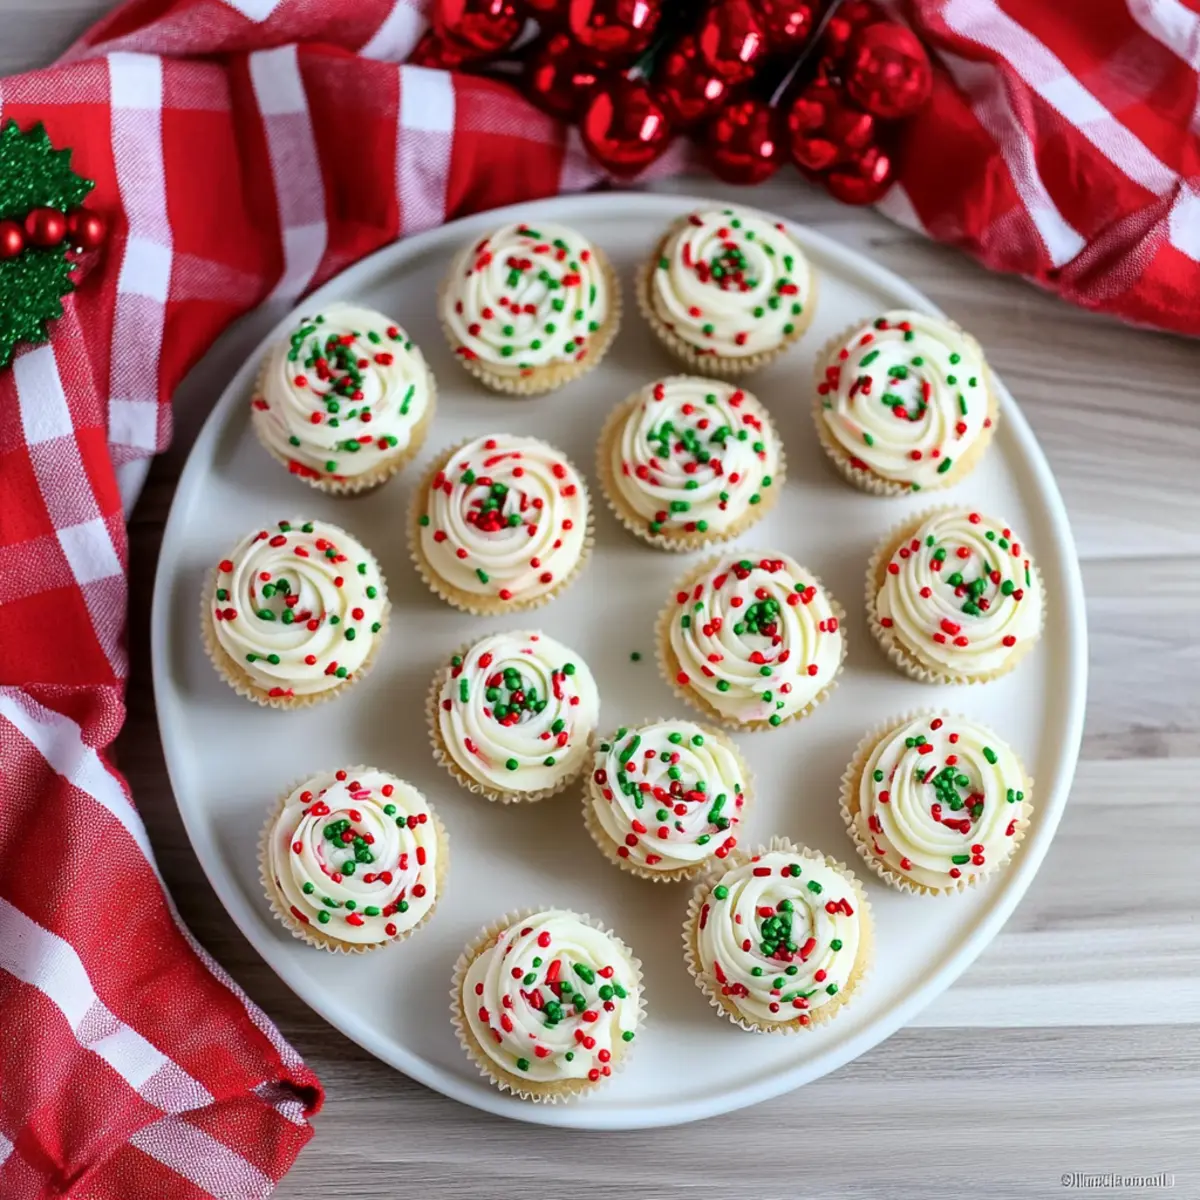
“Can’t wait for the holidays? Neither can I! One of my favorite ways to kick off the festive spirit is by whipping up a batch of Christmas Sprinkle Cookie Cups. These delightful treats are not only vibrant and visually appealing with their cheerful red and green sprinkles, but they’re also incredibly easy to prepare—no rolling pin or cookie cutters in sight! Ideal for holiday gatherings or as a sweet gift, these soft and buttery cookie cups topped with creamy frosting will definitely become a cherished addition to your holiday baking traditions. Curious to see how simple they are to make?”
Why Make Christmas Sprinkle Cookie Cups?
Ease of Preparation: These cookie cups are so simple to whip up, requiring no chilling of dough or special tools. Just mix, shape, and bake!
Festive Appeal: Bright red and green sprinkles instantly bring holiday cheer, making them a hit at any gathering or cookie exchange.
Deliciously Buttery: With a soft, chewy center and creamy frosting, each bite promises a delightful mix of flavors and textures that everyone will adore.
Customizable Fun: Feel free to get creative! Swap in different sprinkles or add chocolate chips to make these cookie cups your own!
Perfect for Sharing: These cookie cups are easy to package and make fantastic party favors or delightful treats for friends and family. Want more festive ideas? Check out these Fun Christmas Candy and Sugar Cookie Cheesecake for inspiration!
Christmas Sprinkle Cookie Cups Ingredients
For the Cookie Cups
- Unsalted Butter – 1 1/4 cups will add richness and moisture; margarine can be used in a pinch.
- Powdered Sugar – 1 1/2 cups provides sweetness for a smooth texture; substituting with granulated sugar may yield a less tender cookie.
- Baking Powder – 1 teaspoon helps the cookie cups rise for a fluffy texture.
- Salt – 1/2 teaspoon enhances the flavor of the cookies.
- Egg – 1 binds the ingredients and adds richness; consider using a flax egg for a vegan option.
- Vanilla Extract – 1 teaspoon brings a fragrant sweetness to the mix.
- All-Purpose Flour – 2 1/2 cups gives the cookie cups their structure; a gluten-free flour blend works too.
- Red Sprinkles – 1/4 cup for decoration that adds a festive touch.
- Green Sprinkles – 1/4 cup enhances the holiday spirit with more colorful fun.
For the Frosting
- Unsalted Butter – 1/2 cup should be softened as the base for a creamy frosting.
- Powdered Sugar – 2 1/2 cups sweetens and thickens your frosting for the ultimate indulgence.
- Vanilla Extract – 1 teaspoon enhances the flavor profile of your frosting.
- Salt – 1/2 teaspoon balances the sweetness perfectly.
- Milk – 2–3 tablespoons to adjust the frosting’s consistency to your liking.
- Additional Sprinkles – for topping the frosted cookie cups and adding extra visual delight.
Step‑by‑Step Instructions for Christmas Sprinkle Cookie Cups
Step 1: Preheat and Prepare
Preheat your oven to 350°F (175°C). While the oven warms up, take your mini muffin pans and generously spray them with baking spray to ensure the cookie cups release easily after baking. This crucial step will set you up for success, making your Christmas Sprinkle Cookie Cups a joy to serve!
Step 2: Cream the Butter and Sugar
In a large mixing bowl, add 1 1/4 cups of softened unsalted butter. Using an electric mixer, beat it on medium speed for about 1 minute until creamy. Gradually mix in 1 1/2 cups of powdered sugar along with 1 teaspoon of baking powder and 1/2 teaspoon of salt. Continue mixing until the mixture is smooth and fluffy, creating a rich base for your cookie cups.
Step 3: Add Egg and Vanilla
Next, incorporate 1 egg and 1 teaspoon of vanilla extract into the butter-sugar mixture. Beat until everything is well combined. The batter will take on a creamy, light texture, indicating it’s ready for the dry ingredients. This step is key as it not only binds the ingredients but also infuses delightful flavor into your Christmas Sprinkle Cookie Cups.
Step 4: Mix in the Flour
Gradually add 2 1/2 cups of all-purpose flour, mixing on low speed until just combined. Avoid overmixing to keep your cookie cups tender. The dough should come together into a soft, pliable mass, indicating you’re ready to shape it into festive, colorful treats.
Step 5: Divide and Color the Dough
Once the dough is ready, divide it into two equal portions. Gently fold 1/4 cup of red sprinkles into one half, and mix 1/4 cup of green sprinkles into the other half. This delightful mix not only colors your dough but will give those cookie cups the signature holiday flair they need for festive occasions.
Step 6: Shape the Cookie Cups
Using your hands, roll each portion of dough into 1-inch balls. Place them into the prepared mini muffin pans, spacing them evenly. After placing the balls, use your thumb to gently press down in the center of each ball to form cup shapes. This will create the perfect base to hold frosting later.
Step 7: Bake the Cookie Cups
Slide the muffin pans into your preheated oven and bake for 8-10 minutes. Keep an eye on them; the edges should turn lightly golden while the centers remain soft. Immediately after removing them from the oven, press the centers of the cups again if needed, allowing them to hold their shape as they cool.
Step 8: Cool on a Rack
Let the cookie cups cool in the muffin pans for about 5 minutes before transferring them to a wire rack. This cooling period is essential, as it allows the cookies to firm up and makes them easier to handle. Your delicious Christmas Sprinkle Cookie Cups are now ready for frosting!
Step 9: Make the Frosting
For the frosting, beat together 1/2 cup of softened unsalted butter and 2 1/2 cups of powdered sugar until creamy. Add in 1 teaspoon of vanilla extract and 1/2 teaspoon of salt, mixing well. Finally, incorporate 2-3 tablespoons of milk to reach your desired consistency. The result should be a smooth, thick frosting perfect for topping your cookie cups.
Step 10: Frost the Cookie Cups
Once the cookie cups are completely cooled, use a piping bag or a zip-top bag with a snipped corner to frost each cup generously. The frosting will beautifully complement the soft cookie, and this is where you get to showcase your creativity by decorating with any additional sprinkles you desire!
Step 11: Serve and Delight
These Christmas Sprinkle Cookie Cups are now ready to be served, whether at holiday parties or as gifts. Each bite will evoke the warmth of the season, making them a favorite among family and friends. Enjoy the process of sharing these delights and making festive memories!
How to Store and Freeze Christmas Sprinkle Cookie Cups
Room Temperature: Store your Christmas Sprinkle Cookie Cups in an airtight container at room temperature for up to 3 days to maintain their freshness and delightful texture.
Fridge: If you prefer longer storage, these cookie cups can be kept in the fridge for up to a week. Just remember to seal them well to prevent drying out!
Freezer: For extended preservation, freeze the cookie cups in a single layer on a baking sheet, then transfer them to a freezer-safe bag or container. They can be frozen for up to 3 months.
Reheating: To enjoy again, simply let the frozen cookie cups thaw at room temperature for a couple of hours. Alternatively, warm them briefly in the microwave (about 10-15 seconds) for a soft, just-baked taste!
Christmas Sprinkle Cookie Cups Variations
Feel free to get creative with these festive cookie cups, enhancing the flavors and textures to suit your celebration.
-
Gluten-Free: Use a gluten-free flour blend to make these cookie cups accessible for everyone at your gathering. Enjoy the same delightful taste without the gluten!
-
Nutty Twist: Fold in 1/2 cup of chopped walnuts or pecans for a nutty crunch. The added texture complements the soft cookie beautifully and gives it a hearty flavor.
-
Chocolate Lovers: Substitute half of the flour with cocoa powder to create a chocolate variation. These chocolate cookie cups topped with vanilla frosting will be a hit!
-
Citrus Zest: Add a teaspoon of orange or lemon zest to the dough for a refreshing twist. A hint of citrus can brighten the flavors and add a lively touch!
-
Mint Chocolate: Swap vanilla extract for peppermint extract in the frosting, and top with crushed candy canes. This delightful minty flavor elevates your cookie cups for a festive treat.
-
Caramel Drizzle: After frosting, drizzle salted caramel sauce over the tops for an indulgent touch. The sweetness of caramel pairs perfectly with the buttery cookie base.
-
Colorful Sprinkles: Instead of traditional red and green, use pastel sprinkles for a fun spring-inspired treat. These vibrant cookie cups can brighten any occasion!
-
Fruity Filling: Once baked, press down the centers of your cookie cups to create space for a dollop of jam or fruit preserve. This fruity surprise will add another layer of flavor.
Looking for more festive ideas? Don’t miss out on delicious Sugar Cookie Cheesecake or try your hand at Easy Festive Cookies for variety!
Expert Tips for Christmas Sprinkle Cookie Cups
-
Room Temperature Butter: Ensure your unsalted butter is softened at room temperature for easy mixing and a smooth texture in your cookie cups.
-
Avoid Overmixing: When adding the flour, mix just until combined. Overmixing can lead to tough cookie cups that lose their tender charm.
-
Sprinkle Variations: Get creative with your sprinkles! Use different colors or shapes to match your holiday theme while making these Christmas Sprinkle Cookie Cups truly unique.
-
Press Centers After Baking: Don’t forget to press the centers of the cups immediately after baking to maintain their charming shape and create the perfect vessel for frosting.
-
Frosting Consistency: Adjust your frosting’s thickness with milk to suit your piping needs. Start with less and add gradually to get the perfect spreadable consistency.
-
Storage Tips: Store any leftover cookie cups in an airtight container at room temperature for up to three days or refrigerate for up to a week to keep them fresh and delicious.
Make Ahead Options
These Christmas Sprinkle Cookie Cups are perfect for meal prep during the bustling holiday season! You can prepare the cookie dough up to 24 hours in advance by mixing it, shaping it into balls, and then refrigerating them in an airtight container. Just remember to let the dough come to room temperature before baking to ensure they puff up beautifully. The frosted cookie cups can also be made ahead and stored in an airtight container for up to 3 days at room temperature, maintaining their delightful texture and flavor. When it’s time to serve, simply arrange them on a festive platter, and watch them disappear in delight!
What to Serve with Christmas Sprinkle Cookie Cups
These delightful treats are the perfect sweet surprise for your holiday gatherings, complementing a spread of festive delights.
-
Hot Cocoa: A rich, warm cup of hot cocoa pairs perfectly with the sweet buttery cookie cups, enhancing the cozy atmosphere of holiday festivities.
-
Christmas Fruitcake: The dense, spiced flavors of a traditional fruitcake balance the sweetness of the cookie cups, providing a delightful variety at your dessert table.
-
Peppermint Bark: The refreshing minty notes of peppermint bark contrast beautifully with the creamy frosting, adding a festive crunch to your holiday treats.
-
Spiced Apple Cider: A warm mug of spiced apple cider enhances the festive vibes and offers a zesty complement to the sugary sweetness of the cookie cups.
-
Vanilla Ice Cream: Serve a scoop of vanilla ice cream alongside the cookie cups to create a heavenly dessert experience with contrasting temperatures and textures.
-
Holiday Cheese Board: A selection of rich cheeses, nuts, and dried fruits balances the sweetness of the cookie cups, making for a well-rounded spread perfect for entertaining.
-
Eggnog: This classic holiday drink’s creamy, nutmeg-infused flavor pairs wonderfully with the soft, sweet cookie cups, wrapping your taste buds in festive cheer.
-
Gingerbread Cookies: For a classic touch, include spiced gingerbread cookies that enhance the holiday spirit while providing a delicious texture contrast with the cookie cups.
-
Chocolate-Dipped Pretzels: The salty crunch of chocolate-dipped pretzels adds an exciting twist, evening out the sweetness and inviting joyful snacking.
Christmas Sprinkle Cookie Cups Recipe FAQs
How do I choose the right ingredients for my cookie cups?
Absolutely! For the best Christmas Sprinkle Cookie Cups, use high-quality unsalted butter as it adds richness and flavor. Make sure your butter is softened at room temperature to ensure a creamy blend with the powdered sugar. When selecting flour, opt for all-purpose flour; if you need a gluten-free variation, a gluten-free flour blend can work just as well.
What are the best storage methods for cookie cups?
To keep your Christmas Sprinkle Cookie Cups fresh and delightful, storing them in an airtight container at room temperature for up to 3 days is ideal. If you want to extend their shelf life, refrigerate them for up to a week. Just make sure they’re well-sealed to avoid drying out!
Can I freeze Christmas Sprinkle Cookie Cups?
Yes! Freezing is a fantastic way to preserve your cookie cups. Start by placing them in a single layer on a baking sheet and freeze until solid. After that, transfer them to a freezer-safe bag or container, where they can be stored for up to 3 months. To enjoy them later, thaw at room temperature for a couple of hours or warm them briefly in the microwave for about 10-15 seconds to regain that fresh-baked softness.
What should I do if my cookie cups don’t hold their shape?
If your cookie cups don’t maintain their shape after baking, don’t worry! This can happen if the dough is too soft or if they were overbaked. To fix this for future batches, ensure that you press the centers immediately after baking to create a cup shape. Additionally, check to see if the dough consistency is right before shaping; it should be soft but not overly sticky. If it’s too soft, try chilling it in the fridge for about 15-30 minutes before baking.
Are there any dietary considerations with these cookie cups?
Very! If you have dietary restrictions, you can substitute the regular egg with a flax egg (1 tablespoon ground flaxseed mixed with 2.5 tablespoons water, let sit for 5 minutes). For butter, you can use margarine or plant-based alternatives. Always double-check sprinkles for allergens, as many brands may contain gluten or dairy.
Delicious Christmas Sprinkle Cookie Cups for Festive Fun
Ingredients
Equipment
Method
- Preheat your oven to 350°F (175°C) and prepare mini muffin pans with baking spray.
- In a large mixing bowl, cream 1 1/4 cups unsalted butter with 1 1/2 cups powdered sugar, 1 teaspoon baking powder, and 1/2 teaspoon salt until smooth and fluffy.
- Add 1 egg and 1 teaspoon vanilla extract, mixing until well combined.
- Gradually add 2 1/2 cups all-purpose flour, mixing on low speed until just combined.
- Divide the dough and fold 1/4 cup of red sprinkles into one half and 1/4 cup of green sprinkles into the other half.
- Roll the dough into 1-inch balls and place them in the mini muffin pans, pressing the centers down to form cup shapes.
- Bake for 8-10 minutes, until edges are lightly golden. Press centers again if needed after removing from oven.
- Cool in the muffin pans for 5 minutes, then transfer to a wire rack.
- For the frosting, beat 1/2 cup softened unsalted butter with 2 1/2 cups powdered sugar, 1 teaspoon vanilla, and 1/2 teaspoon salt until creamy. Add milk to reach desired consistency.
- Frost the cooled cookie cups and decorate with additional sprinkles.
- Serve and enjoy your Christmas Sprinkle Cookie Cups!