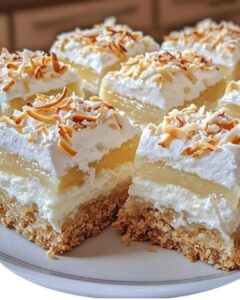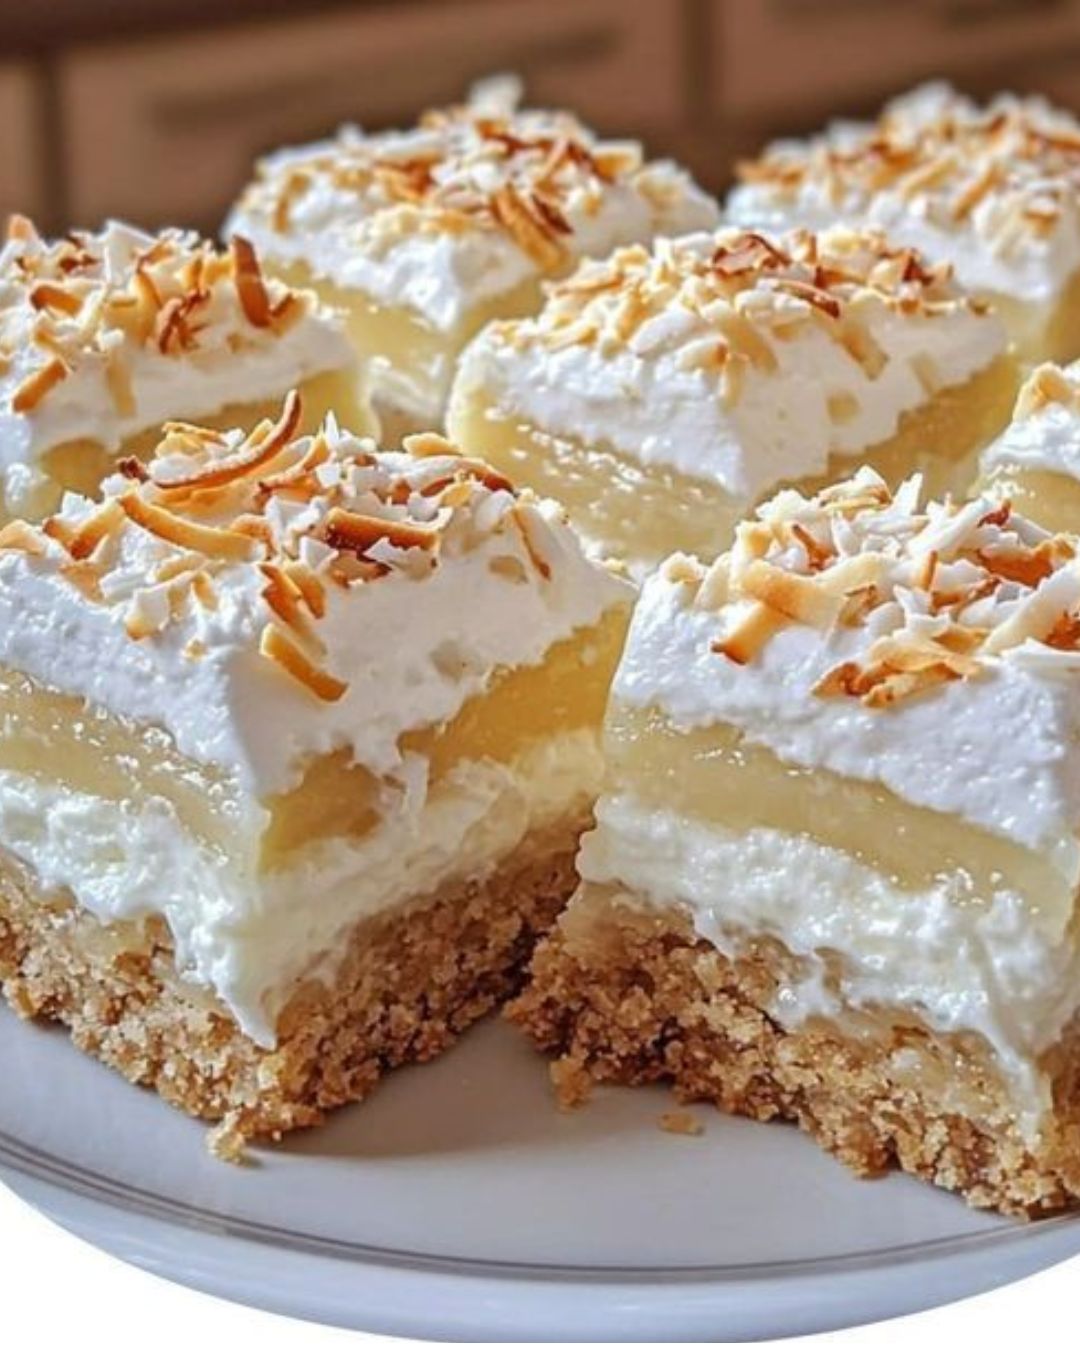
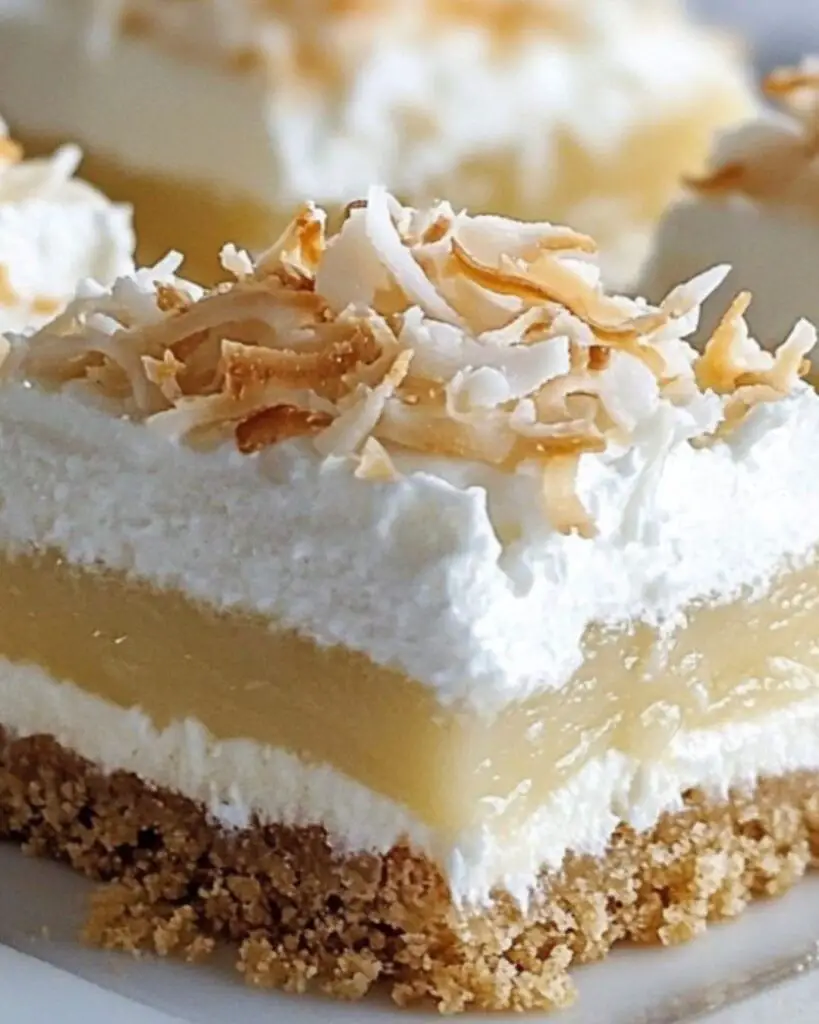
Introduction to Coconut Cream Pie Bars
There’s something magical about dessert that brings people together, and these Coconut Cream Pie Bars are no exception.
I remember the first time I tasted a coconut cream pie; it was at my grandmother’s house, and I was instantly hooked.
These bars capture that same creamy goodness but are easier to share and enjoy.
Perfect for a quick solution on a busy day or a delightful treat to impress your loved ones, they combine a buttery crust with a rich coconut filling.
Trust me, once you try these, they’ll become a staple in your dessert repertoire!
Why You’ll Love This Coconut Cream Pie Bars
These Coconut Cream Pie Bars are a game-changer for dessert lovers.
They’re incredibly easy to whip up, making them perfect for those busy weeknights or last-minute gatherings.
The creamy coconut filling is a taste sensation that will have everyone coming back for seconds.
Plus, the buttery crust adds a delightful crunch.
With just a few simple steps, you can create a dessert that looks and tastes like it took hours to prepare!
Ingredients for Coconut Cream Pie Bars
Creating these Coconut Cream Pie Bars is a breeze, especially with the right ingredients.
Here’s what you’ll need:
- All-purpose flour: This forms the base of your buttery crust, providing structure and texture.
- Granulated sugar: Sweetens both the crust and filling, balancing the flavors beautifully.
- Unsalted butter: Adds richness to the crust and filling; using unsalted allows you to control the saltiness.
- Salt: Just a pinch enhances the sweetness and brings out the flavors.
- Cornstarch: Helps thicken the coconut filling, giving it that creamy, luscious texture.
- Whole milk: Provides creaminess and richness to the filling; you can substitute with low-fat milk if needed.
- Coconut milk: Infuses a deep coconut flavor; for a lighter option, use light coconut milk.
- Egg yolks: These add richness and help set the filling, creating a smooth consistency.
- Vanilla extract: A classic flavor enhancer that complements the coconut beautifully.
- Coconut extract: Intensifies the coconut flavor; if you can’t find it, you can skip it, but it’s worth it!
- Sweetened shredded coconut: Adds texture and a burst of coconut flavor; feel free to use unsweetened if you prefer.
- Heavy whipping cream: Essential for the whipped topping, giving it that light and airy feel.
- Powdered sugar: Sweetens the whipped cream without adding graininess.
- Toasted shredded coconut: A delightful garnish that adds crunch and visual appeal.
For exact measurements, check the bottom of the article where you can find everything listed for easy printing.
With these ingredients, you’re well on your way to creating a dessert that’s sure to impress!
How to Make Coconut Cream Pie Bars
Making Coconut Cream Pie Bars is a delightful journey that’s easier than you might think.
Follow these simple steps, and you’ll have a delicious dessert that will impress everyone.
Let’s dive into the process!
Step 1: Prepare the Baking Pan
Start by preheating your oven to 350°F (175°C).
Line a 9×9-inch baking pan with parchment paper, leaving some overhang.
This will make it super easy to lift the bars out later.
A little prep goes a long way!
Step 2: Make the Crust
In a mixing bowl, combine the all-purpose flour, granulated sugar, salt, and melted butter.
Mix until a crumbly dough forms.
Press this mixture firmly and evenly into the bottom of your prepared pan.
Bake for 15 to 18 minutes, or until the edges are lightly golden.
Let it cool slightly before adding the filling.
Step 3: Prepare the Coconut Filling
In a saucepan, whisk together the sugar, cornstarch, and salt.
Gradually add the whole milk and coconut milk, stirring to combine.
Cook over medium heat, stirring constantly, until the mixture thickens and bubbles gently.
This step is crucial for that creamy texture we all love in Coconut Cream Pie Bars!
Step 4: Combine Egg Yolks
In a separate bowl, whisk the egg yolks until smooth.
Slowly add about half a cup of the hot milk mixture to the yolks while whisking constantly.
This process, called tempering, prevents the eggs from scrambling.
Once combined, pour the egg mixture back into the saucepan and cook for another 2 to 3 minutes.
Step 5: Finalize the Filling
Remove the saucepan from heat and stir in the vanilla extract, coconut extract, butter, and shredded coconut.
This is where the magic happens!
Pour the luscious coconut filling over the cooled crust, spreading it evenly.
Step 6: Chill the Bars
Cover the pan with plastic wrap, pressing it directly onto the surface of the filling.
Refrigerate for at least 4 hours, or until completely set.
For best results, let it chill overnight.
Patience is key here!
Step 7: Prepare the Whipped Topping
In a mixing bowl, whip the heavy cream, powdered sugar, and vanilla extract until stiff peaks form.
This fluffy topping is the perfect complement to your creamy bars.
Make sure not to over-whip, or it might turn grainy!
Step 8: Assemble and Serve
Spread the whipped cream over the chilled coconut filling.
Sprinkle with toasted coconut for that extra crunch.
Cut into squares and serve chilled.
These Coconut Cream Pie Bars are ready to be devoured!
Tips for Success
- For a perfectly flaky crust, don’t overmix the dough; just combine until crumbly.
- Use room temperature ingredients for the filling to ensure a smooth texture.
- When tempering the egg yolks, whisk continuously to avoid scrambling.
- Chill the bars overnight for the best flavor and texture.
- Toast the coconut just until golden to enhance its flavor without burning.
Equipment Needed
- 9×9-inch baking pan: A square pan is ideal, but you can use an 8×8-inch pan if that’s what you have.
- Parchment paper: Essential for easy removal; aluminum foil can work in a pinch.
- Mixing bowls: Use any size you have; just make sure they’re sturdy.
- Whisk: A hand whisk is perfect, but an electric mixer speeds things up.
- Spatula: Great for spreading the filling and whipped cream evenly.
Variations
- Chocolate Coconut Cream Bars: Add cocoa powder to the crust for a chocolatey twist, or swirl in melted chocolate into the filling for a rich flavor.
- Gluten-Free Option: Substitute all-purpose flour with a gluten-free flour blend to make these bars suitable for gluten-sensitive friends.
- Vegan Version: Use coconut oil instead of butter, almond milk in place of whole milk, and a vegan egg substitute to create a plant-based delight.
- Fruit-Infused Bars: Layer fresh fruit like sliced bananas or strawberries on top of the coconut filling before adding the whipped cream for a fruity twist.
- Nutty Coconut Bars: Incorporate chopped nuts like pecans or almonds into the crust for added crunch and flavor.
Serving Suggestions
- Fresh Fruit: Serve with a side of tropical fruits like pineapple or mango for a refreshing contrast.
- Coffee or Tea: Pair with a strong cup of coffee or a soothing herbal tea to balance the sweetness.
- Presentation: Garnish with extra toasted coconut and a sprig of mint for a beautiful touch.
- Ice Cream: A scoop of vanilla or coconut ice cream on the side elevates the dessert experience.
FAQs about Coconut Cream Pie Bars
Can I make Coconut Cream Pie Bars ahead of time?
Absolutely! These bars are perfect for making ahead. Just ensure they chill for at least 4 hours, or overnight for the best results. This allows the flavors to meld beautifully.
How do I store leftover Coconut Cream Pie Bars?
Store any leftovers in an airtight container in the refrigerator. They’ll stay fresh for up to 3 days, but trust me, they might not last that long!
Can I use unsweetened coconut in the filling?
Yes, you can! Unsweetened coconut will give you a more natural coconut flavor. Just adjust the sugar in the filling to taste, if needed.
What can I substitute for heavy whipping cream?
If you’re looking for a lighter option, you can use whipped coconut cream or a dairy-free alternative. Just make sure it can whip up nicely for that fluffy topping!
Can I freeze Coconut Cream Pie Bars?
Yes, you can freeze them! Just wrap the bars tightly in plastic wrap and then in aluminum foil. They’ll keep well for up to 2 months. Thaw in the fridge before serving for the best texture.
Final Thoughts
Baking these Coconut Cream Pie Bars is more than just a culinary task; it’s a delightful experience that fills your kitchen with warmth and sweet aromas.
Each bite transports you to a tropical paradise, where creamy coconut and buttery crust dance together in perfect harmony.
Whether you’re sharing them at a gathering or enjoying them solo, these bars bring joy and satisfaction.
They’re a reminder that simple ingredients can create something truly special.
So, roll up your sleeves, gather your loved ones, and dive into this delicious adventure.
You won’t regret it!
PrintCoconut Cream Pie Bars: Discover This Irresistible Recipe!
- Total Time: 4 hours 30 minutes
- Yield: 16 bars
- Diet: Vegetarian
Description
Delicious and creamy Coconut Cream Pie Bars with a buttery crust and a rich coconut filling, topped with whipped cream and toasted coconut.
Ingredients
- 200 g all-purpose flour
- 50 g granulated sugar
- 115 g unsalted butter, melted
- ¼ teaspoon salt
- 100 g granulated sugar (for filling)
- 40 g cornstarch
- ¼ teaspoon salt (for filling)
- 480 ml whole milk
- 240 ml coconut milk
- 3 large egg yolks
- 1 teaspoon vanilla extract
- 1 teaspoon coconut extract
- 150 g sweetened shredded coconut
- 30 g unsalted butter (for filling)
- 240 ml heavy whipping cream
- 30 g powdered sugar
- ½ teaspoon vanilla extract (for topping)
- 40 g toasted shredded coconut
Instructions
- Preheat the oven to 175°C. Line a 23 × 23 cm baking pan with parchment paper, leaving some overhang for easy removal.
- Mix the flour, sugar, salt, and melted butter until a crumbly dough forms. Press firmly and evenly into the bottom of the pan.
- Bake for 15–18 minutes, or until the edges are lightly golden. Let cool slightly.
- In a saucepan, whisk together the sugar, cornstarch, and salt. Gradually whisk in the milk and coconut milk.
- Cook over medium heat, stirring constantly, until the mixture thickens and begins to gently bubble.
- In a separate bowl, whisk the egg yolks. Slowly add about 120 ml of the hot milk mixture while whisking constantly to temper the eggs.
- Pour the egg mixture back into the saucepan. Cook for another 2–3 minutes, stirring constantly, until thick and smooth.
- Remove from the heat. Stir in the vanilla extract, coconut extract, butter, and shredded coconut.
- Pour the coconut filling over the crust and spread evenly.
- Cover with plastic wrap, pressing it directly onto the surface of the filling. Refrigerate for at least 4 hours, or until completely set.
- Whip the heavy cream, powdered sugar, and vanilla until stiff peaks form.
- Spread or pipe the whipped cream over the chilled bars. Sprinkle with toasted coconut.
- Cut into squares and serve chilled.
Notes
- For best results, refrigerate the bars overnight.
- Ensure the filling is completely set before serving.
- To toast shredded coconut, bake in a preheated oven at 175°C for about 5-7 minutes, stirring frequently.
- Prep Time: 30 minutes
- Cook Time: 30 minutes
- Category: Dessert
- Method: Baking
- Cuisine: American
Nutrition
- Serving Size: 1 bar
- Calories: 250
- Sugar: 15 g
- Sodium: 150 mg
- Fat: 15 g
- Saturated Fat: 10 g
- Unsaturated Fat: 3 g
- Trans Fat: 0 g
- Carbohydrates: 30 g
- Fiber: 1 g
- Protein: 3 g
- Cholesterol: 50 mg