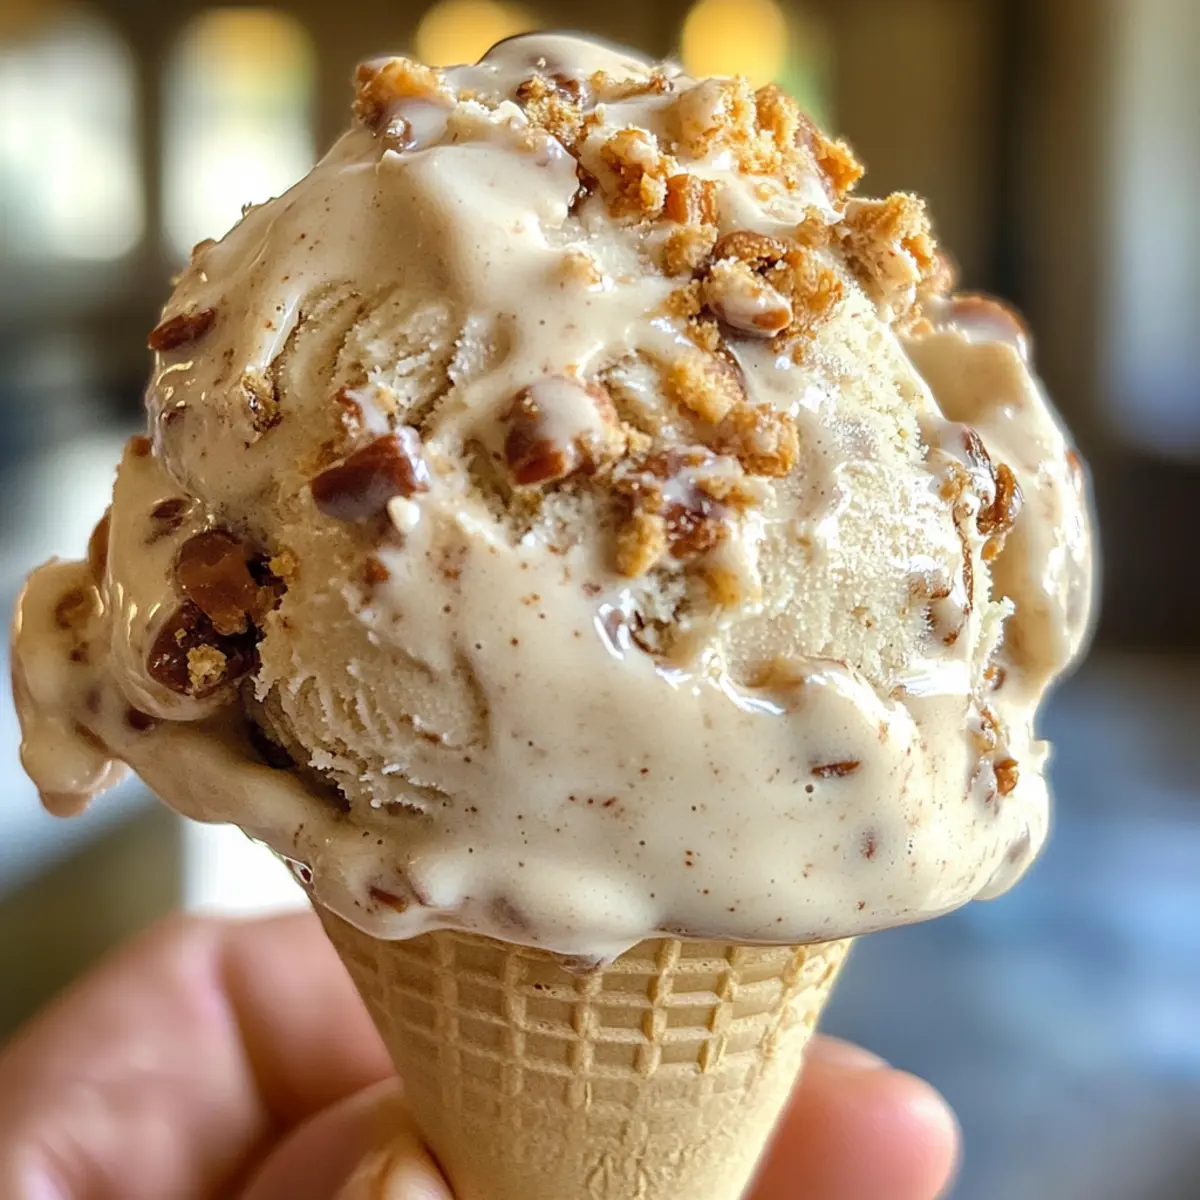
As I strolled through a quaint coffee shop, the aroma of freshly brewed espresso enveloped me like a warm hug, reminding me of my love for homemade indulgences. That day, inspiration struck, leading to my creation of Creamy Coffee Toffee Ice Cream—an irresistible blend that pairs bold coffee with delightful toffee bits. What I adore about this recipe is its simplicity, requiring just a few straightforward steps, making it accessible for anyone looking to elevate their dessert game. Plus, it’s a sure crowd-pleaser, perfect for impressing guests at dinner parties or simply treating yourself after a long day. So why settle for store-bought when you can craft this luscious frozen delight in your own kitchen? Are you ready to dive into this sweet adventure?
Why is Creamy Coffee Toffee Ice Cream irresistible?
Decadent Flavor Explosion: The robust combination of bold coffee and crunchy toffee creates an indulgent treat that sings with every scoop.
Effortless Homemade Delight: With just a handful of ingredients, you can whip up this gourmet dessert right in your kitchen without any complicated techniques.
Crowd-Pleasing Appeal: Whether it’s a family gathering or a cozy night in, this ice cream is sure to impress guests and satisfy your sweet tooth.
Versatile Customization: Feel free to mix and match add-ins, like a swirl of melted chocolate or a pinch of cinnamon, to make it uniquely yours!
Perfect Texture: Each bite offers a luxurious, creamy consistency beautifully complemented by the satisfying crunch of toffee bits.
Enjoy this delightful dessert alongside a warm slice of our Cinnamon Sugar Cream Muffins for the ultimate treat experience!
Creamy Coffee Toffee Ice Cream Ingredients
• For the Ice Cream Base
- Whole Milk – Adds creaminess and balances the flavors; optional: use almond milk for a dairy-free version.
- Large Egg Yolks – Enrich the texture and provide a custard-like base; essential for smooth ice cream.
- Granulated Sugar – Sweetens the ice cream; adjust quantity based on your sweetness preference.
- Strong Coffee – Bold flavor elevates this ice cream; avoid instant coffee for the best results.
- Heavy Cream – Ensures a rich and luscious texture; substitute with coconut cream for a dairy-free version.
- Vanilla Extract – Compliments the coffee and adds depth to the flavor.
- Salt – Enhances sweetness and balances the flavors.
• For the Toffee Crunch
- Chopped Toffee Candy – Provides delightful crunch and bursts of sweetness throughout the ice cream, making the Creamy Coffee Toffee Ice Cream even more indulgent.
This carefully curated list will guide you in creating a batch of this delightful homemade ice cream that everyone will love!
Step‑by‑Step Instructions for Creamy Coffee Toffee Ice Cream
Step 1: Chill Equipment
Start by placing the KitchenAid mixing bowl in the freezer for at least 15 hours to ensure it’s completely chilled. This step is crucial for achieving a creamy texture in your Creamy Coffee Toffee Ice Cream as it helps the mixture freeze quickly, preventing ice crystals from forming.
Step 2: Temper Egg Yolks
In a mixing bowl, whisk together the large egg yolks and 1/4 cup of granulated sugar until the mixture is smooth and slightly pale. Meanwhile, heat the whole milk in a saucepan over medium heat, stirring occasionally until it reaches 165°F. This process will create the perfect custard base for your ice cream.
Step 3: Combine Mixtures
Once the milk is hot, slowly drizzle it into the egg yolk mixture while whisking continuously. This gradual tempering prevents the yolks from curdling. After combining, return the mixture to the saucepan, add the remaining sugar, and cook over low heat, stirring constantly, until it thickens enough to coat the back of a spoon—about 5-7 minutes.
Step 4: Prepare Coffee
Brew a strong cup of your favorite coffee, using high-quality beans for the best flavor. Once brewed, allow the coffee to cool slightly—this will help enhance the aromatic notes in your Creamy Coffee Toffee Ice Cream while preventing it from cooking the custard when combined.
Step 5: Mix Base
In a large bowl, combine the tempered egg mixture, cooled coffee, heavy cream, vanilla extract, and a pinch of salt. Stir until well blended, creating a rich and aromatic base for your ice cream. Cover the bowl and refrigerate the mixture for at least 4 hours, allowing it to chill thoroughly before churning.
Step 6: Churn Ice Cream
Once the mixture is well-chilled, pour it into the KitchenAid bowl. Churn on medium speed for about 25-30 minutes, or until the ice cream reaches a soft-serve consistency. The churning process incorporates air, making your Creamy Coffee Toffee Ice Cream light and fluffy as it freezes.
Step 7: Add Toffee
Transfer the churned ice cream into a freezer-safe container. Gently fold in the chopped toffee candy, ensuring that it’s evenly distributed throughout the ice cream for delightful crunch and bursts of sweetness in every bite.
Step 8: Freeze
Cover the container securely and place it in the freezer. Allow the Creamy Coffee Toffee Ice Cream to firm up for a couple of hours or until it reaches your desired hardness. This final freezing step is essential for achieving that scoopable texture that is perfect for serving.
How to Store and Freeze Creamy Coffee Toffee Ice Cream
-
Fridge: Store any leftovers in an airtight container for up to 3 days. This will help maintain its creamy texture; however, the ice cream is best enjoyed fresh.
-
Freezer: For longer storage, place the Creamy Coffee Toffee Ice Cream in a tightly sealed, freezer-safe container, where it can last for up to 2 weeks.
-
Reheating: When ready to enjoy, allow the ice cream to sit at room temperature for about 10 minutes to soften before scooping. This makes serving easier and enhances the flavor.
-
Avoid Freezer Burn: To prevent freezer burn, press a piece of plastic wrap directly onto the surface of the ice cream before sealing the container. This keeps the luscious texture intact.
What to Serve with Creamy Coffee Toffee Ice Cream
Indulging in a scoop of homemade ice cream is exquisite, but let’s create a full meal that takes your dessert experience to new heights.
-
Crunchy Biscotti: The crisp texture and almond flavors contrast beautifully, providing a delightful crunch that complements the creamy richness.
-
Chocolate Chip Cookies: Warm, gooey cookies paired with the icy coffee flavors create a nostalgic flavor blend that warms the heart.
-
Fresh Berries: Bright blueberries or strawberries add a fruity freshness that balances the sweetness of toffee, offering a vibrant combination.
-
Chocolate Drizzle: A simple drizzle of melted chocolate gives an extra layer of decadence and enhances the dessert’s visual appeal.
-
Espresso Shot: For fellow coffee lovers, a shot of espresso intensifies the coffee flavor, making the indulgence even more delightful.
-
Whipped Cream: Lighter and airy, a dollop of whipped cream adds an elegant touch, inviting you to dive right in for that first heavenly scoop.
Make Ahead Options
These Creamy Coffee Toffee Ice Cream delights are perfect for meal prep enthusiasts! You can prepare the ice cream base (step 5) and refrigerate it for up to 24 hours in advance, allowing the flavors to meld beautifully. For the best results, store the cooled mixture in an airtight container before churning it. If you’re really pressed for time, you can also churn the ice cream and fold in the toffee (steps 6 and 7) up to 3 days before serving; just make sure to store it in a tightly sealed container to prevent ice crystals from forming. When you’re ready to indulge, remove it from the freezer and let it sit at room temperature for about 10 minutes for easier scooping. Enjoy the convenience and deliciousness of homemade ice cream with less last-minute stress!
Creamy Coffee Toffee Ice Cream Variations
Feel free to let your creativity flow and customize this ice cream recipe to suit your taste buds!
-
Dairy-Free: Substitute whole milk with almond milk and use coconut cream for a rich, creamy base.
This twist allows you to enjoy all the flavor without the dairy, perfect for those with lactose sensitivity. -
Decaf Version: Use decaffeinated coffee for a late-night treat to satisfy those sweet cravings without the caffeine buzz.
You can still enjoy the bold taste while unwinding after a long day. -
Chocolate Swirl: Incorporate melted chocolate during the churning process for a decadent twist that pairs beautifully with coffee.
The rich chocolate flavor adds an extra layer of indulgence that’ll have you reaching for more! -
Nutty Addition: Mix in chopped nuts like pecans or almonds for extra crunch and rich nutty flavor.
Not only do they add texture, but they also complement the sweetness of the toffee perfectly. -
Spiced Kick: Add a pinch of cinnamon or nutmeg for a warm spiced flavor that elevates the overall taste.
This simple addition brings a cozy, aromatic element that pairs beautifully with coffee. -
Caramel Drizzle: Blend in caramel sauce with the toffee for a sweeter, gooey twist that’ll take your taste experience to new heights.
The combination of toffee and caramel adds delightful layers of sweetness and texture. -
Minty Fresh: A dash of peppermint extract can transform your ice cream into a refreshing mint-chocolate dessert.
This cool twist is perfect for summer nights, and it offers a deliciously invigorating flavor.
For a perfect pairing, enjoy your ice cream alongside our Cranberry Cream Cheese Dip for a delightful sweet and savory experience!
Expert Tips for Creamy Coffee Toffee Ice Cream
-
Temperature Control: Ensure your mixing bowl is thoroughly chilled for 15 hours before use; this helps achieve a smoother texture in your Creamy Coffee Toffee Ice Cream.
-
Slow Mixing: Drizzle the hot milk into the egg yolks gradually while whisking continuously to prevent curdling and ensure a silky custard base.
-
Quality Ingredients: Use high-quality, freshly brewed coffee instead of instant to elevate the flavor of your ice cream and create a truly indulgent dessert.
-
Chill Time Matters: Refrigerate the ice cream base for at least 4 hours before churning to enhance the flavor and ensure a creamier consistency.
-
Perfect Soft Serve: Let the ice cream sit at room temperature for about 10 minutes before serving; it makes for easier scooping and enhances the tasting experience.
Creamy Coffee Toffee Ice Cream Recipe FAQs
What type of coffee should I use?
Absolutely! Use strong brewed coffee—avoid instant coffee for the best flavor. I recommend a dark roast to really enhance the richness of the ice cream. For a smoother taste, you can use cold brew coffee as well!
How should I store leftover Creamy Coffee Toffee Ice Cream?
For optimal freshness, store your ice cream in an airtight container in the freezer for up to 2 weeks. Be sure to press a piece of plastic wrap against the surface to prevent freezer burn, keeping every scoop creamy and delicious!
Can I freeze this ice cream for a longer time?
Yes, you can! If properly stored in an airtight, freezer-safe container, Creamy Coffee Toffee Ice Cream can last for up to 2 weeks in the freezer. To enjoy it frozen at its best, let it sit at room temperature for about 10 minutes before scooping!
What if my ice cream gets too hard?
Very! If your ice cream becomes too hard after being frozen, simply let it sit at room temperature for 10 minutes. This allows it to soften without losing its creamy texture, making it much easier to scoop!
How do I make this recipe dairy-free?
You can easily make a dairy-free version! Substitute whole milk with almond milk and use coconut cream instead of heavy cream. This keeps the rich texture while ensuring everyone can enjoy the deliciousness of Creamy Coffee Toffee Ice Cream!
Can I add mix-ins to this recipe?
Absolutely! Feel free to get creative! You can mix in various extras like chocolate chips, crushed nuts, or even a swirl of caramel sauce while churning. This will give your ice cream a personalized touch and make it even more delightful!
Delight in Creamy Coffee Toffee Ice Cream at Home
Ingredients
Equipment
Method
- Chill the KitchenAid mixing bowl in the freezer for at least 15 hours.
- Whisk together egg yolks and 1/4 cup of granulated sugar in a mixing bowl. Heat whole milk in a saucepan until it reaches 165°F.
- Slowly drizzle the hot milk into the egg yolk mixture while whisking continuously, then return to the saucepan and cook until thickened.
- Brew a strong cup of coffee and let it cool slightly.
- Combine the tempered egg mixture, cooled coffee, heavy cream, vanilla extract, and salt in a bowl. Stir until blended and refrigerate for 4 hours.
- Pour the mixture into the KitchenAid bowl and churn on medium speed for 25-30 minutes until soft-serve consistency.
- Transfer churned ice cream to a container and fold in chopped toffee candy.
- Cover and freeze for a couple of hours until firm.