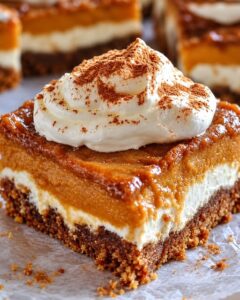
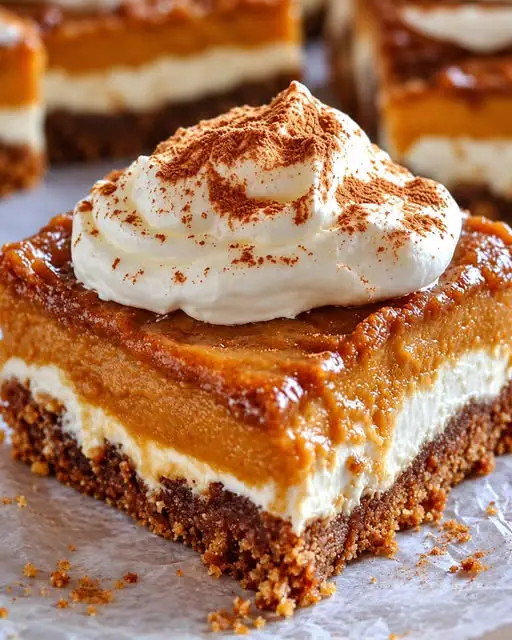
Introduction to Creamy Pumpkin Dream Bars
As the leaves turn and the air gets crisp, I find myself craving the comforting flavors of fall. That’s where these Creamy Pumpkin Dream Bars come in. They’re not just a dessert; they’re a celebration of autumn in every bite. With a buttery graham cracker crust and a rich pumpkin cheesecake layer, these bars are perfect for impressing friends or simply treating yourself after a long day. Plus, they’re no-bake, making them a quick solution for busy days when you still want to indulge in something delicious. Trust me, your taste buds will thank you!
Why You’ll Love This Creamy Pumpkin Dream Bars
These Creamy Pumpkin Dream Bars are a delightful blend of simplicity and flavor. They come together quickly, making them perfect for those hectic fall afternoons. The rich, creamy pumpkin cheesecake layer paired with the crunchy graham cracker crust creates a taste sensation that’s hard to resist. Plus, they’re a hit at gatherings, ensuring you’ll be the star of any autumn celebration. Who wouldn’t love that?
Ingredients for Creamy Pumpkin Dream Bars
Gathering the right ingredients is the first step to creating these Creamy Pumpkin Dream Bars. Here’s what you’ll need:
- Graham cracker crumbs: These form the base of your crust, providing a sweet and crunchy texture.
- Granulated sugar: A touch of sweetness to balance the flavors in the crust.
- Unsalted butter: This adds richness and helps bind the crust together.
For the pumpkin cheesecake layer:
- Cream cheese: The star of the show! It gives the bars their creamy texture and rich flavor.
- Pumpkin puree: Use pure pumpkin puree for that authentic fall taste; it’s packed with nutrients too!
- Powdered sugar: This sweetens the cheesecake layer without the graininess of granulated sugar.
- Pumpkin pie spice: A blend of warm spices that captures the essence of autumn.
- Ground cinnamon: Adds an extra layer of warmth and flavor.
- Vanilla extract: A splash of vanilla enhances the overall flavor profile.
- Whipped topping: This lightens the cheesecake layer, making it fluffy and delightful.
For the topping:
- Ground cinnamon: A sprinkle on top for that aromatic finish.
- Crushed gingersnap cookies: Optional, but they add a spicy crunch that complements the pumpkin beautifully.
- Chopped pecans: Also optional, these provide a nutty flavor and a bit of texture.
Exact quantities for each ingredient can be found at the bottom of the article, ready for printing. Happy baking!
How to Make Creamy Pumpkin Dream Bars
Creating these Creamy Pumpkin Dream Bars is a breeze! Follow these simple steps, and you’ll have a delicious dessert ready to impress. Let’s dive in!
Prepare the Pan
Start by lining a 9-by-13-inch baking pan with parchment paper. Leave some overhang on the edges. This makes it super easy to lift the bars out later. Trust me, you’ll thank yourself when it’s time to serve!
Make the Crust
In a medium bowl, combine graham cracker crumbs, granulated sugar, and melted butter. Mix until the crumbs are evenly moistened. The mixture should resemble wet sand. This crust is the foundation of your pumpkin dessert, so make sure it’s well combined!
Press the Crust
Transfer the crumb mixture into the prepared pan. Use the back of a measuring cup to press it firmly and evenly into the bottom. This step is crucial for a sturdy crust that holds together when sliced. No one wants a crumbly mess!
Chill the Crust
Pop the crust into the refrigerator for about 20–30 minutes. Chilling helps it firm up, making it easier to spread the pumpkin layer on top. While you wait, you can sip on a warm drink and enjoy the fall vibes!
Beat the Cream Cheese
In a large mixing bowl, beat the softened cream cheese until it’s smooth and creamy. You want to eliminate any lumps here. A smooth base is key to achieving that dreamy texture in your fall treat.
Add the Pumpkin
Now, mix in the pumpkin puree, powdered sugar, pumpkin pie spice, ground cinnamon, and vanilla extract. Beat until everything is smooth and fully combined. The aroma will transport you straight to a cozy autumn day!
Fold in the Whipped Topping
Gently fold about two-thirds of the whipped topping into the pumpkin mixture using a spatula. This step adds lightness and fluffiness to your cheesecake layer. Be careful not to deflate it; we want those dreamy bars to be airy!
Spread the Pumpkin Layer
Remove the crust from the refrigerator. Spread the pumpkin cheesecake mixture evenly over the chilled crust. Use a spatula to smooth it out. This layer is where the magic happens, so take your time to get it just right!
Add the Topping
Carefully spread the remaining whipped topping over the pumpkin layer. This adds a lovely lightness and a beautiful finish to your bars. It’s like the icing on the cake, but even better!
Decorate
Sprinkle the top with ground cinnamon, crushed gingersnap cookies, and chopped pecans if you’re feeling fancy. This adds a delightful crunch and a pop of flavor that complements the creamy pumpkin perfectly.
Chill Until Firm
Cover the pan and refrigerate for at least 4 hours, preferably overnight. This allows the layers to set completely. Patience is key here; the wait will be worth it when you take that first bite!
Slice and Serve
Once chilled, lift the dessert out using the parchment paper. Cut into squares with a clean, warm knife for neat slices. Serve chilled and watch as everyone enjoys these no-bake dessert delights!
Tips for Success
- Use pure pumpkin puree for the best flavor; avoid pumpkin pie filling.
- Ensure cream cheese is softened to prevent lumps in your mixture.
- Gently fold in the whipped topping to keep the texture light and airy.
- Press the crust firmly for a sturdy base that holds together.
- For cleaner cuts, refrigerate overnight and wipe the knife between slices.
Equipment Needed
- 9-by-13-inch baking pan: A standard size for these bars; you can use a glass or metal pan.
- Parchment paper: Essential for easy removal; aluminum foil works in a pinch.
- Mixing bowls: Use medium and large bowls for mixing ingredients.
- Spatula: Perfect for folding and spreading; a wooden spoon can also do the trick.
- Measuring cups and spoons: Accurate measurements are key; a kitchen scale is a great alternative.
Variations
- Gluten-Free: Substitute graham cracker crumbs with gluten-free cookie crumbs or almond flour for a gluten-free crust.
- Dairy-Free: Use dairy-free cream cheese and whipped topping to make this dessert suitable for lactose-intolerant friends.
- Spiced Up: Add a pinch of nutmeg or allspice to the pumpkin layer for an extra kick of flavor.
- Chocolate Lovers: Drizzle melted chocolate over the top before chilling for a decadent twist.
- Nut-Free: Omit the pecans and use crushed graham crackers or additional gingersnap cookies for topping instead.
Serving Suggestions
- Pair with Coffee: A warm cup of spiced coffee or chai complements the creamy pumpkin flavors beautifully.
- Top with Whipped Cream: Add a dollop of extra whipped cream for an indulgent touch.
- Garnish with Fresh Mint: A sprig of mint adds a pop of color and freshness.
- Serve with Ice Cream: Vanilla or cinnamon ice cream makes a delightful side.
FAQs about Creamy Pumpkin Dream Bars
Can I make Creamy Pumpkin Dream Bars ahead of time?
Absolutely! These bars are perfect for making ahead. Just prepare them a day in advance and let them chill overnight. This allows the flavors to meld beautifully, making them even more delicious!
How should I store leftover Creamy Pumpkin Dream Bars?
Store any leftovers in an airtight container in the refrigerator. They’ll stay fresh for up to five days. Just be sure to keep them chilled to maintain that creamy texture!
Can I use pumpkin pie filling instead of pumpkin puree?
It’s best to stick with pure pumpkin puree for this recipe. Pumpkin pie filling contains added sugars and spices, which can alter the flavor and texture of your pumpkin dessert.
What can I substitute for the whipped topping?
If you prefer a homemade touch, you can whip heavy cream with a bit of sugar and vanilla extract. This will give you a fresh, fluffy topping that works wonderfully with the pumpkin layer.
Are there any dietary adaptations for Creamy Pumpkin Dream Bars?
Yes! You can easily make these bars gluten-free by using gluten-free cookie crumbs for the crust. For a dairy-free version, opt for dairy-free cream cheese and whipped topping. Enjoy your fall treat without worry!
Final Thoughts
Creating these Creamy Pumpkin Dream Bars is more than just whipping up a dessert; it’s about embracing the warmth of fall and sharing joy with loved ones. Each bite is a delightful blend of creamy pumpkin goodness and crunchy crust, evoking memories of cozy gatherings and laughter. Whether you’re serving them at a festive gathering or enjoying them solo with a cup of coffee, these bars are sure to bring a smile to your face. So, roll up your sleeves, dive into this recipe, and let the flavors of autumn fill your kitchen with happiness!
PrintCreamy Pumpkin Dream Bars: A Delightful Fall Treat!
- Total Time: 4 hours 30 minutes
- Yield: 12 servings
- Diet: Vegetarian
Description
Creamy Pumpkin Dream Bars are a delightful fall treat featuring a buttery graham cracker crust, a rich pumpkin cheesecake layer, and a light whipped topping, perfect for any autumn gathering.
Ingredients
- For the graham cracker crust:
- 2 cups graham cracker crumbs
- 1/3 cup granulated sugar
- 6 tablespoons unsalted butter, melted
- For the pumpkin cheesecake layer:
- 8 oz cream cheese, softened
- 1 cup pumpkin puree
- 1 cup powdered sugar
- 2 teaspoons pumpkin pie spice
- 1 teaspoon ground cinnamon
- 1 teaspoon vanilla extract
- 8 oz whipped topping, thawed, divided
- For the topping:
- 1/2 teaspoon ground cinnamon
- 1/3 cup crushed gingersnap cookies
- 2 tablespoons chopped pecans (optional)
Instructions
- Prepare the pan: Line a 9-by-13-inch baking pan with parchment paper, leaving extra paper over the edges for easy removal.
- Make the crust: In a medium bowl, combine graham cracker crumbs, granulated sugar, and melted butter. Mix until the crumbs are evenly moistened.
- Press the crust: Transfer the mixture into the prepared pan. Press firmly and evenly into the bottom using the back of a measuring cup.
- Chill the crust: Refrigerate for 20–30 minutes to help the crust become firm.
- Beat the cream cheese: In a large mixing bowl, beat softened cream cheese until smooth and creamy, with no lumps.
- Add the pumpkin: Mix in pumpkin puree, powdered sugar, pumpkin pie spice, cinnamon, and vanilla extract. Beat until smooth and fully combined.
- Fold in the whipped topping: Gently fold about two-thirds of the whipped topping into the pumpkin mixture using a spatula. Mix until light and fluffy.
- Spread the pumpkin layer: Remove the crust from the refrigerator. Spread the pumpkin cheesecake mixture evenly over the chilled crust.
- Add the topping: Carefully spread the remaining whipped topping over the pumpkin layer.
- Decorate: Sprinkle the top with ground cinnamon, crushed gingersnap cookies, and chopped pecans if desired.
- Chill until firm: Cover the pan and refrigerate for at least 4 hours, preferably overnight, until the layers are completely set.
- Slice and serve: Lift the dessert out using the parchment paper. Cut into squares with a clean, warm knife and serve chilled.
Notes
- Use pure pumpkin puree, not pumpkin pie filling.
- Make sure the cream cheese is softened before mixing to prevent lumps.
- Fold the whipped topping gently to maintain a light, fluffy texture.
- Press the crust firmly so the bars hold together when sliced.
- For cleaner cuts, refrigerate overnight and wipe the knife between slices.
- Use gingersnap crumbs for extra warmth and a delicious spiced crunch.
- Prep Time: 30 minutes
- Cook Time: 0 minutes
- Category: Dessert
- Method: No-Bake
- Cuisine: American
Nutrition
- Serving Size: 1 bar
- Calories: 250
- Sugar: 18g
- Sodium: 150mg
- Fat: 12g
- Saturated Fat: 7g
- Unsaturated Fat: 3g
- Trans Fat: 0g
- Carbohydrates: 34g
- Fiber: 1g
- Protein: 3g
- Cholesterol: 30mg