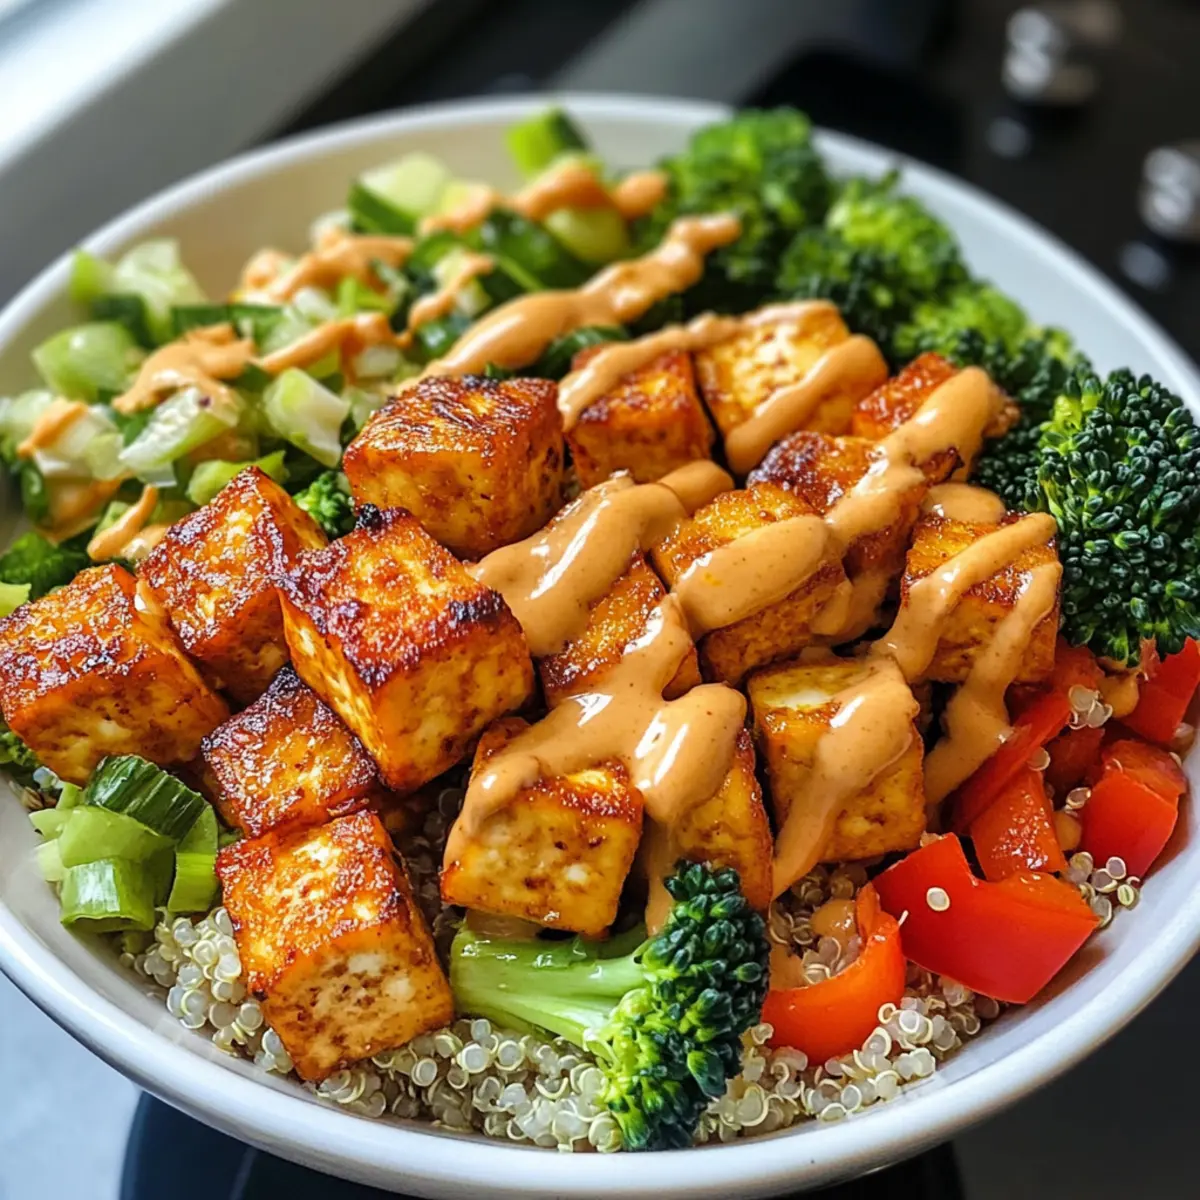
As I stood in my kitchen, the tantalizing aroma of roasted vegetables wafted through the air, pulling me in like a warm hug on a chilly day. It’s moments like these that remind me why I love cooking, especially when creating a vibrant Crispy Baked Tofu Buddha Bowl with Creamy Peanut Sauce. This delightful dish not only satisfies the need for a wholesome meal but is also a breeze to whip up in just 45 minutes—perfect for those busy weeknights when you crave something hearty yet health-conscious. The star of this bowl, crispy tofu, brings a satisfying crunch, while fresh vegetables and a rich peanut sauce elevate it to true culinary comfort. Ready to discover how you can make this nourishing bowl your own? Let’s dive in!
Why is this Buddha Bowl amazing?
Simplicity: This dish is incredibly easy to assemble, making it perfect even for beginner chefs.
Healthy Comfort: Packed with fresh vegetables and plant-based protein, it offers a satisfying meal that nourishes both body and soul.
Versatile: Customize it with your favorite grains or substituting the peanut butter for alternatives to cater to individual tastes and dietary needs.
Quick Cooking: In just 45 minutes, you can enjoy a hearty dinner that fits perfectly into your busy schedule.
Crowd-Pleaser: Whether it’s for a cozy family meal or entertaining friends, this Buddha Bowl is sure to impress! Try pairing it with a side of Chicken Spring Rolls or serve it alongside a refreshing Tofu Oven Baked dish for an exciting dinner spread.
Crispy Baked Tofu Buddha Bowl Ingredients
For the Tofu
• Firm or Extra-Firm Tofu – Essential for the ideal crispy texture; silken tofu won’t hold up in the oven.
For the Grains
• Quinoa or Brown Rice – Hearty options that add fiber; feel free to switch for farro or cauliflower rice for variety.
For the Vegetables
• Fresh Vegetables – Choose your favorites for color and crunch; examples include broccoli, carrots, and bell peppers.
For the Peanut Sauce
• Peanut Butter – A natural, slightly chunky type enhances the creaminess and flavor of the sauce; it’s the heart of the Crispy Baked Tofu Buddha Bowl.
• Soy Sauce or Tamari – Provides a savory umami boost; opt for tamari if you need a gluten-free version.
• Maple Syrup – Adds the perfect touch of sweetness to balance the sauce.
• Warm Water – Adjusts the sauce’s thickness for a smooth consistency.
For Roasting
• Olive Oil – Drizzle over vegetables before roasting to enhance their natural flavors.
Step‑by‑Step Instructions for Crispy Baked Tofu Buddha Bowl
Step 1: Preheat the Oven
Begin your culinary adventure by preheating your oven to 400°F (200°C). This ensures a perfectly crispy finish for the tofu and roasted vegetables later on. Make sure to give it about 10-15 minutes to reach the desired temperature before proceeding to prepare the tofu.
Step 2: Press and Cube the Tofu
While the oven heats up, take your firm tofu and press it to remove excess moisture. Wrap the tofu in a clean towel and place a weighted object on top for about 10 minutes. Once pressed, cut the tofu into even cubes about 1 inch in size, ready to become the crunchy star of your Crispy Baked Tofu Buddha Bowl.
Step 3: Bake the Tofu
In a mixing bowl, toss the cubed tofu with soy sauce until evenly coated. Spread the tofu onto a baking sheet lined with parchment paper, ensuring they are spaced apart. Bake for 25-30 minutes, flipping the tofu halfway through to achieve a golden, crispy exterior.
Step 4: Cook Your Grains
While the tofu bakes to perfection, prepare your quinoa or brown rice according to the package instructions. This usually takes about 15-20 minutes and ensures a wholesome base for your Buddha Bowl. Once cooked, fluff the grains with a fork and set aside to cool slightly.
Step 5: Prepare the Fresh Vegetables
Next, chop your choice of fresh vegetables, such as broccoli, carrots, and bell peppers. Toss them in a bowl with a drizzle of olive oil and season with salt and pepper. If desired, add these veggies to the oven in the last 15 minutes of the tofu’s baking time for a delightful roast, enhancing their flavors and textures.
Step 6: Make the Creamy Peanut Sauce
In a separate bowl, whisk together peanut butter, soy sauce, maple syrup, and warm water until smooth. Adjust the consistency of your sauce by adding more warm water if needed. This creamy peanut sauce will elevate your Crispy Baked Tofu Buddha Bowl, adding a rich, nutty flavor that brings the dish together.
Step 7: Assemble Your Buddha Bowl
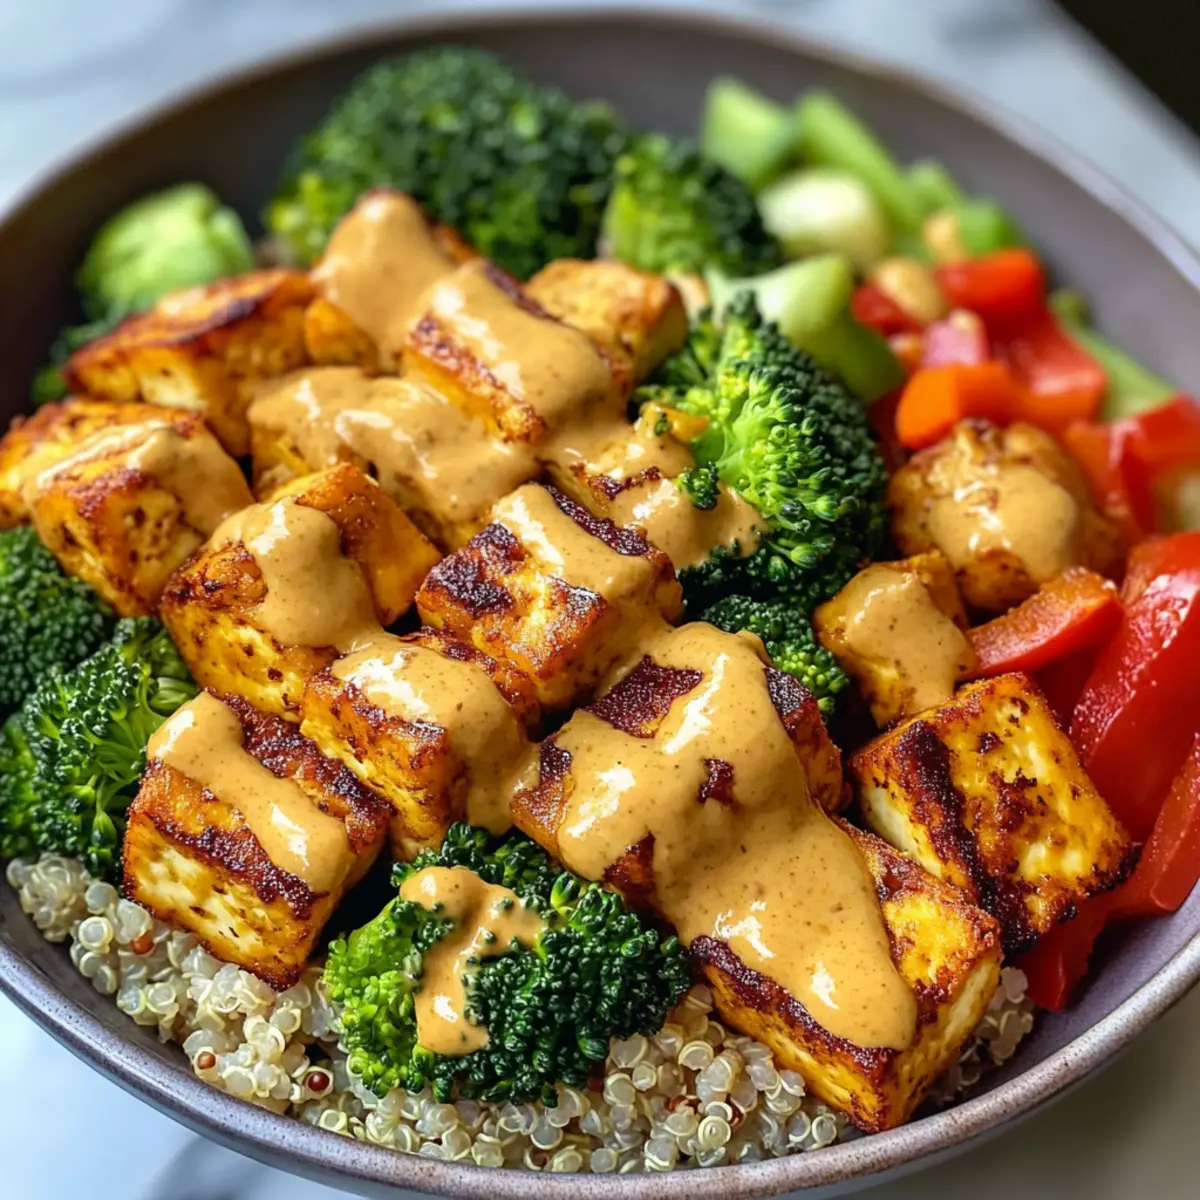
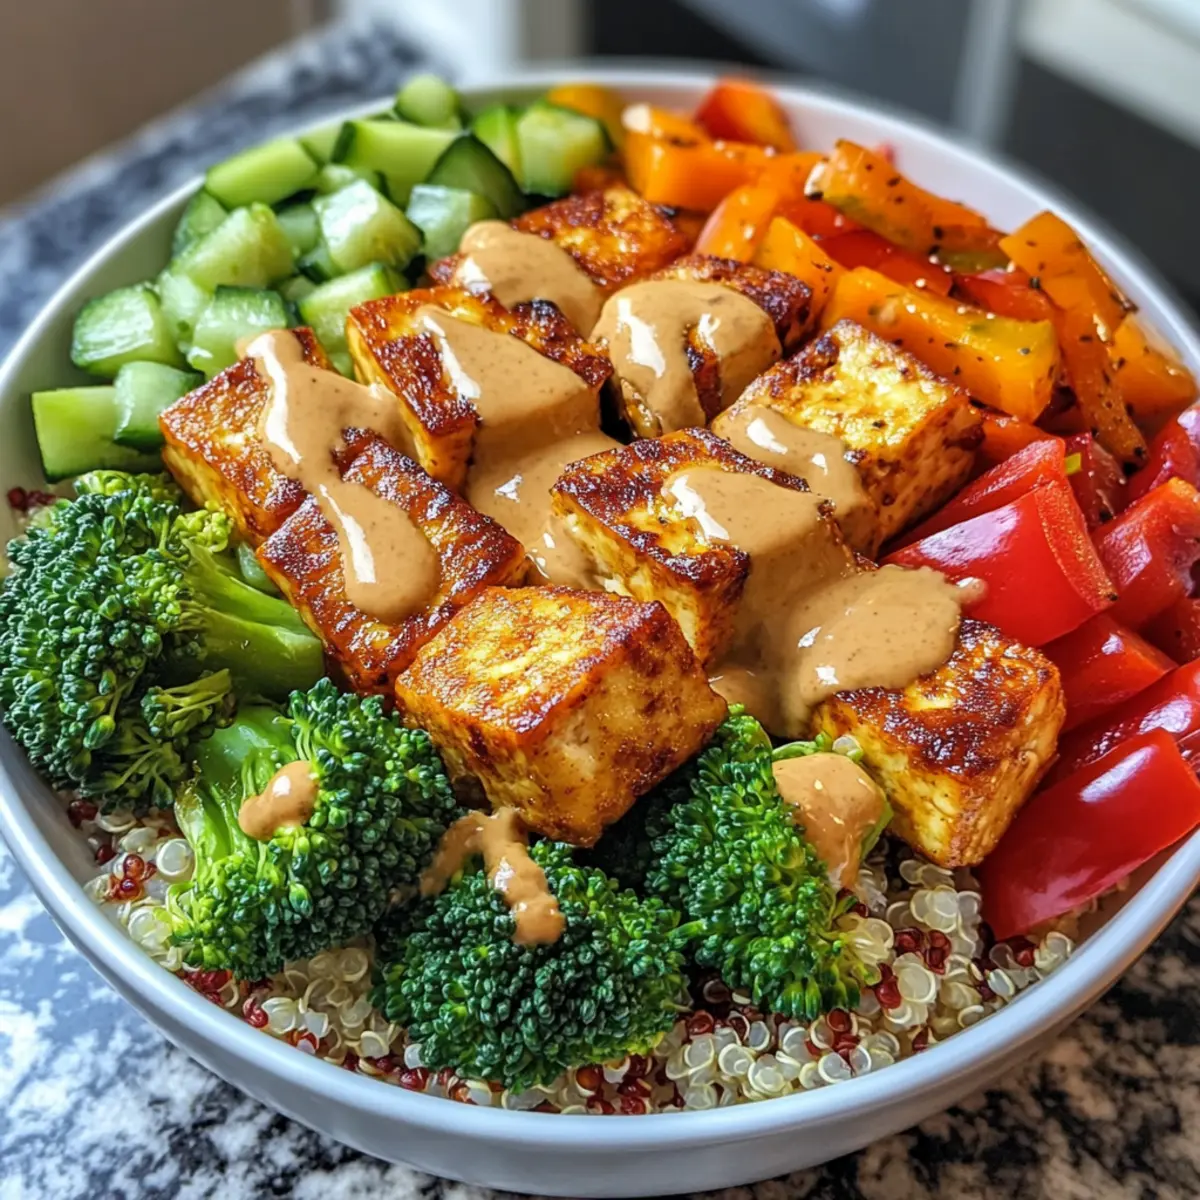
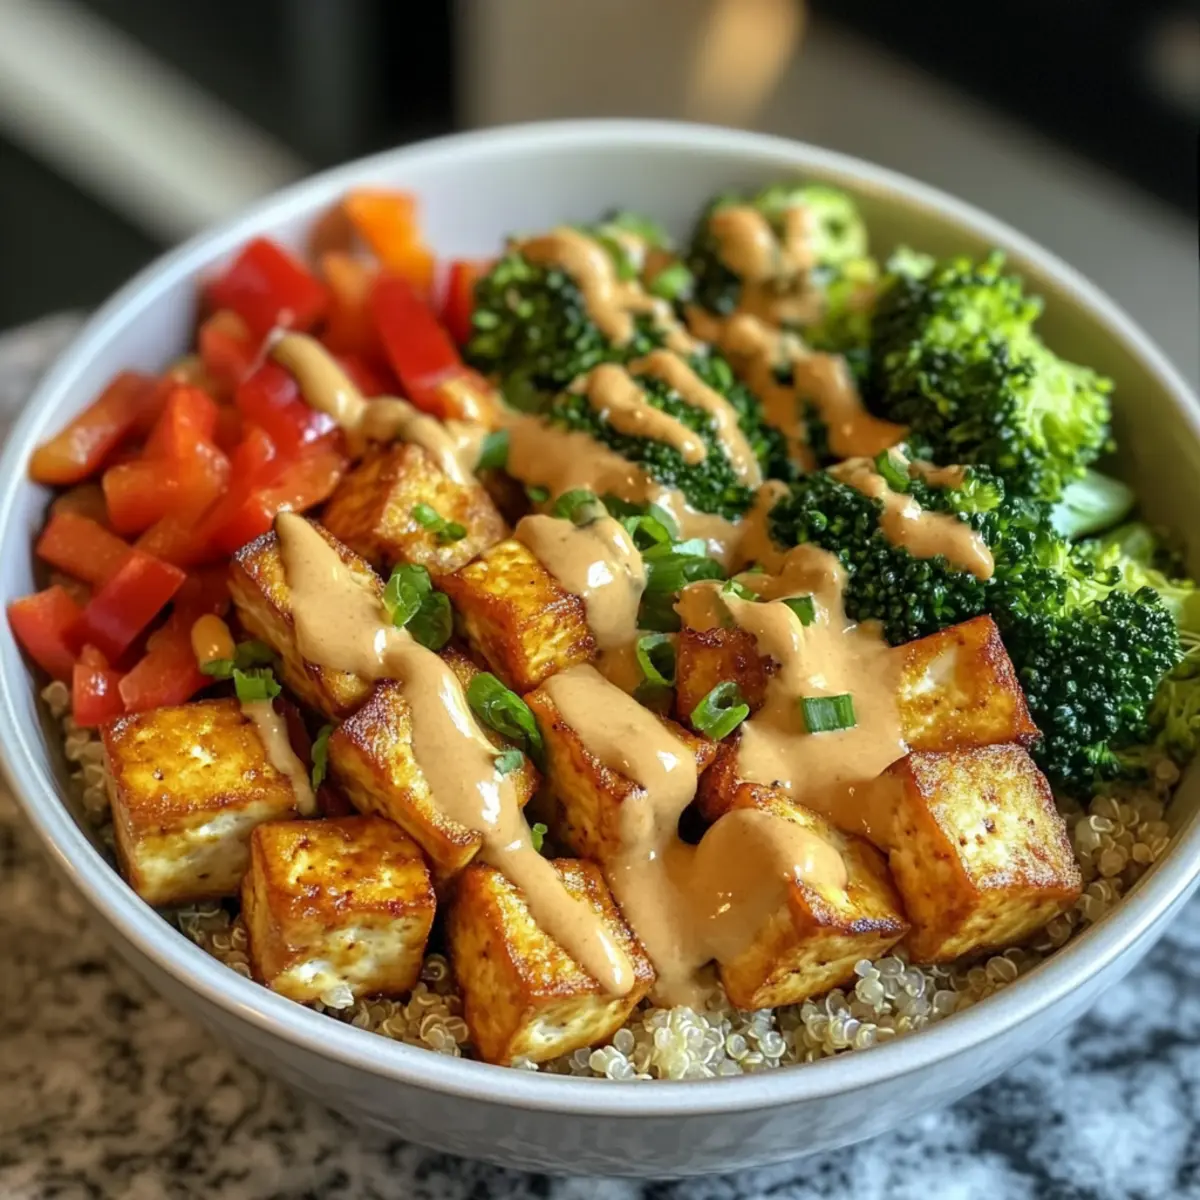
Once everything is cooked, it’s time to assemble your bowl! Start with a generous scoop of your grains, followed by the roasted vegetables and crispy tofu. Drizzle your delicious creamy peanut sauce over the top, and feel free to sprinkle any additional toppings you love, such as sesame seeds or fresh herbs to increase the flavor profile of this vibrant Crispy Baked Tofu Buddha Bowl.
Expert Tips for Crispy Baked Tofu Buddha Bowl
-
Pressing Tofu: Prioritize pressing tofu to remove excess moisture; this step is crucial for achieving the perfect crispy texture in your Buddha Bowl.
-
Flipping Technique: Gently flip the tofu halfway through baking to ensure all sides are equally crispy. Use a silicone spatula to prevent sticking.
-
Sauce Consistency: If your creamy peanut sauce is too thick, gradually add warm water until you reach your desired texture. Taste and adjust sweetness with maple syrup!
-
Customizable Veggies: Don’t hesitate to swap in seasonal vegetables like zucchini or roasted sweet potatoes to add more flavor and nutrition to your bowl.
-
Grain Alternatives: Experiment with different grains! Farro provides a chewy texture, while cauliflower rice offers a low-carb option for those looking to lighten up.
-
Make-Ahead Tips: Prepare the tofu and sauce in advance to make assembling your Crispy Baked Tofu Buddha Bowl a breeze for busy weeknights.
What to Serve with Crispy Baked Tofu Buddha Bowl
Elevate your dining experience with delightful pairings that enhance the flavors of your nourishing bowl.
- Creamy Mashed Potatoes: Their smooth texture is the perfect contrast to the crispy tofu’s crunch, making for a comforting addition.
- Quinoa Salad: A light, zesty quinoa salad with herbs and lemon can brighten your meal while adding extra protein and fiber.
- Cucumber Salad: This refreshing side, tossed with vinegar and herbs, offers a crisp bite that balances the richness of the peanut sauce.
- Steamed Asparagus: Tender, bright asparagus enhances your meal with a vibrant taste, while the natural nuttiness complements the peanut sauce beautifully.
- Chilled Jasmine Iced Tea: This fragrant drink adds a lovely, aromatic experience, helping cleanse the palate between bites of the savory Buddha bowl.
- Chocolate Avocado Mousse: For a delightful finish, this creamy dessert provides a rich flavor without being overly sweet, perfect for wrapping up your wholesome dinner.
Make Ahead Options
These Crispy Baked Tofu Buddha Bowls are perfect for busy weeknights and can be prepared ahead of time! You can press and cube the tofu and store it in an airtight container in the refrigerator up to 24 hours before baking. Additionally, you can cook the quinoa or brown rice and chop the vegetables a day in advance; just keep the veggies in a separate container. To maintain the quality and texture, store the creamy peanut sauce separately and whisk just before serving. When you’re ready to enjoy your Buddha Bowl, simply bake the tofu and warm the grains, then assemble everything with fresh vegetables and sauce for a nutritious, hassle-free meal!
How to Store and Freeze Crispy Baked Tofu Buddha Bowl
Fridge: Store leftovers in an airtight container for up to 3 days. Keep the crispy tofu separate from the vegetables to maintain its crunchiness.
Freezer: For longer storage, freeze the cooked tofu, grains, and vegetables in individual containers for up to 2 months. Thaw in the fridge overnight before reheating.
Reheating: To reheat, warm the tofu in an air fryer or toaster oven for best results, while microwaving (covered) the grains and vegetables until heated through.
Assembly: If you plan to enjoy leftovers, consider assembling the Buddha bowl fresh each time to keep the textures intact, especially for the creamy peanut sauce.
Crispy Baked Tofu Buddha Bowl Variations
Feel free to personalize your bowl with these delightful twists that cater to your taste!
-
Gluten-Free: Use tamari instead of soy sauce to keep the flavors intact while making it gluten-free.
-
Nut-Free: Swap peanut butter for sunflower seed butter in the sauce; it delivers a similar creaminess without the allergens.
-
Roasted Veggie Upgrade: Try using seasonal vegetables like sweet potatoes or zucchini for a different flavor profile that complements the tofu.
-
Grain Alternatives: Replace quinoa with farro or opt for cauliflower rice for a lighter, lower-carb option that doesn’t skimp on taste.
-
Extra Crunch: Toss in some toasted sesame seeds or crushed peanuts as a topping for added texture and nutty flavor.
-
Spicy Kick: Incorporate sriracha or chopped fresh chilies into the peanut sauce to bring a fiery zest that mouth-watering sauce demands.
-
Flavor Boost: Marinate tofu in a mixture of lime juice and garlic before baking for an added zing that elevates the overall dish.
-
Sweet & Tangy: Drizzle some balsamic reduction over the assembled bowl for a sweet balance that enhances the fresh veggies beautifully.
This Crispy Baked Tofu Buddha Bowl serves as a fantastic base for creating your own culinary masterpieces. If you’re looking for more ideas, consider trying out the Ground Beef Bowls for an entirely different experience!
Crispy Baked Tofu Buddha Bowl Recipe FAQs
How do I select the right tofu for this recipe?
Absolutely! For the best results, choose firm or extra-firm tofu. These varieties provide a hearty texture and won’t break down during baking. Silken tofu is too soft and won’t achieve the crispy finish we’re aiming for, so stick with the firmer options for the perfect Buddha Bowl.
What’s the best way to store leftovers from my Crispy Baked Tofu Buddha Bowl?
You can store leftovers in an airtight container for up to 3 days in the refrigerator. To keep the tofu crispy, it’s best to store it separately from the vegetables in the bowl. This way, you can maintain their texture and flavor. When ready to enjoy, just combine the components again for a quick meal.
Can I freeze my Crispy Baked Tofu Buddha Bowl?
Very! You can freeze the cooked tofu and grains for up to 2 months. Divide the components into individual containers for easy meal prep. To freeze, pack them tightly but avoid overcrowding, then seal well to prevent freezer burn. When ready to enjoy, thaw them in the fridge overnight and reheat in an air fryer for the crispiest results!
What if my tofu isn’t crispy after baking?
If your tofu isn’t crispy, it may be due to not pressing it enough to remove moisture or not baking it at a high enough temperature. Make sure to press the tofu with a weight for about 10 minutes before cutting it into cubes. Also, ensure that your oven is preheated to 400°F (200°C) and try flipping the tofu halfway through baking for even crispiness.
Are there any dietary considerations I should keep in mind with this Buddha Bowl?
Yes, definitely! This Crispy Baked Tofu Buddha Bowl is vegan and can be made gluten-free by using tamari instead of soy sauce. If you or someone enjoying this dish has nut allergies, consider substituting peanut butter with sunflower seed butter for a deliciously similar flavor without the allergens. Always check labels for hidden allergens, especially in sauces!
How long can I keep the creamy peanut sauce?
You can store the creamy peanut sauce in an airtight container in the fridge for up to 1 week. It’s a fantastic sauce that pairs with various dishes, so feel free to use it on salads or as a dipping sauce. If it thickens while stored, just whisk in a bit of warm water to regain that lovely creamy consistency before using!
Crispy Baked Tofu Buddha Bowl for a Flavor-Packed Dinner
Ingredients
Equipment
Method
- Preheat your oven to 400°F (200°C).
- Press the firm tofu to remove excess moisture and cube into 1-inch pieces.
- Toss cubed tofu with soy sauce, place on baking sheet, and bake for 25-30 minutes.
- Prepare your grains according to package instructions, usually taking about 15-20 minutes.
- Chop fresh vegetables, toss with olive oil, salt, and pepper, and roast for the last 15 minutes of the tofu baking time.
- Whisk together peanut butter, soy sauce, maple syrup, and warm water until smooth.
- Assemble your bowl with grains, roasted vegetables, and crispy tofu, then drizzle with the peanut sauce.