Introduction to Dreamy No-Bake Funfetti Oreo Icebox Cake
There’s something magical about desserts that require no baking, especially when they come together as effortlessly as this Dreamy No-Bake Funfetti Oreo Icebox Cake.
I remember the first time I made a no-bake dessert; it felt like I had discovered a secret passage to culinary bliss.
This cake is perfect for those busy days when you want to impress your loved ones without spending hours in the kitchen.
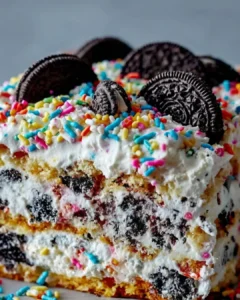
With layers of whipped cream, crushed Oreos, and colorful sprinkles, it’s a celebration on a plate, ready to bring smiles to any gathering.
Why You’ll Love This Dreamy No-Bake Funfetti Oreo Icebox Cake
This Dreamy No-Bake Funfetti Oreo Icebox Cake is a game-changer for dessert lovers.
It’s incredibly easy to whip up, taking just 20 minutes of your time.
The layers of creamy goodness and crunchy Oreos create a delightful contrast that’s hard to resist.
Plus, it’s a crowd-pleaser, making it perfect for parties, potlucks, or just a sweet treat at home.
Who wouldn’t love a dessert that’s as fun to make as it is to eat?
Ingredients for Dreamy No-Bake Funfetti Oreo Icebox Cake
Creating this delightful Dreamy No-Bake Funfetti Oreo Icebox Cake is all about gathering the right ingredients.
Here’s what you’ll need:
- Heavy whipping cream: This is the star of the show, providing that luscious, creamy texture.
- Powdered sugar: A touch of sweetness that blends perfectly into the whipped cream.
- Vanilla extract: Adds a warm, aromatic flavor that elevates the entire dessert.
- Funfetti cake mix: The secret ingredient that brings a burst of color and flavor without any baking.
- Oreo cookies: Crushed for layers of crunchy goodness; they’re the perfect complement to the creaminess.
- Rainbow sprinkles: Because what’s a funfetti dessert without a sprinkle of joy?
- Milk: Used to soften the Oreos, making them easy to layer and enjoy.
Feel free to get creative!
For a chocolate twist, swap regular Oreos for chocolate ones.
You can also add fresh fruit like strawberries or bananas between the layers for a refreshing touch.
Exact measurements for each ingredient are available at the bottom of the article for your convenience.
How to Make Dreamy No-Bake Funfetti Oreo Icebox Cake
Making this Dreamy No-Bake Funfetti Oreo Icebox Cake is a breeze.
Follow these simple steps, and you’ll have a show-stopping dessert ready in no time!
Step 1: Whip the Cream
Start by pouring the heavy whipping cream into a large mixing bowl.
Using a hand mixer or stand mixer, whip the cream on medium speed until soft peaks form.
This step is crucial; soft peaks mean your cream is light and airy, which is key for that dreamy texture.
Don’t rush it—take your time to get it just right!
Step 2: Add Sweetness and Flavor
Once you have those soft peaks, it’s time to sweeten things up.
Gradually add the powdered sugar and vanilla extract while continuing to whip.
Keep mixing until you achieve stiff peaks.
This means the cream holds its shape beautifully, making it perfect for layering in your icebox cake.
Step 3: Mix in Funfetti and Sprinkles
Now, gently fold in the dry Funfetti cake mix and rainbow sprinkles.
Use a spatula to combine everything without deflating the whipped cream.
You want those colorful sprinkles evenly distributed throughout the mixture for that festive look and flavor.
Step 4: Prepare the Oreo Layer
Grab your Oreo cookies and a shallow dish of milk.
Dip each Oreo into the milk for just a few seconds—this softens them up nicely.
Layer the dipped Oreos in the bottom of your 9×13 inch baking dish.
This creates a delicious base for your cake.
Step 5: Assemble the Cake
Spread half of the whipped cream mixture over the layer of Oreos.
Make sure to cover them completely for a creamy delight in every bite.
Repeat the process with another layer of dipped Oreos followed by the remaining whipped cream mixture.
It’s all about those layers!
Step 6: Final Touches
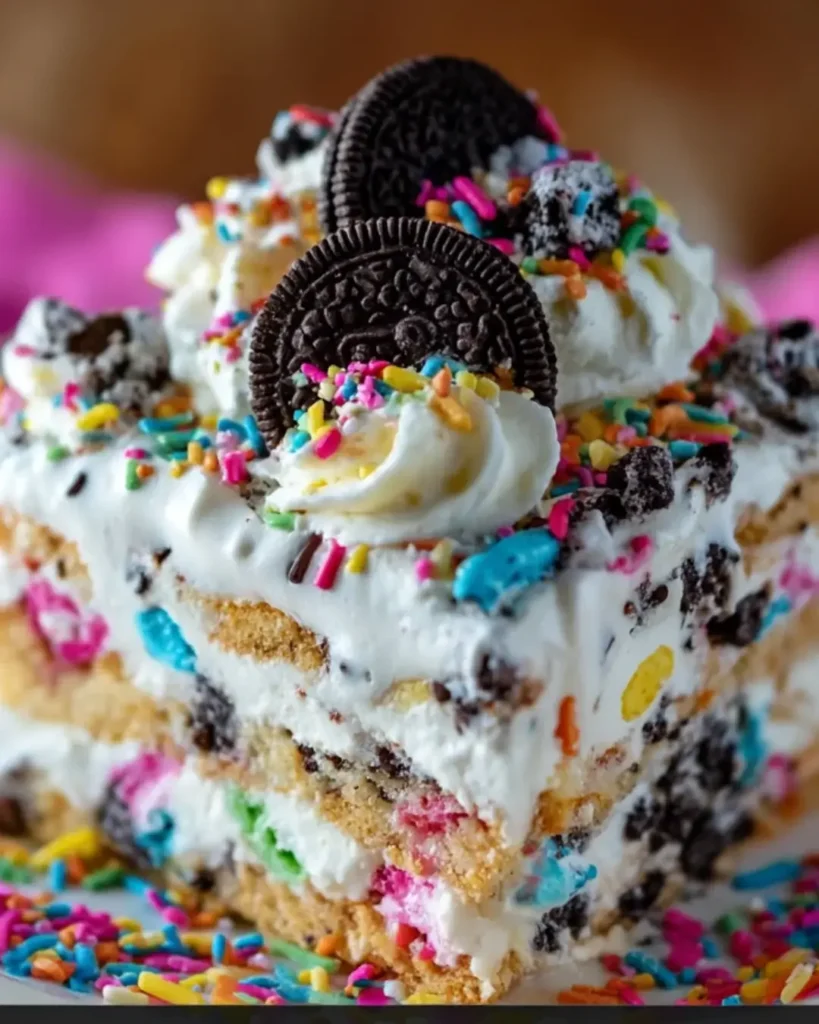
To finish, sprinkle crushed Oreos and extra rainbow sprinkles on top.
This adds a fun crunch and a pop of color.
Cover the dish with plastic wrap and refrigerate for at least 4 hours, or overnight for the best results.
This chilling time allows the flavors to meld beautifully, making each slice a dreamy experience.

Tips for Success
- Use cold heavy cream for better whipping results; it helps achieve those perfect peaks.
- Don’t skip the chilling time; it’s essential for the flavors to blend and the cake to set.
- Feel free to customize with your favorite cookies or add layers of fruit for extra flavor.
- For a smoother texture, sift the powdered sugar before adding it to the cream.
- Keep an eye on the whipped cream; over-whipping can turn it into butter!
Equipment Needed
- Mixing bowl: A large bowl is essential; a glass or stainless steel one works great.
- Hand mixer or stand mixer: Either will do the job; a whisk can work, but it’ll take longer.
- 9×13 inch baking dish: Perfect for layering; any similar-sized dish will suffice.
- Spatula: For folding and spreading; a silicone spatula is ideal for scraping every bit.
Variations
- Chocolate Delight: Swap regular Oreos for chocolate Oreos for a rich, chocolatey twist.
- Fruit Fusion: Add layers of fresh fruit like strawberries, bananas, or blueberries for a refreshing burst of flavor.
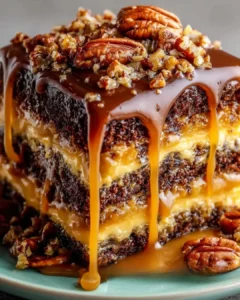
- Nutty Crunch: Incorporate chopped nuts, such as walnuts or pecans, for added texture and flavor.
- Gluten-Free Option: Use gluten-free Oreos and a gluten-free cake mix to make this dessert suitable for gluten-sensitive friends.
- Vegan Version: Substitute heavy cream with coconut cream and use vegan Oreos for a plant-based treat.
Serving Suggestions
- Pair with a scoop of vanilla ice cream for an extra creamy experience.
- Serve alongside fresh fruit, like strawberries or raspberries, for a refreshing contrast.
- Drizzle with chocolate or caramel sauce for added indulgence.
- Garnish with mint leaves for a pop of color and freshness.
FAQs about Dreamy No-Bake Funfetti Oreo Icebox Cake
Can I make this cake ahead of time?
Absolutely! This Dreamy No-Bake Funfetti Oreo Icebox Cake is perfect for making ahead. Just prepare it the day before your event and let it chill overnight. The flavors will meld beautifully, making it even more delicious!
How long can I store leftovers?
You can store any leftovers in the refrigerator for up to 3 days. Just make sure to cover it tightly with plastic wrap to keep it fresh. However, I doubt there will be much left!
Can I use different cookies?
Definitely! While Oreos are a classic choice, feel free to experiment with other cookies. Chocolate wafers or even graham crackers can add a unique twist to your Dreamy No-Bake Funfetti Oreo Icebox Cake.
Is this dessert suitable for kids?
Yes! This cake is a hit with kids and adults alike. The colorful sprinkles and creamy layers make it a fun treat for any celebration. Just keep an eye on the sugar content if you’re serving it to little ones!
Can I freeze this cake?
While it’s best enjoyed fresh, you can freeze the cake for up to a month. Just slice it and wrap each piece tightly in plastic wrap before placing it in an airtight container. Thaw in the fridge before serving for the best texture.
Final Thoughts
Creating this Dreamy No-Bake Funfetti Oreo Icebox Cake is more than just a cooking experience; it’s a joyful journey.
Each layer tells a story, from the whipped cream’s airy texture to the crunch of Oreos.
This dessert brings people together, sparking laughter and sweet memories at every gathering.
Whether it’s a birthday party or a simple family dinner, this cake is sure to impress.
So, roll up your sleeves, gather your ingredients, and let the magic unfold.
You’ll find that the smiles it brings are the best reward of all!
PrintDreamy No-Bake Funfetti Oreo Icebox Cake Awaits You!
- Total Time: 4 hours 20 minutes
- Yield: 12 servings
- Diet: Vegetarian
Description
A delightful and easy no-bake dessert featuring layers of whipped cream, crushed Oreos, and Funfetti cake mix, perfect for any celebration.
Ingredients
- 2 cups heavy whipping cream
- 1 cup powdered sugar
- 1 teaspoon vanilla extract
- 1 cup Funfetti cake mix (dry)
- 24 Oreo cookies, crushed (plus extra for topping)
- 1 cup rainbow sprinkles
- 1 cup milk
Instructions
- In a large mixing bowl, whip the heavy cream until soft peaks form.
- Gradually add the powdered sugar and vanilla extract, continuing to whip until stiff peaks form.
- Gently fold in the dry Funfetti cake mix and rainbow sprinkles until well combined.
- In a 9×13 inch baking dish, dip each Oreo cookie into the milk for a few seconds to soften, then layer them in the bottom of the dish.
- Spread half of the whipped cream mixture over the layer of Oreos.
- Repeat the process with another layer of dipped Oreos followed by the remaining whipped cream mixture.
- Top with crushed Oreos and additional rainbow sprinkles for decoration.
- Cover the dish with plastic wrap and refrigerate for at least 4 hours, or overnight for best results.
- Slice and serve chilled.
Notes
- For a chocolate twist, use chocolate Oreo cookies instead of regular Oreos.
- Add a layer of fresh fruit, such as sliced strawberries or bananas, between the Oreo layers for added flavor and texture.
- Prep Time: 20 minutes
- Cook Time: 0 minutes
- Category: Dessert
- Method: No-Bake
- Cuisine: American
Nutrition
- Serving Size: 1 slice
- Calories: 250
- Sugar: 15g
- Sodium: 150mg
- Fat: 15g
- Saturated Fat: 9g
- Unsaturated Fat: 3g
- Trans Fat: 0g
- Carbohydrates: 30g
- Fiber: 1g
- Protein: 3g
- Cholesterol: 50mg