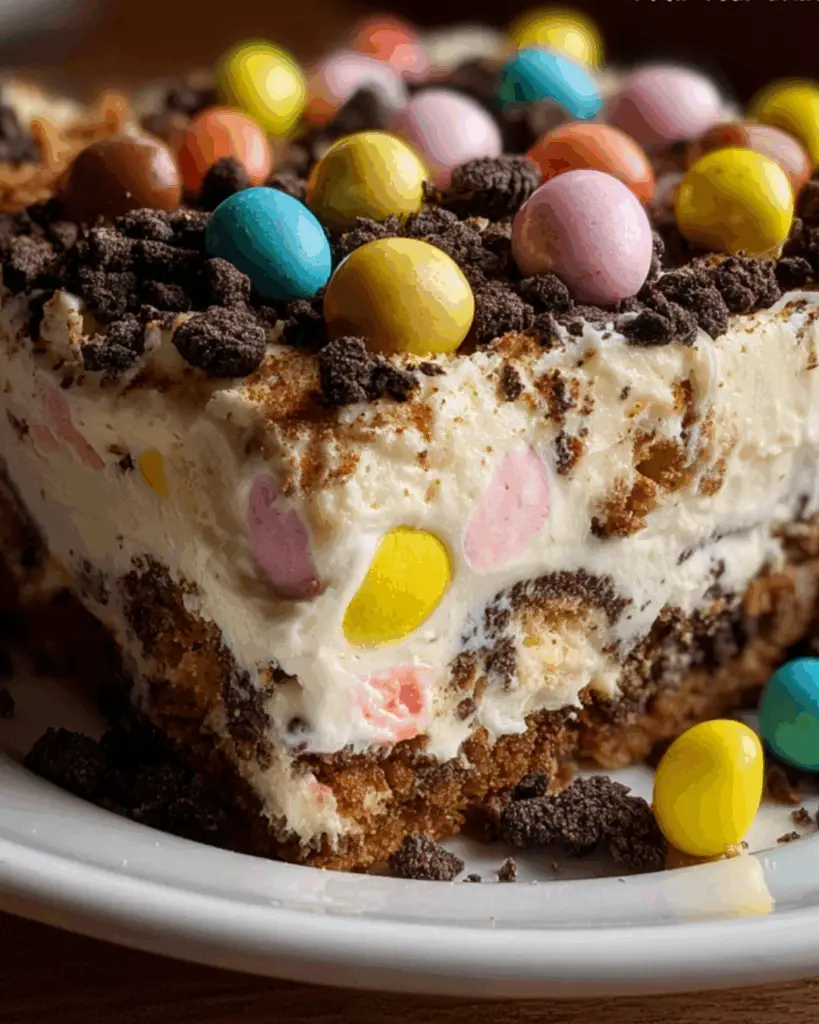
Introduction to Easter Dirt Cake Casserole
Springtime brings a sense of renewal, and with it, the joy of gathering with family and friends. One of my favorite ways to celebrate is with a delightful dessert that never fails to impress: the Easter Dirt Cake Casserole. This fun and festive treat is not only a crowd-pleaser but also a quick solution for those busy days leading up to the holiday. With its creamy layers and playful toppings, it’s a dish that sparks smiles and sweet memories. Trust me, this dessert will become a cherished part of your Easter traditions!
Why You’ll Love This Easter Dirt Cake Casserole
This Easter Dirt Cake Casserole is a game-changer for dessert lovers. It’s incredibly easy to whip up, requiring no baking at all. In just 20 minutes of prep, you’ll have a stunning dessert ready to chill. The combination of creamy layers and crunchy Oreos creates a delightful texture that everyone will adore. Plus, it’s a fun way to get the kids involved in the kitchen, making memories while you create this festive treat!
Ingredients for Easter Dirt Cake Casserole
Gathering the right ingredients is half the fun of making this Easter Dirt Cake Casserole. Here’s what you’ll need:
- Cream Cheese: Softened to create a rich, creamy base that adds a delightful tang.
- Powdered Sugar: This sweetener blends seamlessly into the cream cheese, giving it that perfect sweetness.
- Whipped Topping: Thawed, it lightens the mixture, making it fluffy and airy.
- Instant Vanilla Pudding Mix: This adds a creamy texture and a hint of vanilla flavor that complements the other ingredients.
- Milk: Used to prepare the pudding, it helps achieve the right consistency.
- Oreo Cookies: Crushed to create a crunchy layer that mimics dirt, adding a fun twist to the dessert.
- Gummy Worms: These playful candies are the perfect topping, bringing a whimsical touch to your casserole.
- Chocolate Eggs: Any Easter-themed candy works here, adding color and sweetness to the final presentation.
- Fresh Mint Leaves: Optional, but they make a lovely garnish that adds a pop of color and freshness.
For those looking to mix things up, consider substituting the Oreo cookies with chocolate graham crackers for a different flavor profile. You can find all the exact quantities for these ingredients at the bottom of the article, ready for printing!
How to Make Easter Dirt Cake Casserole
Creating the Easter Dirt Cake Casserole is a delightful journey that’s as fun as it is delicious. Follow these simple steps, and you’ll have a show-stopping dessert ready in no time!
Step 1: Prepare the Cream Cheese Mixture
Start by grabbing a large mixing bowl. Beat the softened cream cheese and powdered sugar together until the mixture is smooth and creamy. This step is crucial; it sets the foundation for your dessert. You want it to be velvety, so take your time and ensure there are no lumps.
Step 2: Fold in the Whipped Topping
Next, gently fold in the thawed whipped topping. Use a spatula and a light hand to maintain that airy texture. The goal here is to keep the mixture fluffy, so avoid vigorous stirring. Just fold until everything is combined, and you’ll have a light and creamy filling.
Step 3: Mix the Pudding
In another bowl, whisk together the instant vanilla pudding mix and milk. Keep whisking until the mixture thickens, which should take about two minutes. This step adds a rich creaminess to your casserole, enhancing the overall flavor. It’s like magic watching it transform!
Step 4: Combine Mixtures
Now, it’s time to bring it all together. Carefully fold the pudding mixture into the cream cheese mixture. This is where the magic happens! Make sure everything is well blended, creating a luscious filling that will be the star of your casserole.
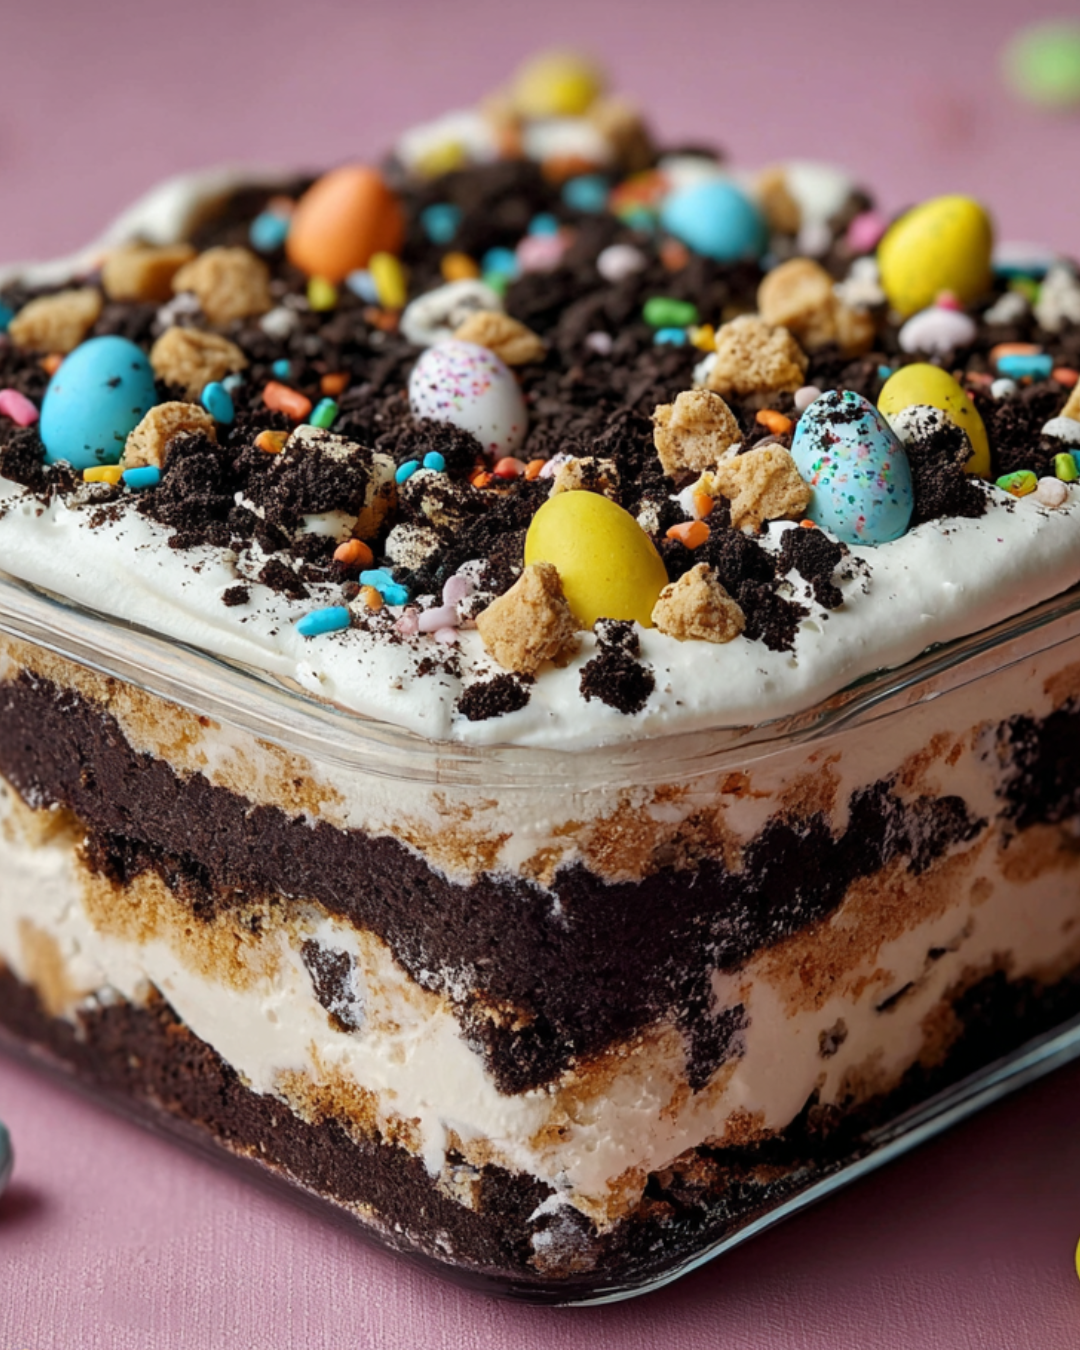
Step 5: Layer the Casserole
Grab your 9×13-inch casserole dish and start layering. Begin with half of the crushed Oreo cookies at the bottom. Then, spread half of the cream cheese mixture over the cookies. Repeat this process with the remaining crushed Oreos and cream cheese mixture. Each layer adds texture and flavor, making every bite a delight!
Step 6: Add Toppings
Now for the fun part! Top the final layer with gummy worms and chocolate eggs. Arrange them however you like; this is your chance to get creative! The colorful toppings not only look great but also add a playful touch that kids and adults will love.
Step 7: Refrigerate
Finally, cover your casserole and refrigerate it for at least two hours. This chilling time is essential for the flavors to meld and the dessert to set properly. Trust me, the wait will be worth it when you serve this delightful treat!
Tips for Success
- Make sure your cream cheese is softened for easy mixing.
- Use a spatula to gently fold ingredients; this keeps the mixture light and fluffy.
- Chill the casserole longer if possible; overnight is even better for flavor.
- Get creative with toppings—try adding jelly beans or pastel M&Ms for a colorful twist.
- For a richer flavor, consider using chocolate pudding instead of vanilla.
Equipment Needed
- Mixing Bowls: A large bowl for mixing the cream cheese and a smaller one for the pudding. Any size will do!
- Electric Mixer: A hand mixer makes it easy, but a whisk works too if you’re feeling strong.
- Spatula: Essential for folding and layering; a rubber spatula is ideal.
- Casserole Dish: A 9×13-inch dish is perfect, but any similar-sized dish will work.
Variations
- Chocolate Graham Crackers: Swap out the Oreos for chocolate graham crackers for a different flavor twist.
- Fruit Additions: Incorporate fresh berries like strawberries or raspberries for a fruity burst.
- Nutty Crunch: Add chopped nuts, such as walnuts or pecans, for an extra crunch in the layers.
- Vegan Option: Use dairy-free cream cheese and whipped topping to create a vegan-friendly version.
- Gluten-Free: Opt for gluten-free cookies to make this dessert suitable for gluten-sensitive guests.
Serving Suggestions
- Pair with Fresh Fruit: Serve alongside a fruit salad for a refreshing contrast.
- Complement with Beverages: Offer iced tea or lemonade to balance the sweetness.
- Presentation: Garnish with mint leaves for a pop of color and freshness.
- Individual Servings: Consider serving in small cups for a fun, personal touch.
FAQs about Easter Dirt Cake Casserole
Can I make Easter Dirt Cake Casserole ahead of time?
Absolutely! This dessert is perfect for making a day in advance. Just prepare it, refrigerate, and let the flavors meld overnight. It’ll taste even better the next day!
What can I use instead of Oreos?
If you want to switch things up, chocolate graham crackers work wonderfully. They provide a similar crunch and flavor, making them a great alternative for your Easter Dirt Cake Casserole.
How long can I store leftovers?
Leftovers can be stored in the refrigerator for up to three days. Just make sure to cover it well to keep it fresh. But trust me, it’s so delicious, you might not have any leftovers!
Can I use different flavors of pudding?
Definitely! While vanilla is classic, chocolate pudding can add a rich twist to your casserole. Feel free to experiment with flavors that you love!
Is this dessert suitable for kids?
Yes! The Easter Dirt Cake Casserole is a hit with kids. They’ll love the fun toppings and the chance to help make it. Just be ready for some giggles when they see the gummy worms!
Final Thoughts
Creating the Easter Dirt Cake Casserole is more than just whipping up a dessert; it’s about making memories with loved ones. The laughter shared while layering the ingredients and the excitement of revealing the colorful toppings bring joy to any gathering. Each bite is a delightful mix of creamy and crunchy, evoking the spirit of springtime celebrations. This recipe is a reminder that food can be fun and festive, transforming an ordinary day into something special. So, gather your family, roll up your sleeves, and dive into this delicious adventure together!
PrintEaster Dirt Cake Casserole: A Fun, Festive Treat!
- Total Time: 2 hours 20 minutes
- Yield: 12 servings
- Diet: Vegetarian
Description
Easter Dirt Cake Casserole is a fun and festive dessert perfect for celebrating Easter with family and friends.
Ingredients
- 2 (8-ounce) packages cream cheese, softened
- 1 cup powdered sugar
- 1 (12-ounce) container whipped topping, thawed
- 1 (5.1-ounce) package instant vanilla pudding mix
- 3 cups milk
- 1 (15-ounce) package Oreo cookies, crushed
- 1 cup gummy worms
- 1 cup chocolate eggs (or any Easter-themed candy)
- Fresh mint leaves for garnish (optional)
Instructions
- In a large mixing bowl, beat the softened cream cheese and powdered sugar together until smooth and creamy.
- Gently fold in the whipped topping until fully combined.
- In another bowl, whisk together the instant vanilla pudding mix and milk until thickened, about 2 minutes.
- Fold the pudding mixture into the cream cheese mixture until well blended.
- In a 9×13-inch casserole dish, layer half of the crushed Oreo cookies on the bottom.
- Spread half of the cream cheese mixture over the cookie layer.
- Repeat the layers with the remaining crushed Oreos and cream cheese mixture.
- Top the final layer with gummy worms and chocolate eggs, arranging them as desired.
- Refrigerate for at least 2 hours before serving to allow the flavors to meld and the dessert to set.
Notes
- For a fun twist, try adding different types of candy on top, such as jelly beans or pastel M&Ms.
- You can also substitute the Oreo cookies with chocolate graham crackers for a different flavor profile.
- Prep Time: 20 minutes
- Cook Time: 0 minutes
- Category: Dessert
- Method: No-Bake
- Cuisine: American
Nutrition
- Serving Size: 1 slice
- Calories: 320
- Sugar: 20g
- Sodium: 200mg
- Fat: 18g
- Saturated Fat: 10g
- Unsaturated Fat: 8g
- Trans Fat: 0g
- Carbohydrates: 30g
- Fiber: 1g
- Protein: 4g
- Cholesterol: 40mg