Introduction to Festive Red Velvet Poke Cake
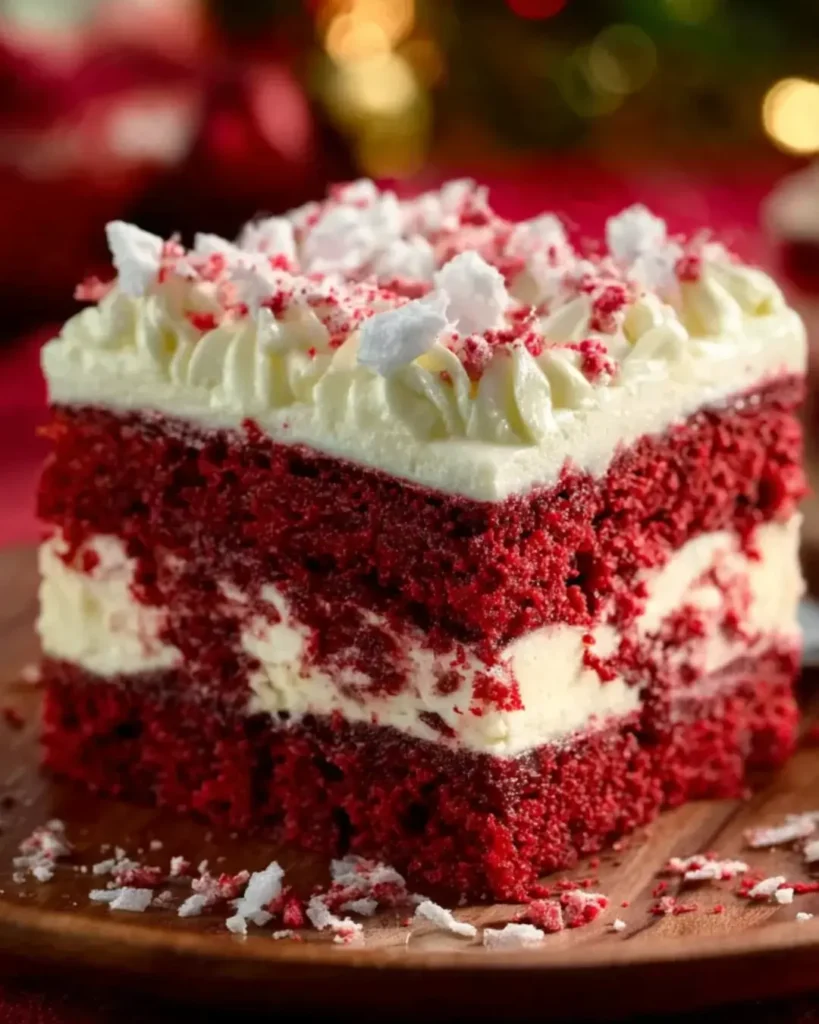
There’s something magical about a cake that not only looks stunning but also tastes divine. The Festive Red Velvet Poke Cake is just that—a showstopper for any gathering. I remember the first time I made it; the vibrant red color and creamy topping had everyone at the table reaching for seconds. This cake is perfect for busy days when you want to impress your loved ones without spending hours in the kitchen. With its rich flavor and delightful texture, it’s a dessert that brings joy to any celebration, making it a must-try for your next festive occasion.
Why You’ll Love This Festive Red Velvet Poke Cake
This Festive Red Velvet Poke Cake is a game-changer for dessert lovers. It’s incredibly easy to whip up, making it perfect for those last-minute gatherings. The combination of moist cake and creamy toppings creates a flavor explosion that will leave your guests raving. Plus, it’s visually stunning, so you can impress without breaking a sweat. Trust me, this cake will quickly become your go-to for any celebration!
Ingredients for Festive Red Velvet Poke Cake
Gathering the right ingredients is the first step to creating your Festive Red Velvet Poke Cake. Each component plays a vital role in achieving that perfect balance of flavor and texture. Here’s what you’ll need:
- All-purpose flour: The backbone of your cake, providing structure and stability.
- Granulated sugar: Sweetens the cake and helps create a moist texture.
- Baking soda: This leavening agent gives the cake its lift, making it light and fluffy.
- Salt: Enhances the flavors and balances the sweetness.
- Cocoa powder: Adds a subtle chocolate flavor, complementing the red velvet beautifully.
- Vegetable oil: Keeps the cake moist and tender, unlike butter which can dry it out.
- Buttermilk: Adds richness and acidity, helping to activate the baking soda for a perfect rise.
- Large eggs: Bind the ingredients together and contribute to the cake’s structure.
- Red food coloring: The star of the show, giving the cake its signature vibrant hue.
- Vanilla extract: Infuses a warm, sweet flavor that enhances the overall taste.
- White vinegar: Works with the baking soda to create a tender crumb and adds a slight tang.
- Cream cheese: The base for your rich frosting, providing a creamy and tangy flavor.
- Unsalted butter: Adds richness and helps create a smooth frosting.
- Powdered sugar: Sweetens the frosting and gives it that perfect creamy texture.
- Heavy whipping cream: Whipped to perfection, it lightens the frosting and adds a luxurious finish.
For those looking to add a festive touch, consider topping your cake with crushed peppermint candies or colorful holiday sprinkles. If cream cheese isn’t your thing, a vanilla buttercream can be a delightful alternative. You can find the exact measurements for these ingredients at the bottom of the article, ready for printing!
How to Make Festive Red Velvet Poke Cake
Creating your Festive Red Velvet Poke Cake is a delightful journey. Each step builds on the last, leading to a dessert that’s as fun to make as it is to eat. Let’s dive into the process!
Step 1: Preheat and Prepare
Start by preheating your oven to 350°F (175°C). This is crucial for a perfect bake. While the oven warms up, grease and flour a 9×13-inch baking pan. This ensures your cake won’t stick, making it easier to serve later.
Step 2: Mix Dry Ingredients
In a large mixing bowl, combine the all-purpose flour, granulated sugar, baking soda, salt, and cocoa powder. Whisk them together until well blended. This dry mixture is the foundation of your cake, so make sure there are no lumps!
Step 3: Combine Wet Ingredients
In another bowl, mix together the vegetable oil, buttermilk, eggs, red food coloring, vanilla extract, and white vinegar. This combination adds moisture and flavor to your cake. The vibrant red color will make your cake pop!
Step 4: Combine Mixtures
Gradually add the wet ingredients to the dry ingredients. Mix gently until just combined. Be careful not to overmix; this is key for a tender cake. You want a smooth batter, but a few lumps are okay!
Step 5: Bake the Cake
Pour the batter into your prepared pan, spreading it evenly. Bake for 30-35 minutes, or until a toothpick inserted in the center comes out clean. This is where the magic happens—your kitchen will smell heavenly!
Step 6: Poke Holes
Once the cake is out of the oven, let it cool in the pan for about 10 minutes. Then, using the end of a wooden spoon, poke holes all over the cake. This step is essential as it allows the cream cheese mixture to seep in, enhancing the flavor.
Step 7: Prepare Cream Cheese Mixture
In a medium bowl, beat together the softened cream cheese and unsalted butter until smooth. Gradually add the powdered sugar and vanilla extract, mixing until well combined. This rich topping is what makes your poke cake truly special!
Step 8: Spread Cream Cheese Mixture
Spread the cream cheese mixture over the warm cake, ensuring it seeps into the holes. This enhances the flavor and creates a deliciously creamy texture. Don’t be shy—make sure every inch is covered!
Step 9: Whip Cream
In a separate bowl, whip the heavy cream until stiff peaks form. This adds lightness to your cake. Gently fold the whipped cream into the cream cheese mixture until fully combined. The result will be a fluffy, dreamy topping.
Step 10: Final Layer
Spread the whipped cream mixture over the top of the cake. Refrigerate for at least 2 hours before serving. This allows the flavors to meld beautifully, making each bite a delightful experience.

Tips for Success
- Use room temperature ingredients for better mixing and a smoother batter.
- Don’t skip the poking step; it’s crucial for flavor absorption.
- Let the cake cool completely before adding the cream cheese mixture.
- For a festive touch, consider adding crushed peppermint or sprinkles on top.
- Refrigerate the cake overnight for even better flavor!
Equipment Needed
- 9×13-inch baking pan (a round cake pan works too)
- Mixing bowls (a large and a medium size)
- Whisk (a fork can work in a pinch)
- Wooden spoon (or any sturdy spoon for poking holes)
- Electric mixer (a hand whisk can suffice for small batches)
Variations
- For a chocolate twist, add chocolate chips to the batter before baking.
- Make it gluten-free by substituting all-purpose flour with a gluten-free blend.
- For a lighter version, use Greek yogurt instead of cream cheese in the frosting.
- Add a layer of raspberry or strawberry jam between the cake and cream cheese mixture for a fruity surprise.
- Try a spice version by adding cinnamon and nutmeg to the dry ingredients for a warm flavor.
Serving Suggestions
- Pair with a scoop of vanilla ice cream for a delightful contrast.
- Serve alongside fresh berries to add a pop of color and freshness.
- Drizzle with chocolate or caramel sauce for an extra indulgent touch.
- Garnish with mint leaves for a refreshing finish.
- Present on a festive platter to elevate your dessert table.
FAQs about Festive Red Velvet Poke Cake
Curious about the Festive Red Velvet Poke Cake? You’re not alone! Here are some common questions I’ve encountered, along with helpful answers to guide you through your baking adventure.
Can I make this cake ahead of time?
Absolutely! This cake actually tastes better after a day in the fridge. Just make sure to cover it well to keep it fresh.
What can I use instead of buttermilk?
If you don’t have buttermilk on hand, mix one cup of milk with a tablespoon of vinegar or lemon juice. Let it sit for about 5 minutes, and you’re good to go!
How do I store leftovers?
Store any leftover cake in an airtight container in the refrigerator. It should stay fresh for up to 3 days, but trust me, it won’t last that long!
Can I freeze the cake?
Yes, you can freeze the cake! Just wrap it tightly in plastic wrap and then in aluminum foil. It can last up to 3 months in the freezer. Thaw it in the fridge before serving.
What’s the best way to serve this cake?
For a festive touch, serve slices with a dollop of whipped cream and a sprinkle of crushed peppermint or holiday sprinkles. It’s sure to impress!
Final Thoughts
Creating a Festive Red Velvet Poke Cake is more than just baking; it’s about sharing joy and deliciousness with those you love. Each slice is a celebration, bursting with flavor and a touch of nostalgia. I cherish the moments spent around the table, laughter echoing as we indulge in this delightful dessert. Whether it’s a holiday gathering or a simple family dinner, this cake brings people together. So, roll up your sleeves, embrace the process, and let this cake be the centerpiece of your next celebration. Trust me, the smiles it brings are worth every effort!
PrintFestive Red Velvet Poke Cake: Treat Yourself Today!
- Total Time: 2 hours 55 minutes
- Yield: 12 servings
- Diet: Vegetarian
Description
A delicious and festive red velvet poke cake that is perfect for any celebration.
Ingredients
- 2 cups all-purpose flour
- 1 ½ cups granulated sugar
- 1 teaspoon baking soda
- 1 teaspoon salt
- 1 teaspoon cocoa powder
- 1 ½ cups vegetable oil
- 1 cup buttermilk, room temperature
- 2 large eggs, room temperature
- 2 tablespoons red food coloring
- 1 teaspoon vanilla extract
- 1 teaspoon white vinegar
- 1 (8 oz) package cream cheese, softened
- ½ cup unsalted butter, softened
- 4 cups powdered sugar
- 1 teaspoon vanilla extract
- 1 cup heavy whipping cream
Instructions
- Preheat your oven to 350°F (175°C). Grease and flour a 9×13-inch baking pan.
- In a large mixing bowl, whisk together the flour, sugar, baking soda, salt, and cocoa powder.
- In another bowl, combine the vegetable oil, buttermilk, eggs, red food coloring, vanilla extract, and vinegar. Mix well.
- Gradually add the wet ingredients to the dry ingredients, mixing until just combined.
- Pour the batter into the prepared baking pan and spread it evenly. Bake for 30-35 minutes, or until a toothpick inserted in the center comes out clean.
- Allow the cake to cool in the pan for about 10 minutes, then poke holes all over the cake using the end of a wooden spoon.
- In a medium bowl, beat together the cream cheese and butter until smooth. Gradually add the powdered sugar and vanilla extract, mixing until well combined.
- Spread the cream cheese mixture over the warm cake, allowing it to seep into the holes.
- In a separate bowl, whip the heavy cream until stiff peaks form. Gently fold the whipped cream into the cream cheese mixture until combined.
- Spread the whipped cream mixture over the top of the cake. Refrigerate for at least 2 hours before serving.
Notes
- For a festive touch, top the cake with crushed peppermint candies or holiday sprinkles before serving.
- Substitute the cream cheese frosting with a vanilla buttercream for a different flavor profile.
- Prep Time: 20 minutes
- Cook Time: 35 minutes
- Category: Dessert
- Method: Baking
- Cuisine: American
Nutrition
- Serving Size: 1 slice
- Calories: 350
- Sugar: 30g
- Sodium: 300mg
- Fat: 18g
- Saturated Fat: 10g
- Unsaturated Fat: 8g
- Trans Fat: 0g
- Carbohydrates: 45g
- Fiber: 1g
- Protein: 4g
- Cholesterol: 70mg