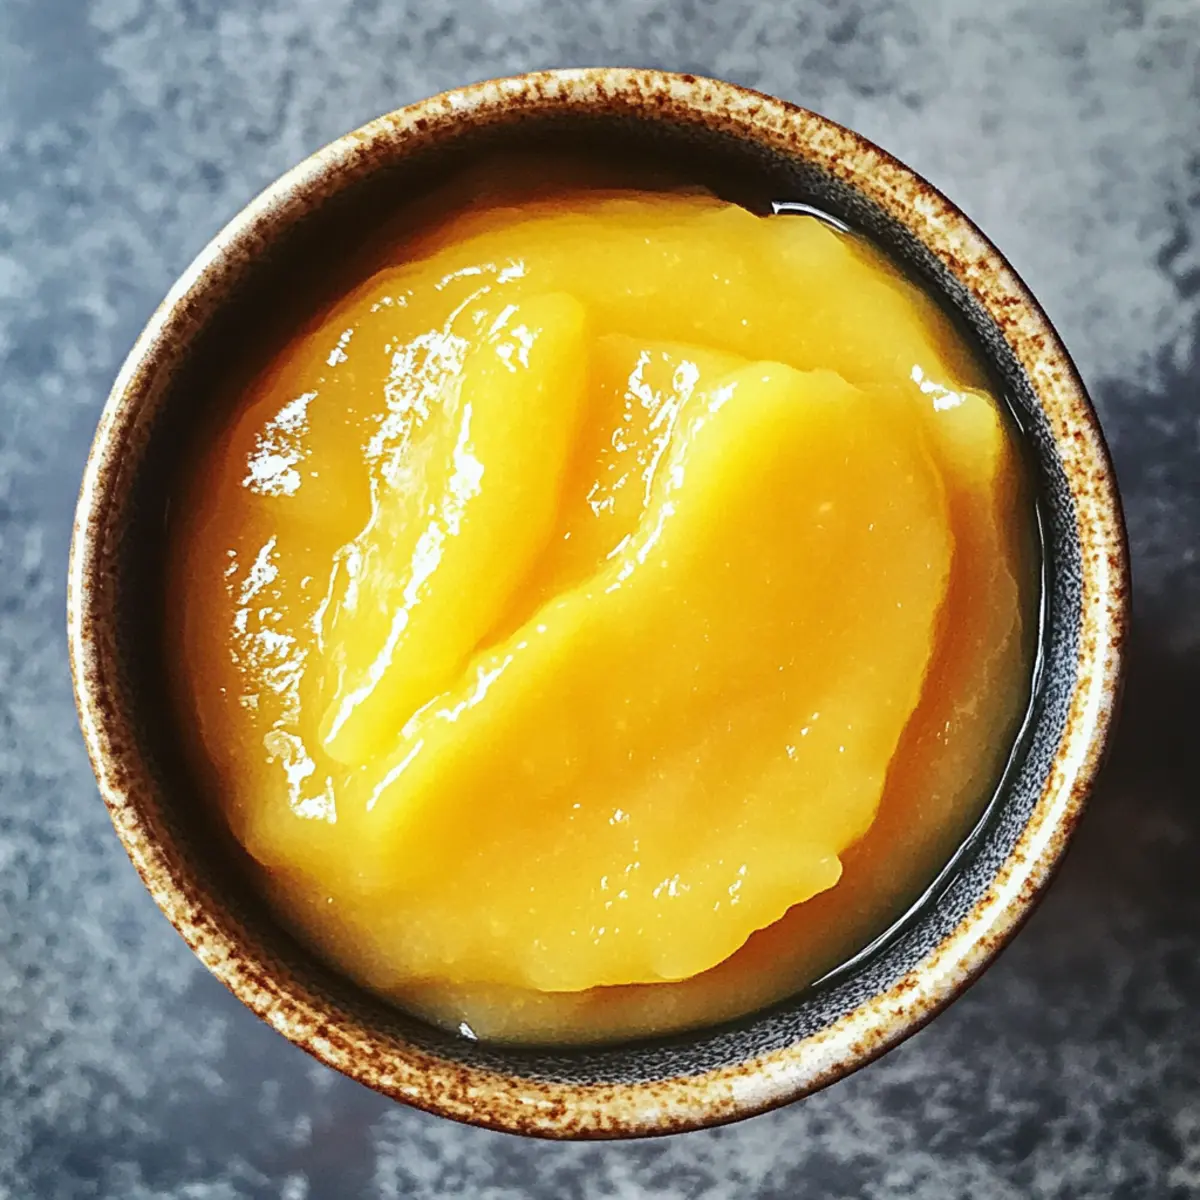
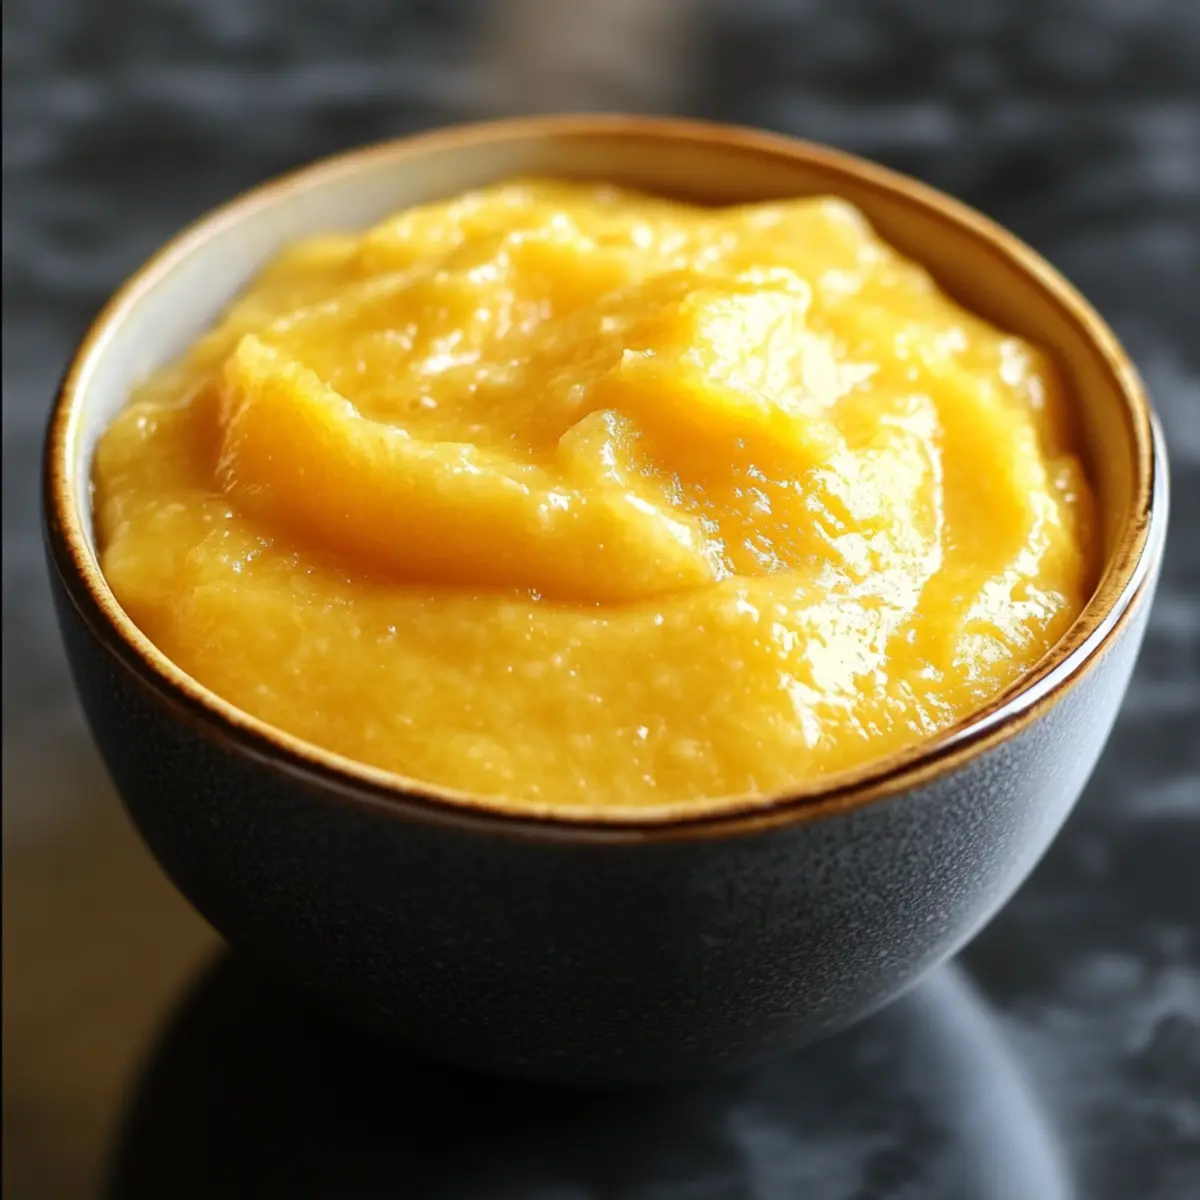
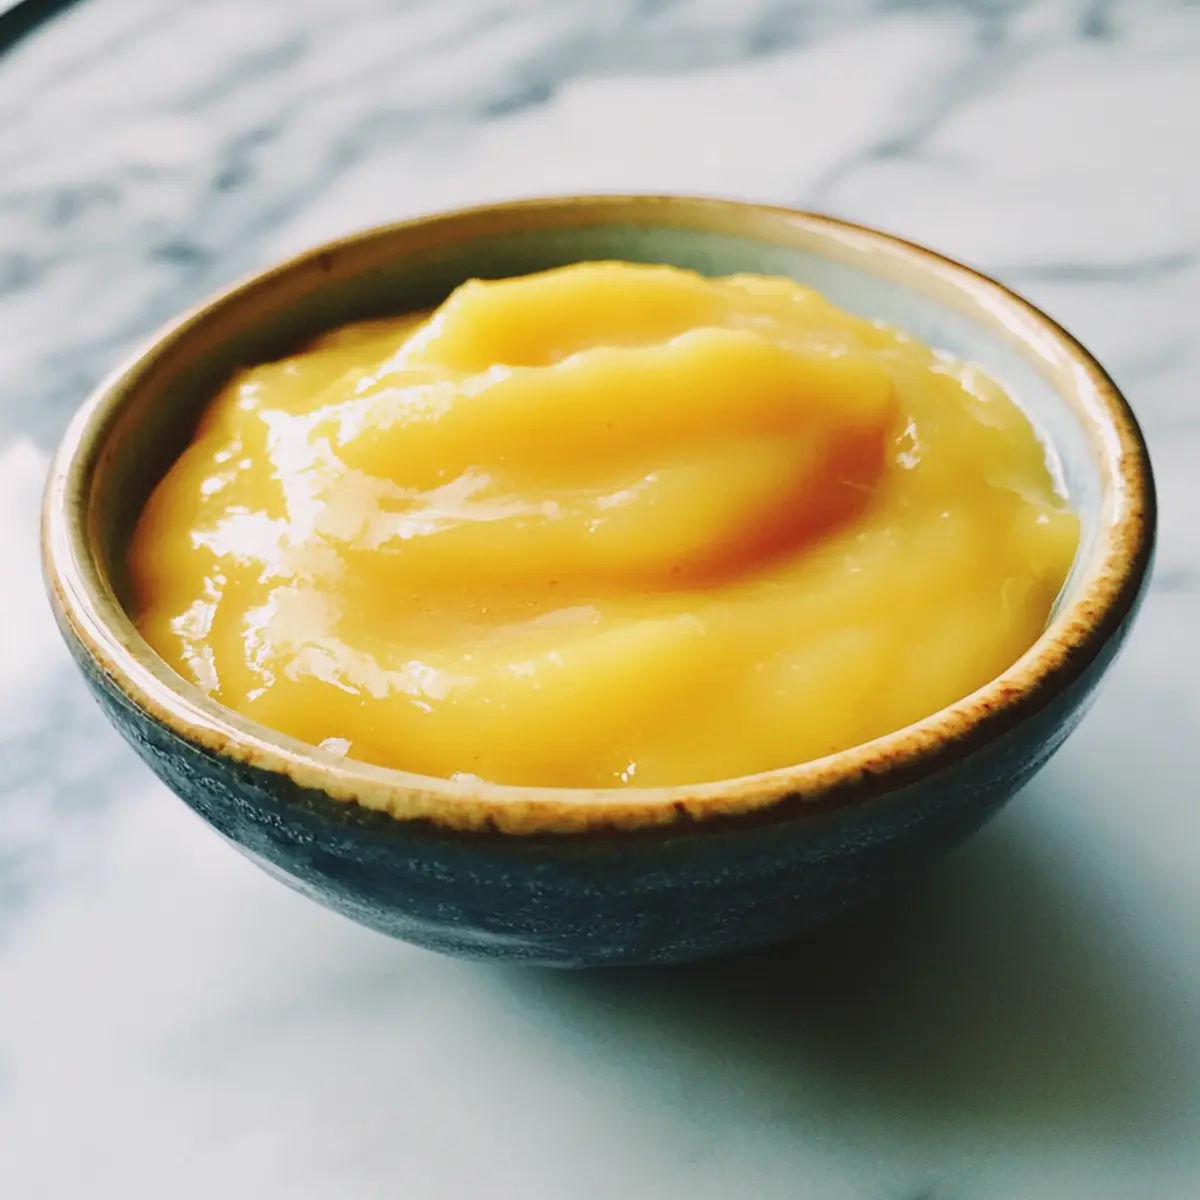
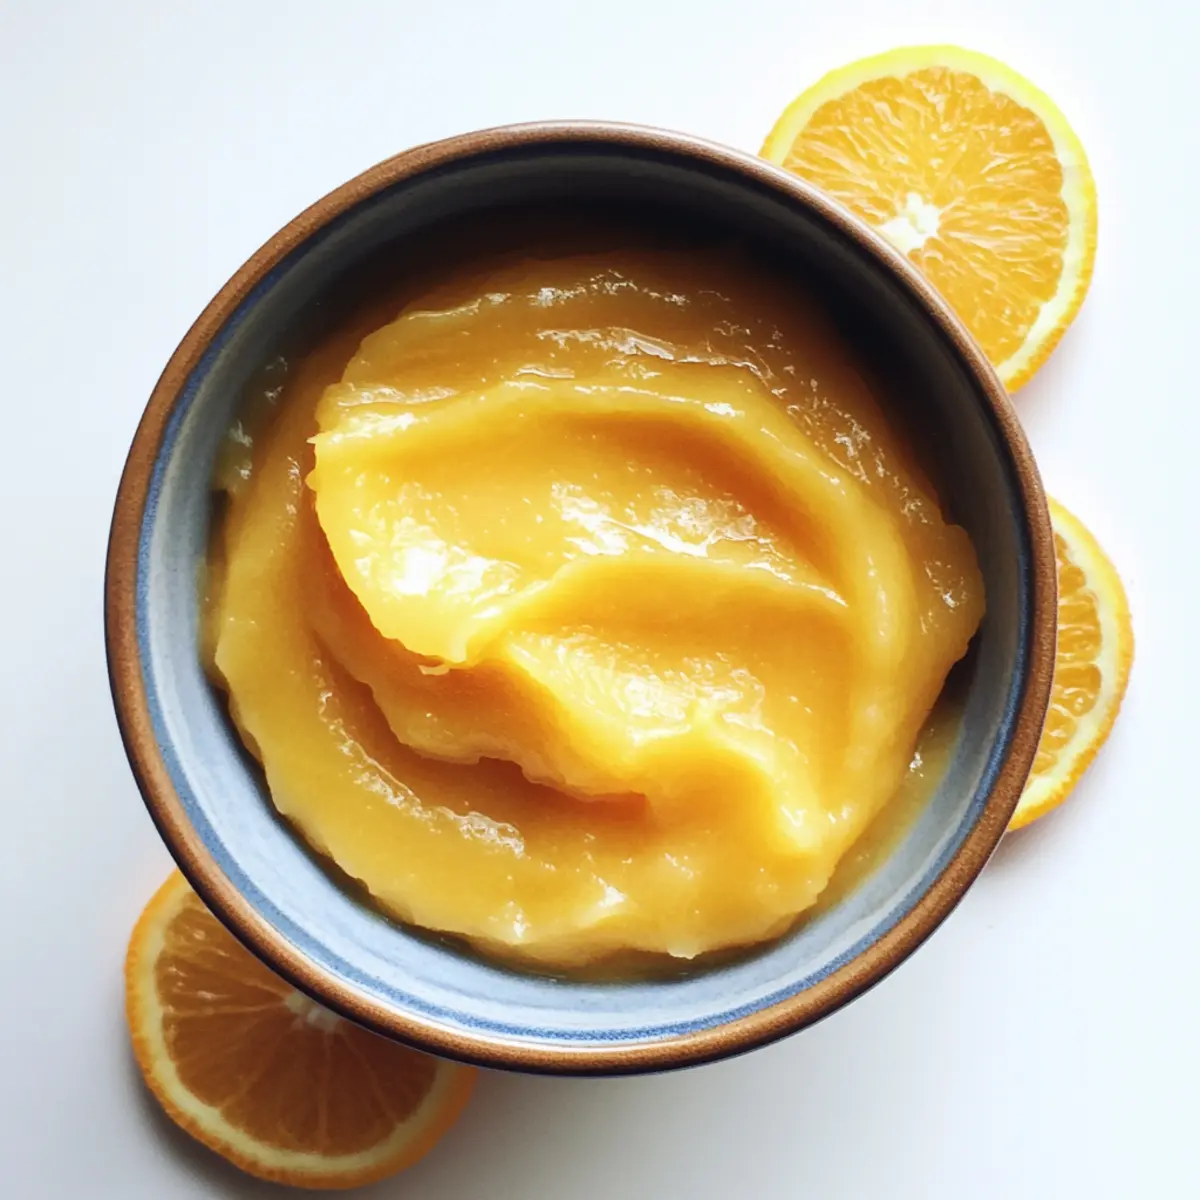
The refreshing scent of zesty oranges instantly transports me to sunny afternoons spent in the kitchen. Today, I’m thrilled to share my recipe for Homemade Orange Curd (Eggless, Dairy-Free)—the perfect way to awaken your taste buds and brighten up your meals! This creamy vegan delight is not only a crowd-pleaser but also incredibly easy to whip up, making it ideal for both seasoned bakers and those just starting their culinary adventures. Imagine spreading this luscious orange curd on toast, pancakes, or even drizzling it atop your favorite desserts. Each spoonful offers a natural sweetness enhanced by freshly squeezed oranges, bringing a nutritious yet indulgent twist to your table. Curious about how to elevate your brunch game with this vibrant treat? Let’s dive into the details!
Why is Homemade Orange Curd Amazing?
Rich, Creamy Texture: This eggless, dairy-free orange curd boasts a smooth consistency that’s perfect for spreading on toast or using as a dessert topping.
Bursting with Flavor: Freshly squeezed oranges provide a zesty punch that elevates pancakes or pastries to a whole new level of deliciousness.
Simple Preparation: Crafted in just a few easy steps, even beginners can create this vibrant curd without stress.
Vegan-Friendly Delight: Whether you’re vegan or simply looking to cut back on dairy, this recipe offers a guilt-free indulgence!
Perfect for Any Occasion: From breakfast spreads to cake fillings, this curd is versatile enough to brighten any meal. Don’t forget to pair it with delightful options like Homemade Strawberry Lemon or Homemade Apple Pie to create a full spread!
Homemade Orange Curd Ingredients
• Elevate your dish with this delicious orange curd!
For the Curd
- Zest of 3 oranges – This ingredient gives the curd its essential flavor; using organic oranges yields the best taste.
- 360 ml (1 ¼ cups) orange juice – Freshly squeezed juice adds vibrancy to your curd; bottled juice does not compare.
- 150 g (1 cup) cane sugar – This sweetens the curd beautifully; golden caster sugar can be used as a delightful alternative.
- 120 ml (½ cup) non-dairy milk – Provides creaminess; feel free to use unsweetened soy, almond, or oat milk for a dairy-free treat.
- 50 g (5 tbsp) cornstarch – The secret to thickening your curd; can be swapped with arrowroot starch for similar results.
- ¼ teaspoon sea salt – Balancing the sweetness is imperative; this ingredient is essential for enhancing overall flavor.
- 60 g (¼ cup) vegan butter – Adds richness to the curd; for a tropical twist, replace with coconut cream or thick coconut milk.
This Homemade Orange Curd (Eggless, Dairy-Free) is not just a recipe; it’s a celebration of bright, zesty flavors that will bring joy to any table. Enjoy creating this delightful treat!
Step‑by‑Step Instructions for Homemade Orange Curd (Eggless, Dairy-Free)
Step 1: Prepare Oranges
Start by soaking the oranges in a vinegar-water solution for about 10 minutes to clean them thoroughly. Once done, zest the oranges using a microplane, and then juice them, straining through a fine mesh sieve to catch any seeds. This will give your Homemade Orange Curd a vibrant flavor and the essential oils from the zest.
Step 2: Flavor Sugar
In a medium saucepan, combine the cane sugar and the freshly grated orange zest. Using your fingertips, rub the zest into the sugar for about 2-3 minutes until the sugar is damp and fragrant. This step enhances the sweetness and aroma of your Homemade Orange Curd, infusing it with the essence of oranges.
Step 3: Combine Ingredients
Next, whisk in the cornstarch to the flavored sugar mixture until well combined. Gradually pour in the freshly squeezed orange juice and non-dairy milk, followed by the sea salt. Whisk continuously until the mixture is smooth, ensuring there are no lumps that could affect the consistency of your Homemade Orange Curd later.
Step 4: Cook
Place the saucepan over medium heat and cook the mixture, whisking constantly for about 10 minutes. As you cook, the mixture will begin to thicken and should coat the back of a spatula. Keep an eye on it to ensure it doesn’t boil vigorously, as this could affect the texture of your Homemade Orange Curd.
Step 5: Sift and Mix
Once thickened, remove the saucepan from heat and pour the curd through a fine-mesh sieve into a clean bowl that contains the cubed vegan butter. This process will ensure your Homemade Orange Curd is silky smooth. Whisk until the butter is fully incorporated and the mixture is glossy.
Step 6: Chill
To complete your Homemade Orange Curd, cover the surface directly with plastic wrap to prevent a skin from forming. Let it cool for about 10-15 minutes at room temperature, then transfer to an airtight container. Refrigerate for at least an hour before using to let the flavors meld and the curd set properly.
Make Ahead Options
These Homemade Orange Curd (Eggless, Dairy-Free) delights are perfect for meal prep! You can zest and juice the oranges, then store them in an airtight container in the refrigerator for up to 24 hours before making the curd. Additionally, the sugar can be flavored with the zest and left to sit for up to 3 days, intensifying its aroma. When you’re ready to enjoy your curd, simply combine your prepped ingredients and follow the cooking instructions. To maintain the quality of your Homemade Orange Curd, be sure to store it in a sealed container in the fridge for up to a week, keeping it just as delicious and fresh for your busy week ahead!
Expert Tips for Homemade Orange Curd
Fresh Juice Focus: Use freshly squeezed orange juice to ensure maximum flavor; bottled juice lacks the vibrant freshness essential for your Homemade Orange Curd.
Control Cooking Heat: Keep the heat on medium to avoid rapid thickening, which can create a grainy texture; patience is key!
Whisk Thoroughly: For the silkiest curd, whisk the mixture continuously while cooking. This prevents lumps and promotes a smooth finish.
Avoid Curdling: If using non-dairy milk, opt for unsweetened varieties to minimize the risk of curdling during cooking.
Proper Storage: Store your Homemade Orange Curd in an airtight container in the fridge for up to a week; it’s a perfect make-ahead treat!
Homemade Orange Curd Variations & Substitutions
Feel free to explore these delightful twists and swaps to make your orange curd even more personalized and scrumptious!
- Citrus Blend: Mix in blood oranges or tangerines for a unique flavor profile. This helps create a delightful spectrum of tastes, perfect for adventurous palates!
- Tartness Boost: Substitute half of the orange juice with lemon or lime juice for a tangy kick. This adds a zesty contrast that can brighten up any dessert.
- Sweetener Swap: Use maple syrup or agave nectar instead of cane sugar for a richer, more complex sweetness. Just be mindful of adjustments in the overall consistency!
- Creamy Coconut: Replace vegan butter with coconut cream for a tropical twist. The added richness will take your curd to new creamy heights, perfect for summer desserts.
- Flavor Infusion: Add a splash of vanilla extract or a hint of almond extract for an aromatic twist. These give the curd an unexpected delicious depth that will surprise your taste buds.
- Spice it Up: Mix in a pinch of cinnamon or nutmeg to introduce a warm spice note to the curd. This is a comforting touch that’s especially wonderful for the fall season.
- Colorful Add-ins: Stir in finely chopped mint or basil for a herbaceous flair. The fresh herbs will elevate the curd, making it a refreshing option for summer treats!
- Bourbon Kick: Add a tablespoon of bourbon for an adult twist. The rich flavors of bourbon will deepen the taste profile, perfect for drizzling over warm desserts like Homemade Apple Pie.
With these variations, your homemade orange curd becomes a canvas for your culinary creativity. Enjoy experimenting and let your taste buds guide you to your favorite version!
How to Store and Freeze Homemade Orange Curd
Fridge: Store your Homemade Orange Curd in an airtight container for up to 1 week to keep it fresh and flavorful.
Freezer: For longer storage, freeze in an airtight container, leaving a little space for expansion as it freezes. It can last up to 3 months.
Thawing: When ready to use, simply transfer the frozen curd to the fridge overnight to thaw, and give it a good whisk before serving.
Usage Tip: This zesty curd is perfect for brightening up pastries or dessert toppings; make sure to enjoy it within the storage timeframes for optimal flavor!
What to Serve with Homemade Orange Curd (Eggless, Dairy-Free)
Elevate your brunch or dessert spread with delightful accompaniments that complement the zesty brightness of orange curd.
- Fluffy Pancakes: Soft and fluffy pancakes provide a perfect base for the tangy curd, transforming breakfast into a gourmet experience. Top them with fresh fruits for a colorful presentation.
- Crispy Waffles: Waffles with their golden, crispy texture shine alongside orange curd, creating a heavenly mix of flavors that dances on your palate. Drizzle with maple syrup for a touch of sweetness.
- Creamy Yogurt Parfaits: Layering orange curd with creamy plant-based yogurt and granola creates a bright and nutritious parfait, bursting with fresh flavors. Add some berries for extra color.
- Buttery Toast: A slice of warm, buttery toast becomes a canvas for the orange curd, enhancing its smoothness while providing a satisfying crunch. Enjoy it as a simple yet indulgent breakfast option.
- Graham Cracker Crust: Use orange curd as a filling for a delightful no-bake tart on a graham cracker crust. The combination of citrus and crust is simply irresistible!
- Tea or Sparkling Water: For drinks, a light herbal tea or sparkling water with a hint of citrus will cleanse the palate and complement the bright notes of the curd beautifully.
- Decadent Cupcakes: Use orange curd as a filling or topping for cupcakes for an unexpected citrus burst that adds a layer of extravagance to any dessert table.
- Fruit Salad: A colorful fruit salad with seasonal fruits pairs wonderfully, with the orange curd acting as a refreshing drizzle to bring the dish together.
- Classic Pound Cake: Serve orange curd atop slices of lemon or vanilla pound cake for a dessert that feels both nostalgic and sophisticated, perfect for any occasion.
Homemade Orange Curd (Eggless, Dairy-Free) Recipe FAQs
How do I choose the best oranges for this recipe?
Absolutely! For the brightest and most flavorful curd, I recommend using organic oranges. Look for ones that are firm and free from dark spots or blemishes. Fresh, juicy oranges will yield the best juice and zest.
How should I store the orange curd, and how long will it last?
You can store your Homemade Orange Curd in an airtight container in the fridge for up to 1 week. Just make sure to keep it well-sealed to prevent it from absorbing odors from the fridge.
Can I freeze the orange curd?
Very! For longer storage, you can freeze your Homemade Orange Curd in an airtight container, leaving about an inch of space for expansion. It can last up to 3 months. When you’re ready to use it, simply move the container to the fridge to thaw overnight and give it a good whisk before serving.
What if my orange curd didn’t thicken properly?
If your curd remains runny, it may need more cooking time. Simply return it to the saucepan over low heat, whisking continuously. To help it thicken, you can mix an additional teaspoon of cornstarch with a splash of cold water and whisk it into the cooking curd. Continue to cook until it reaches your desired thickness.
Is this recipe suitable for my dog?
While your Homemade Orange Curd contains ingredients that are generally safe for dogs, keep in mind that sugar and certain dairy substitutes can upset a dog’s stomach. It’s best to enjoy this treat yourself!
Can I alter the sweetness of the curd?
Absolutely! If you prefer a less sweet curd, you can reduce the cane sugar to 100 g (just under ½ cup) and adjust to your taste. Alternatively, using a natural sweetener like maple syrup or agave could also be a delightful option!
Delicious Homemade Orange Curd: Eggless and Dairy-Free Magic
Ingredients
Equipment
Method
- Soak the oranges in a vinegar-water solution for about 10 minutes, zest them, and juice them, straining through a fine mesh sieve.
- Combine cane sugar and grated orange zest in a saucepan, rub zest into sugar for 2-3 minutes until fragrant.
- Whisk in cornstarch, then gradually pour in orange juice and non-dairy milk, followed by sea salt until smooth.
- Cook the mixture over medium heat, whisking constantly for about 10 minutes until it thickens.
- Remove from heat and pour through a fine-mesh sieve into a bowl with cubed vegan butter, whisk until glossy.
- Cover the curd with plastic wrap and let it cool for 10-15 minutes, then refrigerate for at least an hour.