As I rummaged through my pantry the other day, I stumbled upon a package of graham crackers, instantly transporting me back to those cozy campfire nights filled with gooey s’mores. This discovery inspired an exciting twist: No-Bake S’mores Energy Bites! These delightful little snacks combine the nostalgic flavors of creamy peanut butter, rich chocolate, and fluffy marshmallows without the fuss of baking. With just a quick 15 minutes of prep time, these healthy bites are not only a breezy kitchen project but also the perfect solution for busy days when cravings strike. They’re a fantastic option for meal prep, lunch boxes, or those post-workout energy boosts. Can you believe that such a satisfying treat can be so easy? Let’s dive into making these bites of goodness together!

Why are S’mores Energy Bites irresistible?
Nostalgic Flavors: These bites bring back the classic s’mores experience without the campfire mess.
No-Bake Convenience: Quick and easy to whip up, ready in just 15 minutes, perfect for busy lifestyles.
Healthy Indulgence: Packed with wholesome ingredients like oats and chia seeds, they satisfy cravings while being guilt-free.
Customizable Goodness: Add your favorite nuts or dried fruits to create unique flavor combinations tailored to your taste.
Crowd-Pleasing Snack: Great for parties, lunchboxes, or post-workout munching, making everyone happy and satisfied!
For more delightful ideas, check out my Crunch Cheesecake Bites or try the easy Date Pecan Bites for another healthy treat!
No Bake S’mores Energy Bites Ingredients
For the Base
• Old Fashioned Rolled Oats – Provide structure and wholesome fiber; quick oats can be used but may alter texture slightly.
• Graham Crackers (Crushed) – Create the classic s’mores flavor and add texture; substitute with gluten-free graham crackers for a gluten-free option.
• Chia Seeds – Add nutritional benefits and a bit of crunch; flaxseeds can be used but will impart a different flavor.
For the Mix
• Mini-Chocolate Chips – Offer sweetness and rich chocolate flavor; dark chocolate chips can replace for a deeper taste.
• Mallow Bits (Marshmallow Bits) – Provide iconic marshmallow flavor without moisture; use mini marshmallows but remember they require refrigeration.
• Peanut Butter – Binds the mixture while delivering flavor and healthy fats; substitute almond butter or sunflower seed butter for nut allergies.
• Honey – Acts as a binder and adds natural sweetness; maple syrup can be used for a vegan alternative.
• Vanilla Extract – Enhances the overall flavor profile; you can leave it out if it’s not on hand.
These No Bake S’mores Energy Bites are not only easy to make but also a delightful snack that everyone will adore!
Step‑by‑Step Instructions for No Bake S’mores Energy Bites
Step 1: Prepare Pan
Start by lining a baking pan with parchment paper, which will help prevent the No Bake S’mores Energy Bites from sticking. Make sure the parchment overlaps the edges slightly for easy removal. This simple step lays the foundation for your treats, ensuring a smooth process as you scoop and chill them later.
Step 2: Mix Dry Ingredients
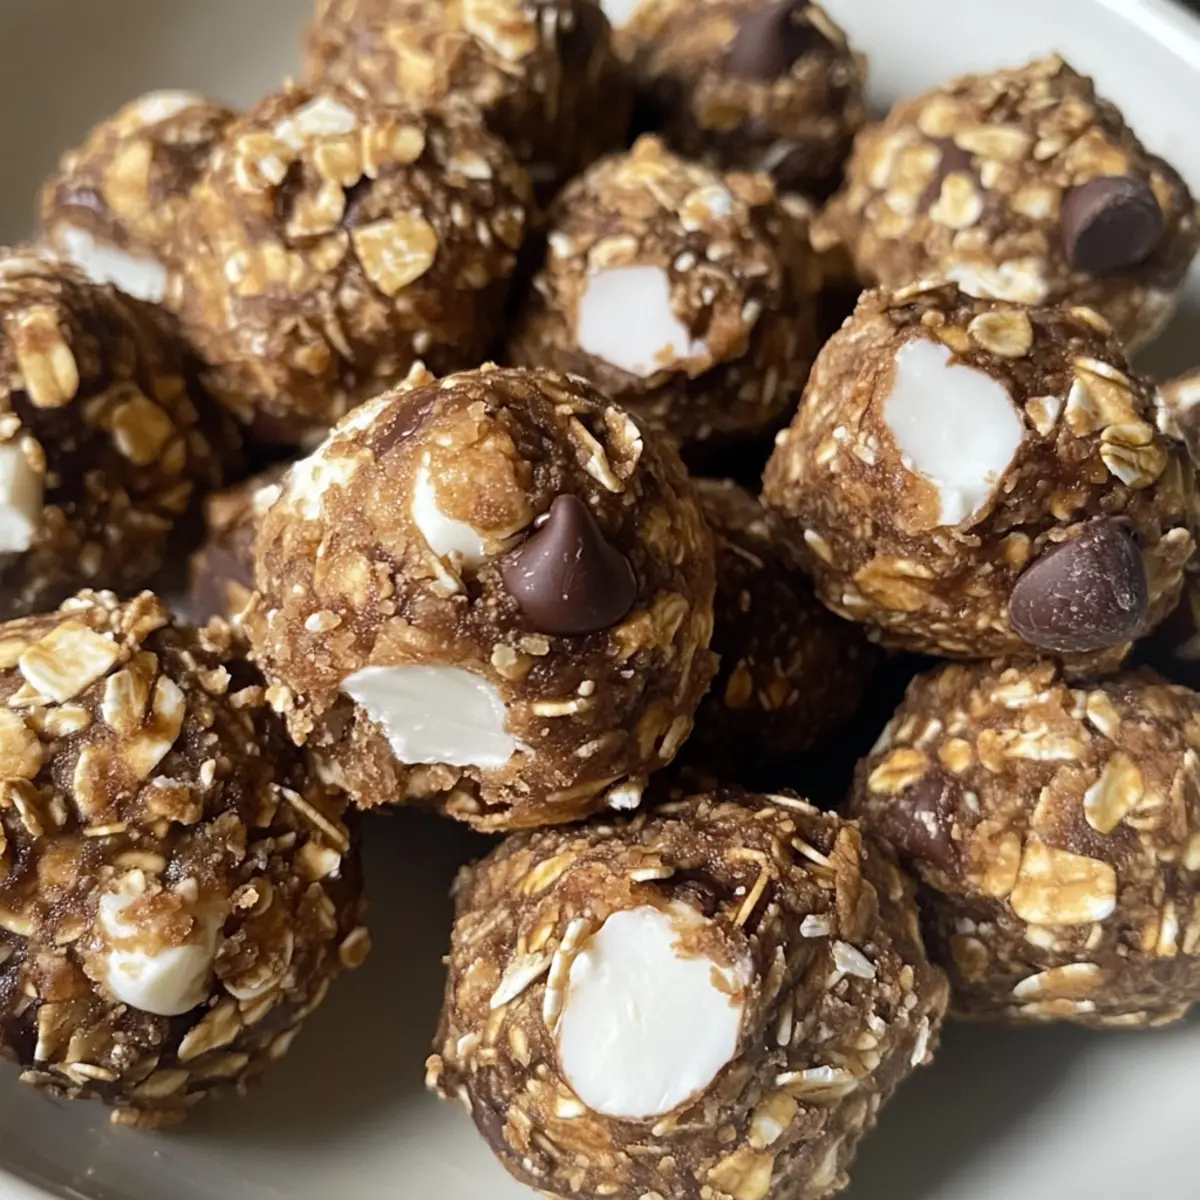
In a large mixing bowl, whisk together the old fashioned rolled oats, crushed graham crackers, chia seeds, mini-chocolate chips, and mallow bits. Combine these dry ingredients until evenly distributed, allowing all those delightful flavors to meld. This mixture should look rustic and textured, setting the stage for that classic s’mores taste.
Step 3: Combine Wet Ingredients
Next, add creamy peanut butter, honey, and vanilla extract to your dry mixture. Stir well until everything is fully combined; using your hands can help achieve an even blend. The mixture should transform into a sticky, cohesive mass that holds together, embodying the essence of those No Bake S’mores Energy Bites we’re creating.
Step 4: Form Bites
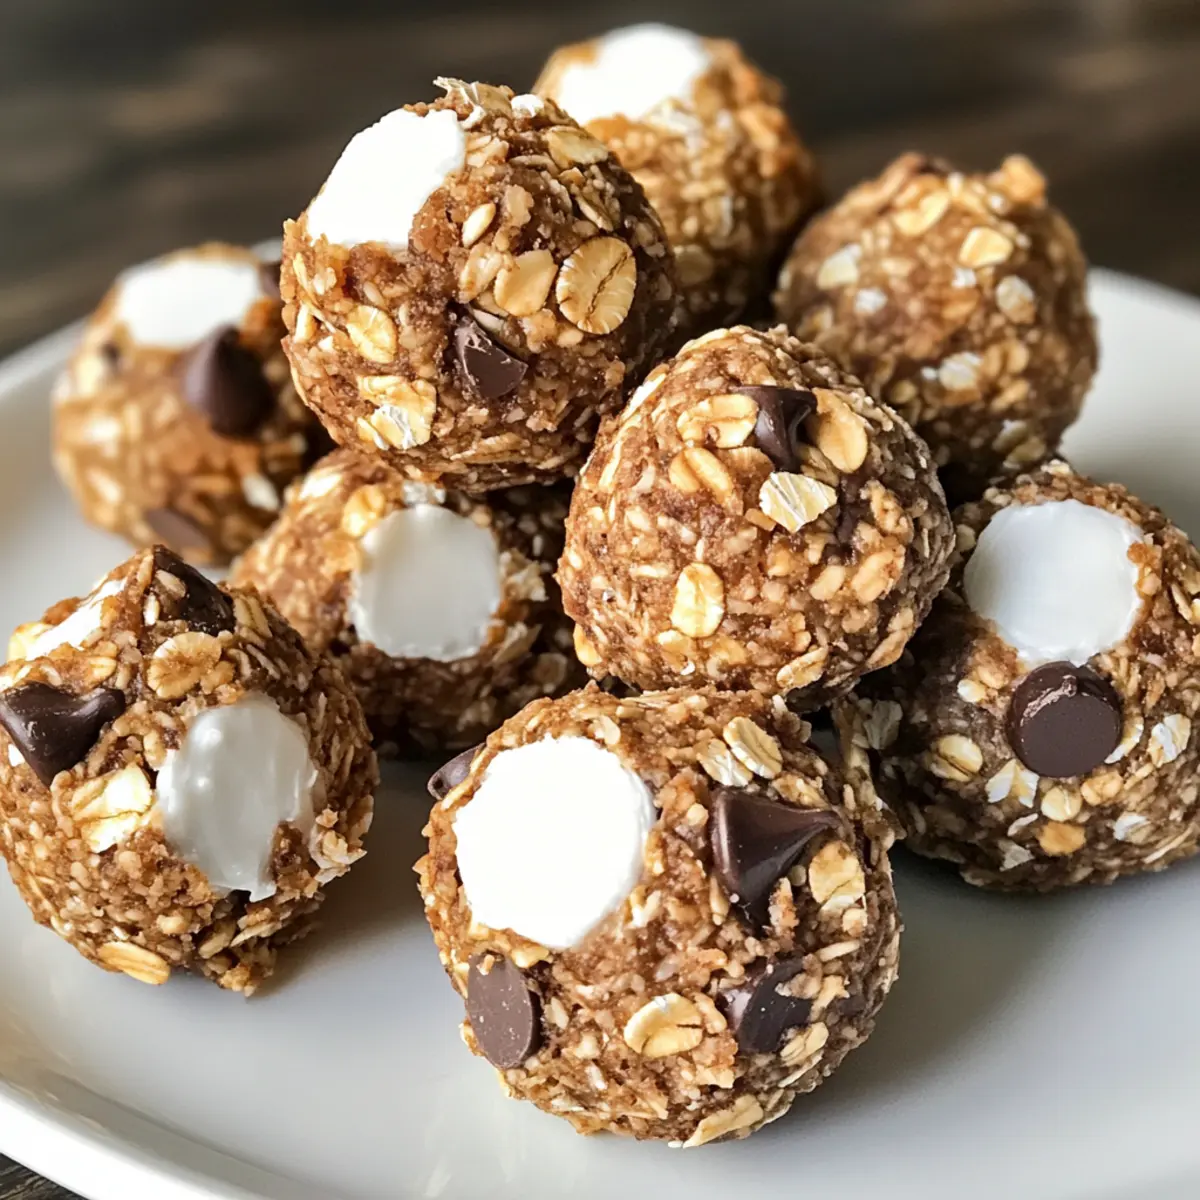
Using your hands, scoop the mixture and roll it into 1-inch balls. Firmly press and roll each bite to ensure they hold together, then place them on the prepared baking pan. This step creates the perfect bite-sized snacks, and you’ll love how satisfying it is to see your efforts taking shape!
Step 5: Chill
To finish your No Bake S’mores Energy Bites, refrigerate your baking pan for about 30 minutes. This chilling time will help the bites firm up, making them easier to handle. Once chilled, they should feel solid and ready to be enjoyed, bringing you one step closer to indulging in these wholesome treats.
No Bake S’mores Energy Bites Variations
Feel free to let your imagination run wild and personalize these delightful bites to suit your cravings!
-
Nut-Free: Replace peanut butter with sunflower seed butter for a tasty nut-free alternative. You won’t sacrifice any flavor, and it’s perfect for school lunches!
-
Vegan Delight: Swap honey for maple syrup to make these bites completely vegan. You’ll still get that sweet touch without any animal products.
-
Chocolate Lovers: Use dark chocolate chips instead of mini-chocolate chips for a more intense chocolate flavor. It’s a rich twist that chocolate lovers will enjoy!
-
Fruity Additions: Add dried cranberries or chopped apricots for a fruity burst and natural sweetness. These chewy additions bring a whole new dimension to every bite!
-
Protein Boost: Incorporate a scoop of your favorite protein powder into the mixture to elevate the nutritional value. Perfect for pre or post-workout snacks!
-
Coconut Flavor: Stir in shredded unsweetened coconut for a tropical touch that complements the s’mores theme beautifully. It adds extra texture and nuttiness!
-
Extra Crunch: Toss in some crushed nuts like almonds or pecans for added crunch. They provide a delightful contrast to the chewiness of the energy bites.
For more fun variations, you might also enjoy trying out my Tofu Oven Baked recipe for a savory twist or indulge in some sweet Crumbl Salted Bake cookies!
What to Serve with No Bake S’mores Energy Bites?
Elevate your snack time and create a delightful mini feast with these scrumptious bites!
- Creamy Yogurt Parfait: A refreshing layer of creamy yogurt topped with granola complements the chewy texture of the energy bites brilliantly. Add fresh berries for a burst of color and flavor!
- Fruit Salad Medley: A bright mix of seasonal fruits brings a juicy, zesty contrast to the rich flavors of the S’mores Energy Bites, adding freshness and vibrancy to your spread.
- Nutty Trail Mix: A handful of trail mix, featuring crunchy nuts and seeds, pairs perfectly, enhancing the protein content for a wholesome, energy-packed snack combo.
- Dark Chocolate-Covered Strawberries: The sweetness of strawberries covered in dark chocolate adds a touch of sophisticated indulgence while echoing the chocolatey flavor of the bites.
- Milkshake Delight: A creamy chocolate or vanilla milkshake creates a nostalgic vibe and makes for the perfect dipping companion for your S’mores Energy Bites!
- Chilled Herbal Tea: Refreshing iced herbal tea offers a light, crisp palate cleanser that balances the sweet nuttiness of the energy bites, making it ideal for warm afternoons.
- Mini Cheesecake Cups: These bite-sized treats provide a rich and creamy texture that contrasts beautifully with the chewy energy bites, perfect for a sweet treat.
- Sparkling Water with Lime: A splash of zingy lime in sparkling water cleanses the palate and refreshes while enjoying the sweet bites. Such a refreshing combination!
Make Ahead Options
These No-Bake S’mores Energy Bites are perfect for meal prep enthusiasts and can save you valuable time during busy weeks! You can prepare the mixture up to 24 hours in advance by following the mixing steps and forming the balls, then placing them on the prepared baking pan. Just cover the pan tightly with plastic wrap and refrigerate it. This ensures that your bites maintain their delightful texture and flavor until you’re ready to indulge. When you’re ready to enjoy them, simply chill the bites for about 30 minutes after forming to ensure they firm up nicely. This way, you’ll have quick, easy snacks that taste just as delicious as when freshly made!
How to Store and Freeze No Bake S’mores Energy Bites
Fridge: Store the bites in an airtight container in the refrigerator for up to one week. This keeps them fresh and ready for whenever cravings strike!
Freezer: For longer storage, freeze the energy bites in a single layer, then transfer to a freezer-safe bag. They can last up to 3 months, perfect for surprising energy boosts!
Thawing: To enjoy frozen No Bake S’mores Energy Bites, remove them from the freezer and let them thaw at room temperature for about 10-15 minutes before indulging.
Avoid Moisture: Always ensure the container is completely sealed to prevent moisture, which can affect both flavor and texture.
Expert Tips for No Bake S’mores Energy Bites
- Ingredient Quality: Use high-quality chocolate and natural peanut butter for richer flavor; this makes the No Bake S’mores Energy Bites truly irresistible.
- Mixing Technique: Ensure all dry ingredients are well mixed before combining with wet ingredients to avoid dry patches later on.
- Proper Chilling: Don’t skip the chilling step—this is key for achieving the ideal texture and firmness in the bites.
- Adjust Sweetness: Taste the mixture before rolling into balls; adjust the honey to suit your sweetness preference.
- Consistency Check: If the mixture feels too crumbly, don’t hesitate to add a splash more peanut butter until it holds together nicely.
No Bake S’mores Energy Bites Recipe FAQs
What type of oats should I use for S’mores Energy Bites?
I recommend using old-fashioned rolled oats for the best texture and fiber content. While quick oats can be used in a pinch, they may slightly alter the chewiness of the bites.
How long can I store No Bake S’mores Energy Bites?
These delightful bites can be stored in an airtight container in the refrigerator for up to one week. This keeps them fresh, so they’re always ready whenever you need a tasty snack.
Can I freeze No Bake S’mores Energy Bites?
Absolutely! For longer storage, freeze the bites in a single layer on a baking sheet. Once solid, transfer them to a freezer-safe bag, where they can last for up to 3 months. When you’re ready to enjoy them, let them thaw at room temperature for about 10-15 minutes.
What should I do if the mixture feels too crumbly?
If your mixture isn’t holding together well and feels crumbly, don’t fret! Simply add a bit more peanut butter—start with a tablespoon—and mix until everything binds together nicely. This will help achieve that delightful texture we all love!
Are there any dietary considerations with these bites?
These No Bake S’mores Energy Bites are naturally vegetarian. For those with nut allergies, feel free to substitute peanut butter with sunflower seed butter or another nut-free alternative. Always check ingredient labels, especially for components like graham crackers, to ensure they meet your dietary needs.
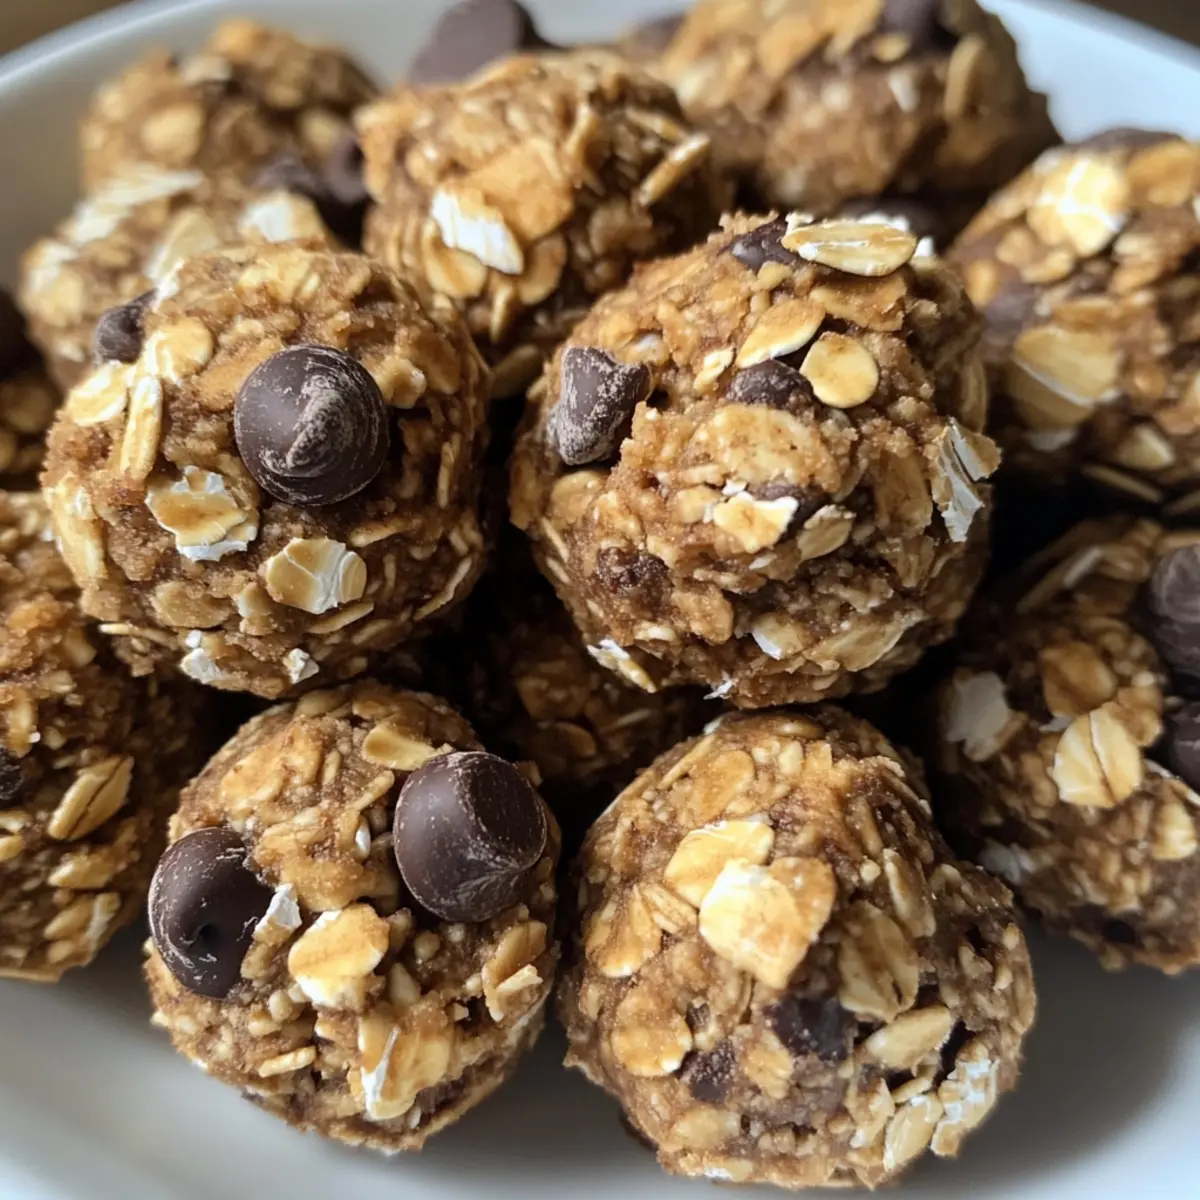
No Bake S'mores Energy Bites for Guilt-Free Indulgence
Ingredients
Equipment
Method
- Prepare Pan: Start by lining a baking pan with parchment paper, preventing the bites from sticking.
- Mix Dry Ingredients: In a large bowl, whisk together the oats, crushed graham crackers, chia seeds, mini-chocolate chips, and mallow bits.
- Combine Wet Ingredients: Add peanut butter, honey, and vanilla extract to the dry mixture, and stir well.
- Form Bites: Using your hands, scoop the mixture and roll it into 1-inch balls, placing them on the prepared baking pan.
- Chill: Refrigerate the baking pan for about 30 minutes to help the bites firm up.