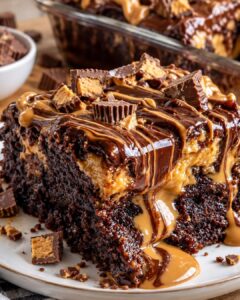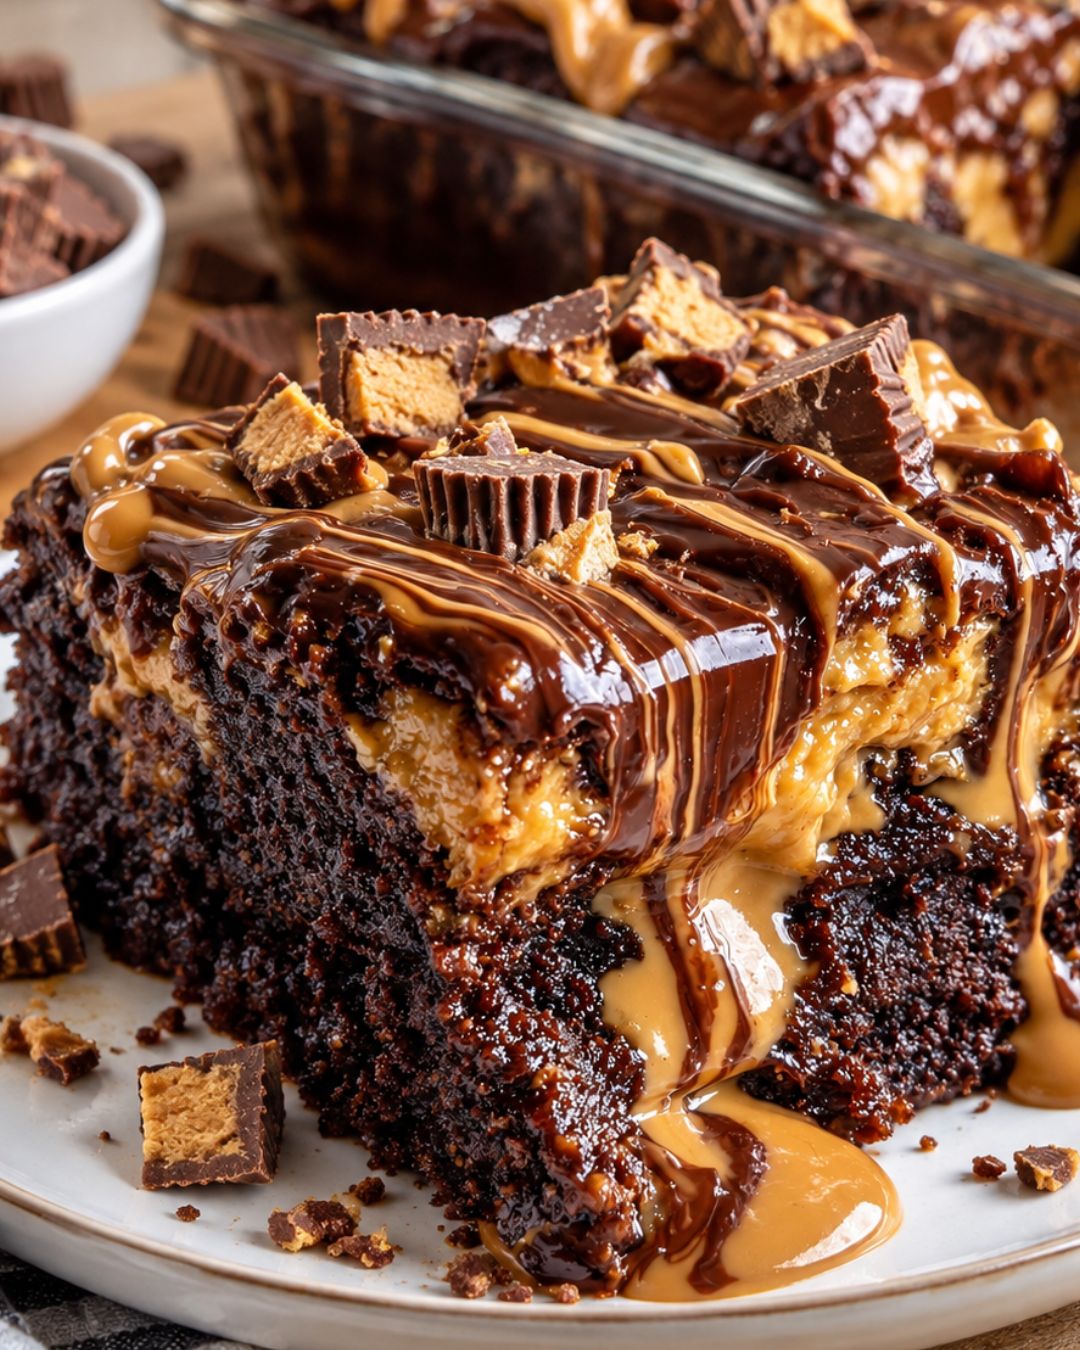
Introduction to Peanut Butter Cup Dump Cake
There’s something magical about desserts that come together with minimal effort, and that’s exactly what you get with this Peanut Butter Cup Dump Cake. As a busy home cook, I often find myself juggling work, family, and the occasional craving for something sweet. This recipe is my go-to solution for those hectic days when I want to impress my loved ones without spending hours in the kitchen. With its rich chocolate flavor and creamy peanut butter goodness, this cake is sure to become a favorite in your household. Let’s dive into this delightful treat!
Why You’ll Love This Peanut Butter Cup Dump Cake
This Peanut Butter Cup Dump Cake is a dessert lover’s dream come true. It’s incredibly easy to make, requiring just a few simple steps. In less than an hour, you can whip up a decadent treat that’s perfect for any occasion. The combination of rich chocolate and creamy peanut butter creates a flavor explosion that will leave everyone asking for seconds. Trust me, this cake is a crowd-pleaser!
Ingredients for Peanut Butter Cup Dump Cake
Gathering the right ingredients is the first step to creating this indulgent Peanut Butter Cup Dump Cake. Here’s what you’ll need:
- Chocolate cake mix: The base of this dessert, providing a rich and moist texture. You can opt for dark chocolate for an even deeper flavor.
- Creamy peanut butter: This adds that signature peanut butter taste, making every bite heavenly. Choose your favorite brand for the best results.
- Milk: Essential for moistening the cake mix, it helps create a luscious consistency. Whole milk works best, but any milk will do.
- Unsalted butter: Melted butter enhances the cake’s richness. Unsalted is preferred to control the overall saltiness.
- Peanut butter cups: Chopped into chunks, these sweet treats add delightful pockets of flavor throughout the cake.
- Chocolate chips: For an extra chocolatey kick, sprinkle these on top. They melt beautifully and create a gooey texture.
- Peanut butter chips (optional): If you’re a peanut butter fanatic, these are a must! They add an additional layer of flavor.
For exact measurements, check the bottom of the article where you can find everything listed for easy printing. Now, let’s get cooking!
How to Make Peanut Butter Cup Dump Cake
Creating this Peanut Butter Cup Dump Cake is as simple as it gets. Follow these easy steps, and you’ll have a dessert that’s sure to impress. Let’s get started!
Step 1: Preheat and Prepare
First things first, preheat your oven to 350°F. While that’s warming up, grab a 9×13-inch baking dish and grease it well. This will help your cake come out easily and prevent any sticky situations later on.
Step 2: Layer the Peanut Butter Cups
Next, take those chopped peanut butter cups and spread them evenly over the bottom of your greased dish. This layer is where the magic begins, as these sweet morsels will melt and create delicious pockets of flavor throughout the cake.
Step 3: Add the Cake Mix
Now, sprinkle the dry chocolate cake mix evenly on top of the peanut butter cups. Don’t worry about mixing it in; this is a dump cake, after all! Just let the layers do their thing.
Step 4: Drizzle the Liquids
Time to add some moisture! Drizzle the milk and melted butter over the cake mix. Remember, do not stir! The beauty of this recipe lies in the layers, so let them sit as they are.
Step 5: Add the Peanut Butter
Warm the creamy peanut butter slightly in the microwave until it’s pourable. Then, drizzle it generously over the top of the cake mix. This step adds that signature peanut butter flavor that makes this dessert so irresistible.
Step 6: Top with Chips
For an extra touch of decadence, sprinkle chocolate chips and peanut butter chips on top. If you’re feeling adventurous, go ahead and add both! They’ll melt into gooey goodness as the cake bakes.
Step 7: Bake
Pop your creation into the preheated oven and bake for 35–40 minutes. You’ll know it’s ready when the top is set and the edges are bubbly. The aroma wafting through your kitchen will be hard to resist!
Step 8: Cool and Serve
Once baked, let the cake cool for about 10–15 minutes before serving. This waiting period is crucial; it allows the flavors to meld beautifully. Enjoy it warm, especially with a scoop of vanilla ice cream on top for that ultimate indulgence!
Tips for Success
- Use room temperature ingredients for better mixing and texture.
- Don’t skip greasing the baking dish; it ensures easy removal.
- For a richer flavor, consider using dark chocolate cake mix.
- Experiment with different types of peanut butter for unique tastes.
- Serve warm for the best experience, especially with ice cream.
Equipment Needed
- 9×13-inch baking dish: A standard size for this recipe. If you don’t have one, a similar-sized dish will work.
- Mixing bowl: For combining ingredients. A large bowl is ideal, but any bowl will do.
- Measuring cups: Essential for accurate ingredient portions.
- Spatula: Great for spreading and drizzling ingredients evenly.
Variations
- Gluten-Free Option: Use a gluten-free chocolate cake mix to make this dessert suitable for those with gluten sensitivities.
- Nut-Free Version: Substitute sunflower seed butter for peanut butter to create a nut-free alternative that still packs a punch.
- Vegan Twist: Replace the milk with almond or oat milk and use a vegan chocolate cake mix for a plant-based version.
- Flavor Infusion: Add a teaspoon of vanilla extract or a sprinkle of cinnamon to the cake mix for an extra layer of flavor.
- Fruit Addition: Toss in some chopped bananas or strawberries before baking for a fruity twist that complements the chocolate and peanut butter.
Serving Suggestions
- Pair with a scoop of vanilla ice cream for a classic combination that enhances the cake’s richness.
- Drizzle with chocolate or caramel sauce for an extra touch of indulgence.
- Serve with a dollop of whipped cream for a light contrast.
- Accompany with a strong cup of coffee or a glass of cold milk.
FAQs about Peanut Butter Cup Dump Cake
Curious about this delightful dessert? Here are some frequently asked questions that might help you out:
Can I make Peanut Butter Cup Dump Cake ahead of time?
Absolutely! You can prepare the layers in advance and store them in the fridge. Just bake it when you’re ready to serve. It’s a great way to save time for gatherings!
What can I substitute for peanut butter?
If you’re looking for alternatives, almond butter or sunflower seed butter work well. They’ll give you a different flavor but still keep that creamy texture.
How do I store leftovers?
Store any leftovers in an airtight container at room temperature for up to three days. If you want to keep it longer, refrigerate it for up to a week.
Can I freeze Peanut Butter Cup Dump Cake?
Yes, you can freeze it! Just make sure it’s completely cooled, then wrap it tightly in plastic wrap and foil. It can last up to three months in the freezer.
What’s the best way to serve this cake?
For the ultimate experience, serve it warm with a scoop of vanilla ice cream on top. The melting ice cream pairs perfectly with the rich chocolate and peanut butter flavors!
Final Thoughts
Creating this Peanut Butter Cup Dump Cake is more than just baking; it’s about sharing joy and indulgence with those you love. The rich chocolate and creamy peanut butter meld together in a way that brings smiles and satisfied sighs. Whether it’s a family gathering or a quiet night in, this dessert is sure to elevate the moment. Plus, the ease of preparation means you can focus on what really matters—enjoying time with friends and family. So, roll up your sleeves, embrace the delicious chaos, and let this cake become a cherished part of your dessert repertoire!
PrintPeanut Butter Cup Dump Cake: A Decadent Dessert Delight!
- Total Time: 50-55 minutes
- Yield: 12 servings
- Diet: Vegetarian
Description
A rich and indulgent dessert that combines chocolate cake with creamy peanut butter and chunks of peanut butter cups.
Ingredients
- 1 box chocolate cake mix
- 1 cup creamy peanut butter
- 1 1/2 cups milk
- 1/2 cup unsalted butter, melted
- 1 package peanut butter cups, chopped (about 10 oz)
- 1/2 cup chocolate chips
- 1/2 cup peanut butter chips, optional
Instructions
- Preheat oven to 350°F. Grease a 9×13-inch baking dish.
- Spread the chopped peanut butter cups evenly over the bottom of the dish.
- Sprinkle the dry chocolate cake mix evenly on top.
- Drizzle the milk and melted butter over the cake mix. Do not stir.
- Warm the peanut butter slightly until pourable, then drizzle it over the top.
- Sprinkle with chocolate chips and peanut butter chips, if using.
- Bake for 35–40 minutes, until the top is set and the edges are bubbly.
- Let cool for 10–15 minutes before serving. Enjoy warm, especially with vanilla ice cream.
Notes
- For a richer flavor, use dark chocolate cake mix.
- Serve with whipped cream or ice cream for added indulgence.
- Store leftovers in an airtight container at room temperature for up to 3 days.
- Prep Time: 15 minutes
- Cook Time: 35-40 minutes
- Category: Dessert
- Method: Baking
- Cuisine: American
Nutrition
- Serving Size: 1 slice
- Calories: 350
- Sugar: 25g
- Sodium: 300mg
- Fat: 18g
- Saturated Fat: 8g
- Unsaturated Fat: 6g
- Trans Fat: 0g
- Carbohydrates: 45g
- Fiber: 2g
- Protein: 6g
- Cholesterol: 30mg