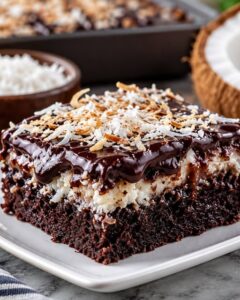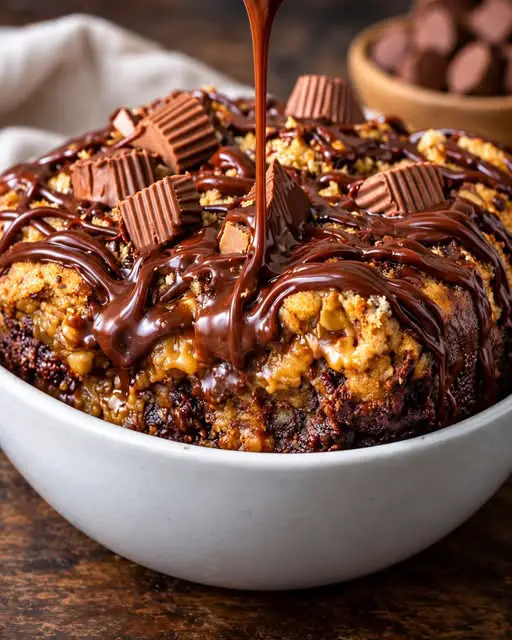
Introduction to Peanut Butter Cup Dump Cake
There’s something magical about the combination of peanut butter and chocolate. It takes me back to my childhood, where every visit to the local diner meant a slice of something sweet and indulgent. This Peanut Butter Cup Dump Cake is a delightful chocolate treat that captures that nostalgia perfectly. It’s not just a dessert; it’s a quick solution for a busy day or a dish to impress your loved ones. With minimal effort and maximum flavor, this recipe is sure to become a favorite in your home. Let’s dive into this delicious adventure!
Why You’ll Love This Peanut Butter Cup Dump Cake
This Peanut Butter Cup Dump Cake is a game-changer for anyone who loves dessert but craves simplicity. It’s incredibly easy to whip up, making it perfect for those hectic weeknights or last-minute gatherings. The rich, gooey layers of chocolate and peanut butter create a flavor explosion that will have everyone coming back for seconds. Plus, it’s a crowd-pleaser, ensuring you’ll impress family and friends without breaking a sweat!
Ingredients for Peanut Butter Cup Dump Cake
Gathering the right ingredients is the first step to creating this delightful dessert. Here’s what you’ll need:
- Chocolate cake mix: The base of our cake, providing that rich chocolate flavor. You can use any brand you prefer.
- Creamy peanut butter: This adds a luscious, nutty taste. Opt for a good-quality brand for the best results.
- Unsalted butter: Melted butter helps bind everything together and adds moisture. Unsalted is best to control the saltiness.
- Whole milk: This keeps the cake moist and fluffy. You can substitute with almond or oat milk for a dairy-free option.
- Chocolate chips: These little morsels melt into gooey pockets of chocolate goodness. Semi-sweet or dark chocolate works well.
- Chopped peanut butter cups: For that extra peanut butter punch! Feel free to use any brand you love.
- Additional creamy peanut butter: A drizzle on top adds a beautiful swirl and enhances the flavor.
- Chopped peanuts (optional): For a crunchy texture, sprinkle these on top. They’re not necessary but add a nice touch.
Exact quantities for each ingredient are listed at the bottom of the article, making it easy for you to print and follow along!
How to Make Peanut Butter Cup Dump Cake
Creating this Peanut Butter Cup Dump Cake is a breeze! Follow these simple steps, and you’ll have a delicious dessert ready in no time. Trust me, the hardest part will be waiting for it to cool!
Step 1: Preheat and Prepare
Start by preheating your oven to 350°F. While it warms up, grab a 9×13-inch baking dish and grease it well. This ensures your cake won’t stick, making it easier to serve later. A little cooking spray or butter works wonders!
Step 2: Layer the Cake Mix
Next, sprinkle the dry chocolate cake mix evenly over the bottom of your prepared baking dish. Make sure to cover the entire surface. This layer forms the foundation of your cake, so take your time to spread it out nicely.
Step 3: Add the Butter
Now, drizzle the melted butter evenly over the cake mix. This step is crucial as it adds moisture and richness to the cake. Don’t worry about mixing; just let the butter do its magic as it bakes!
Step 4: Pour the Milk
Pour the whole milk evenly over the top of the cake mix and butter. Resist the urge to stir! The magic happens in the oven, where the layers will meld together into a fudgy delight.
Step 5: Add Peanut Butter and Toppings
Dollop 1 cup of creamy peanut butter over the surface. Then, sprinkle the chocolate chips and chopped peanut butter cups on top. This is where the flavor explosion begins! Each bite will be a heavenly mix of chocolate and peanut butter.
Step 6: Swirl the Peanut Butter
Warm the remaining 1/2 cup of peanut butter in the microwave for about 15–20 seconds until it’s easy to drizzle. Drizzle it over the cake and gently swirl it with a knife. This creates beautiful patterns and enhances the flavor.
Step 7: Bake
Pop your cake into the preheated oven and bake for 35–40 minutes. Keep an eye on it! You want the edges to be set while the center remains slightly soft and fudgy. That’s the sweet spot for texture!
Step 8: Cool and Serve
Once baked, let the cake cool for 15–20 minutes before serving. This waiting period allows the flavors to settle. Serve it warm, and watch everyone’s eyes light up with joy!
Tips for Success
- Use room temperature ingredients for better mixing and texture.
- Don’t skip the cooling time; it enhances the flavor and makes serving easier.
- Experiment with different chocolate chips, like white or milk chocolate, for variety.
- For a richer taste, add a splash of vanilla extract to the milk.
- Store leftovers in an airtight container to keep it fresh for days.
Equipment Needed
- 9×13-inch baking dish: Essential for baking your cake. A glass or metal dish works well.
- Mixing bowl: For combining ingredients. Any large bowl will do.
- Measuring cups: To ensure accurate ingredient amounts.
- Spatula: Perfect for spreading and swirling the peanut butter.
- Microwave-safe bowl: For warming the peanut butter easily.
Variations
- Gluten-Free Option: Substitute the chocolate cake mix with a gluten-free blend to make this dessert suitable for gluten-sensitive friends.
- Nut-Free Version: Replace peanut butter with sunbutter or almond butter for a nut-free alternative that still packs a punch.
- Vegan Adaptation: Use a vegan chocolate cake mix, almond milk, and coconut oil instead of butter for a plant-based treat.
- Extra Crunch: Add crushed pretzels or graham crackers on top for a delightful crunch that contrasts with the gooey cake.
- Flavor Twists: Mix in a teaspoon of espresso powder or a splash of coffee to enhance the chocolate flavor.
Serving Suggestions
- Serve warm with a scoop of vanilla ice cream for a classic pairing that enhances the flavors.
- Drizzle with chocolate or caramel sauce for an extra indulgent touch.
- Pair with a strong cup of coffee or a glass of cold milk to balance the sweetness.
- Garnish with whipped cream and a sprinkle of chopped peanuts for a beautiful presentation.
FAQs about Peanut Butter Cup Dump Cake
Curious about this delightful dessert? Here are some frequently asked questions that might help you out:
Can I make this Peanut Butter Cup Dump Cake ahead of time?
Absolutely! You can prepare the cake a day in advance and store it in the fridge. Just warm it up before serving for that fresh-out-of-the-oven taste.
What can I substitute for peanut butter?
If you’re looking for alternatives, try almond butter or sunbutter. They’ll give you a similar creamy texture without the peanuts.
How do I store leftovers?
Store any leftovers in an airtight container at room temperature for up to three days. If you want to keep it longer, refrigerate it for up to a week.
Can I freeze this cake?
Yes! This Peanut Butter Cup Dump Cake freezes well. Just wrap it tightly in plastic wrap and foil, and it can last for up to three months. Thaw it in the fridge before serving.
What’s the best way to serve it?
For the ultimate experience, serve it warm with a scoop of vanilla ice cream on top. The melting ice cream pairs perfectly with the fudgy cake!
Final Thoughts
Creating this Peanut Butter Cup Dump Cake is more than just baking; it’s about sharing joy and indulgence with those you love. The rich, gooey layers of chocolate and peanut butter evoke memories of simpler times, where dessert was a celebration. Each bite is a delightful reminder of the sweet moments in life. Whether it’s a weeknight treat or a special occasion, this cake brings smiles and satisfaction. So, roll up your sleeves, embrace the mess, and enjoy the deliciousness that comes from your kitchen. Trust me, your taste buds will thank you!
PrintPeanut Butter Cup Dump Cake: A Delightful Chocolate Treat!
- Total Time: 50-55 minutes
- Yield: 12 servings
- Diet: Vegetarian
Description
A delightful chocolate treat combining the rich flavors of peanut butter and chocolate in a simple dump cake.
Ingredients
- 1 box chocolate cake mix
- 1 cup creamy peanut butter
- 1/2 cup unsalted butter, melted
- 1 cup whole milk
- 1 cup chocolate chips
- 1 cup chopped peanut butter cups
- 1/2 cup creamy peanut butter, for swirling
- 1/2 cup chopped peanuts, optional
Instructions
- Preheat the oven to 350°F. Grease a 9×13-inch baking dish.
- Sprinkle the dry chocolate cake mix evenly over the bottom of the prepared baking dish.
- Drizzle the melted butter evenly over the cake mix.
- Pour the milk evenly over the top. Do not stir.
- Dollop 1 cup of peanut butter over the surface, followed by the chocolate chips and chopped peanut butter cups.
- Warm the remaining 1/2 cup peanut butter in the microwave for about 15–20 seconds, just until easy to drizzle. Drizzle it over the cake and gently swirl with a knife.
- Sprinkle with chopped peanuts if using.
- Bake for 35–40 minutes, until the edges are set and the center remains slightly soft and fudgy.
- Let cool for 15–20 minutes before serving.
Notes
- Serve warm with vanilla ice cream for an extra indulgent peanut-butter-and-chocolate dessert.
- Prep Time: 15 minutes
- Cook Time: 35-40 minutes
- Category: Dessert
- Method: Baking
- Cuisine: American
Nutrition
- Serving Size: 1 slice
- Calories: 350
- Sugar: 25g
- Sodium: 200mg
- Fat: 18g
- Saturated Fat: 7g
- Unsaturated Fat: 8g
- Trans Fat: 0g
- Carbohydrates: 40g
- Fiber: 2g
- Protein: 6g
- Cholesterol: 30mg