Introduction to Salt River Bars Guide
What Are Salt River Bars?
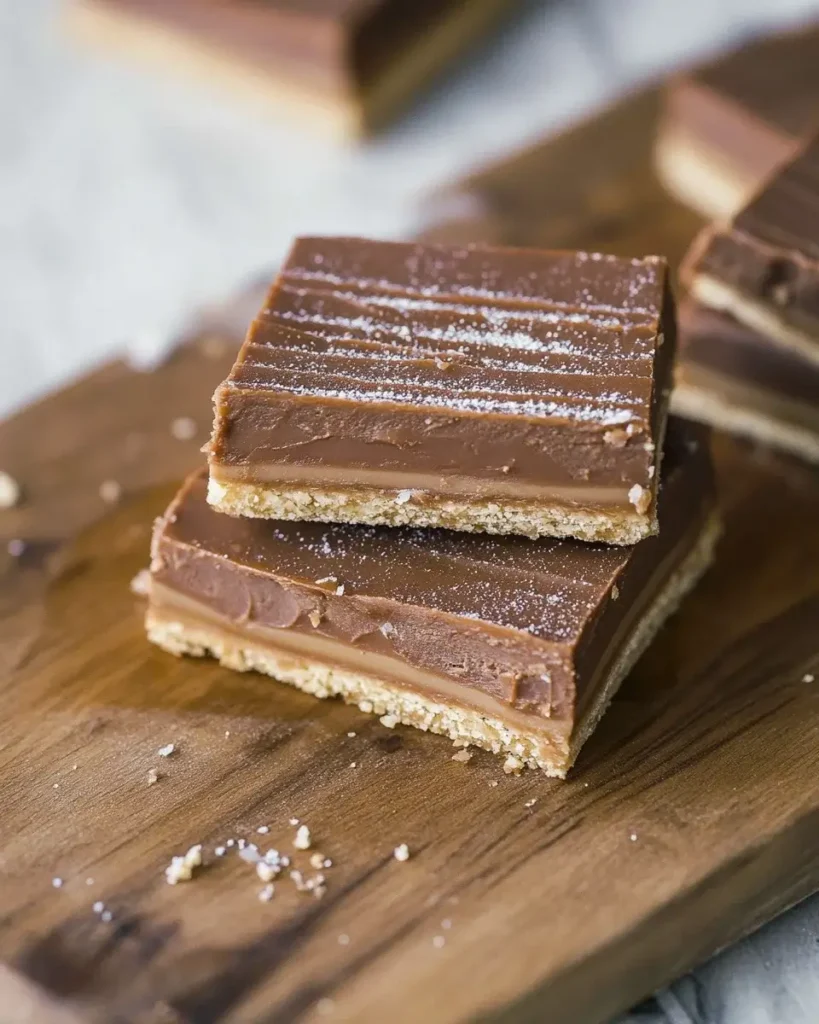
Salt River Bars are a delightful treat that combines the best of sweet and savory flavors. These bars are chewy, rich, and packed with delicious ingredients. They are perfect for any occasion, whether it’s a family gathering, a picnic, or just a cozy night at home. The combination of oats, chocolate chips, and optional nuts or coconut creates a satisfying texture that everyone loves.
Originating from the heart of home baking, Salt River Bars have become a favorite for many. They are easy to make and require simple ingredients that you might already have in your pantry. The bars are not only tasty but also versatile, allowing you to customize them to suit your taste. You can add your favorite mix-ins or even swap out ingredients to create a unique version of this classic treat.
In this guide, we will walk you through everything you need to know about making Salt River Bars. From the ingredients to the preparation steps, and even some tips for perfecting your bars, we’ve got you covered. So, let’s dive into the world of Salt River Bars and discover how to make this delicious dessert!
Ingredients for Salt River Bars
To create the perfect Salt River Bars, you’ll need a selection of simple yet essential ingredients. Each component plays a vital role in achieving that delightful balance of flavors and textures. Here’s what you’ll need:
- 1 cup unsalted butter, softened: This is the base of your bars, providing richness and moisture.
- 1 cup granulated sugar: Adds sweetness and helps create a lovely texture.
- 1 cup packed brown sugar: This gives a deeper flavor and a hint of caramel.
- 2 large eggs: They bind the ingredients together and add structure.
- 2 teaspoons vanilla extract: Enhances the overall flavor with a warm, sweet note.
- 3 cups all-purpose flour: The main dry ingredient that forms the base of the bars.
- 1 teaspoon baking soda: This helps the bars rise and become fluffy.
- 1 teaspoon salt: Balances the sweetness and enhances the flavors.
- 1 cup rolled oats: Adds chewiness and a wholesome texture.
- 1 cup chocolate chips: The star ingredient that brings sweetness and richness.
- 1 cup chopped nuts (optional): Adds crunch and flavor; choose your favorite nuts!
- 1 cup sweetened shredded coconut (optional): For a tropical twist and extra texture.
These ingredients come together to create a delicious treat that is sure to please everyone. Feel free to mix and match based on your preferences. Now that you have your ingredients ready, let’s move on to the preparation steps!
Preparation of Salt River Bars
Step 1: Gather Your Ingredients
Before you start baking, it’s important to gather all your ingredients. This makes the process smoother and more enjoyable. Make sure you have everything listed in the ingredients section. Having your butter softened is key, so take it out of the fridge ahead of time. You’ll also want to pre-measure your sugars, flour, and any optional ingredients like nuts or coconut. This way, you can focus on mixing and baking without any interruptions!
Step 2: Prepare the Base
Now, let’s get to the fun part! In a large mixing bowl, cream together the softened butter, granulated sugar, and brown sugar. Use an electric mixer or a sturdy wooden spoon to mix until the mixture is light and fluffy. This step is crucial as it incorporates air into the batter, making your bars soft and chewy. Next, add the eggs one at a time, mixing well after each addition. Don’t forget to stir in the vanilla extract, which adds a lovely aroma and flavor to your base.
Step 3: Create the Topping
In a separate bowl, whisk together the all-purpose flour, baking soda, and salt. This helps to evenly distribute the baking soda and salt throughout the flour. Gradually add this dry mixture to your wet ingredients. Stir gently until just combined. Be careful not to overmix, as this can make your bars tough. Once combined, fold in the rolled oats, chocolate chips, and any optional ingredients like nuts or shredded coconut. This is where you can get creative with your mix-ins!
Step 4: Assemble the Salt River Bars
Now that your mixture is ready, it’s time to spread it into the prepared baking pan. Use a spatula to evenly distribute the batter across the bottom of the pan. Make sure to press it down gently to create an even layer. This will help your bars bake uniformly. If you like, you can sprinkle a pinch of sea salt on top for an extra flavor boost. It adds a nice contrast to the sweetness!
Step 5: Bake to Perfection
Preheat your oven to 350°F (175°C) if you haven’t done so already. Place your baking pan in the oven and bake for 25-30 minutes. Keep an eye on them! You’ll know they’re done when the edges are golden brown and a toothpick inserted in the center comes out clean. Once baked, allow the bars to cool in the pan for about 10 minutes. Then, transfer them to a wire rack to cool completely. This cooling step is important, as it helps the bars set properly before cutting.
Variation of Salt River Bars
Alternative Ingredients for Salt River Bars
One of the best things about Salt River Bars is their versatility. You can easily swap out ingredients to suit your taste or dietary needs. For instance, if you’re looking for a gluten-free option, simply replace the all-purpose flour with a 1:1 gluten-free flour blend. This way, you can still enjoy the deliciousness without worrying about gluten.
If you want to cut down on sugar, consider using a sugar substitute like stevia or monk fruit sweetener. These alternatives can help maintain the sweetness without the extra calories. Additionally, you can experiment with different types of chocolate chips. Dark chocolate, white chocolate, or even butterscotch chips can add a unique twist to your bars.
For those who prefer a nut-free version, you can omit the nuts entirely or replace them with seeds like sunflower or pumpkin seeds. These options still provide a satisfying crunch without the allergens. Lastly, if coconut isn’t your thing, feel free to leave it out or substitute it with dried fruit like cranberries or raisins for a chewy texture.
Flavor Combinations for Salt River Bars
When it comes to flavor combinations, the sky’s the limit! You can create a variety of Salt River Bars by mixing and matching different ingredients. For a tropical vibe, try adding crushed pineapple and macadamia nuts. This combination will transport you to a sunny beach with every bite.
If you’re a fan of peanut butter, consider swirling in some creamy peanut butter into the batter before baking. This will give your bars a rich, nutty flavor that pairs perfectly with chocolate chips. Another delightful option is to add spices like cinnamon or nutmeg for a warm, cozy taste. Just a teaspoon can elevate the flavor profile significantly.
For a more indulgent treat, you can layer in caramel or fudge between the batter. This will create a gooey center that is simply irresistible. You can also try adding a hint of espresso powder to enhance the chocolate flavor, making your bars taste even richer.
With these alternative ingredients and flavor combinations, you can customize your Salt River Bars to fit any occasion or preference. So, don’t hesitate to get creative and make these bars your own!
Cooking Note for Salt River Bars
When it comes to baking Salt River Bars, a few cooking notes can help ensure your bars turn out perfectly every time. First, always preheat your oven. This step is crucial as it allows your bars to bake evenly. If you skip this, you might end up with undercooked centers or overly browned edges.
Next, consider the type of baking pan you use. A 9×13-inch pan is ideal for this recipe, but if you use a different size, you may need to adjust the baking time. A smaller pan will require a longer baking time, while a larger pan may bake faster. Keep an eye on your bars as they bake, and use the toothpick test to check for doneness.
Another important tip is to let your bars cool in the pan for about 10 minutes before transferring them to a wire rack. This cooling period helps them set and makes cutting easier. If you try to cut them too soon, they may crumble or fall apart.
Lastly, remember that every oven is different. If you find that your bars are browning too quickly, you can cover them loosely with aluminum foil during the last few minutes of baking. This will help prevent over-browning while allowing the center to cook through.
By following these cooking notes, you’ll be well on your way to creating delicious Salt River Bars that are sure to impress your family and friends!
Serving Suggestions for Salt River Bars
Pairing Drinks with Salt River Bars
When it comes to enjoying your Salt River Bars, the right drink can elevate the experience. Here are some delightful pairing suggestions:
- Milk: A classic choice! The creaminess of milk complements the sweetness of the bars perfectly. Whether you prefer whole, skim, or even almond milk, it’s a match made in heaven.
- Coffee: For adults, a warm cup of coffee can enhance the rich flavors of the chocolate chips. Try a light roast for a milder taste or a dark roast for a bolder flavor.
- Tea: Herbal teas, like chamomile or peppermint, offer a soothing contrast to the sweetness of the bars. If you prefer something stronger, a chai tea can add a spicy kick!
- Hot Chocolate: For a cozy treat, serve your bars with a cup of hot chocolate. The chocolatey goodness will make for a delightful dessert experience.
- Fruit Juices: Fresh fruit juices, like orange or apple juice, provide a refreshing balance to the richness of the bars. They add a fruity zing that brightens up the flavors.
These drink pairings not only enhance the taste of your Salt River Bars but also create a delightful experience for your guests. So, grab a drink and enjoy your delicious creation!
Presentation Ideas for Salt River Bars
Presentation is key when serving your Salt River Bars. A beautiful display can make your treat even more appealing. Here are some creative ideas to consider:
- Cut into Uniform Squares: Use a sharp knife to cut your bars into even squares. This gives a neat and tidy appearance, making them easy to serve.
- Serve on a Decorative Platter: Arrange the bars on a colorful platter or cake stand. This adds a touch of elegance to your presentation.
- Garnish with Fresh Fruit: Add a few slices of fresh fruit, like strawberries or kiwi, around the bars. This not only looks beautiful but also adds a pop of color.
- Dust with Powdered Sugar: For a simple yet effective touch, dust the top of the bars with powdered sugar before serving. It gives a lovely finish and makes them look extra special.
- Wrap Individually: For a fun take, wrap each bar in parchment paper and tie with twine. This makes for a charming gift or party favor!
With these presentation ideas, your Salt River Bars will not only taste amazing but also look stunning. Enjoy sharing your delicious creation with family and friends!
Tips for Perfecting Your Salt River Bars
Common Mistakes to Avoid
When baking Salt River Bars, a few common mistakes can lead to less-than-perfect results. Here are some pitfalls to watch out for:
- Not Softening Butter: Using cold butter can make it hard to cream with sugars. Always soften your butter to room temperature for the best texture.
- Overmixing the Batter: Mixing too much can lead to tough bars. Stir until just combined to keep them soft and chewy.
- Skipping the Cooling Time: Cutting the bars too soon can cause them to crumble. Allow them to cool in the pan for at least 10 minutes before transferring.
- Incorrect Oven Temperature: Always preheat your oven. An unheated oven can lead to uneven baking. Use an oven thermometer if needed.
- Ignoring the Toothpick Test: Not checking for doneness can result in undercooked or overcooked bars. Always use a toothpick to check the center.
By avoiding these common mistakes, you’ll be on your way to baking perfect Salt River Bars every time!
Storage Tips for Salt River Bars
Proper storage is key to keeping your Salt River Bars fresh and delicious. Here are some helpful tips:
- Room Temperature: Store your bars in an airtight container at room temperature for up to a week. This keeps them soft and chewy.
- Refrigeration: If you want to extend their shelf life, you can refrigerate them. Just make sure they are in a sealed container to prevent drying out.
- Freezing: For longer storage, freeze your bars. Wrap them individually in plastic wrap and place them in a freezer-safe bag. They can last up to three months!
- Thawing: When ready to enjoy, thaw your frozen bars in the fridge overnight or at room temperature for a few hours.
With these storage tips, you can enjoy your Salt River Bars for days to come, keeping them fresh and tasty!
Breakdown of Time for Salt River Bars
Prep Time
Getting everything ready for your Salt River Bars is a breeze! The prep time usually takes about 15-20 minutes. This includes gathering your ingredients, measuring them out, and mixing the batter. If you have your ingredients prepped and ready to go, you can whip up the batter even faster. Just remember to soften your butter ahead of time for the best results!
Cooking Time
Once your batter is ready and in the baking pan, it’s time to bake! The cooking time for Salt River Bars is typically around 25-30 minutes. Keep an eye on them as they bake. You’ll know they’re done when the edges turn golden brown and a toothpick inserted in the center comes out clean. This is the moment you’ve been waiting for!
Total Time
In total, you can expect to spend about 40-50 minutes from start to finish. This includes both prep and cooking time. Once your bars are baked, don’t forget to let them cool for about 10 minutes in the pan before transferring them to a wire rack. This cooling period is essential for achieving the perfect texture. After that, you can cut them into bars and enjoy your delicious creation!
Nutritional Information for Salt River Bars
Calories in Salt River Bars
When indulging in Salt River Bars, it’s good to know what you’re consuming. Each bar contains approximately 250 calories. This makes them a satisfying treat without being overly indulgent. The combination of ingredients provides a balance of energy and flavor, making them a great option for a snack or dessert. Just remember, moderation is key!
Protein Content in Salt River Bars
In terms of protein, each Salt River Bar offers about 3 grams. While this isn’t a high-protein snack, it does contribute to your daily intake. The protein comes mainly from the eggs and any nuts you might add. If you’re looking to boost the protein content, consider adding more nuts or even a scoop of protein powder to the batter. This way, you can enjoy a delicious treat while also supporting your nutritional needs!
Sodium Levels in Salt River Bars
Each serving of Salt River Bars contains around 150 milligrams of sodium. This level is fairly moderate, especially considering the overall flavor profile of the bars. The sodium primarily comes from the added salt in the recipe. If you’re watching your sodium intake, you can reduce the amount of salt slightly without compromising the taste. Just be mindful of any additional ingredients, like nuts, which may also contain sodium.
FAQs About Salt River Bars Guide
How do I know when my Salt River Bars are done?
Knowing when your Salt River Bars are done is key to achieving the perfect texture. The best way to check is by using a toothpick. Insert it into the center of the bars. If it comes out clean or with just a few crumbs, your bars are ready! If the toothpick has wet batter on it, give them a few more minutes in the oven. Keep an eye on the edges as well; they should be golden brown. This visual cue, combined with the toothpick test, will help you bake them to perfection!
Can I make Salt River Bars ahead of time?
Absolutely! Salt River Bars are great for making ahead of time. You can bake them a day or two in advance and store them in an airtight container at room temperature. This allows the flavors to meld together, making them even tastier. If you want to prepare them even further in advance, consider freezing them. Just wrap the bars tightly in plastic wrap and place them in a freezer-safe bag. They can last up to three months in the freezer. When you’re ready to enjoy, simply thaw them in the fridge overnight or at room temperature!
What can I substitute for ingredients in Salt River Bars?
There are plenty of substitutions you can make in Salt River Bars to suit your taste or dietary needs. For a gluten-free version, swap the all-purpose flour with a 1:1 gluten-free flour blend. If you want to reduce sugar, consider using a sugar substitute like stevia or monk fruit sweetener. You can also replace chocolate chips with different varieties, such as dark chocolate or butterscotch chips. For a nut-free option, omit the nuts or use seeds instead. The flexibility of this recipe allows you to get creative while still enjoying delicious bars!
How should I store leftover Salt River Bars?
To keep your leftover Salt River Bars fresh, store them in an airtight container at room temperature. They will stay soft and chewy for up to a week. If you want to extend their shelf life, you can refrigerate them, but make sure they are sealed properly to prevent drying out. For longer storage, freezing is a great option. Wrap each bar in plastic wrap and place them in a freezer-safe bag. They can last up to three months in the freezer. When you’re ready to enjoy, just thaw them in the fridge or at room temperature!
Conclusion of Salt River Bars Guide
In conclusion, Salt River Bars are a delightful and versatile treat that can bring joy to any occasion. With their chewy texture and rich flavors, they are sure to be a hit with family and friends. Whether you choose to stick to the classic recipe or experiment with various ingredients and flavors, the possibilities are endless. This guide has provided you with all the essential information, from ingredients and preparation steps to tips for perfecting your bars.
Remember, baking is not just about following a recipe; it’s about having fun and expressing your creativity. Don’t hesitate to make these bars your own by adding your favorite mix-ins or trying out new flavor combinations. With a little practice and patience, you’ll master the art of making Salt River Bars that everyone will love.
So, gather your ingredients, preheat your oven, and get ready to enjoy the deliciousness of Salt River Bars. Whether you’re serving them at a gathering, enjoying them as a snack, or gifting them to someone special, these bars are sure to bring smiles all around. Happy baking!
Salt River Bars Guide: Discover Delicious Recipes Today!
Ingredients
Method
- Prepare the Pan:Line a 9×13-inch baking dish with parchment paper, leaving some overhang for lifting. Spray the parchment and sides of the pan with nonstick spray.
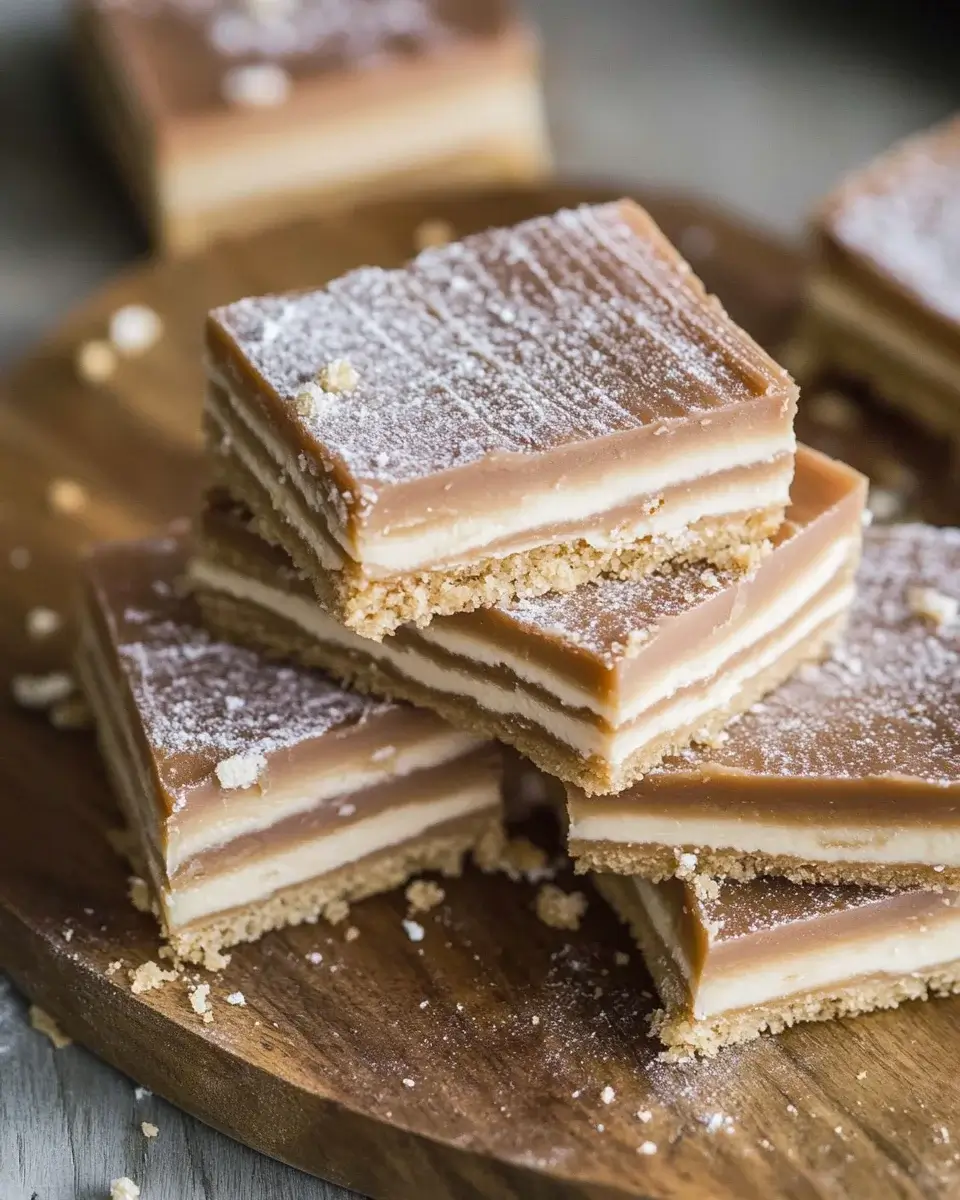
- First Cracker Layer:Arrange a layer of Club crackers on the bottom of the pan. Cut them to fit if necessary (typically 5 rows of 6 crackers).
- Cook the Caramel Mixture:In a heavy-bottomed saucepan over medium heat, combine butter, brown sugar, graham cracker crumbs, and heavy cream. Stir continuously until the mixture reaches a boil.Continue boiling and stirring for 7 minutes to create a thick caramel.
- First Caramel Layer:Pour half of the hot caramel mixture over the first layer of crackers and spread evenly.
- Second Cracker and Caramel Layers:Add a second layer of crackers directly on top of the caramel.Pour the remaining caramel over this layer and spread it out smoothly.
- Final Cracker Layer:Top with a final layer of Club crackers, aligning them as evenly as possible.
- Chill to Set:Place the pan in the refrigerator while you prepare the chocolate topping.
- Make the Chocolate Topping:In a microwave-safe bowl, combine milk chocolate chips, butterscotch chips, and peanut butter.Microwave for 30–45 seconds, stir, then continue in 15-second intervals until fully melted and smooth.
- Top and Finish:Pour the chocolate mixture over the cracker layers and spread evenly with a spatula.Sprinkle Maldon sea salt generously over the top.Refrigerate for 1–2 hours until fully set.
- Slice and Serve:Use the parchment paper to lift the bars from the pan. Slice into squares or rectangles with a sharp knife. Makes about 30 bars.
Notes
- Use a sharp knife and wipe it clean between cuts for neat edges.
- Store bars in the refrigerator for up to 5 days in an airtight container.
- For easier cutting, let bars sit at room temperature for 10 minutes before slicing.
- If you prefer a stronger peanut butter flavor, increase the peanut butter slightly and reduce butterscotch chips.