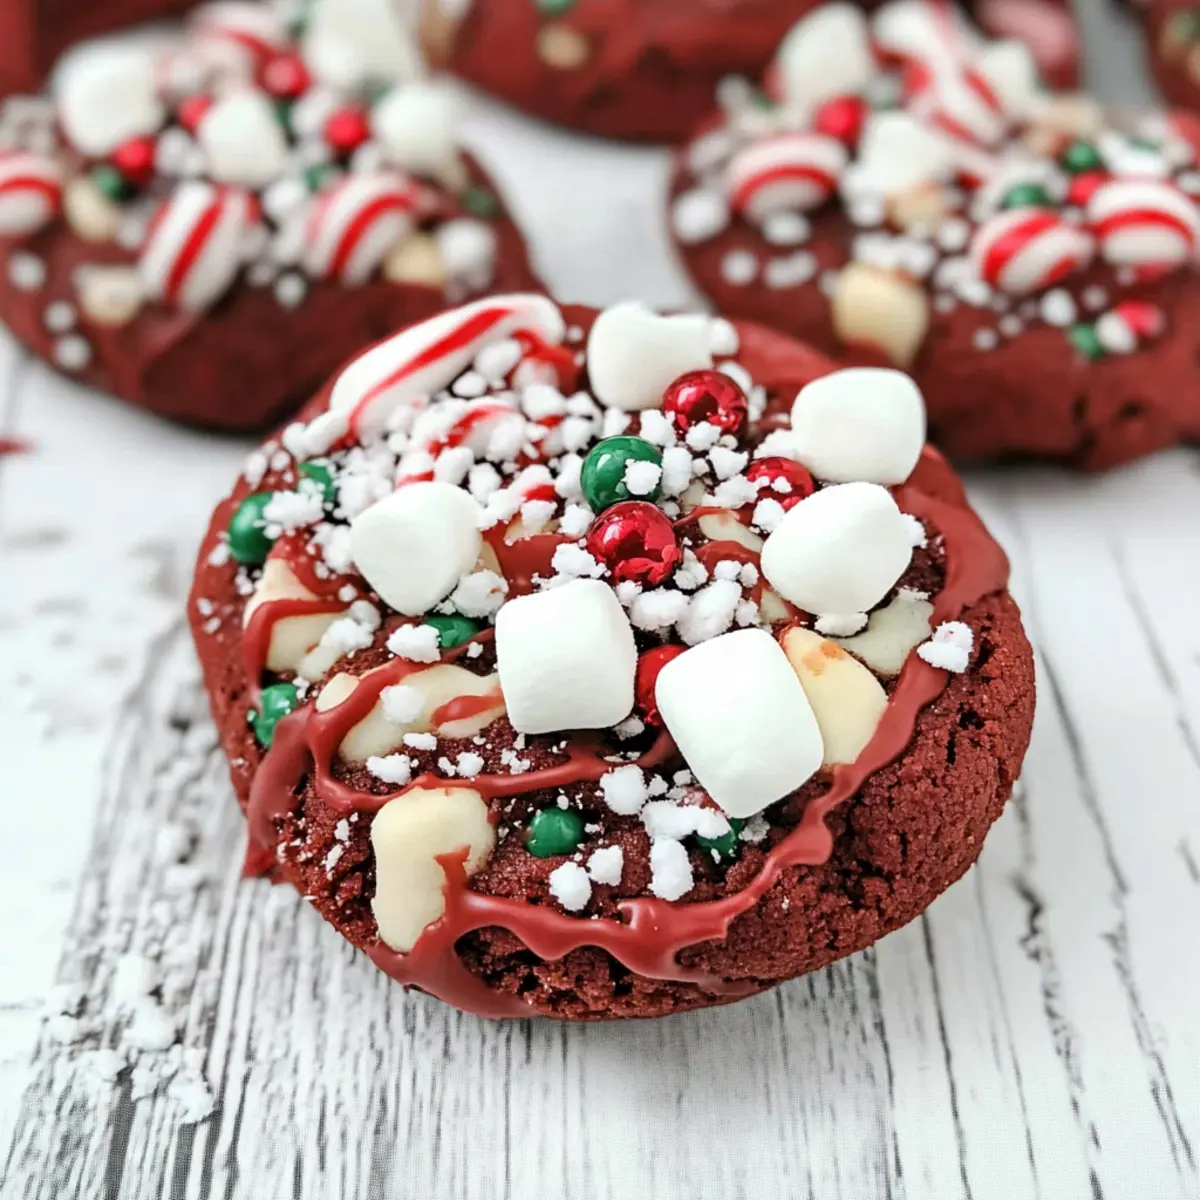
The aroma of freshly baked cookies wafting through the kitchen conjures up memories of joyous holiday gatherings. This is precisely how I felt when I first pulled Santa’s Red Velvet Christmas Cookies from the oven, their vibrant red hue beckoning like a festive invitation. Each bite reveals a delightful combination of semi-sweet chocolate chips and mini marshmallows, creating a chewy and gooey sensation that’s impossible to resist. Not only are these cookies a showstopper for any holiday dessert table, but they also make for a fun family baking activity, allowing everyone to personalize their creation with extra toppings. Whether you’re hosting a Christmas party or simply looking to share the joy of homemade treats, these cookies are the perfect blend of color, flavor, and festivity. Are you ready to bring some holiday cheer into your kitchen?
Why are Santa’s Cookies a Must-Bake?
Visual Appeal: The striking red color of these cookies makes them a centerpiece for any holiday gathering, instantly drawing attention.
Delightful Texture: Experience the perfect balance of a soft, gooey center and a slightly chewy exterior, making each bite a joyful experience.
Endless Customization: Get creative with optional toppings like crushed candy canes or chocolate chips to cater to everyone’s tastes.
Quick to Bake: With simple steps and minimal chill time, these cookies come together in under an hour, making them ideal for last-minute baking sessions.
Family Activity: Engaging everyone in decorating makes baking these cookies a festive family tradition that sparks joy and togetherness.
Don’t forget to check out my recipe for Making Christmas Crack for another delightful holiday treat!
Santa’s Cookies Ingredients
For the Cookie Base
- Butter – Provides richness and moisture; use unsalted butter for the best flavor.
- Sugar – Adds sweetness; white granulated sugar is used, but light brown sugar can substitute for a deeper flavor.
- Eggs – For structure and moisture; large eggs should be at room temperature.
- Vanilla Extract – Adds flavor; can substitute with almond extract for a different taste.
- Super Red Food Coloring – Essential for the classic red velvet look of these Santa’s Cookies.
- Unsweetened Cocoa Powder – Provides a subtle chocolate flavor without adding excess sweetness.
- Baking Soda – Leavening agent for cookie rise; check expiry for effectiveness.
- Cornstarch – Helps create a soft center and chewy texture while preventing spreading.
- Kosher Salt – Enhances overall flavor; omit if using salted butter.
- Cake Flour – Contributes to a tender texture; gluten-free alternatives can be used.
- All-Purpose Flour – Main structure; can switch with gluten-free alternatives.
For the Mix-Ins
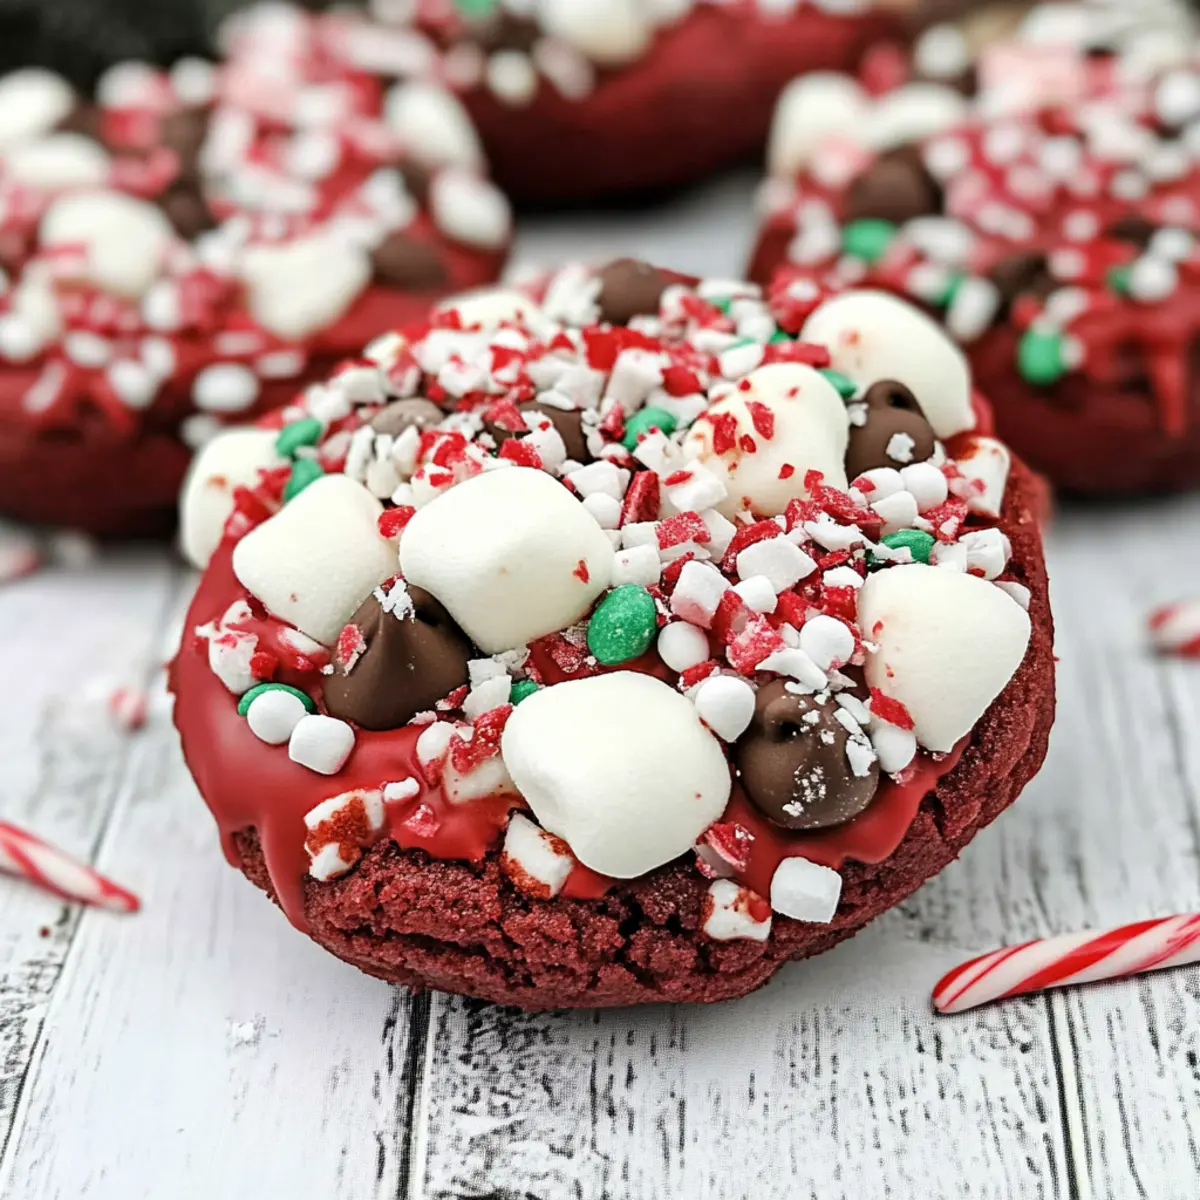
- Semi-Sweet Chocolate Chips – Provides richness and chocolate flavor; can use milk or dark chocolate for variety.
- Mini Marshmallows – Add delightful texture; regular marshmallows can be cut small.
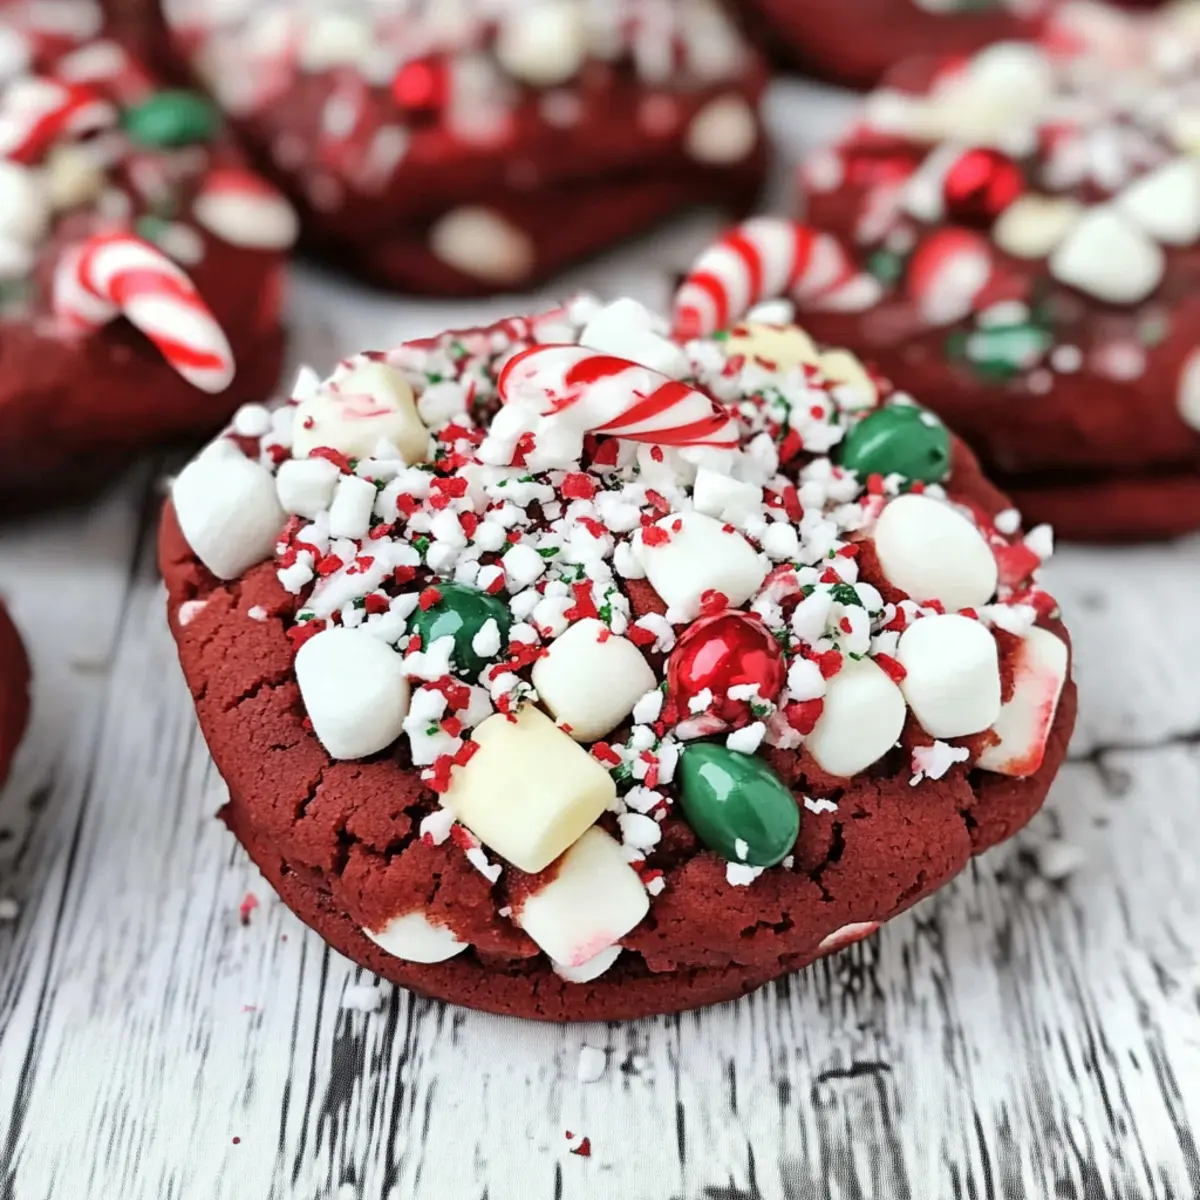
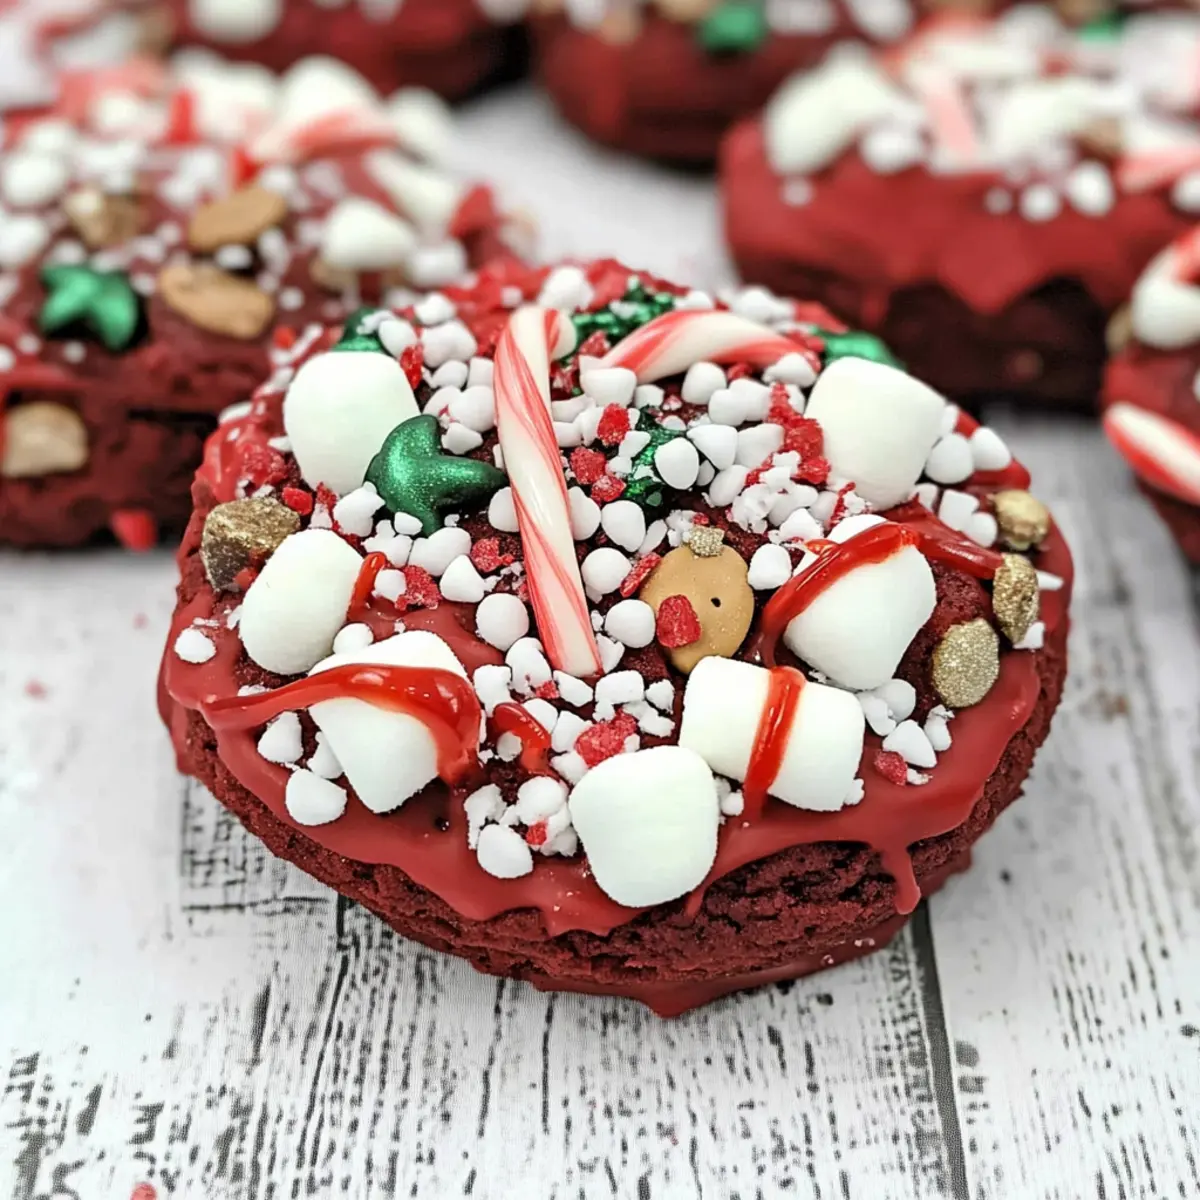
- Crushed Candy Canes – For festive decoration and flavor; crush in a sealable bag to avoid mess.
For the Icing
- Powdered Sugar – Forms a sweet icing base; can use premade icing for convenience.
- Milk – Helps achieve the desired consistency for the icing; adjust based on how thick you want it.
Optional Toppings
- Cookie Dough – Add more fun with extra dollops on top.
- White Chocolate Chips – Offer a sweeter flavor contrast.
- Holiday Sprinkles – Make your Santa’s Cookies visually festive and colorful!
Explore the merry joy of baking with Santa’s Cookies, a delightful red velvet treat that’s perfect for the holiday season!
Step‑by‑Step Instructions for Santa’s Cookies (Red Velvet Christmas Cookies)
Step 1: Preheat the Oven
Begin by preheating your oven to 410°F (210°C). This high temperature will ensure that your Santa’s Cookies achieve that delightful crispy exterior while keeping the centers gooey. As the oven warms, gather your baking sheets and line them with silicone liners, creating the perfect surface for your cookies to bake beautifully.
Step 2: Cream the Butter and Sugar
In a stand mixer, combine the softened unsalted butter and white sugar. Mix on medium speed for about 3 minutes, or until the mixture is light and fluffy. You’ll know it’s ready when the color lightens and the texture becomes creamy, inviting all the wonderful flavors of your Santa’s Cookies to blend together seamlessly.
Step 3: Incorporate Eggs and Flavorings
Now it’s time to add the large room-temperature eggs, one at a time, mixing thoroughly after each addition. Once incorporated, add in the vanilla extract and super red food coloring. Mix until all ingredients are fully combined, creating a vibrant and flavorful dough that really sets the stage for your festive treats.
Step 4: Mix the Dry Ingredients
In a separate bowl, whisk together the cake flour, all-purpose flour, unsweetened cocoa powder, baking soda, cornstarch, and kosher salt. This mixture will contribute to the texture of your Santa’s Cookies, ensuring they are soft and chewy. Gradually add this dry blend into the wet mixture, mixing until a soft, cohesive dough forms.
Step 5: Blend in Chocolate Chips
Reduce the mixer speed to low and gently fold in the semi-sweet chocolate chips. This will allow the chips to be evenly distributed throughout the dough without breaking them apart. The chocolate chips will melt slightly while baking, adding a delicious richness to your Santa’s Cookies.
Step 6: Chill the Dough
Cover the dough with plastic wrap and place it in the refrigerator to chill for approximately 20 minutes. This chilling step is important as it helps prevent the cookies from spreading too much while baking, ensuring they maintain their lovely shape and texture.
Step 7: Shape and Position the Dough
Once the dough has chilled, scoop out approximately 3.5 oz of dough for each cookie and roll them into tall balls. Place them spaced apart on the prepared baking sheets. These dough balls should look plump and inviting, ready to be flattened slightly before baking into the perfect Santa’s Cookies.
Step 8: Bake the Cookies
Gently flatten each dough ball with your fingers before baking them in the preheated oven for 8-11 minutes. You’ll know they are done when the edges firm up but the centers remain slightly gooey—this is key for that delightful texture of the Santa’s Cookies. Let them cool on the baking sheet for a few minutes to set.
Step 9: Prepare the Icing
While your cookies are cooling, prepare the icing by mixing powdered sugar and milk in a bowl until you achieve a thick consistency. This icing will provide a sweet finish to your Santa’s Cookies, enhancing both their flavor and visual appeal.
Step 10: Decorate the Cookies
Once the cookies have cooled completely, drizzle the prepared icing on top and get creative! Add cookie dough, chocolate chips, mini marshmallows, or colorful holiday sprinkles for a festive touch. Each Santa’s Cookie should look as delightful as it tastes, making them a perfect treat for any holiday gathering.
Santa’s Cookies Customization Secrets
Feel free to let your creativity shine as you explore exciting twists for these delicious cookies!
-
Butterscotch Chips: Swap chocolate chips for butterscotch for a sweet, buttery flavor that complements the red velvet beautifully.
-
Dried Fruit: Replace mini marshmallows with chopped dried cranberries or candied citrus for a chewy texture and festive zing. Mixing flavors can elevate your holiday cookies!
-
Gluten-Free Flour: Use a gluten-free flour blend in place of all-purpose and cake flour, so everyone can enjoy these festive delights. This way, no one misses out on the holiday cheer!
-
Cream Cheese Icing: For a rich twist, make a cream cheese frosting instead of traditional icing. The tangy flavor pairs wonderfully with red velvet for a tasty spin.
-
Peppermint Extract: Add a few drops of peppermint extract to the dough for a refreshing holiday flavor. It brings a delightful surprise to every bite.
-
Chopped Nuts: Mix in some finely chopped pecans or walnuts for added crunch and richness. Nuts can transform the texture and make your cookies even more satisfying.
-
Colorful Sprinkles: Top with festive holiday sprinkles after icing for an extra dash of flair. Sprinkles bring joy and invite everyone to indulge in these delightful treats!
Don’t forget to try out these personalized touches while baking your batch of Santa’s Cookies. They are sure to become family favorites! And if you’re eager for more holiday delights, consider whipping up some Crunchy Sugar Cookies or sharing the joy with Fun Christmas Candy. Happy baking and customizing!
Expert Tips for Santa’s Cookies
Perfectly Soft Center: Chill the dough: This essential step prevents spreading, ensuring a beautifully soft and gooey center in your Santa’s Cookies.
Check Freshness: Baking Soda: Always check the expiry date on your baking soda to ensure your cookies rise properly and have that delightful texture.
Icing Consistency: Thicker Icing: Adjust the milk-to-powdered sugar ratio to achieve your desired icing thickness—too much milk makes it runny, which can be less appealing.
Mixing Order: Add eggs one at a time: This helps incorporate air into the dough, leading to a lighter texture in your Santa’s Cookies.
Custom Flavoring: Experiment with extracts: Swap out the vanilla for almond extract for a unique twist that pairs wonderfully with the red velvet flavor.
What to Serve with Santa’s Cookies
Indulging in the festive spirit calls for complementary flavors and textures that elevate your baking experience to new heights.
- Glass of Milk: The classic pairing with cookies, milk’s creaminess cuts through the sweetness and enhances the flavors beautifully.
- Hot Chocolate: A warm mug of rich hot chocolate adds a cozy touch, perfect for holiday gatherings or a chilly day treat.
- Whipped Cream: Adding a dollop of whipped cream on top of your hot chocolate offers a creamy contrast that delights your taste buds.
- Fruit Salad: A refreshing mix of seasonal fruits adds a burst of freshness, balancing the sweetness of the cookies perfectly.
- Cheesecake Bars: The rich, tangy flavor of cheesecake bars creates a contrasting texture and taste that can beautifully complement your red velvet treats.
- Candy Cane Milkshake: For a fun twist, a minty milkshake echoes the festive theme with a cool flavor that pairs well with warm cookies.
- Gingerbread Cookies: Emphasize the holiday cheer by serving gingerbread alongside, creating a delightful platter of shared nostalgia.
- Vanilla Ice Cream: A scoop of vanilla ice cream melting over warm cookies offers a creamy, dreamy finish that’s hard to resist.
- Holiday Spritz Cookies: These bite-sized classics can enhance your dessert table’s variety while keeping the holiday theme intact, adding another layer of festive joy.
Make Ahead Options
These Santa’s Cookies are perfect for meal prep enthusiasts! You can prepare the cookie dough up to 24 hours in advance by following the initial steps and then chilling the dough in the refrigerator. This helps maintain their soft, chewy texture when baked. If you want even more flexibility, scoop the dough into individual balls and freeze them for up to 3 months; simply bake them straight from the freezer, adjusting baking time by a couple of minutes. The icing can also be made ahead and stored in the fridge; just give it a quick stir before decorating. When ready to impress your guests, bake the cookies and drizzle with icing for that festive touch—just as delicious as if they were made fresh!
How to Store and Freeze Santa’s Cookies
Room Temperature: Store your Santa’s Cookies in an airtight container at room temperature for up to 1-2 weeks to keep them soft and fresh.
Fridge: If you prefer a longer shelf life, refrigerate the cookies in a sealed container for up to 3 weeks without compromising flavor.
Freezer: For extended storage, freeze the cookie dough balls for up to 3 months. Thaw in the fridge before baking fresh cookies to enjoy at any time.
Reheating: To revive the cookies, simply warm them in the microwave for about 10-15 seconds, ensuring they remain gooey in the center!
Santa’s Cookies (Red Velvet Christmas Cookies) Recipe FAQs
What type of food coloring should I use for the best red color?
I recommend using super red food coloring to achieve the classic vibrant hue of these Santa’s Cookies. It’s specifically designed for food use and will give you the bold color needed. Make sure to follow the recommended quantity on the bottle for the best results!
How should I store Santa’s Cookies to keep them fresh?
Store your Santa’s Cookies in an airtight container at room temperature for 1-2 weeks. To maintain their soft texture, avoid exposing them to air or moisture. For longer storage, you can refrigerate them for up to 3 weeks. Just remember that the taste is best when they’re fresh!
Can I freeze the cookie dough for later use?
Absolutely! You can freeze the cookie dough balls for up to 3 months. To do this, scoop and shape your dough into balls, then place them on a baking sheet to freeze for about 2 hours. Once frozen solid, transfer them to a sealable freezer bag. When you’re ready to bake, simply thaw them in the fridge overnight before baking as instructed!
What can I do if my cookies come out too flat?
If your Santa’s Cookies come out too flat, it might be due to using melted butter or not chilling the dough long enough. Make sure your butter is softened, not melted, and chill the dough for at least 20 minutes before baking. This will help maintain their shape and give you that desired chewy texture!
Are these cookies safe for pets?
While Santa’s Cookies are a delightful treat for humans, they are not safe for pets, especially due to ingredients like chocolate and sugar. Always keep freshly baked goods out of reach of your furry friends to avoid any mishaps!
Can I substitute ingredients for dietary restrictions?
Certainly! If you’re looking for a gluten-free option, you can use a gluten-free flour blend instead of all-purpose flour. Additionally, you can replace some of the sugar with applesauce or your preferred sugar substitute. Don’t hesitate to get creative with these variations to suit your dietary needs!
Santa’s Cookies: Irresistible Red Velvet Christmas Delights
Ingredients
Equipment
Method
- Preheat your oven to 410°F (210°C) and line baking sheets with silicone liners.
- In a stand mixer, cream together the softened butter and sugar on medium speed for about 3 minutes.
- Add the eggs one at a time, mixing thoroughly after each, then add vanilla and food coloring.
- In a separate bowl, whisk together cake flour, all-purpose flour, cocoa, baking soda, cornstarch, and salt.
- Gradually add the dry ingredients to the wet mixture, mixing until a soft dough forms.
- Fold in chocolate chips on low speed until evenly distributed in the dough.
- Cover dough with plastic wrap and chill in the refrigerator for approximately 20 minutes.
- Scoop approximately 3.5 oz of dough for each cookie and roll into balls.
- Flatten each dough ball slightly and bake for 8-11 minutes, letting cool on the baking sheet.
- Prepare icing by mixing powdered sugar and milk until you achieve a thick consistency.
- Once cooled, decorate cookies with icing and desired toppings.