Introduction to Snowball Cake
There’s something magical about a cake that looks as delightful as it tastes. The Snowball Cake is just that—a festive treat that brings joy to any gathering. I remember the first time I made it; the kitchen filled with the sweet aroma of coconut and vanilla, instantly lifting my spirits. This recipe is perfect for impressing your loved ones or simply indulging yourself after a long day. With its fluffy layers and creamy filling, it’s a quick solution for a busy day or a showstopper for special occasions. Trust me, this cake will become a favorite!
Why You’ll Love This Snowball Cake
This Snowball Cake is a true crowd-pleaser, and for good reason! It’s incredibly easy to whip up, making it perfect for both novice bakers and seasoned pros. The layers of fluffy white cake paired with a rich coconut cream filling create a taste sensation that’s hard to resist. Plus, it looks stunning on any dessert table, ensuring you’ll impress your guests without spending hours in the kitchen. What’s not to love?
Ingredients for Snowball Cake
Gathering the right ingredients is the first step to creating your Snowball Cake masterpiece. Here’s what you’ll need:
- White cake mix: This is the base of your cake, providing a light and fluffy texture.
- Large eggs: They add moisture and richness, helping the cake rise beautifully.
- Whole milk: This keeps the cake moist and enhances the flavor.
- Vegetable oil: It contributes to a tender crumb and keeps the cake from drying out.
- Vanilla extract: A splash of this adds a warm, inviting flavor that complements the coconut.
- Cream cheese: Used in both the filling and frosting, it adds a creamy tang that balances the sweetness.
- Powdered sugar: Essential for sweetening the filling and frosting, giving them a smooth texture.
- Heavy whipping cream: This is whipped to create a light and airy filling, making each bite heavenly.
- Sweetened shredded coconut: The star of the show! It adds texture and that signature coconut flavor.
- Unsalted butter: Used in the frosting, it adds richness and helps achieve a smooth consistency.
- White chocolate chips (optional): For a touch of decadence, sprinkle these in the filling or on top.
- Powdered sugar (optional): A light dusting before serving gives the cake a snowy appearance.
For exact measurements, check the bottom of the article where you can find everything listed for easy printing. Happy baking!
How to Make Snowball Cake
Creating a Snowball Cake is a delightful journey that fills your kitchen with sweet aromas and anticipation. Follow these simple steps, and you’ll have a stunning dessert that’s sure to impress!
Step 1: Preheat and Prepare
Start by preheating your oven to 350°F. This is crucial for even baking, ensuring your cake rises perfectly. While the oven warms up, grease two 8-inch round cake pans and line the bottoms with parchment paper. This little trick prevents sticking and makes for easy removal later.
Step 2: Make the Cake Batter
In a large mixing bowl, combine the white cake mix, eggs, whole milk, vegetable oil, and vanilla extract. Beat the mixture until it’s smooth and well combined. This step is key; a smooth batter means a fluffy cake. Don’t rush it—take your time to mix thoroughly!
Step 3: Bake the Cake
Divide the batter evenly between the prepared pans. Bake for 25 to 30 minutes. To check for doneness, insert a toothpick into the center of the cakes. If it comes out clean, they’re ready! If not, give them a few more minutes. Trust me, the smell will be irresistible!
Step 4: Cool the Cakes
Once baked, let the cakes cool in the pans for about 10 minutes. Then, carefully transfer them to a wire rack to cool completely. This step is essential; if you frost the cakes while they’re warm, the frosting will melt and slide right off!
Step 5: Prepare the Coconut Cream Filling
In a separate bowl, beat the softened cream cheese, powdered sugar, and vanilla until smooth. In another bowl, whip the heavy cream until stiff peaks form. Gently fold the whipped cream and shredded coconut into the cream cheese mixture. This gentle folding keeps the filling light and airy, just like a cloud!
Step 6: Make the Frosting
For the frosting, beat together the softened cream cheese and unsalted butter until smooth. Gradually add the powdered sugar, mixing well. Then, stir in the vanilla extract and enough heavy cream to achieve a spreadable consistency. You want it creamy but not too runny—think of spreading a soft butter on warm toast!
Step 7: Assemble the Cake
Place one cake layer on a serving plate. Spread the coconut cream filling evenly over the top. Then, gently place the second cake layer on top. This layering creates a beautiful contrast of textures and flavors, making each slice a delight!
Step 8: Frost and Cover with Coconut
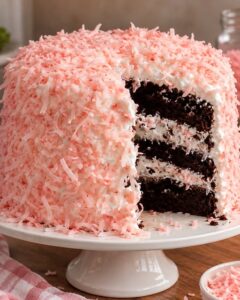
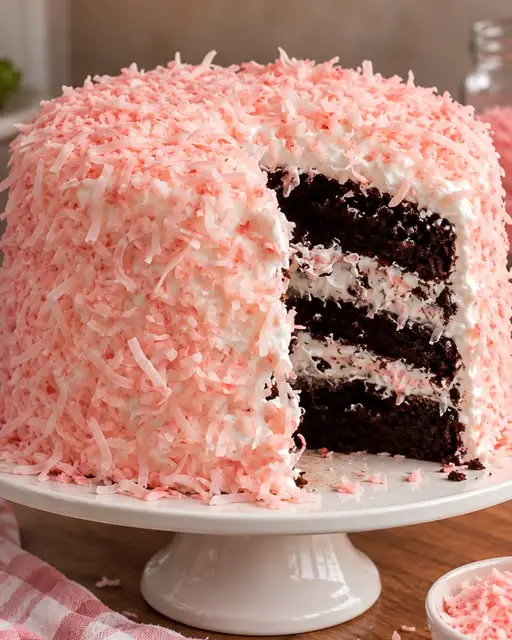
Now it’s time to frost! Use the frosting to cover the top and sides of the cake completely. Once frosted, gently press the sweetened shredded coconut onto the frosting until the entire cake is covered. This gives it that signature snowy appearance that’s simply irresistible!
Step 9: Chill Before Serving
Finally, refrigerate the cake for at least 2 hours before slicing and serving. Chilling allows the flavors to meld beautifully and makes for a firmer texture. Trust me, the wait will be worth it when you take that first bite!
Tips for Success
- Always measure your ingredients accurately for the best results.
- Let your eggs and cream cheese come to room temperature for easier mixing.
- Use a serrated knife to level your cake layers for a professional look.
- Don’t rush the cooling process; it’s crucial for frosting adherence.
- For a fun twist, add a layer of fruit preserves between the cake layers.
Equipment Needed
- Mixing bowls: A set of various sizes is ideal; you can also use any large bowl you have on hand.
- Electric mixer: A hand mixer works great, but a stand mixer can save time.
- Measuring cups and spoons: Essential for accuracy; use any standard kitchen measuring tools.
- 8-inch round cake pans: If you don’t have these, any similar-sized pans will do.
- Wire rack: Perfect for cooling; a plate can work in a pinch.
Variations of Snowball Cake
- Chocolate Snowball Cake: Swap the white cake mix for chocolate cake mix for a rich twist. Pair it with chocolate ganache for an indulgent filling.
- Fruit-Infused Filling: Add fresh fruit like strawberries or raspberries to the coconut cream filling for a burst of flavor and color.
- Gluten-Free Option: Use a gluten-free cake mix to make this dessert suitable for those with gluten sensitivities.
- Vegan Version: Substitute eggs with flaxseed meal and use plant-based cream cheese and whipped coconut cream for a vegan-friendly treat.
- Nutty Coconut Cake: Incorporate chopped nuts like almonds or pecans into the filling for added crunch and flavor.
Serving Suggestions for Snowball Cake
- Pair with a scoop of vanilla ice cream for a delightful contrast in temperature and texture.
- Serve alongside fresh berries to add a pop of color and a tart balance to the sweetness.
- Drizzle with chocolate sauce for an indulgent touch.
- Garnish with mint leaves for a fresh, vibrant presentation.
- Enjoy with a cup of coffee or tea to enhance the flavors.
FAQs about Snowball Cake
Can I make Snowball Cake ahead of time?
Absolutely! You can bake the cake layers a day in advance. Just wrap them tightly in plastic wrap and store them in the fridge. Assemble and frost the cake on the day you plan to serve it for the best texture and flavor.
What can I substitute for cream cheese?
If you’re looking for a lighter option, you can use Greek yogurt or mascarpone cheese. Both will give you a creamy texture, though the flavor will vary slightly. For a dairy-free alternative, try using a plant-based cream cheese.
How do I store leftover Snowball Cake?
Store any leftover cake in an airtight container in the refrigerator. It should stay fresh for up to 3 days. Just be sure to keep it covered to maintain its moisture and flavor!
Can I freeze Snowball Cake?
Yes, you can freeze the cake! Wrap it tightly in plastic wrap and then in aluminum foil. It can be frozen for up to 3 months. Thaw it in the fridge overnight before serving for the best results.
What’s the best way to serve Snowball Cake?
For a stunning presentation, slice the cake with a serrated knife and serve it on a beautiful platter. Pair it with fresh fruit or a scoop of ice cream for an extra special treat!
Final Thoughts
Creating a Snowball Cake is more than just baking; it’s about crafting memories. Each layer tells a story, from the fluffy cake to the creamy coconut filling. As you slice into this delightful dessert, the joy on your loved ones’ faces will be priceless. Whether it’s a birthday, holiday, or just a Tuesday, this cake brings a touch of celebration to any occasion. So, roll up your sleeves, embrace the process, and let the sweet aroma fill your kitchen. Trust me, once you share this cake, it will become a cherished tradition in your home!
PrintSnowball Cake: Discover the Delicious Recipe Today!
- Total Time: 2 hours 30 minutes
- Yield: 12 servings
- Diet: Vegetarian
Description
A delightful and festive Snowball Cake, perfect for any celebration, featuring layers of white cake, coconut cream filling, and a fluffy frosting.
Ingredients
- 1 box (15.25 oz) white cake mix
- 3 large eggs
- 1 cup whole milk
- ½ cup vegetable oil
- 1 tsp vanilla extract
- 8 oz cream cheese, softened
- ½ cup powdered sugar
- 1 tsp vanilla extract
- 1 cup heavy whipping cream
- 1 cup sweetened shredded coconut
- 8 oz cream cheese, softened
- ½ cup unsalted butter, softened
- 3 cups powdered sugar
- 1 tsp vanilla extract
- 2–3 tbsp heavy cream or milk
- 2 cups sweetened shredded coconut
- ½ cup white chocolate chips, optional
- Powdered sugar, optional
Instructions
- Preheat the oven to 350°F. Grease two 8-inch round cake pans and line the bottoms with parchment paper.
- Make the cake batter. Combine the cake mix, eggs, milk, vegetable oil, and vanilla. Beat until smooth.
- Divide the batter evenly between the prepared pans. Bake for 25–30 minutes, or until a toothpick inserted in the center comes out clean.
- Let the cakes cool in the pans for 10 minutes, then transfer them to a wire rack to cool completely.
- Make the filling. Beat the cream cheese, powdered sugar, and vanilla until smooth. In a separate bowl, whip the heavy cream until stiff peaks form. Gently fold the whipped cream and shredded coconut into the cream cheese mixture.
- Make the frosting. Beat the cream cheese and butter until smooth. Gradually add the powdered sugar, then mix in the vanilla and enough cream to create a smooth, spreadable frosting.
- Assemble the cake. Place one cake layer on a serving plate. Spread the coconut cream filling evenly over the top. Place the second cake layer on top.
- Frost the top and sides of the cake completely.
- Cover with coconut. Gently press the shredded coconut onto the frosting until the entire cake is covered.
- Refrigerate for at least 2 hours before slicing and serving.
Notes
- For an extra snowy appearance, lightly dust the finished cake with powdered sugar just before serving.
- Prep Time: 30 minutes
- Cook Time: 30 minutes
- Category: Dessert
- Method: Baking
- Cuisine: American
Nutrition
- Serving Size: 1 slice
- Calories: 350
- Sugar: 25g
- Sodium: 200mg
- Fat: 18g
- Saturated Fat: 10g
- Unsaturated Fat: 5g
- Trans Fat: 0g
- Carbohydrates: 45g
- Fiber: 1g
- Protein: 4g
- Cholesterol: 60mg