Introduction to Strawberry Crunch Cheesecake Tacos
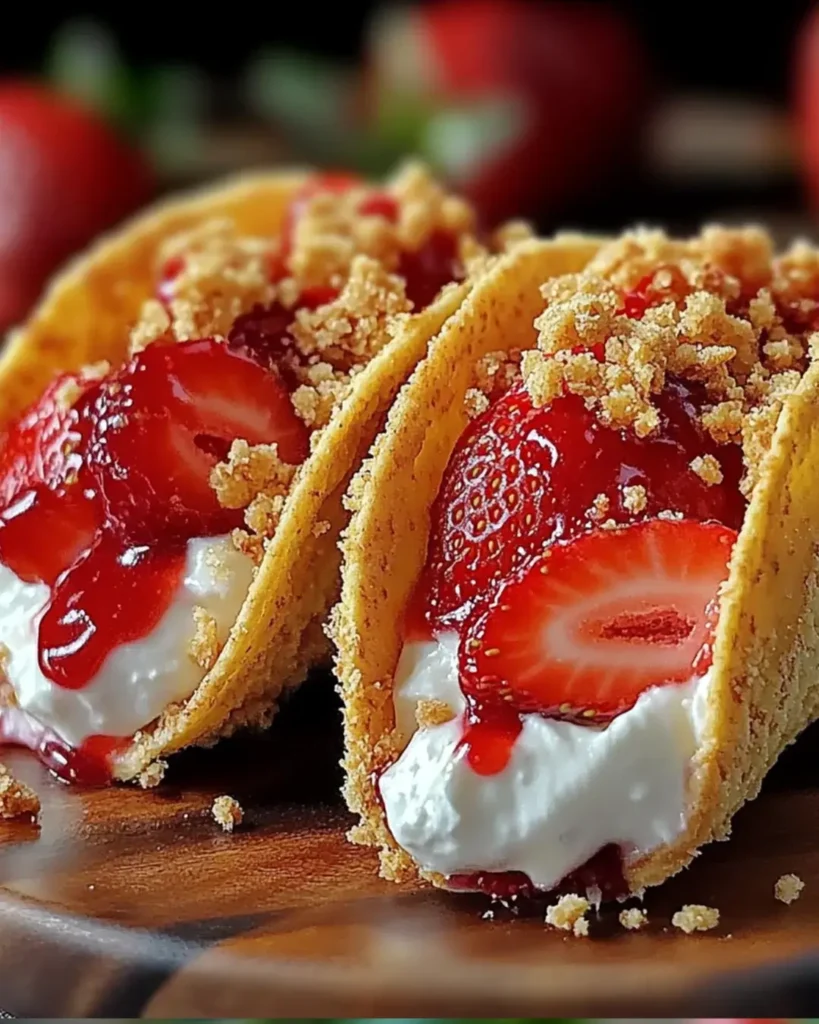
There’s something magical about dessert that brings people together, and these Strawberry Crunch Cheesecake Tacos are no exception. Picture a warm evening, laughter filling the air, and a plate of these delightful treats at the center of it all. This recipe is perfect for those busy days when you want to impress your loved ones without spending hours in the kitchen. With a creamy cheesecake filling nestled in a crunchy taco shell, it’s a fun twist on traditional desserts that will have everyone asking for seconds. Let’s dive into this sweet adventure!
Why You’ll Love This Strawberry Crunch Cheesecake Tacos
These Strawberry Crunch Cheesecake Tacos are a game-changer for dessert lovers. They’re incredibly easy to whip up, making them perfect for any occasion. The combination of creamy cheesecake and fresh strawberries in a crunchy shell is simply irresistible. Plus, they’re quick to prepare, so you can spend less time in the kitchen and more time enjoying the company of friends and family. Trust me, these tacos will steal the show!
Ingredients for Strawberry Crunch Cheesecake Tacos
Gathering the right ingredients is the first step to creating these delightful Strawberry Crunch Cheesecake Tacos. Here’s what you’ll need:
- Crushed graham crackers: These form the base of your taco shell, adding a sweet, crunchy texture.
- Unsalted butter: Melted butter binds the graham cracker crumbs together, giving the shells their structure.
- Granulated sugar: A touch of sweetness enhances the flavor of the taco shells.
- Cream cheese: The star of the filling, it provides that rich, creamy texture we all love.
- Powdered sugar: This sweetens the cream cheese mixture without adding graininess.
- Vanilla extract: A splash of vanilla elevates the flavor profile, making it more aromatic.
- Heavy whipping cream: Whipped to perfection, it lightens the filling and adds a luscious mouthfeel.
- Fresh strawberries: Diced strawberries bring a burst of freshness and color to your tacos.
- Strawberry syrup: Drizzled on top, it adds an extra layer of sweetness and a beautiful finish.
- Mini taco shells: These are the perfect vessel for your cheesecake filling, making each bite a treat.
For those looking to mix things up, consider using blueberries or raspberries instead of strawberries for a different flavor. You can also swap the strawberry syrup for chocolate syrup if you’re in the mood for a chocolate cheesecake taco. The exact quantities for each ingredient are available at the bottom of the article for easy printing!
How to Make Strawberry Crunch Cheesecake Tacos
Creating these Strawberry Crunch Cheesecake Tacos is a delightful journey that’s easier than you might think. Follow these simple steps, and you’ll have a dessert that’s sure to impress!
Step 1: Prepare the Taco Shells
Start by preheating your oven to 350°F. In a medium bowl, mix together the crushed graham crackers, melted butter, and granulated sugar until everything is well combined. This mixture will form the base of your taco shells.
Next, press the mixture into the bottom and up the sides of a taco shell mold or a muffin tin. This is where the magic happens! Bake for 5-7 minutes until they turn golden brown. Once they’re out of the oven, let them cool completely. Cooling is crucial; it helps the shells hold their shape and adds that perfect crunch.
Step 2: Make the Cheesecake Filling
While the taco shells are cooling, it’s time to whip up the cheesecake filling. In a large mixing bowl, beat the softened cream cheese, powdered sugar, and vanilla extract until the mixture is smooth and creamy. This is where the rich flavor starts to shine!
In another bowl, whip the heavy cream until stiff peaks form. Gently fold the whipped cream into the cream cheese mixture. This step is key for achieving that light, airy texture that makes these tacos so irresistible. Be careful not to overmix; you want to keep that fluffiness!
Step 3: Assemble the Tacos
Once your taco shells are cool and your filling is ready, it’s time to assemble! Carefully fill each taco shell with the cheesecake mixture. Don’t be shy—load them up!
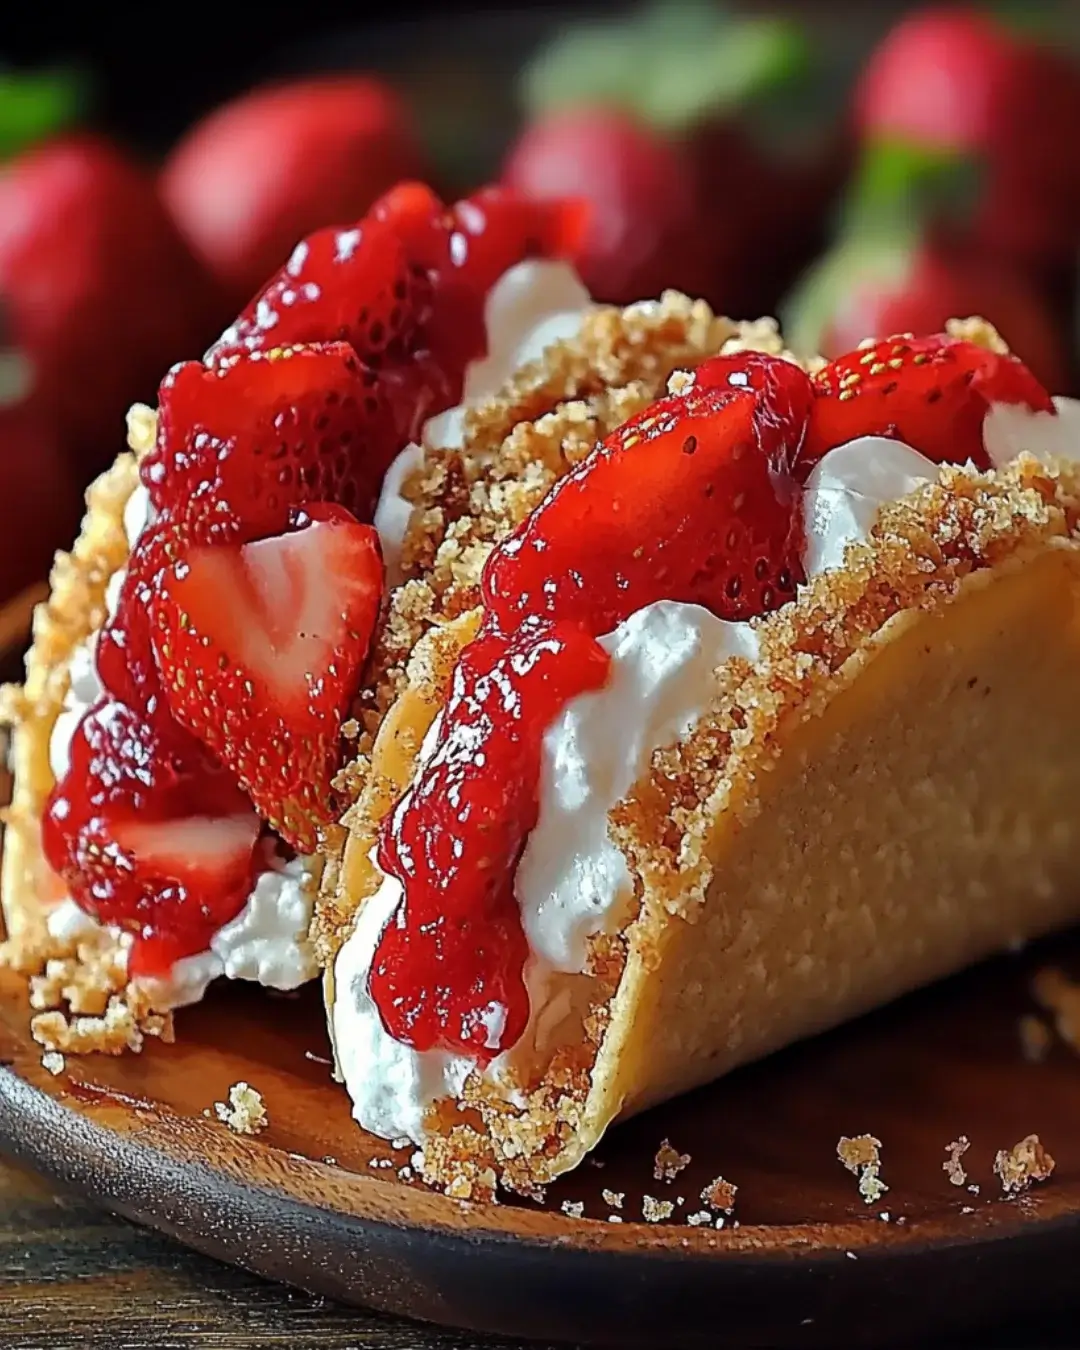
Top each filled taco with diced strawberries and drizzle with strawberry syrup. This adds a pop of color and a burst of flavor that complements the creamy filling perfectly. Each bite will be a delightful surprise!
Step 4: Chill and Serve
After assembling, it’s important to chill the filled tacos in the refrigerator for at least 30 minutes. This allows the flavors to meld together beautifully. Plus, it makes for a refreshing treat!
When you’re ready to serve, arrange the tacos on a platter. The vibrant colors and textures will make your dessert table shine. Enjoy the smiles as everyone digs in!
Tips for Success
- Make sure your cream cheese is softened for easy mixing.
- Don’t skip the chilling step; it enhances the flavors and texture.
- Use a piping bag for filling the taco shells for a neat presentation.
- Experiment with different toppings like whipped cream or nuts for added crunch.
- Keep an eye on the taco shells while baking to avoid burning.
Equipment Needed
- Taco shell mold or muffin tin: If you don’t have a mold, use a regular baking sheet.
- Mixing bowls: A large bowl for the filling and a medium bowl for the crust.
- Electric mixer: A hand mixer works just as well if you don’t have a stand mixer.
- Whisk: For whipping the cream, a whisk can do the job too.
Variations
- For a tropical twist, try adding diced mango or pineapple to the filling.
- Substitute the cream cheese with Greek yogurt for a lighter version.
- Use gluten-free graham crackers to make this dessert gluten-free.
- For a chocolate lover’s delight, mix cocoa powder into the cheesecake filling.
- Top with crushed nuts or granola for an extra crunch and flavor contrast.
Serving Suggestions
- Pair with a scoop of vanilla ice cream for a delightful contrast in temperature.
- Serve alongside fresh fruit salad for a refreshing side.
- Drizzle extra strawberry syrup on the plate for a beautiful presentation.
- Complement with a chilled glass of sparkling lemonade.
FAQs about Strawberry Crunch Cheesecake Tacos
Can I make Strawberry Crunch Cheesecake Tacos ahead of time?
Absolutely! You can prepare the taco shells and cheesecake filling a day in advance. Just assemble them right before serving to keep the shells crunchy.
What can I use instead of strawberries?
If strawberries aren’t your thing, feel free to swap them out for other fruits like blueberries, raspberries, or even diced peaches. Each fruit brings its own unique flavor!
How do I store leftover tacos?
Store any leftover Strawberry Crunch Cheesecake Tacos in an airtight container in the refrigerator. They’re best enjoyed within a couple of days for optimal freshness.
Can I freeze these tacos?
While the taco shells can be frozen, the filled tacos are best enjoyed fresh. If you want to freeze, consider freezing the shells separately and filling them later.
What’s the best way to serve these tacos?
Serve them chilled on a platter, garnished with extra strawberries and a drizzle of syrup. A sprinkle of powdered sugar on top adds a nice touch!
Final Thoughts
Creating Strawberry Crunch Cheesecake Tacos is more than just making a dessert; it’s about crafting moments of joy. Each bite is a delightful blend of creamy, crunchy, and fruity goodness that brings smiles to the table. Whether you’re celebrating a special occasion or simply treating yourself after a long day, these tacos are sure to impress. They’re easy to make, fun to eat, and perfect for sharing with family and friends. So, roll up your sleeves, gather your ingredients, and let the sweet adventure begin. Trust me, you’ll be glad you did!
Strawberry Crunch Cheesecake Tacos Delightful Recipe Guide
Ingredients
Method
- Preheat your oven to 350°F. In a medium bowl, combine crushed graham crackers, melted butter, and granulated sugar. Mix until well combined.
- Press the mixture into the bottom and up the sides of a taco shell mold or a muffin tin to form mini taco shells. Bake for 5-7 minutes until golden brown. Remove from the oven and let cool completely.
- In a large mixing bowl, beat the softened cream cheese, powdered sugar, and vanilla extract until smooth and creamy.
- In another bowl, whip the heavy cream until stiff peaks form. Gently fold the whipped cream into the cream cheese mixture until fully combined.
- Once the taco shells are cool, fill each shell with the cheesecake mixture. Top with diced strawberries and drizzle with strawberry syrup.
- Chill the filled tacos in the refrigerator for at least 30 minutes before serving to allow the flavors to meld.
Nutrition
Notes
- For a twist, try using different fruits like blueberries or raspberries instead of strawberries.
- You can also substitute the strawberry syrup with chocolate syrup for a chocolate cheesecake taco.