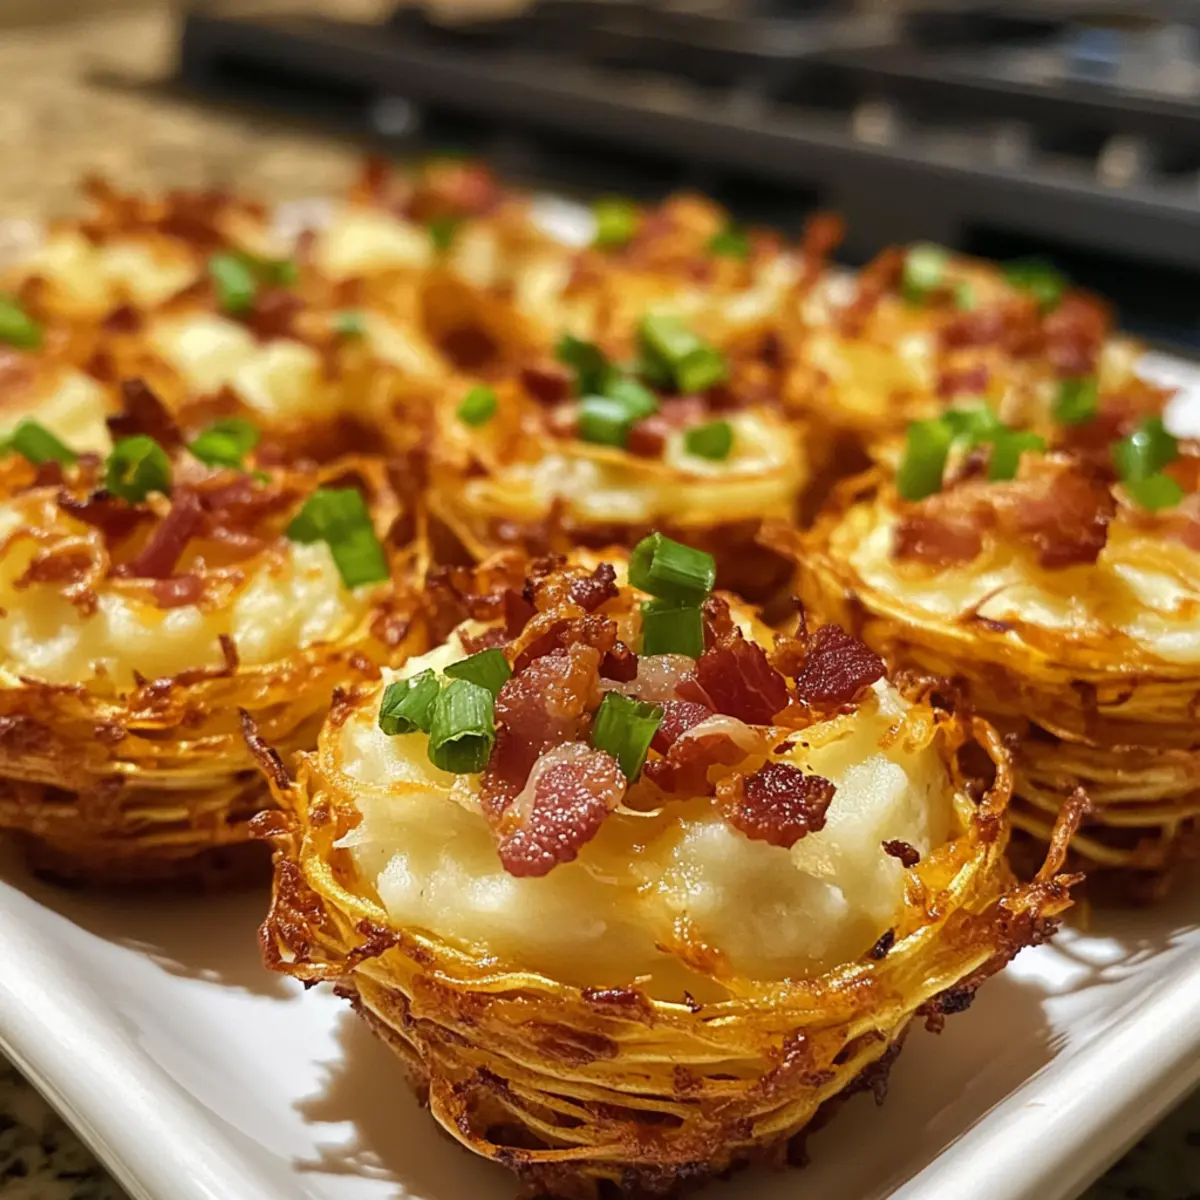
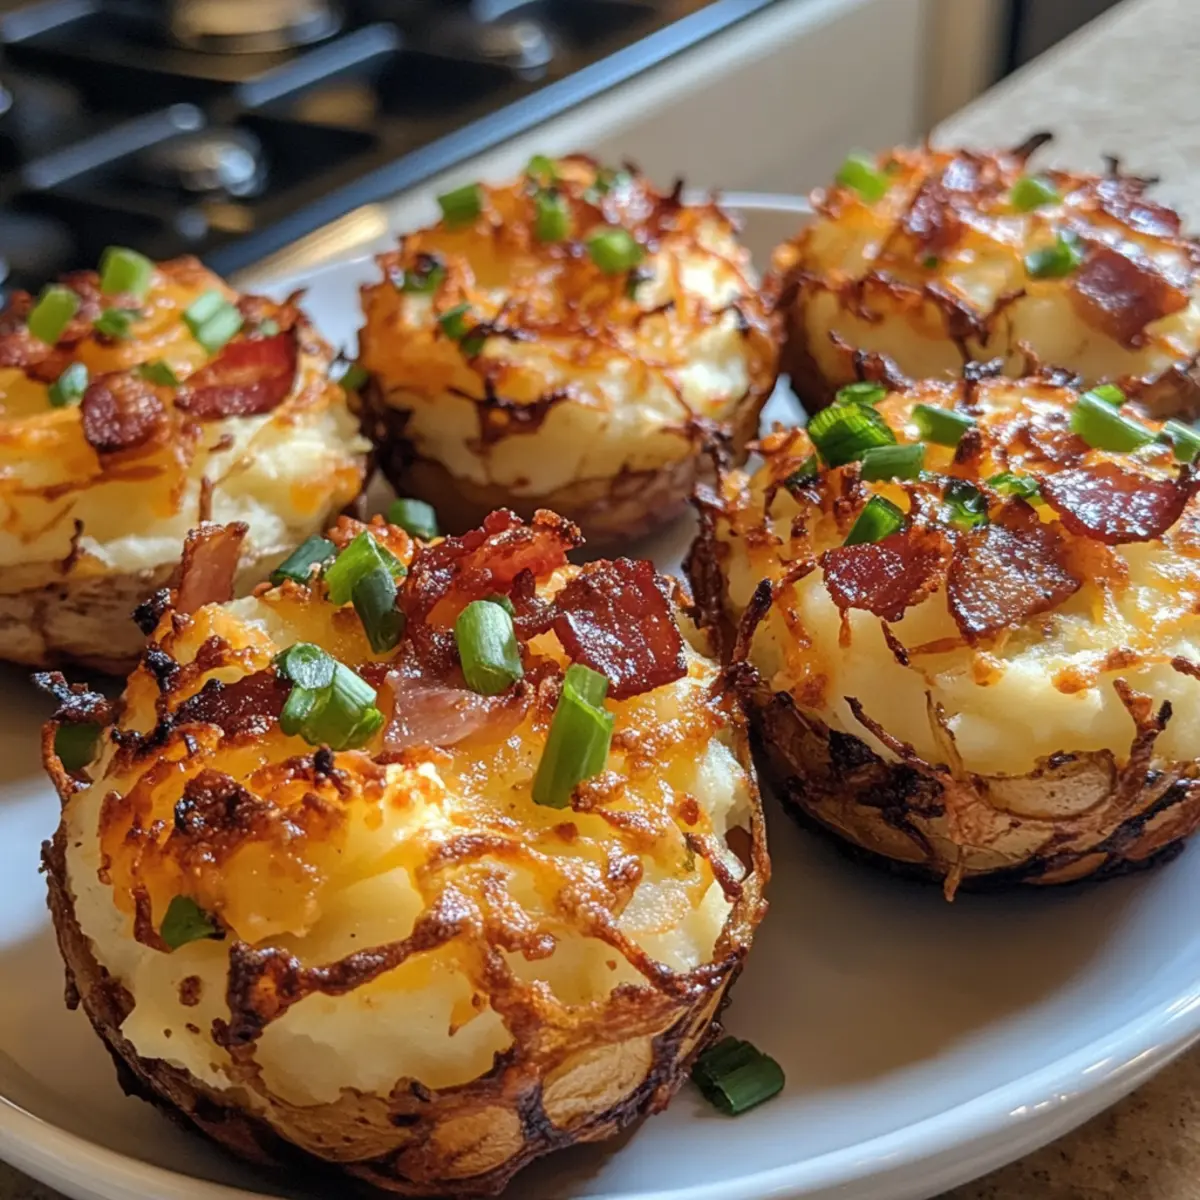
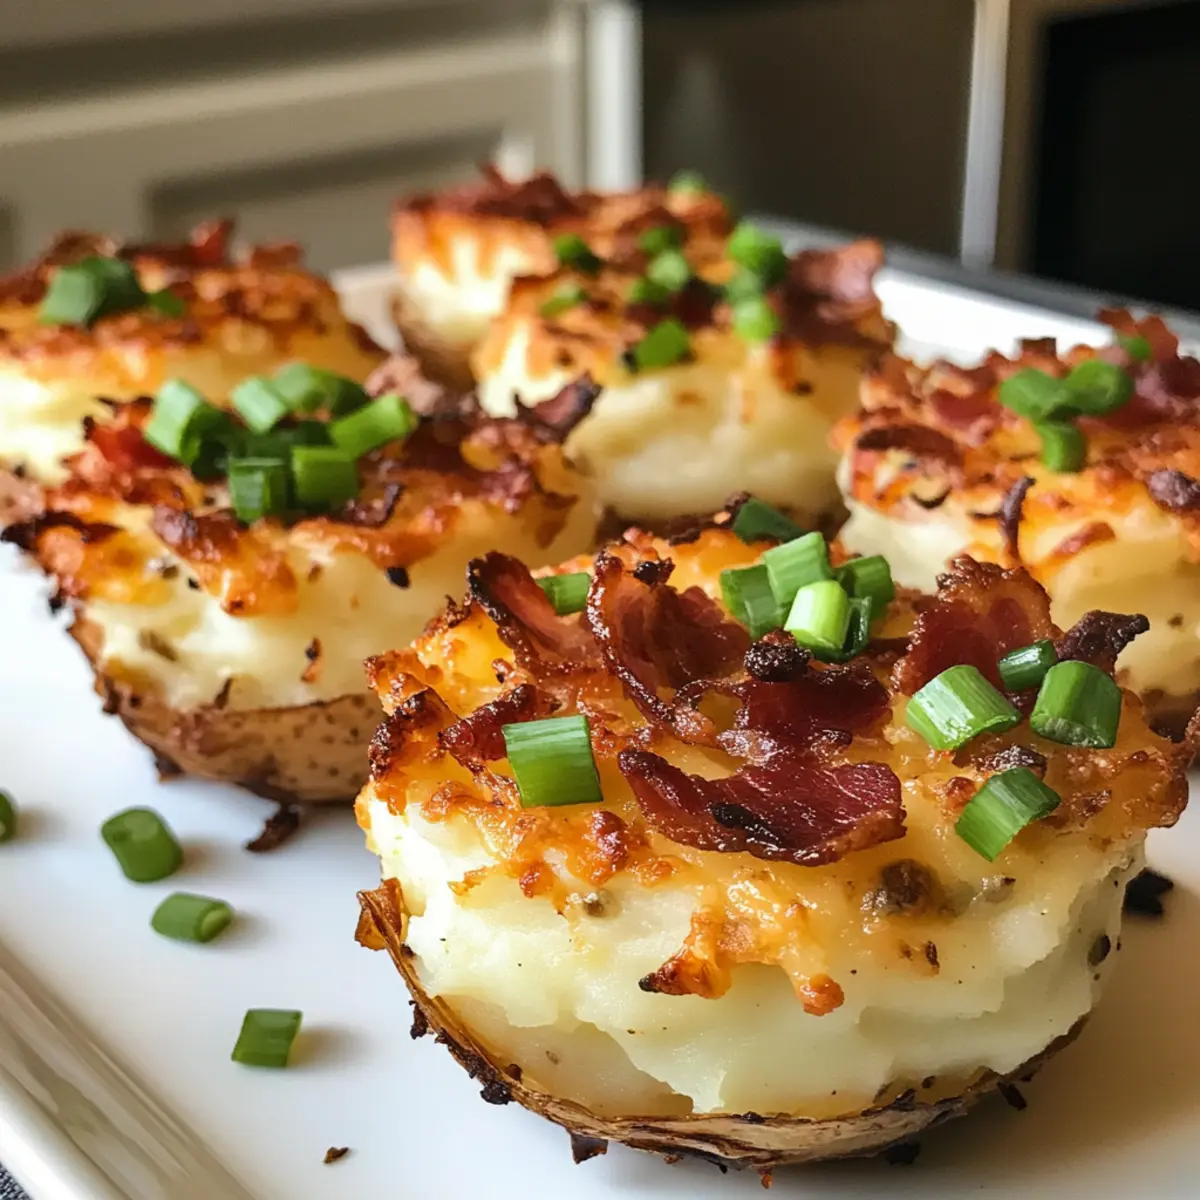
As I stood in my kitchen, the comforting aroma of buttery potatoes filled the air, instantly transporting me back to family gatherings and cozy winter nights. It’s in those moments that I realized how much I adore these Stuffed Mashed Potato Nests – a perfect blend of comfort food that warms not just the belly, but the heart too. These crispy, golden nests, brimming with creamy mashed potatoes, savory cheese, and crunchy bacon, are undeniably crowd-pleasers that can turn any ordinary dinner into a memorable feast. Plus, they’re make-ahead and freezer-friendly, so you can enjoy this cozy delight whenever the craving strikes! Are you ready to transform your potatoes into a nest of happiness?

Why Are Stuffed Mashed Potato Nests Irresistible?
Comforting Flavor: Each bite combines creamy mashed potatoes with a savory filling, making them the ultimate comfort food. Versatile Delight: You can easily swap ingredients, using sautéed veggies instead of bacon for a vegetarian treat. Make-Ahead Magic: Prep your nests ahead of time and store them in the fridge or freezer for easy meals throughout the week. Crowd-Pleaser: Enjoy them at family dinners or potlucks—these little nests are sure to impress everyone! If you love cozy recipes, you won’t want to miss my Goat Cheese Stuffed Peppers or Ground Beef Potatoes that also highlight comfort food at its best.
Stuffed Mashed Potato Nests Ingredients
For the Nests
• Potatoes – Use starchy varieties like Russet for a fluffy mash that holds shape.
• Butter – This adds creamy richness to the potatoes; feel free to substitute with olive oil for a lighter option.
• Milk or Cream – Ensures the potatoes are smooth and creamy; almond milk works wonderfully for a dairy-free choice.
• Salt and Pepper – Essential for seasoning; adjust to your personal taste.
For the Filling
• Cheese – Cheddar or mozzarella provides a delightful creaminess; you can swap with dairy-free cheese if desired.
• Bacon – Adds a savory, smoky flavor; or replace it with sautéed mushrooms for a vegetarian alternative.
• Green Onions – These add a pop of freshness; regular onions can step in if needed.
Discover these deliciously comforting Stuffed Mashed Potato Nests as you elevate your meal with delightful flavor contrasts!
Step‑by‑Step Instructions for Stuffed Mashed Potato Nests
Step 1: Prepare Potatoes
Begin by peeling and cutting the potatoes into chunks, then place them in a large pot of salted water. Bring the water to a boil and cook the potatoes for about 15-20 minutes, or until they are fork-tender. Once cooked, drain the potatoes and let them cool slightly before mashing.
Step 2: Make Mashed Potatoes
In a mixing bowl, combine the drained potatoes with butter and milk. Use a potato masher or mixer to blend until smooth and creamy. Season with salt and pepper to taste until you achieve a flavorful, comforting consistency that serves as the base for your Stuffed Mashed Potato Nests.
Step 3: Preheat Oven
While you prepare the mashed potatoes, preheat your oven to 400°F (200°C). This high temperature is essential for creating crispy nests. Ensure your oven is fully heated before baking the nests to achieve that delightful golden brown color on the outside.
Step 4: Form Nests
Grease a standard muffin tin generously with cooking spray or butter to prevent sticking. Take a portion of the mashed potato mixture and firmly press it into the muffin cups, creating nests with a well in the center. The nests should be shaped to hold the flavorful filling without crumbling.
Step 5: Add Filling
In a separate bowl, combine cooked bacon, cheese, and green onions. Spoon this delicious mixture generously into the wells of your potato nests, ensuring each one is packed with flavors that will complement the creamy mashed potatoes.
Step 6: Bake
Place the muffin tin in the preheated oven and bake for 25-30 minutes, or until the tops are golden and the edges are crispy. The aroma of the Stuffed Mashed Potato Nests baking will fill your kitchen, announcing that comfort food is on its way.
Step 7: Cool & Serve
Once baked to perfection, remove the nests from the oven and let them cool in the pan for about 5 minutes. This cooling period will help the nests firm up, making it easier to remove them from the tin. Gently lift them out and serve warm, relishing the contrast between the crispy exterior and creamy, savory filling inside.
What to Serve with Stuffed Mashed Potato Nests
Elevate your dining experience with delightful pairings that complement the cozy flavors of your nests, perfect for any occasion.
-
Crispy Green Salad: Fresh greens with a zesty vinaigrette bring a refreshing crunch, balancing the creaminess of the nests. A vibrant salad enhances the meal’s visual appeal and freshness!
-
Roasted Brussels Sprouts: These caramelized bites add a nutty richness, harmonizing beautifully with the savory filling. Their slight bitterness will perfectly contrast with the smooth, creamy potatoes.
-
Garlic Herb Bread: Soft and fragrant, this bread adds an aromatic touch, perfect for wiping up any leftover fillings. It’s a classic comfort food companion that’s sure to please.
-
Homemade Tomato Soup: A warm, soothing bowl provides lovely acidity, cutting through the richness of the nests. Dipping the potatoes into soup creates a cozy, delightful experience.
-
Sweet Corn on the Cob: The natural sweetness and crunch of corn elevate your meal while evoking childhood memories of summer barbecues. It pairs wonderfully with the savory nests for a well-rounded dish.
-
Sparkling Lemonade: A refreshing drink, tangy and bubbly, that complements the hearty flavors without overpowering them. Perfect for a family gathering or a cozy night in!
-
Chocolate Lava Cake: End your meal on a sweet note with this indulgent dessert. The rich, warm center contrasts beautifully with the fluffy nests, making it a delightful finale.
-
Herb-Infused Olive Oil: Drizzle this over your nests before serving for an extra layer of flavor. The fresh herbs will brighten the overall taste, adding a gourmet touch to your dish.
Stuffed Mashed Potato Nests Variations
Feel free to get creative with these cozy nests and make them your own delicious masterpiece!
- Dairy-Free: Substitute cheese with dairy-free cheese and use almond milk for creamy mashed potatoes. It’s a comforting option for those avoiding dairy.
- Vegetarian: Replace bacon with sautéed mushrooms or spinach, adding a savory depth that complements the creamy texture beautifully.
- Flavor Boost: Add spices such as garlic powder or smoked paprika to the mash for an extra flavor kick. You’ll be delighted by the savory warmth each bite brings!
- Cheese Variety: Experiment with different cheeses like feta for a tangy twist or pepper jack for a touch of heat. It’s the perfect way to tailor the taste to your liking!
- Nutty Flavor: Incorporate toasted pine nuts or sunflower seeds into the filling for added crunch and nutty richness. This will elevate the texture of your nests perfectly.
- Herb Infusion: Stir in fresh herbs like chives or parsley into the mashed potatoes. Not only will this enhance the flavor, but it’ll add a lovely pop of color too!
- Spicy Kick: For those who enjoy a little heat, add diced jalapeños or a splash of hot sauce to the filling. It’s a fun and fiery twist on a classic comfort dish!
- Sweet Surprise: For a unique sweet-savory contrast, mix in caramelized onions or a hint of maple syrup into the filling. It’s a delightful way to surprise your taste buds!
Embrace the possibilities with these Stuffed Mashed Potato Nests and enjoy experimenting with flavors that make them uniquely yours! For more cozy recipes, check out my Ground Beef Potatoes for another comforting classic you won’t want to miss!
Expert Tips for Stuffed Mashed Potato Nests
- Choose the Right Potatoes: Using starchy varieties like Russets will ensure your mashed potatoes are fluffy and can hold their shape well in nests.
- Don’t Overmix: Keep the mashed potatoes light and fluffy by avoiding overmixing. This will help retain a beautifully creamy texture.
- Press Firmly: When forming the nests, press the potato mixture firmly into the muffin tin to prevent them from collapsing during baking.
- Cooling is Key: Allow the nests to cool slightly in the pan before removing to avoid breakage and ensure they maintain their shape.
- Customize Fillings: Feel free to experiment with different cheeses or vegetables in your Stuffed Mashed Potato Nests for a unique twist that suits your taste.
How to Store and Freeze Stuffed Mashed Potato Nests
Room Temperature: Store your baked nests at room temperature for up to 2 hours after cooking. After that, refrigerate to maintain freshness.
Fridge: Keep any leftovers in an airtight container in the fridge for up to 3 days. Reheat in the oven or microwave until heated through for best results.
Freezer: Freeze completely cooled nests in a single layer on a baking sheet, then transfer to a freezer bag for up to 2 months. Reheat from frozen in the oven until warmed and crispy.
Reheating: To enjoy your Stuffed Mashed Potato Nests, bake from frozen at 375°F (190°C) for about 20-25 minutes, or until hot throughout and crispy.
Make Ahead Options
These Stuffed Mashed Potato Nests are perfect for meal prep enthusiasts! You can prepare the mashed potato mixture up to 24 hours in advance by storing it covered in the refrigerator, which keeps the potatoes creamy and prevents browning. Additionally, you can form the nests and add the filling, then refrigerate them for up to 3 days; just cover the muffin tin tightly with plastic wrap. When you’re ready to serve, simply bake the nests directly from the fridge, adding an extra few minutes to the baking time if they are colder. This way, you’ll have restaurant-quality results with minimal effort, saving you precious time on busy weeknights!
Stuffed Mashed Potato Nests Recipe FAQs
What type of potatoes should I use for the nests?
Absolutely! For the best results, choose starchy varieties like Russet potatoes. These will give you a fluffy mash that holds its shape well and creates delightful nests.
How do I store leftover Stuffed Mashed Potato Nests?
Very simply! After they’ve cooled, place any leftovers in an airtight container and refrigerate for up to 3 days. This way, you can enjoy them again by reheating in the oven or microwave until warmed throughout.
Can I freeze Stuffed Mashed Potato Nests?
Yes, you can! First, let them cool completely. Then, place them in a single layer on a baking sheet to freeze for about 1-2 hours. Once frozen, transfer them to a freezer-safe bag or container, where they’ll keep well for up to 2 months. When ready to enjoy, bake from frozen at 375°F (190°C) for about 20-25 minutes until heated through and crispy.
What if my mashed potatoes are too gluey?
Oh no! If you find your mashed potatoes are gluey, this usually means they were over-mixed. To avoid this, use a gentle hand with your potato masher or mixer, only blending until smooth. If it happens, try adding a splash more milk or cream to help soften the texture.
Are there any dietary considerations for Stuffed Mashed Potato Nests?
Definitely! If you’re looking to make these vegetarian, simply replace bacon with sautéed mushrooms or your favorite veggies. Also, for dairy-sensitive individuals, you can substitute the cheese with a dairy-free alternative and use almond milk or other non-dairy options for the mash. It’s all about making this comforting dish work for everyone!
Stuffed Mashed Potato Nests for Cozy Comfort Food Nights
Ingredients
Equipment
Method
- Peel and cut the potatoes into chunks, place them in a large pot of salted water, bring to a boil and cook for 15-20 minutes until fork-tender.
- In a mixing bowl, combine drained potatoes with butter and milk. Mash until smooth and creamy, then season with salt and pepper.
- Preheat oven to 400°F (200°C).
- Grease a muffin tin with cooking spray or butter, press potato mixture into the muffin cups to form nests.
- In a separate bowl, combine bacon, cheese, and green onions, and spoon mixture into wells of potato nests.
- Bake for 25-30 minutes until tops are golden and edges are crispy.
- Let cool in the pan for about 5 minutes before serving warm.