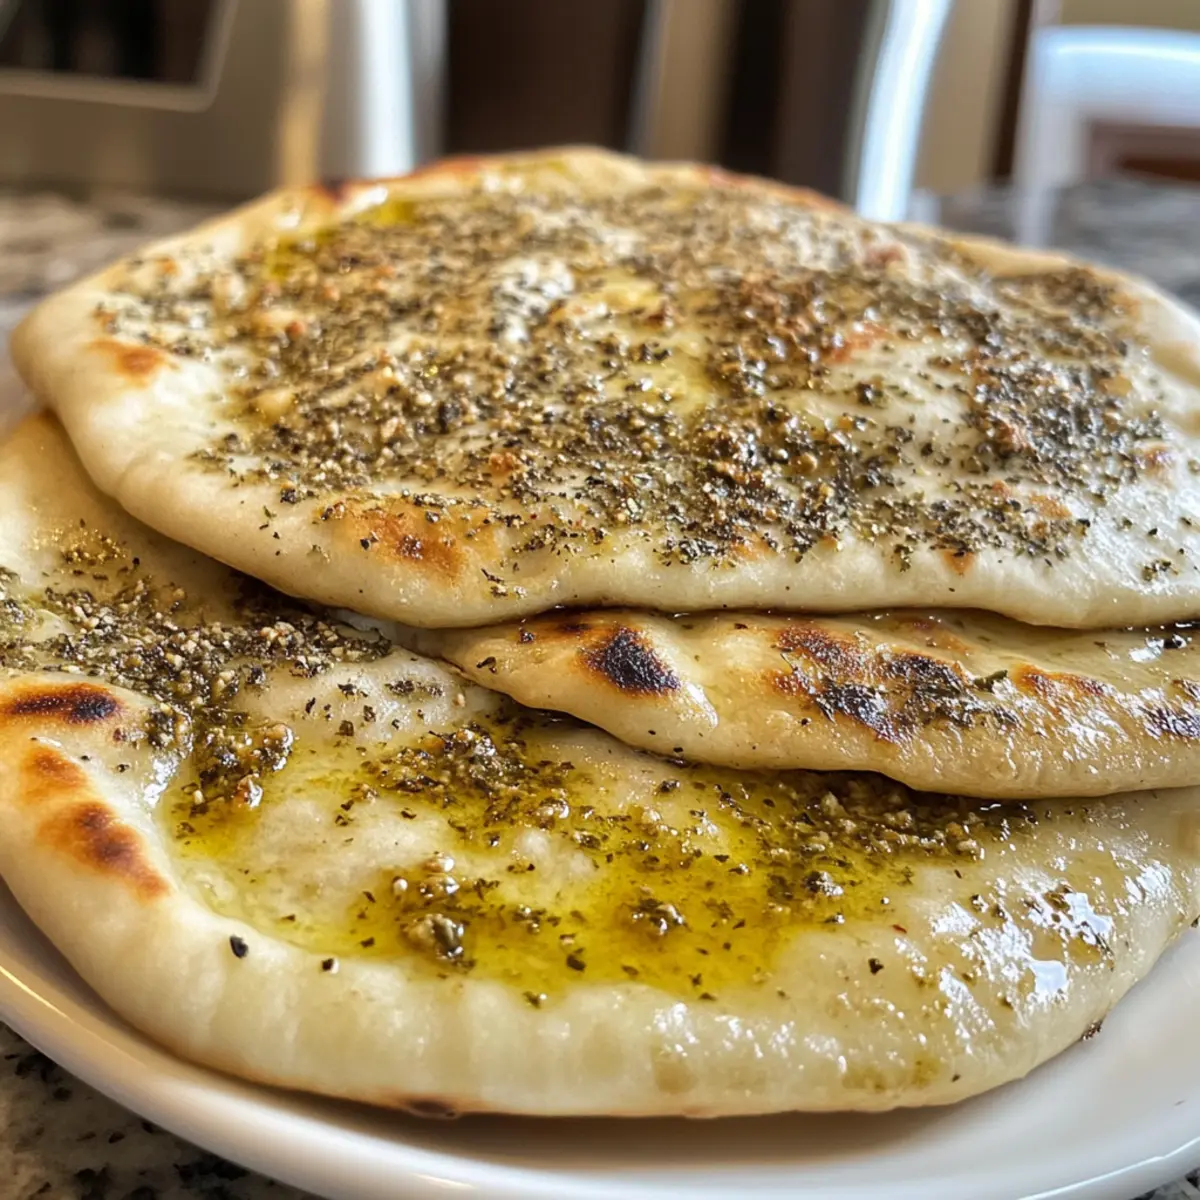
The rich aroma wafting from the oven whisked me back to my time in a bustling market in Beirut, where the air was thick with spices and laughter over shared meals. Today, I’m thrilled to share my version of Za’atar Flatbread with Olive Oil, also known as Manakish—an irresistible Middle Eastern favorite. This delightful flatbread is not only quick to prepare but also incredibly customizable, allowing you to top it with anything from melty cheese to savory meats. With its tender, chewy texture and golden crust, it’s perfect for breakfast, brunch, or as a satisfying snack. Plus, it’s a fantastic way to bring a taste of the Middle East into your kitchen! Are you ready to create your own aromatic masterpiece?
Why is Za’atar Flatbread Essential?
Aromatic Experience: The enchanting scent of za’atar and olive oil fills your kitchen, transporting you straight to a Middle Eastern marketplace, creating an unforgettable experience.
Versatile Toppings: Customizable with cheeses, meats, or fresh herbs, this flatbread meets everyone’s craving, making it a fantastic choice for family meals or gatherings.
Easy-to-Make: Simple preparation means you can whip up a delicious snack in no time, perfect for those busy days when you crave homemade goodness.
Perfect for Sharing: Manakish encourages sharing, making your dining table feel more inviting and communal; pair it with fresh vegetables or a dollop of labneh for an incredible experience.
Healthy Indulgence: With wholesome ingredients, you can enjoy this tasty treat guilt-free. Discover more delightful recipes, like our Healthy Stovetop Protein or Beef Rice Skillet, that combine flavor with nutrition!
Za’atar Flatbread with Olive Oil Ingredients
For the Dough
• All-Purpose Flour – Provides structure for the dough and can be mixed with whole wheat flour for added nuttiness.
• Sugar – Activates yeast and adds a hint of sweetness for a perfect balance.
• Salt – Essential for enhancing the overall flavor of your Za’atar Flatbread.
• Instant Yeast – This leavening agent allows the dough to rise beautifully and can be swapped with active dry yeast if needed.
• Warm Water – Hydrates the flour to create a smooth dough while activating the yeast.
• Warm Milk – Enriches the dough, adding tenderness and a subtle flavor.
• Olive Oil – Infuses richness within the dough, making every bite delectable.
For the Topping
• Za’atar Spice – The key flavor component that gives your flatbread its unique, aromatic twist.
• Extra Virgin Olive Oil – Used to mix with za’atar, amplifying the depth of flavor in your topping.
Get your ingredients ready and let’s get baking this delightful Za’atar Flatbread with Olive Oil! Whether for a cozy breakfast or an afternoon snack, this recipe is sure to impress.
Step-by-Step Instructions for Za’atar Flatbread with Olive Oil
Step 1: Prepare the Dough
In a small bowl, mix ¾ cup warm water, ¼ cup warm milk, 1 teaspoon sugar, and 2 teaspoons instant yeast. Let this sit for about 5-10 minutes until it froths. In a large mixing bowl, combine 3 cups all-purpose flour, 1 teaspoon salt, and 2 tablespoons olive oil. Gradually pour in the yeast mixture, stirring until a dough forms. Knead for 8-10 minutes on a floured surface until smooth and elastic.
Step 2: Let Dough Rise
Place the kneaded dough into a lightly oiled bowl, covering it with a damp cloth. Let it rise in a warm, draft-free area for about 1 hour, or until it has doubled in size. The dough should feel airy and soft to the touch. This step is crucial for creating that delightful texture in your Za’atar Flatbread with Olive Oil.
Step 3: Make Za’atar Topping
While the dough is rising, prepare the za’atar topping. In a small bowl, mix together ¼ cup of za’atar spice with 3 tablespoons of extra virgin olive oil until it reaches a thick, spreadable consistency. Allow the mixture to sit for 15-20 minutes to let the flavors meld together, enhancing the aromatic profile that will soon crown your flatbread.
Step 4: Shape the Dough
Once the dough has risen, punch it down gently to release excess air. Divide the dough into four equal portions and shape each piece into a ball. On a lightly floured surface, roll each ball into an 8-inch circle about ¼ inch thick. Make sure the edges are slightly thicker to hold the za’atar topping beautifully, creating a lovely crust for your Za’atar Flatbread with Olive Oil.
Step 5: Apply Topping
Transfer the rolled flatbreads to a parchment-lined baking sheet. Spoon the prepared za’atar mixture onto each circle, spreading it evenly while leaving a small border around the edges. The za’atar topping should be generously applied, creating a vibrant layer that will caramelize beautifully as it bakes.
Step 6: Bake
Preheat your oven to 475°F (245°C) and ensure it’s thoroughly hot before baking. Place the baking sheet in the oven and bake for 10-12 minutes or until the edges are golden brown and the flatbreads are puffed up. Keep a close eye on them, as they can go from perfectly baked to slightly charred quickly.
Step 7: Serve
Once baked, remove the Za’atar Flatbread with Olive Oil from the oven and allow them to cool for a couple of minutes. This delightful flatbread is best served warm, and you can pair it with fresh vegetables, labneh, or enjoy it as is to relish its rich flavors.
Za’atar Flatbread with Olive Oil Variations
Feel free to experiment and create your own unique version of this delicious flatbread that tantalizes all the senses!
-
Cheesy Delight: Add a layer of shredded mozzarella or feta cheese before baking for a rich, gooey topping. The melty cheese pairs beautifully with za’atar, creating a comforting twist.
-
Meat Lover’s Manakish: Top with seasoned minced lamb or beef for a heartier option. This savory addition transforms your flatbread into a satisfying meal that will impress any meat lover at the table.
-
Herb-Infused Dough: Mix fresh herbs like parsley or cilantro directly into the dough for an aromatic twist. The added freshness elevates the flavor and adds a luscious green hue to your flatbread.
-
Vegan Swap: Use plant-based milk and olive oil for a vegan version without losing the delicious taste. This way, everyone at the table can enjoy this delightful treat!
-
Spice It Up: Add a sprinkle of red pepper flakes or sumac on top of the za’atar for an extra kick. The heat complements the earthy za’atar, creating a delightful balance of flavors.
-
Gluten-Free Option: Substitute all-purpose flour with a gluten-free flour blend. Be sure to include xanthan gum as needed to maintain the dough’s elasticity, allowing everyone to savor this classic dish.
-
Nutty Addition: Mix in ground almonds or tahini to the dough for a nutty flavor profile. This adds depth and complements the za’atar wonderfully.
-
Sweet Drizzle: For a sweet twist, drizzle honey over your warm flatbread just before serving. The combinations of savory and sweet create an indulgent flavor experience that will leave everyone wanting more.
These variations not only allow you to customize your Za’atar Flatbread with Olive Oil but can also be paired with some comforting side dishes. Enjoy with a cooling dollop of labneh, or check out our Sugar Cookie Dessert for a sweet ending after your delicious meal!
Make Ahead Options
These delicious Za’atar Flatbread with Olive Oil are perfect for busy home cooks looking to save time during the week! You can prepare the dough up to 24 hours in advance. Simply complete step 1 (preparing the dough) and then cover it tightly with plastic wrap, refrigerating it until you’re ready to shape and bake. For even more convenience, you can shape the flatbreads (step 4) and store them on a parchment-lined baking sheet in the refrigerator for up to 3 days. Just remember to cover them loosely with a kitchen towel to maintain moisture. When you’re ready to serve, apply the za’atar topping and bake them fresh for crispy, aromatic results, just as delightful as the day they were made!
What to Serve with Za’atar Flatbread with Olive Oil
Imagine diving into a feast where the flavors and textures dance together, creating a symphony of delight for your taste buds.
-
Labneh Dip: Creamy and tart, labneh balances the aromatic za’atar flatbread, enhancing every bite while offering a refreshing contrast to its rich flavors. Serve it alongside to enjoy the perfect dip for a delightful appetizer.
-
Fresh Vegetable Platter: Crisp cucumbers, vibrant radishes, and juicy tomatoes contribute freshness and crunch to your meal. This vibrant medley not only adds color but also complements the warm, chewy flatbread beautifully.
-
Hummus: This classic Middle Eastern dip offers a velvety smoothness that pairs perfectly with the bready warmth of the za’atar flatbread. Spread it generously, and you’ve got a match made in culinary heaven.
-
Minty Fattoush Salad: Bursting with herbs and tangy dressing, this refreshing salad completes any meal. The bright flavors cut through the richness of the flatbread, turning every bite into a light and invigorating experience.
-
Sweet Kunafa: For a delightful finish, the warm, cheesy kunafa offers a contrast of sweet and savory that lingers in your mouth. The delicate sweetness rounds off your meal, leaving you and your guests craving more.
-
Iced Mint Tea: This refreshing beverage, with its sweet and fragrant notes, beautifully complements the warm spices of the flatbread. Sipping on this alongside your meal will transport you to the sunny streets of the Middle East.
How to Store and Freeze Za’atar Flatbread with Olive Oil
Fridge: Store leftover flatbread in an airtight container or wrapped in plastic wrap for up to 3 days. This helps retain moisture while maintaining its chewy texture.
Freezer: Wrap cooled Za’atar Flatbread individually in foil or plastic wrap and place in a freezer-safe bag. It can be frozen for up to 2 months, allowing you to enjoy this delightful snack anytime.
Reheating: For the best results, reheat frozen flatbreads directly from the freezer in a 350°F (175°C) oven for about 10-15 minutes or until heated through. This will restore its crusty exterior and warm, chewy interior!
Expert Tips for Za’atar Flatbread
-
Fresh Yeast Matters: Ensure your yeast is fresh and actively bubbling after proofing; dull yeast can lead to a dense bread.
-
Knead It Right: Knead the dough thoroughly for 8-10 minutes to develop gluten, which gives your Za’atar Flatbread that delightful chewy texture.
-
Pizza Stone Perfection: For an authentic crust, bake your flatbread on a preheated pizza stone; it mimics the intense heat of traditional clay ovens.
-
Experiment with Toppings: While za’atar is classic, don’t hesitate to try toppings like feta cheese or minced lamb for delicious variations of your flatbread.
-
Resting Time is Key: Allow the dough to rise in a warm space, covered. This creates that airy texture you’re looking for in your Za’atar Flatbread with Olive Oil.
Za’atar Flatbread with Olive Oil Recipe FAQs
How do I choose ripe ingredients for Za’atar Flatbread?
Absolutely! For the freshest taste, select ingredients that are high quality. Look for a good quality extra virgin olive oil, ensuring it is green and fragrant, as it significantly enhances the flavor of your Manakish. When picking za’atar, opt for a blend with vibrant herbs and spices—this will elevate your flatbread. Freshness is key, so check the packaging dates on your flour and grains too!
What is the best way to store leftover Za’atar Flatbread?
To keep your delicious Za’atar Flatbread fresh, store it in an airtight container at room temperature for up to 3 days. If you want to enjoy it longer, wrap it in plastic wrap or aluminum foil and refrigerate. For best results, allow it to come to room temperature before reheating!
Can I freeze Za’atar Flatbread, and how long does it last?
Absolutely! To freeze your Za’atar Flatbread with Olive Oil, cool it completely and then wrap each piece individually in plastic wrap followed by aluminum foil to ensure they don’t get freezer burn. They can be stored in the freezer for up to 3 months. When you’re ready to enjoy, bake them directly from frozen in a preheated 350°F (175°C) oven for 10-15 minutes—this brings back that warm, chewy goodness!
What if my dough doesn’t rise properly?
If your dough doesn’t rise as expected, it could be due to inactive yeast. Make sure you’re using fresh yeast that foams after being mixed with warm water and sugar. You can also factor in the room temperature—yeast thrives in warmth, so find a cozy spot in your kitchen for proofing. If it’s too cool, consider placing the dough in an oven with just the light on to create a warm environment for rising!
Is this recipe suitable for people with dietary restrictions?
Yes! For those with gluten sensitivities, you can substitute all-purpose flour with a gluten-free flour blend. Just be aware that the texture may vary slightly. Additionally, if you’re concerned about dairy, try using a dairy-free milk alternative in place of warm milk. Always check the za’atar spice mix for any allergens if you’re cooking for someone with specific dietary needs!
How can I add variety to my Za’atar Flatbread?
The more the merrier! While za’atar is classic, consider experimenting with toppings like melty cheese or minced vegetables. For a heartier version, you might consider adding seasoned ground meat before baking. Also, you can mix fresh herbs into the dough for added flavor. The sky’s the limit when it comes to customizing your Manakish!
Delicious Za’atar Flatbread with Olive Oil Your New Favorite Snack
Ingredients
Equipment
Method
- In a small bowl, mix ¾ cup warm water, ¼ cup warm milk, 1 teaspoon sugar, and 2 teaspoons instant yeast. Let sit for about 5-10 minutes until frothy.
- In a large mixing bowl, combine 3 cups all-purpose flour, 1 teaspoon salt, and 2 tablespoons olive oil. Gradually pour in the yeast mixture, stirring until a dough forms.
- Knead for 8-10 minutes on a floured surface until smooth and elastic.
- Place the kneaded dough in a lightly oiled bowl and cover it with a damp cloth. Let rise in a warm area for about 1 hour, until doubled in size.
- While the dough rises, mix ¼ cup of za’atar spice with 3 tablespoons extra virgin olive oil to make the topping. Let sit for 15-20 minutes.
- Once the dough has risen, punch it gently to release excess air. Divide into four portions and shape each into a ball. Roll each ball into an 8-inch circle about ¼ inch thick.
- Transfer the rolled flatbreads to a parchment-lined baking sheet. Spoon the za’atar mixture onto each circle, spreading evenly, leaving a border around the edges.
- Preheat oven to 475°F (245°C). Bake for 10-12 minutes until edges are golden brown and flatbreads are puffed.
- Remove from the oven and let cool for a couple of minutes. Best served warm with fresh vegetables or labneh.